

To claim your business on ChatGPT, open Business Hub from the ChatGPT sidebar, find your listing and verify it by business phone, business email, a DNS record or a Shopify login. That gets you in, but almost nothing works until a second Persona ID check is approved: edits, insights, the blue check and the Business Agent all wait on it. Claim it anyway. It's free and takes minutes, and it's the only way to fix wrong facts. Then make sure the "where's my order" questions it can't answer have somewhere to go, which is the job eesel's AI helpdesk teammate does inside your helpdesk.
What does claiming your business on ChatGPT actually mean?
On November 10, 2026, OpenAI launched Businesses in ChatGPT in beta. Every business ChatGPT knows about can have a profile, and the owner can now claim it through a dashboard called Business Hub.
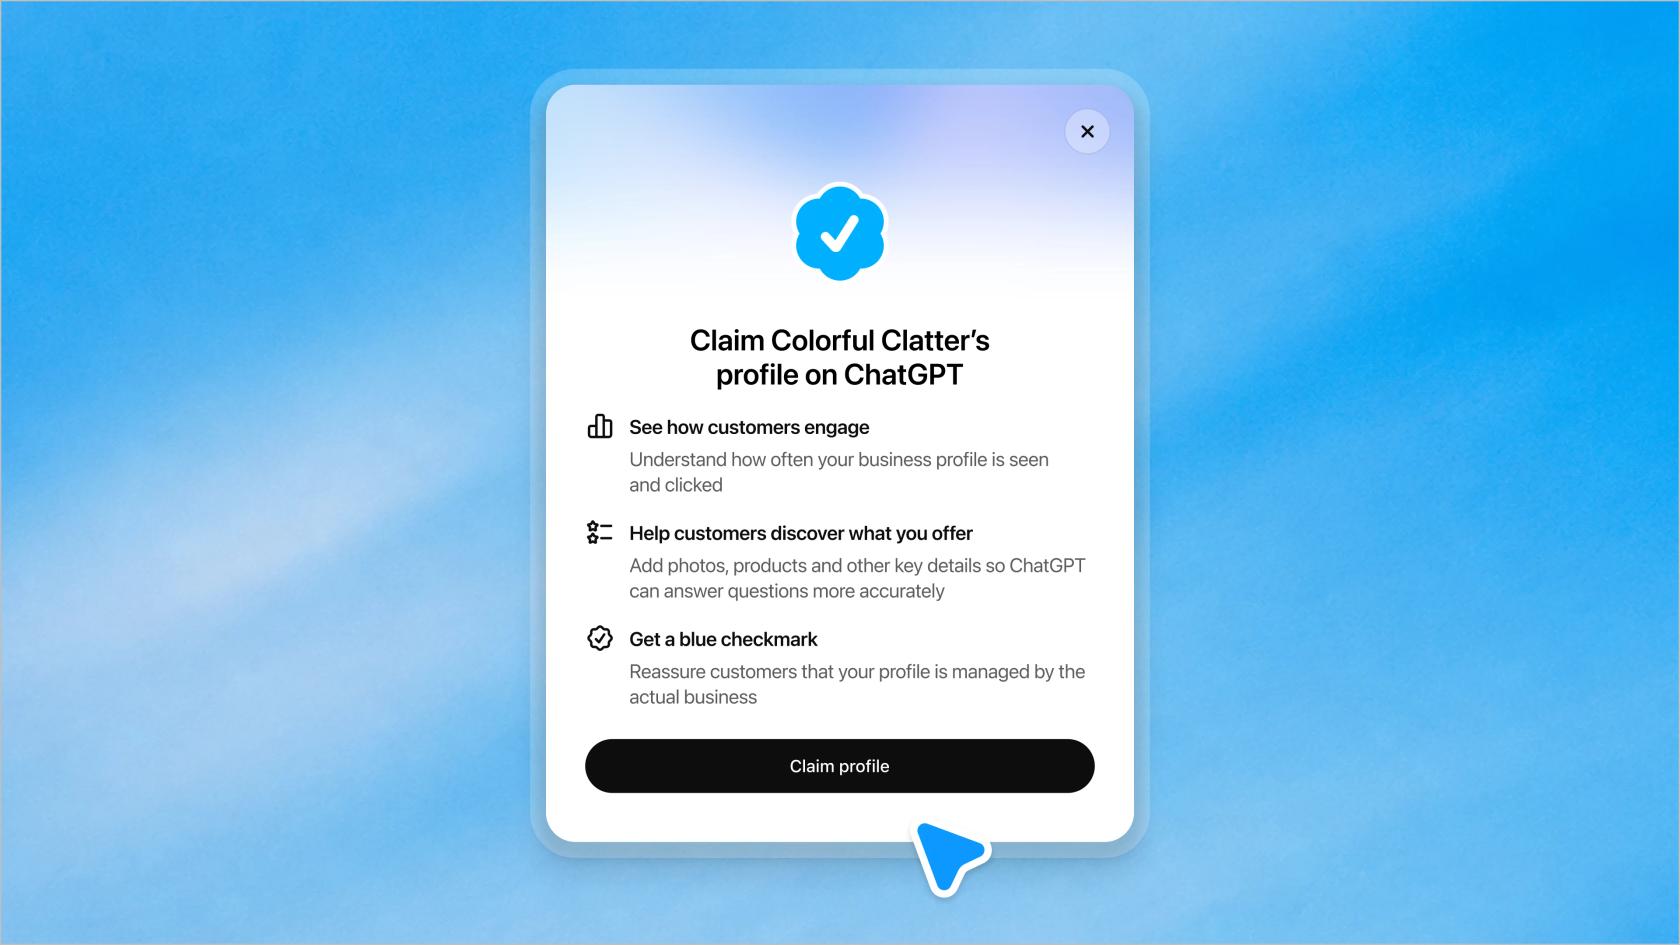
Claiming means proving you run the business so you can manage what ChatGPT says about it.
It's the business-side counterpart to the shopping research and buy-in-ChatGPT features shoppers already use. Once your claim and identity check are approved, you can:
- Edit your website, description, category, logo, delivery policy and return policy
- Connect a product feed with prices and availability
- See 28 days of mentions, website clicks and discovery topics
- Create a Business Agent, if you're a US ecommerce or online service business
I build integrations at eesel, so the first thing I did was read the verification flow the way I'd read an OAuth spec. The short version: it's two separate gates, not one. The claim proves you control a phone, inbox, domain or store. The Persona check proves who you are. Most confusion I've seen comes from treating the first gate as the finish line.
Who can claim a business on ChatGPT?
From OpenAI's setup guide, the rules are short:
- You must own the business or be authorized to represent it. Agencies get access later through the owner, not by claiming it themselves.
- No Ads account or Enterprise agreement needed. Claiming is free and separate from advertising, and separate from the ChatGPT Work plans you buy for staff.
- Location and type matter. You can claim where ChatGPT is available and the required verification is supported.
- Local stores and restaurants can only claim an existing US listing. Eligible online businesses may be able to add a new profile.
- The Business Agent has stricter rules. It's limited to US ecommerce and online service businesses with a website that also meet the Business Agents Policy.
Some categories are on hold. The Businesses in ChatGPT policy says OpenAI may decline claims where a business raises safety or integrity concerns, and may delay other categories until safeguards are ready.
How do you claim your business on ChatGPT, step by step?
Here's the full path, from search to verified profile.
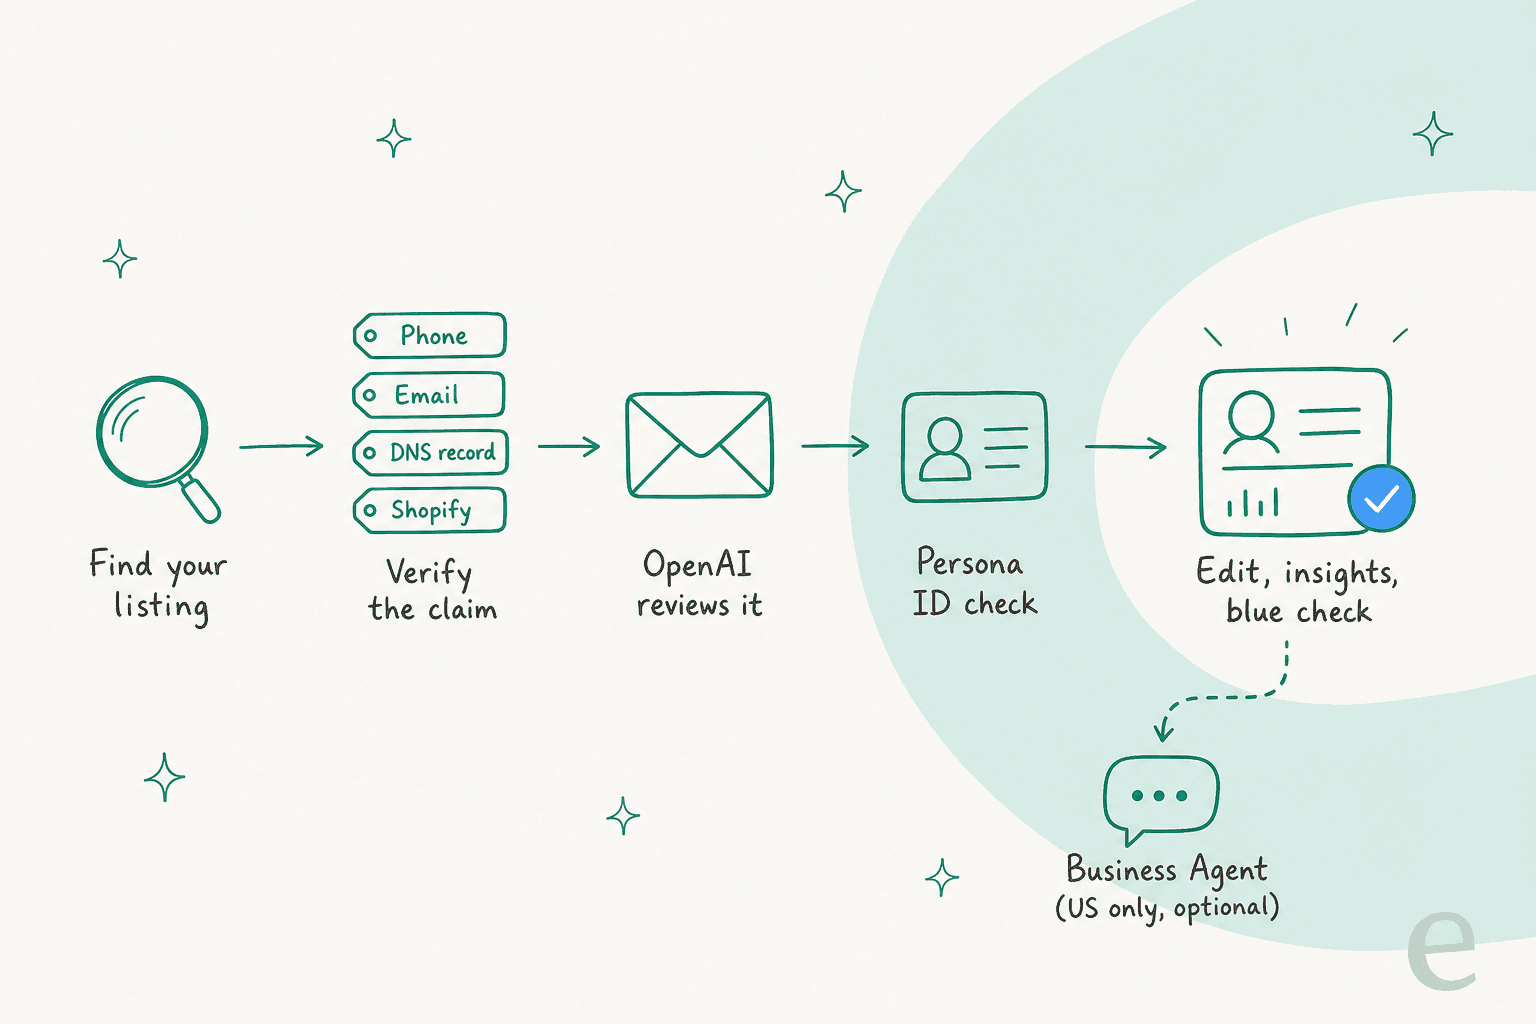
Step 1: Open Business Hub and find your listing
Sign in to ChatGPT with the account you want to manage the business from, and open Business Hub in the sidebar. Search for your business by name.
Pick that account carefully. Teammates and agencies are added by the admin who claimed the business, and for a business claimed inside a ChatGPT workspace, invitees may need to be members of that workspace. If your company runs ChatGPT Business or Enterprise seats, decide up front whether the claim lives in that workspace or a personal account.
Step 2: Select the listing and confirm the account
Select the listing that matches your business and confirm the ChatGPT account. Three things can show up here instead:
- A claim invitation email: open the personal link and sign in with the email address that received it. Don't forward it to someone else.
- A Contact support button: your listing is locked. Select it to request access.
- No listing at all: online businesses may see an option to add one. Local businesses can't add one yet.
Step 3: Verify your claim
ChatGPT shows the verification methods available for your business. You won't always see all four.
| Method | What you do | Best for |
|---|---|---|
| Business phone | Choose SMS or an automated call, select Get code, enter it | Local businesses with a listed phone line |
| Business email | Select Get code, enter the code sent to the business email | Teams that own the listed inbox |
| Website domain | Add the TXT record ChatGPT shows to your DNS, then select Verify domain | Online businesses with DNS access |
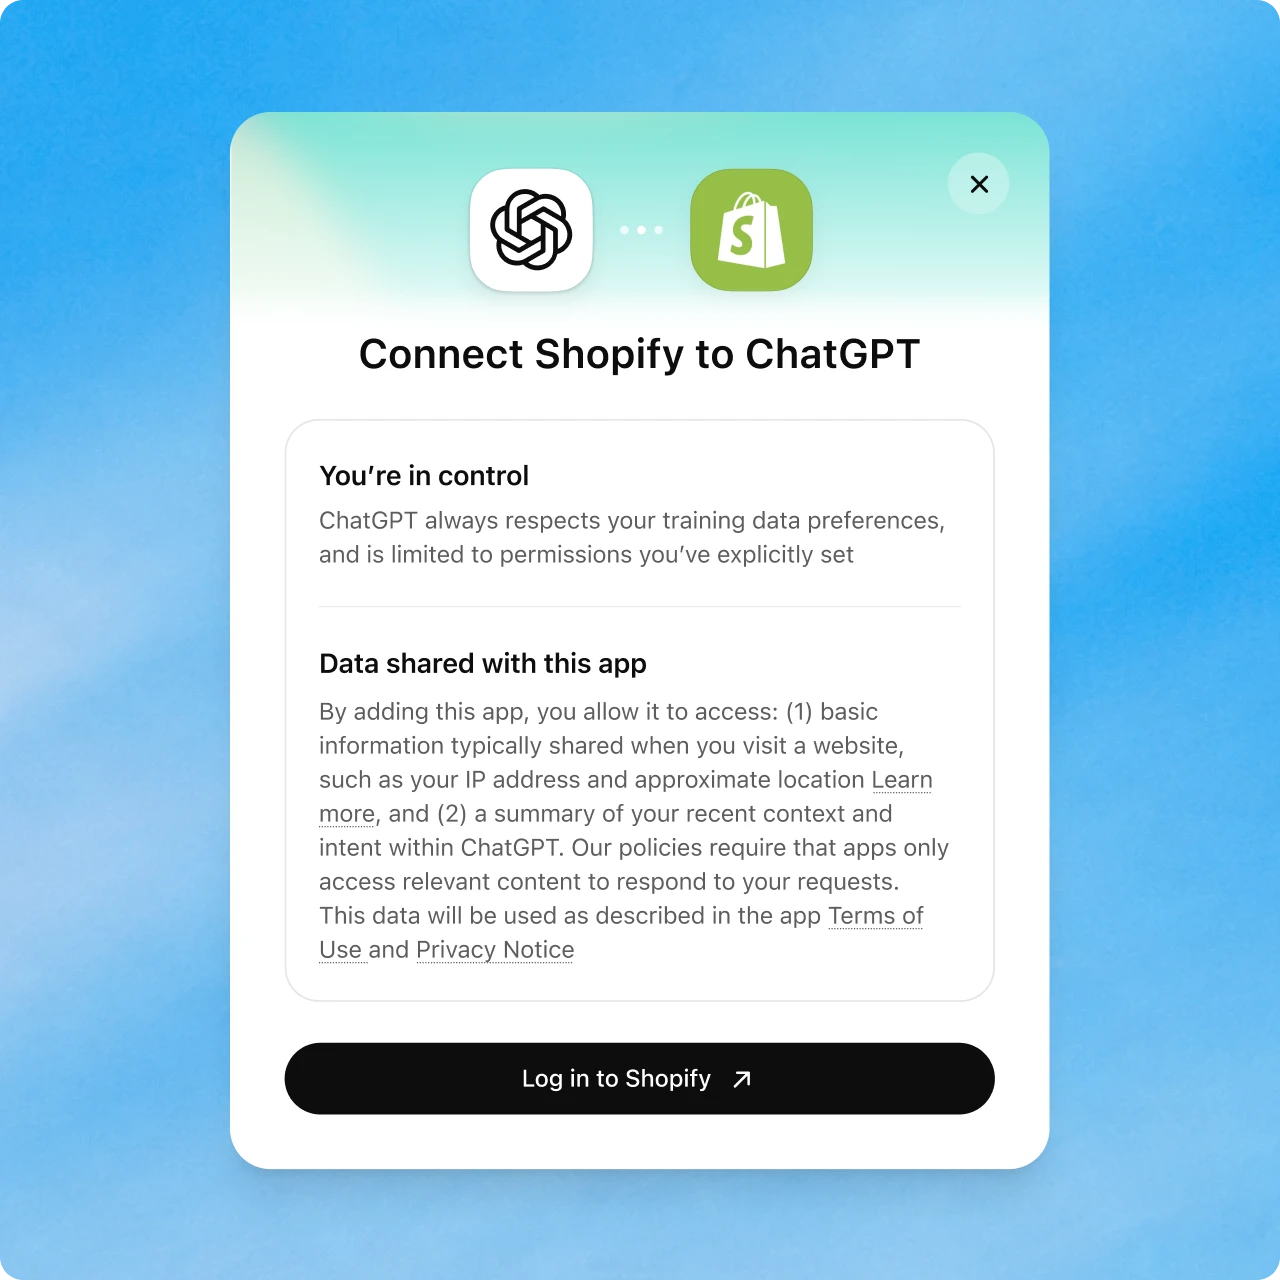
| Shopify store | Select Connect Shopify, review permissions, log in to the store | Shopify merchants |
Two notes from the integration side. For the DNS method, copy the type, host and value exactly as shown. A trailing dot or a host field that your DNS provider auto-appends your domain to is the classic reason a TXT check fails. DNS changes also take time to show up, so if Verify domain fails right away, wait and retry before you change anything.
For Shopify (the same connection behind ChatGPT's Shopify commerce features), you can also start from the ChatGPT Shopify app in your Shopify admin instead of Business Hub. Either way, the store's product details, prices and availability come across through Shopify's catalog, so it's the path that does the most work for you.
Not sure which to pick? This picks for you, based on what you already control.
Which ChatGPT verification method should you use?
Pick the one that best describes you. Only methods ChatGPT offers for your listing will appear in Business Hub.
Step 4: Wait for OpenAI to approve the claim
OpenAI reviews each claim and emails you a decision or a request for more information. While it's pending, you can select Cancel claim. OpenAI doesn't publish a review time.
Step 5: Pass the Persona identity check
This is the step that unlocks everything. Select Verify with Persona, then Continue to Persona, and submit what it asks for. OpenAI says you may need a government-issued ID, business registration information, and proof you can represent the business.
If you verified with another method first, do Persona later: open the Business tab, select your profile, find Complete verification with Persona in the overview and select Verify. Another review follows by email, and you can Cancel submission while it's pending.
One trap to know before you start: if you use Persona to create a brand new profile, OpenAI's approval publishes it automatically. There's no separate publish step, and OpenAI Support can't delete, unpublish or hide a published profile. Only drafts can be deleted. So fill in the details you want public before you submit.
Step 6: Update your business information
Once both approvals are in, open your profile in Business to update your website, description, category, logo, delivery policy and return policy. You can add a cover photo and other optional details. Everything has to follow the Businesses in ChatGPT policy, which bans things like fabricated reviews and claims that hide fees or conditions.
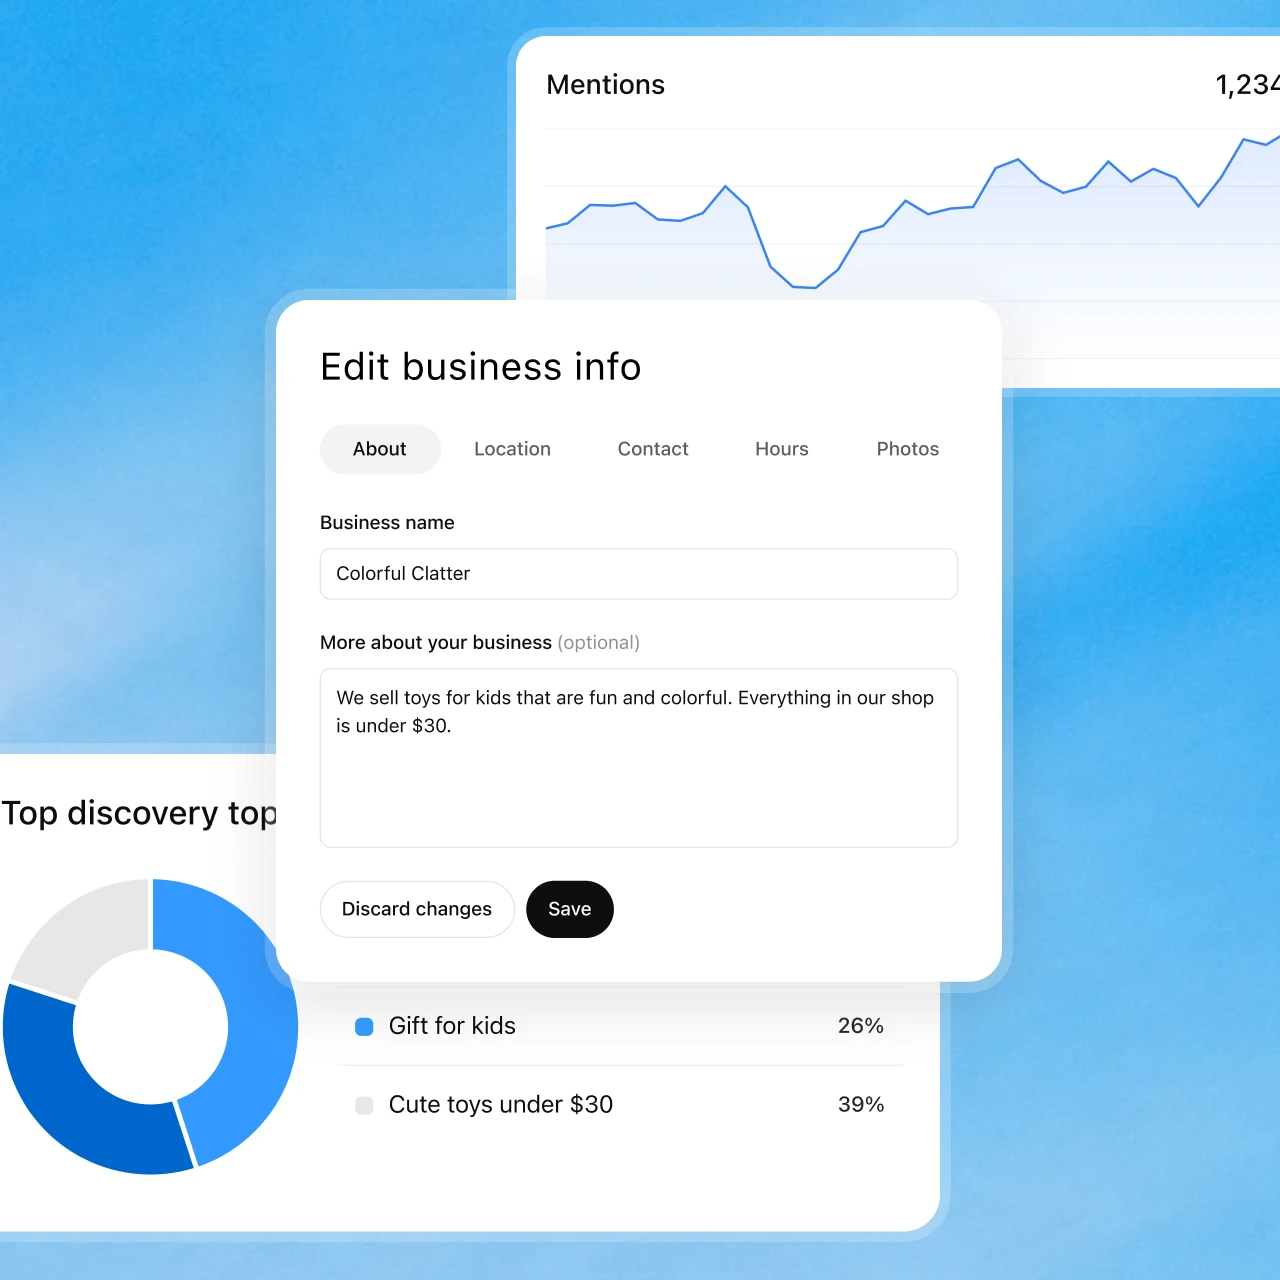
Write the return and delivery policy as carefully as you would a help center article. It's what ChatGPT and your Business Agent will quote to shoppers, and the same source you'd feed any AI knowledge base. OpenAI also reviews each edit before publishing it, and ChatGPT may still pull from other sources, so a saved change won't show up in answers right away.
Step 7 (optional): Connect a product feed and publish an agent
If you sell products and didn't come through Shopify, you can upload a CSV feed that follows OpenAI's product feed specification, or give a hosted URL. A feed doesn't publish an agent or guarantee ChatGPT recommends your products, and selling through ChatGPT carries its own fees. It sits alongside the selling features I covered in ChatGPT Instant Checkout and the Agentic Commerce Protocol.
Eligible US businesses can then build a Business Agent: review the information it uses, preview it with a real customer question, and select Publish. Customers can only chat with a published agent. It's a narrower tool than the ChatGPT agents your own team uses, or the apps in ChatGPT other brands build. My Business Agents guide walks through setup and limits.
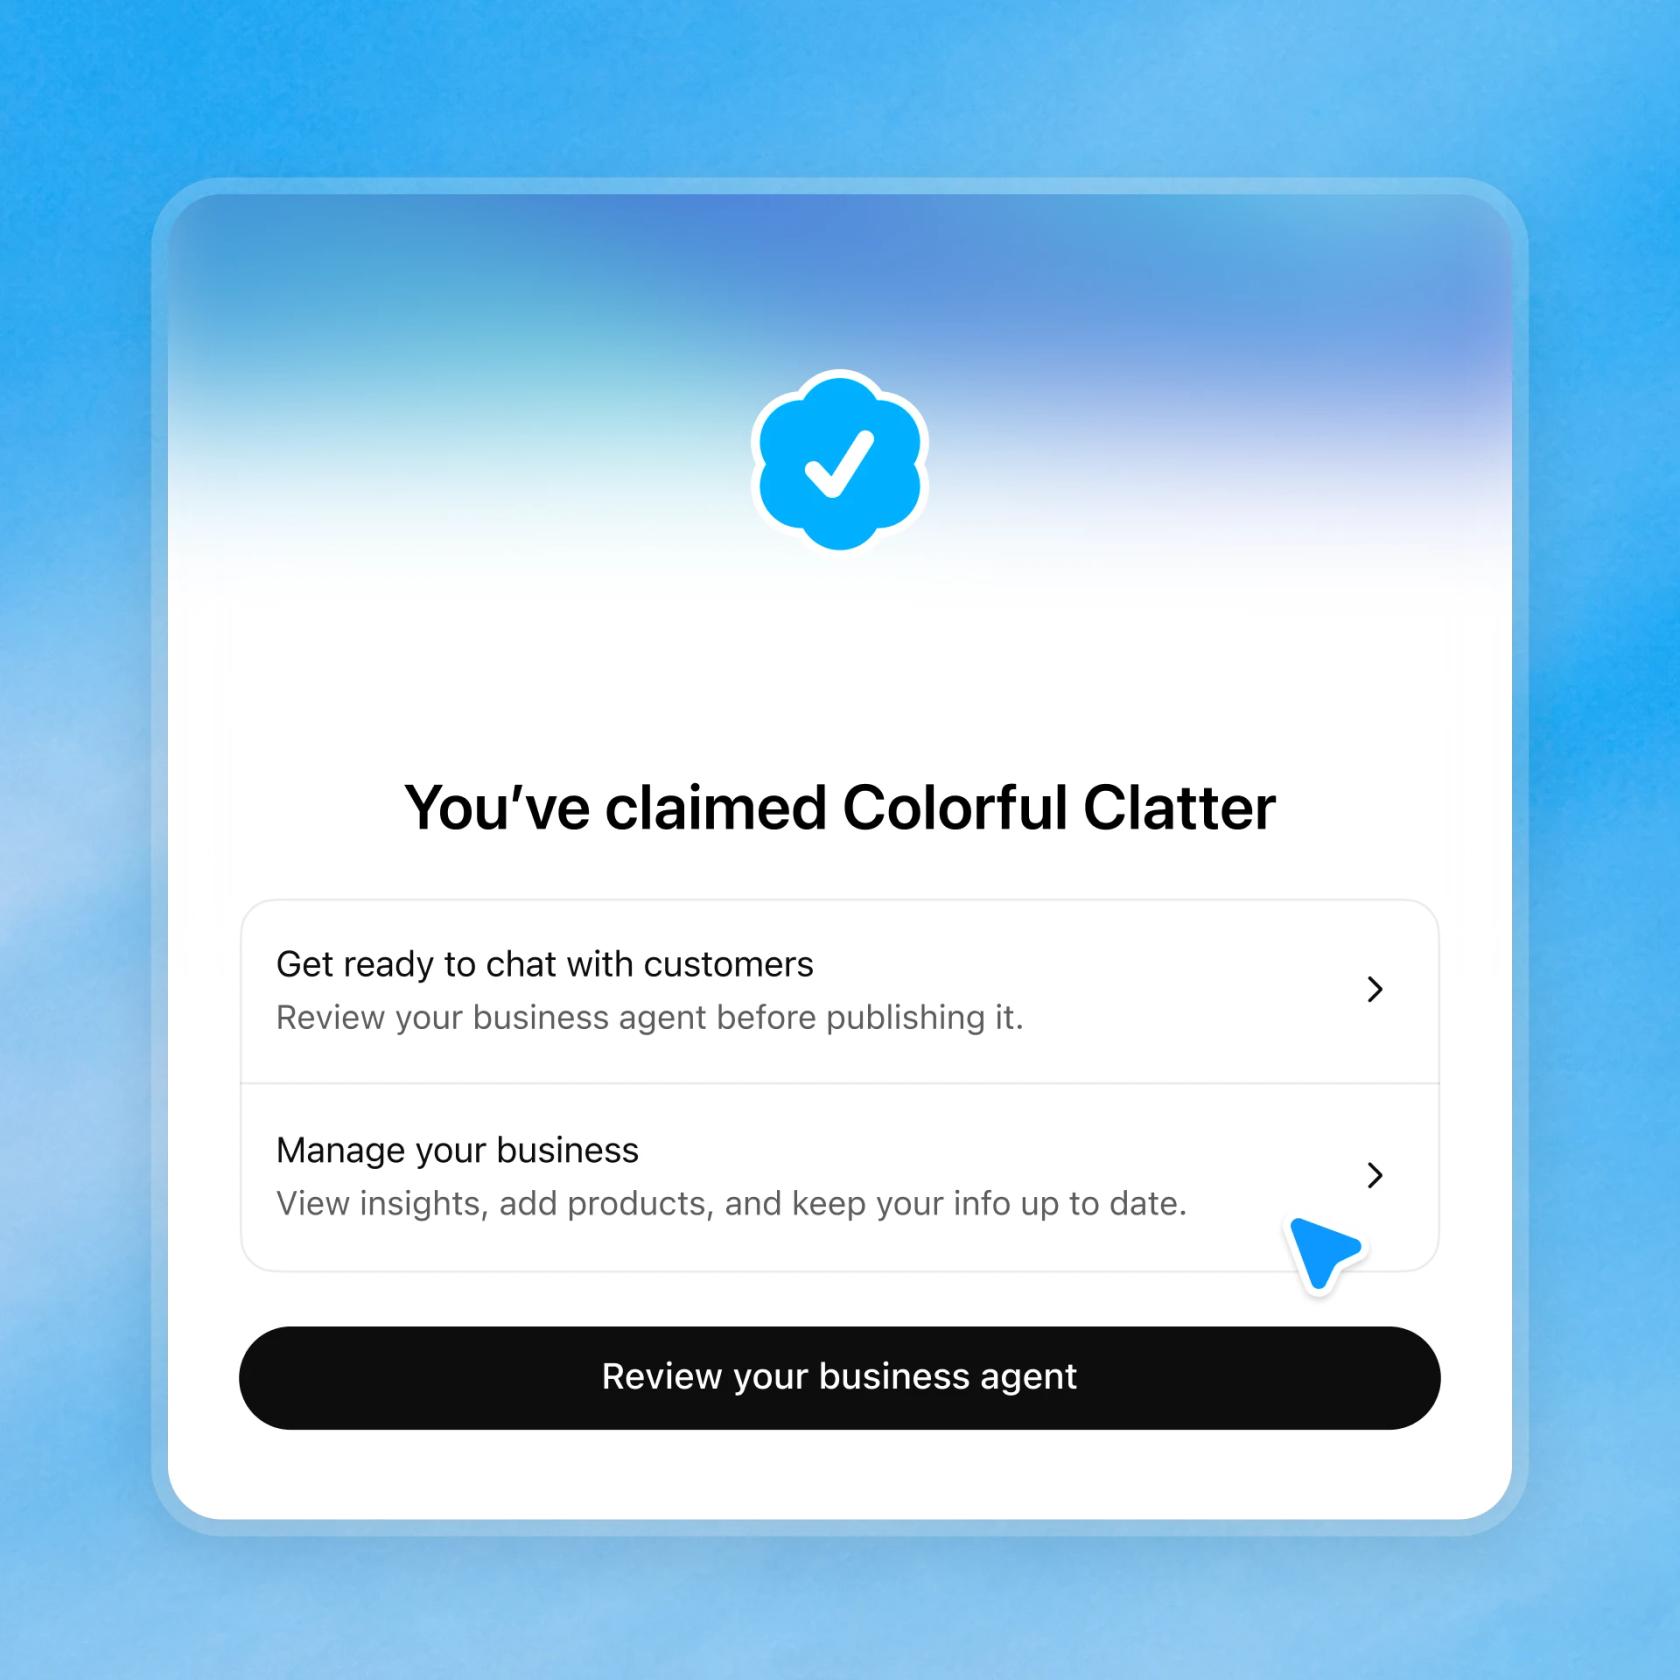
What does each part of the claim unlock?
The two approvals unlock different things, which is easy to miss in the launch announcements. Here's how OpenAI's help center splits them.
| What you want | Claim approved | Persona approved |
|---|---|---|
| Access the business in Business Hub | Yes | Yes |
| Publish edits to business information | No | Yes |
| Connect a product feed | No | Yes |
| View insights (mentions, clicks, topics) | No | Yes |
| Blue check on the profile | No | Yes |
| Create a Business Agent (if eligible) | No | Yes |
One discrepancy worth knowing: OpenAI's Businesses in ChatGPT page says a blue check appears "to show it's been claimed". The help center is more specific and says the badge comes only after Persona approval. I've gone with the help center, since that's the document that describes the flow step by step.
What if your claim gets stuck?
These are the six blockers OpenAI's setup guide covers, and the fix for each.
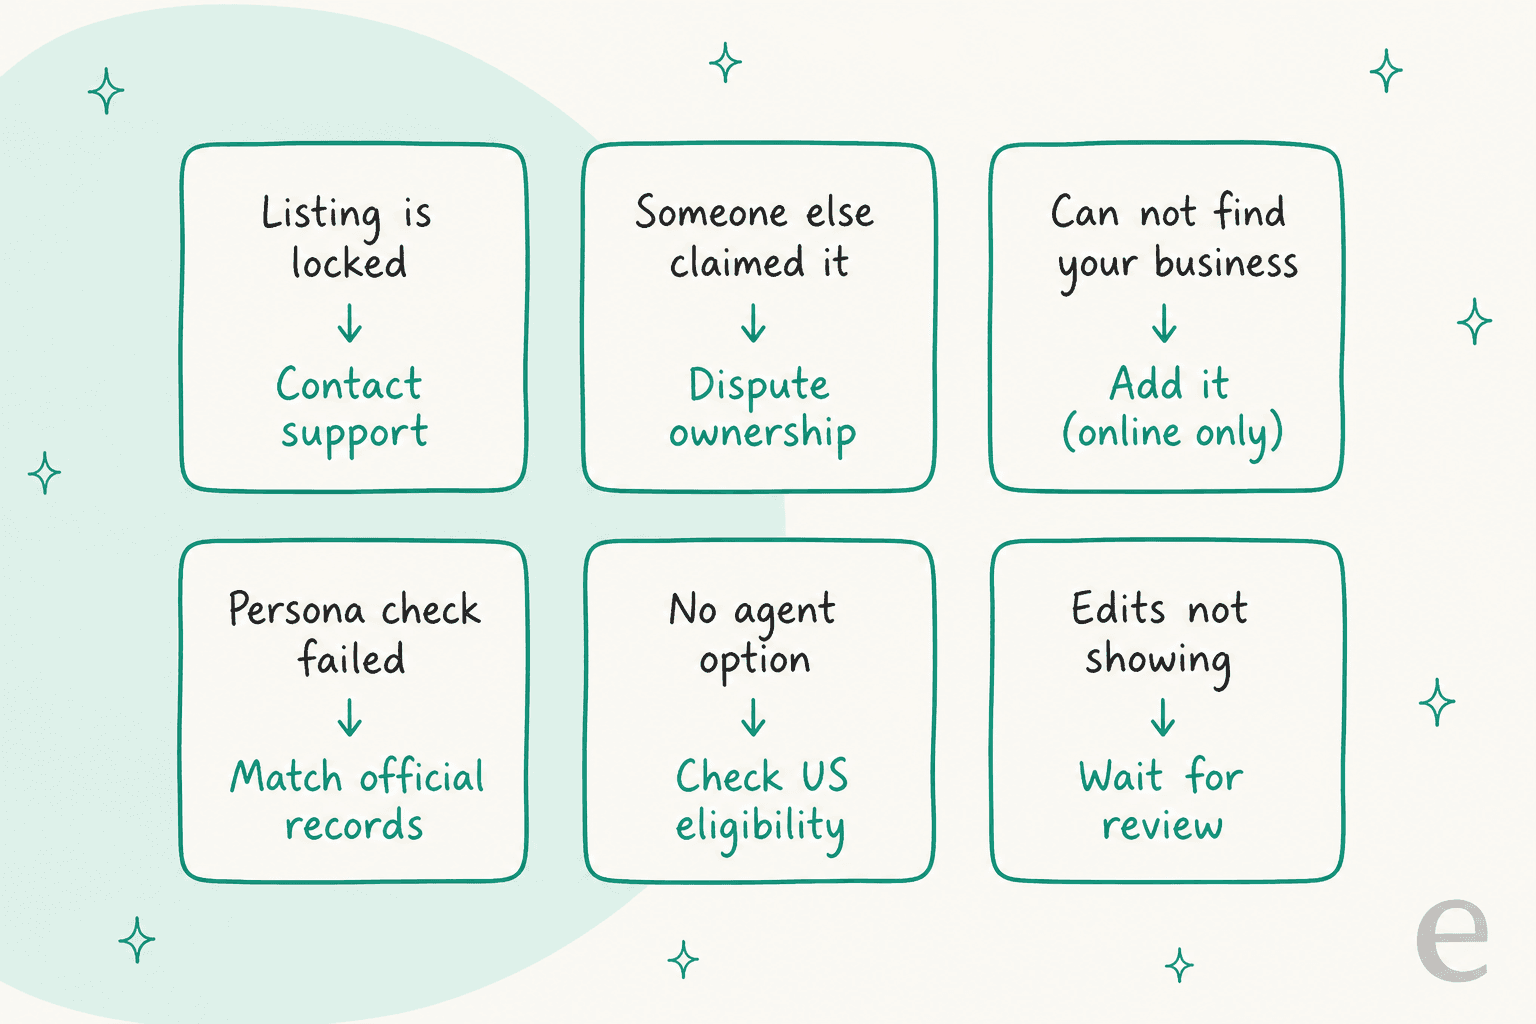
- Listing is locked. You'll see Contact support instead of verification options. Use it. Big brands on a managed claim process often see this, and OpenAI points them to their account contact.
- Someone else already claimed it. Open the profile, select •••, then Dispute ownership, and verify with Persona. Disputing doesn't change the profile's visibility while it's reviewed.
- You can't find the business. Online businesses may get an option to add it. Local stores and restaurants can't add a new listing yet.
- Persona failed or expired. Follow the email. If Try again is available, resubmit with the business name, address and any registration or tax number matching your official records exactly. Submitting isn't the same as approved.
- No option to create an agent. Check you're on the claimed profile and Persona is approved, not pending or failed. Then check the US, business type and industry rules.
- Edits aren't showing. OpenAI reviews changes before publishing, and answers can take time to catch up.
If you run several brands or locations, plan for more admin. OpenAI says each distinct brand is managed separately, central management across a parent company isn't available, and claiming the main brand doesn't claim its locations.
For anything else, contact OpenAI Support with the step you were on, the error message, and a screenshot with sensitive details removed.
What should you do right after you claim it?
Claiming fixes what ChatGPT says about you. It doesn't change how it ranks you. OpenAI says plainly that claiming doesn't guarantee higher placement or sales, and advertising doesn't influence ChatGPT's independent answers. So treat the claim as hygiene. If you want to track visibility, generative engine optimization tools and AI rank tracking do that job. Then spend your effort on three things.
- Get your return and delivery policies right. They're the facts shoppers ask ChatGPT about most, and they're the ones your agent will quote. My AI for returns roundup covers the handling side.
- Check insights after a few weeks. For online businesses, a mention only counts when ChatGPT references your website, not just your brand name. A blank metric can mean you're under the reporting threshold, not zero. The Business Hub guide explains each number.
- Plan for the questions ChatGPT can't answer. OpenAI's Business Agent can't complete purchases, make bookings or check a customer's order. It links to your website for those. Businesses also never see the chats themselves.
That third point is where support teams feel it. Someone who asks ChatGPT "where's my order?" gets a link, then emails you. WISMO tickets were already the biggest slice of most ecommerce queues. On one sales call, a DTC brand told us they wanted AI to auto-resolve half their email volume, mostly WISMO, subscription changes and basic product questions, with knowledge scattered across SOP docs and untranscribed videos. A ChatGPT profile won't change that mix. It just adds another front door, which nudges your contact rate up rather than down.
How does eesel pick up what ChatGPT hands off?
I'd claim your listing today. Then I'd make sure whatever lands in your helpdesk after the click gets answered with real order data.
That's what eesel's AI helpdesk teammate does, as an add-on to your existing ecommerce helpdesk rather than a replacement.
It works inside Gorgias, Zendesk or Freshdesk, learns from your past tickets, macros and help center, and looks up Shopify orders before it replies.
Rúngne, a Norwegian climbing apparel brand on Gorgias, is a good example. eesel handled about 2,100 Gorgias tickets for them in a month. One agent triages and tags, one leaves drafts for the team, and one answers shipping, return policy, order status and stock questions on its own from Shopify order and stock data. It's the same kind of order tracking job, and exactly the "where's my order" follow-up a ChatGPT agent sends back to your site.
The multi-brand point above applies to helpdesks too. Nordbutiker runs a separate eesel bot for each of its four brands across four Nordic countries, each trained on its own store's site and Zendesk tickets. Same idea as ChatGPT's one-profile-per-brand rule, just on the support side.
If you'd rather set it up from a terminal, the eesel CLI lets a coding agent like Claude Code upload the same return and delivery policies you just wrote for ChatGPT, then ask test questions and check the answers before anything goes live. Connecting the helpdesk itself still needs an admin to approve it.
Try eesel on the order and return questions your ChatGPT listing sends your way. My Shopify support roundup compares the alternatives, and eesel pricing is public. You can test it against your past tickets before a single customer sees a reply.
If you're in a specific vertical, I've written up how this works for beauty brands and fashion brands, including what ChatGPT merchant fees mean for each.