Classic vs. Messaging: the choice you need to make first
Two very different products share the "Zendesk web widget" name, and mixing them up is how teams end up in the "I'm a Zendesk consultant and I wish they didn't exclusively push messaging" situation.
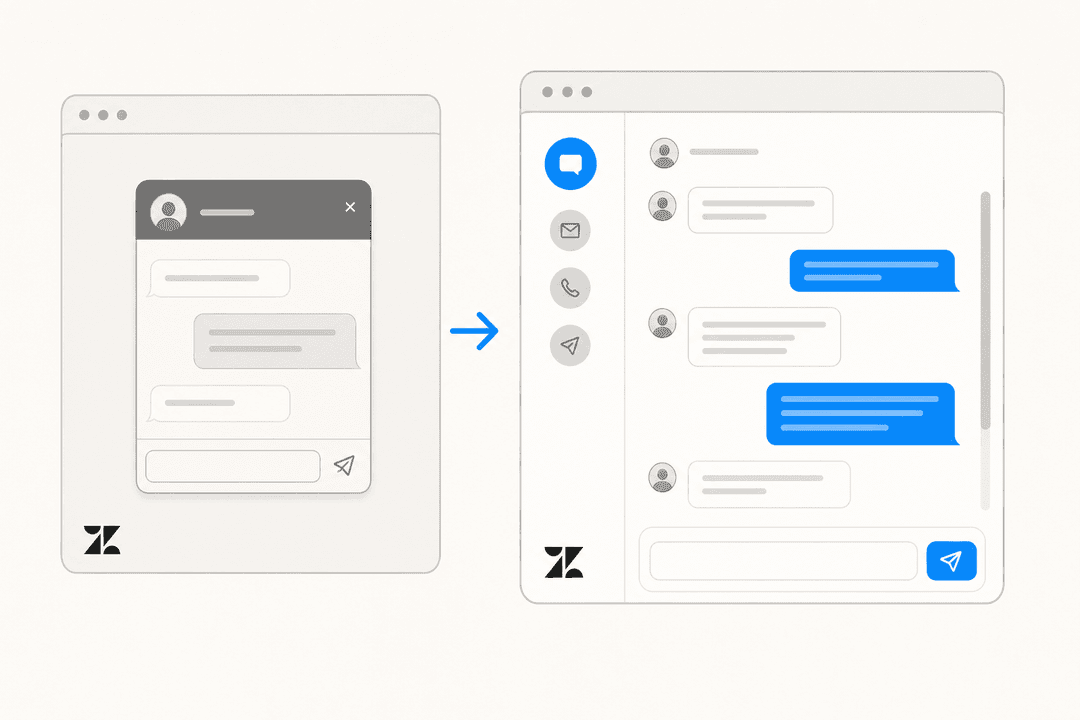
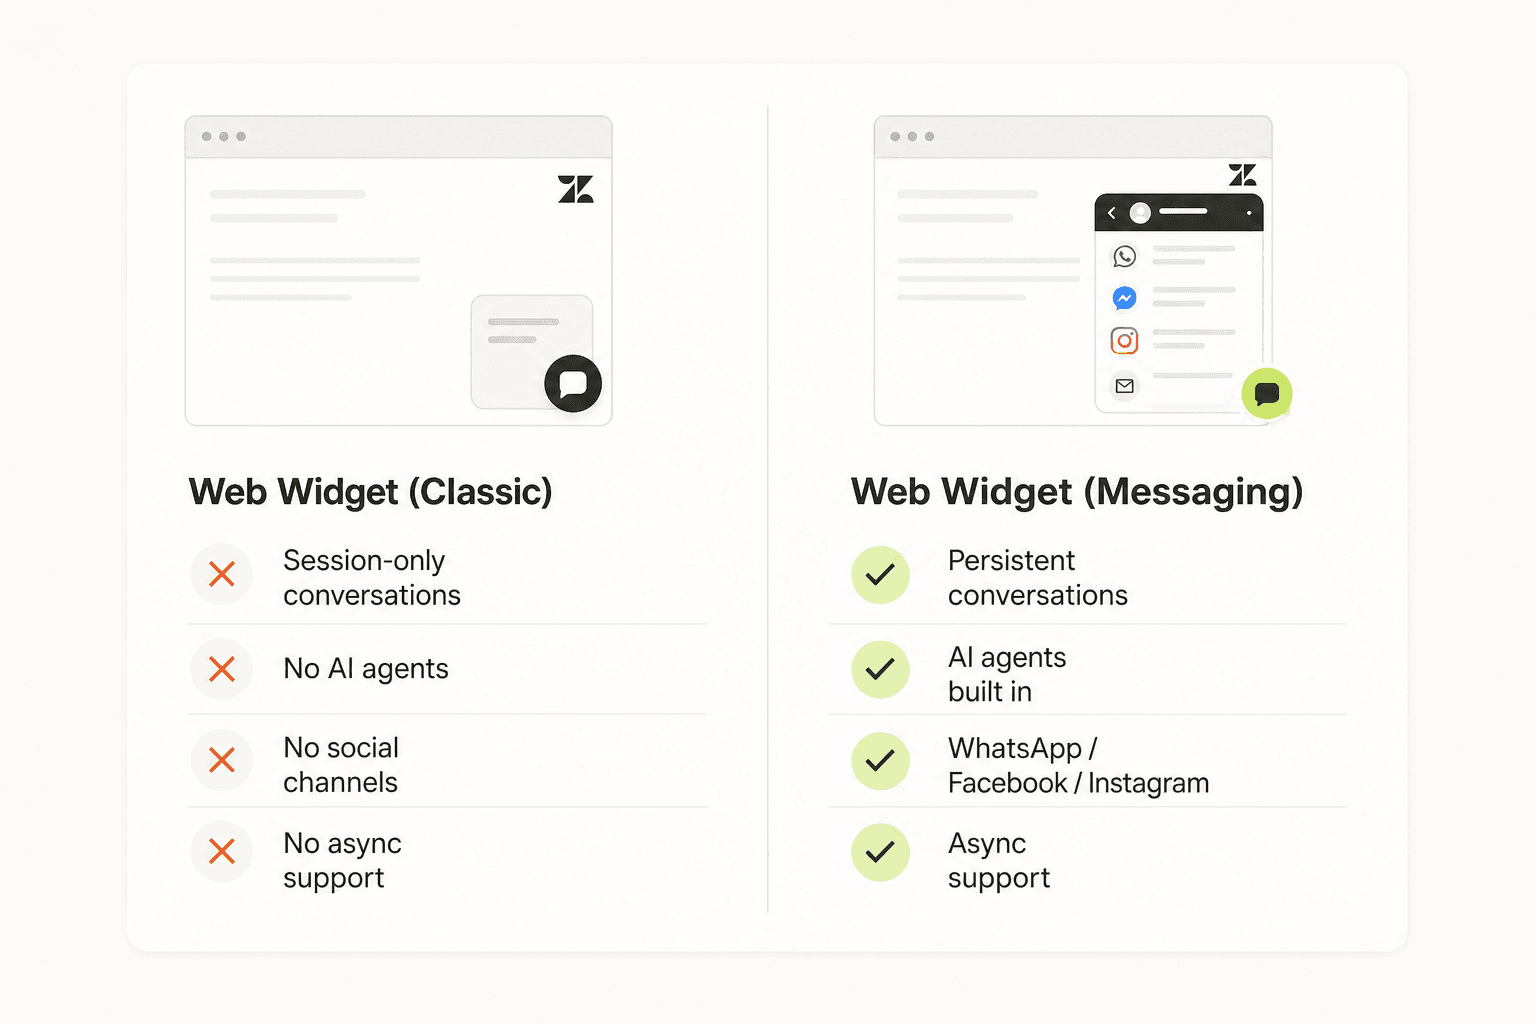
Web Widget (Classic) runs on Zendesk Chat (Zopim) and creates session-based live chats. When the visitor closes the browser, the conversation is gone. Agents see a visitor list, can initiate chats, and have an offline form fallback when no one's available. It's familiar and it works - it just can't run AI agents, and Zendesk isn't building new features for it.
Web Widget (Messaging) runs on Sunshine Conversations and is where all development is happening. Conversations are persistent - a customer can start on your website, pick up the thread on WhatsApp three days later, and the full history is there for the agent. Bot Builder flows, generative AI replies, and omnichannel routing all require Messaging.
One thing worth knowing: migration from Classic to Messaging is one-way at the account level. Enabling Messaging disables your Classic widget config. Zendesk does offer a "Switch to Web Widget (Classic)" button in the Installation tab, but it's not a quick rollback - it requires disabling Messaging entirely. Check your live-chat usage patterns before flipping the switch.
| Capability | Classic | Messaging |
|---|---|---|
| Conversation persistence | Session only | Full history retained |
| AI agents (Bot Builder) | No | Yes |
| Social channels (WhatsApp, FB, etc.) | No | Yes |
| Real-time visitor list | Yes | No |
| Agent-initiated end-chat | Yes | No |
| Offline form fallback | Yes | No |
| Async support | No | Yes |
| Mobile SDKs | Legacy | Android, iOS, Unity |
| Remove Zendesk branding | No | Enterprise only |
The clear recommendation: use Messaging for any new setup. If you're already on Classic and your team relies on the visitor list or agent-side chat ending, read the community threads before migrating - those features are on the roadmap but not shipped as of June 2026.
Setting up Web Widget (Messaging): step by step
Here's the setup path for accounts created after November 2, 2021 that haven't previously used Zendesk live chat. If you were on live chat before, follow Creating a messaging Web Widget when using live chat instead.
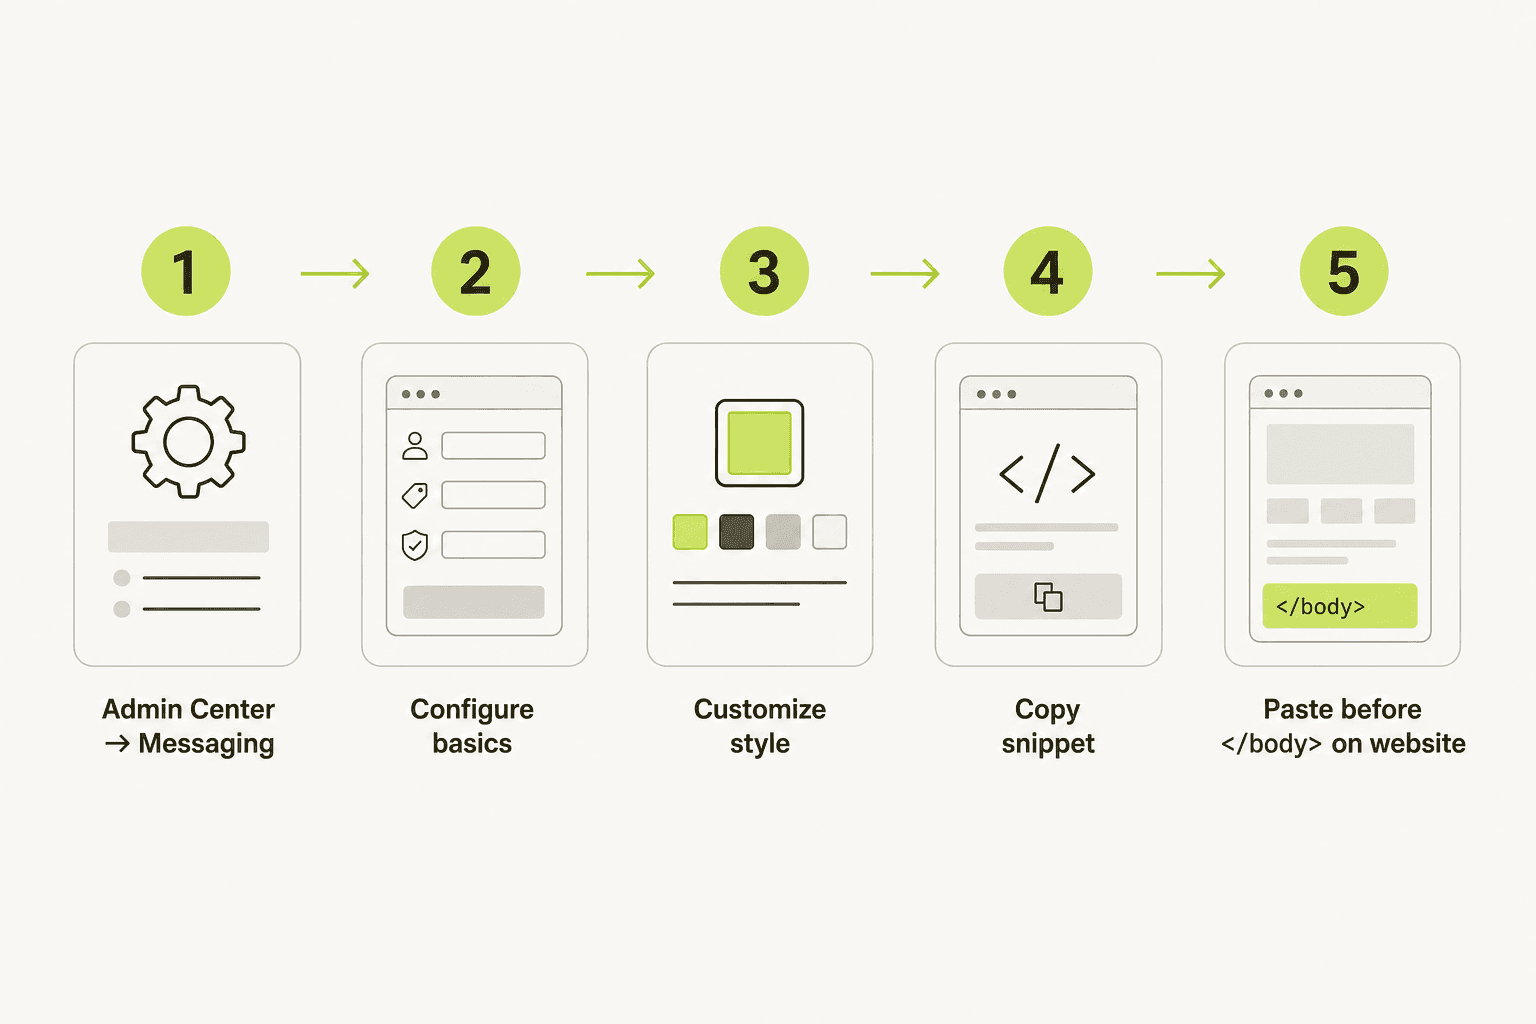
Step 1: open Admin Center → Messaging
Go to Admin Center → Channels → Messaging and social → Messaging. Zendesk automatically creates a default Web Widget named after your account. Click it to open the configuration wizard.
Step 2: configure the basics
In the Basics tab:
- Channel name - internal identifier; defaults to your brand name
- Brand - select the relevant brand if you have multiple
- Privacy notice - add recording notice text and optionally link to your privacy policy
- Allow customers to switch channels - links the widget to WhatsApp, Facebook Messenger, and Instagram DM so visitors can continue on their preferred platform
Click Next.
Step 3: customize the appearance
Set a primary color (controls the launcher button and widget header), add a title and optional logo, then click Test it now to preview the end-user experience before going live. Click Next, then Done.
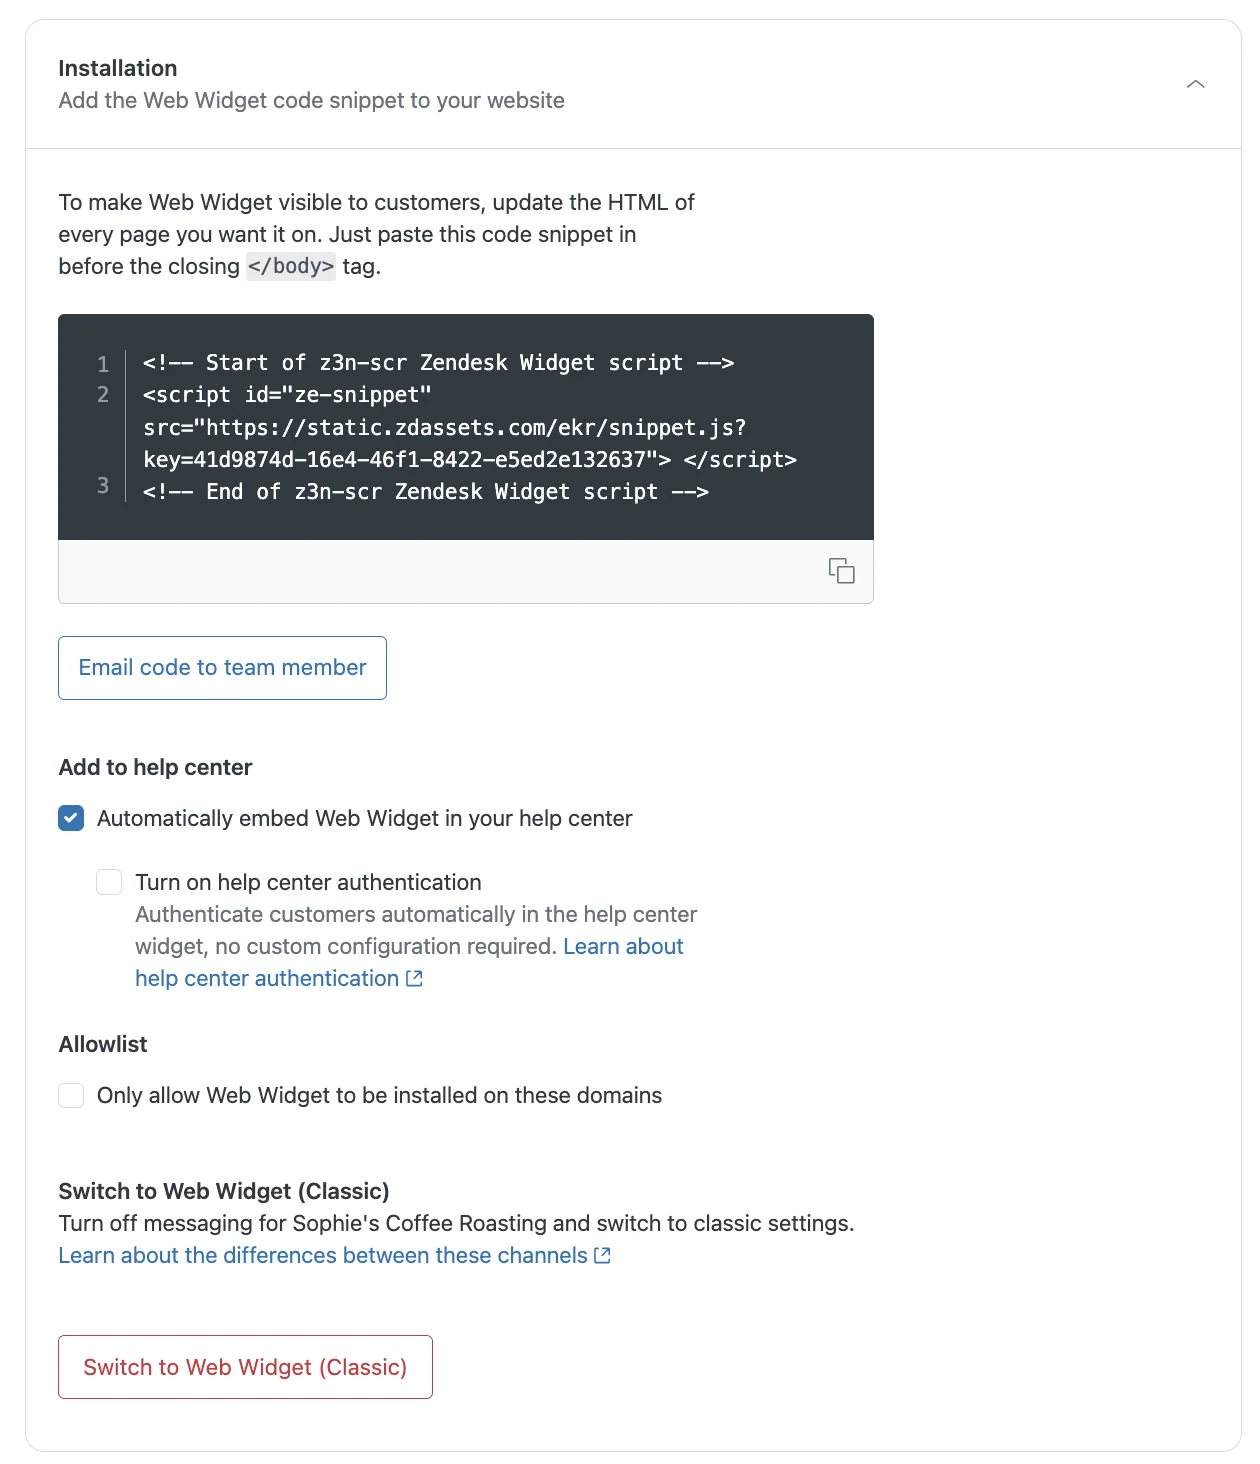
Step 4: copy the code snippet
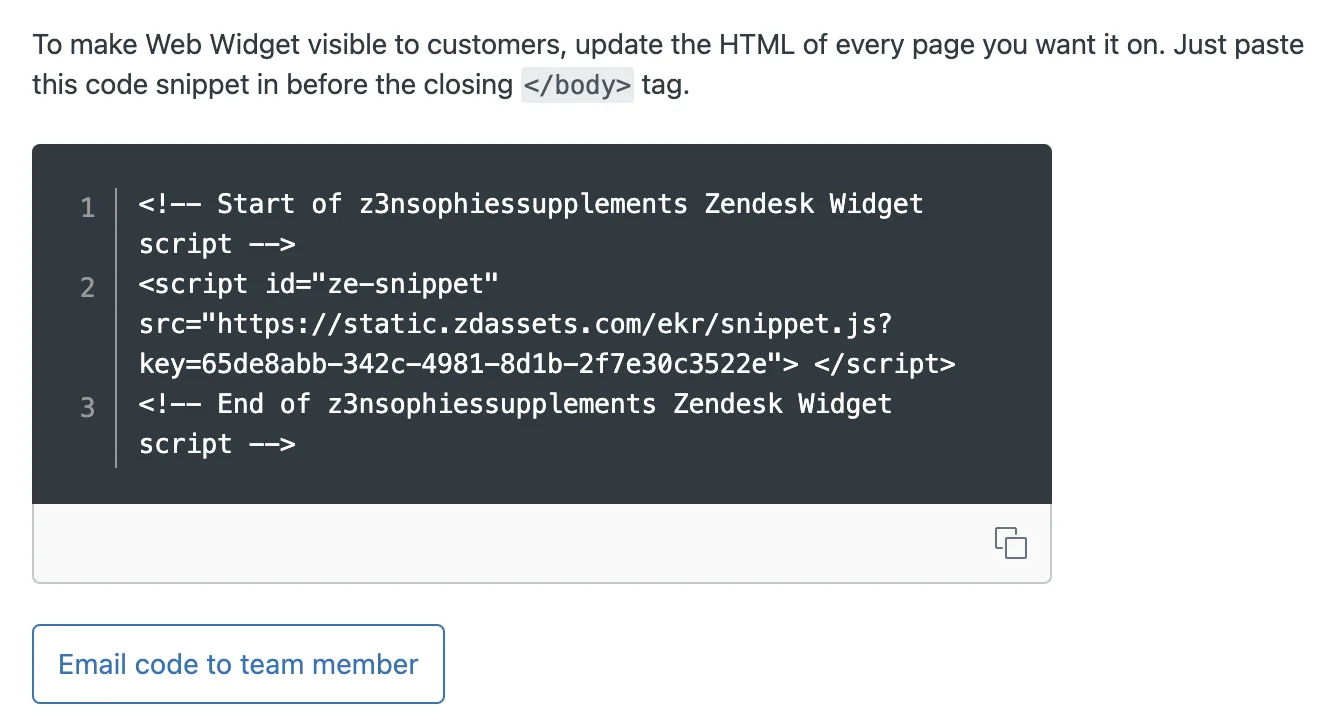
In the Installation tab, copy the snippet:
<script id="ze-snippet"
  src="https://static.zdassets.com/ekr/snippet.js?key=YOUR_KEY">
</script>
You can also click Email code to team member to send it to whoever handles your site's HTML.
Step 5: paste before </body> - or auto-embed on your help center
For your website: paste the snippet before the closing </body> tag on every page where you want the widget to appear. That's the whole install.
For a Zendesk Help Center: tick Automatically embed Web Widget in your Help Center in the Installation tab and click Save. The widget appears across all help center pages immediately - no snippet pasting needed.

One more thing: if your site is behind a firewall, make sure the widget's required domains are allowed. And if you want to restrict where the widget appears, fill in the Allowlist field in the Installation tab - separate multiple domains with spaces.
Configuring your widget
Once the widget is live, the six settings tabs are where you tune it. Here's what each one does.
Style and appearance
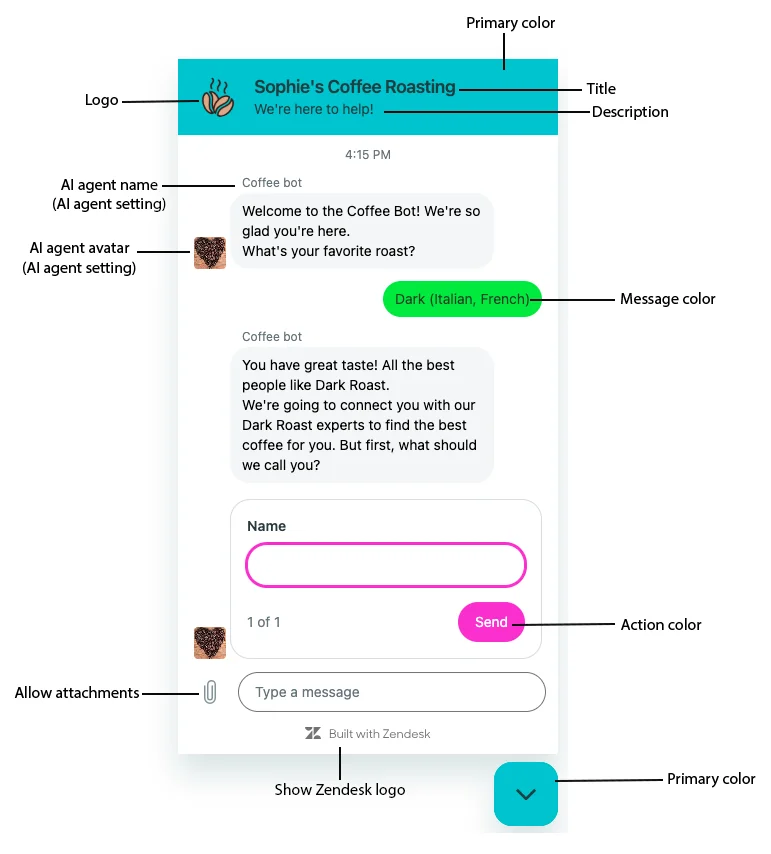
The Style tab is where you match the widget to your brand. The most important controls:
- Primary color - used for the launcher button and widget header
- Message color - color of customer message bubbles
- Action color - buttons and quick-reply options
- Logo - JPG or PNG shown at the top of the widget
- Border radius - slider from sharp corners (0px) to fully rounded (20px)
- Position - bottom right or bottom left, with pixel offsets
- Show Zendesk logo - toggle to hide the "Built with Zendesk" label (Suite Enterprise only)
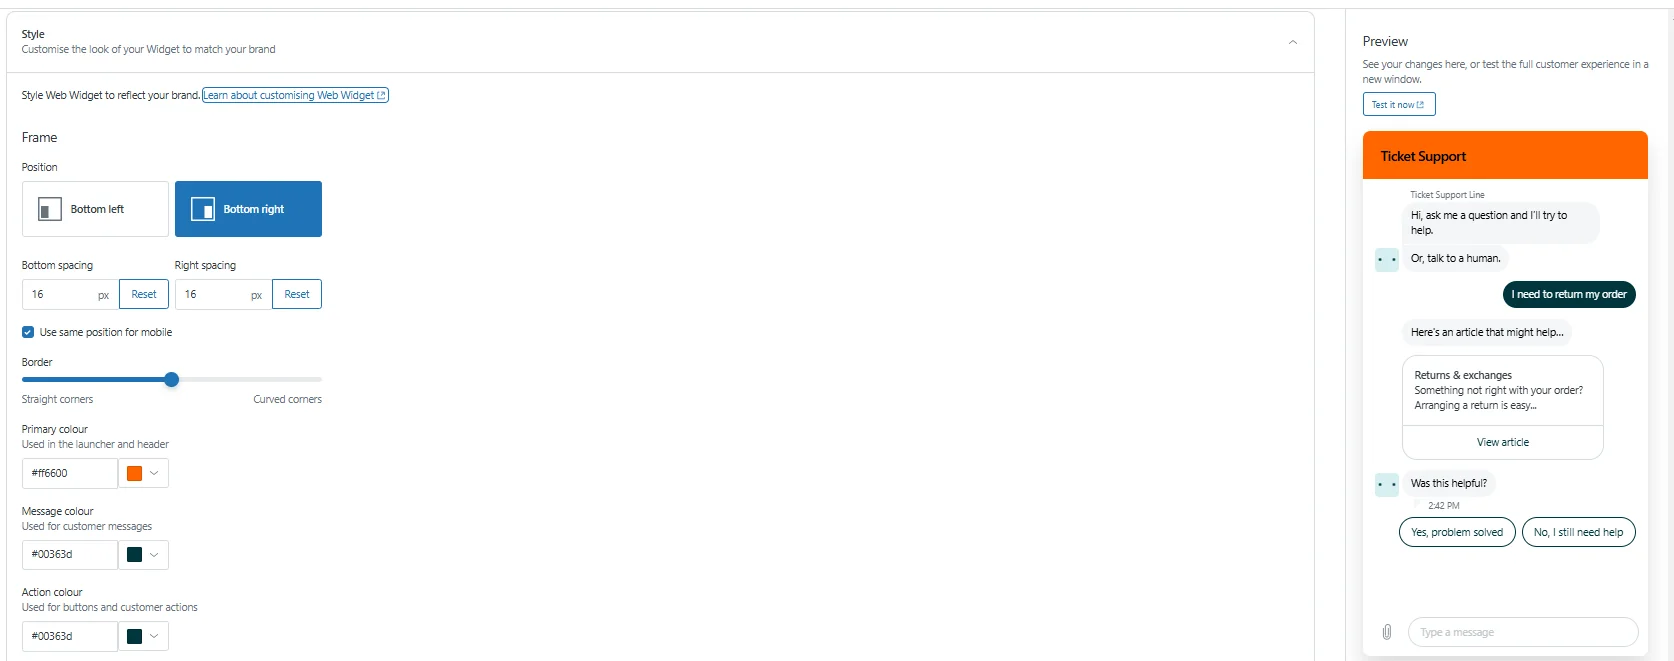
The Preview panel on the right updates in real time, so you can iterate without reloading the live site.
Responses and AI agents
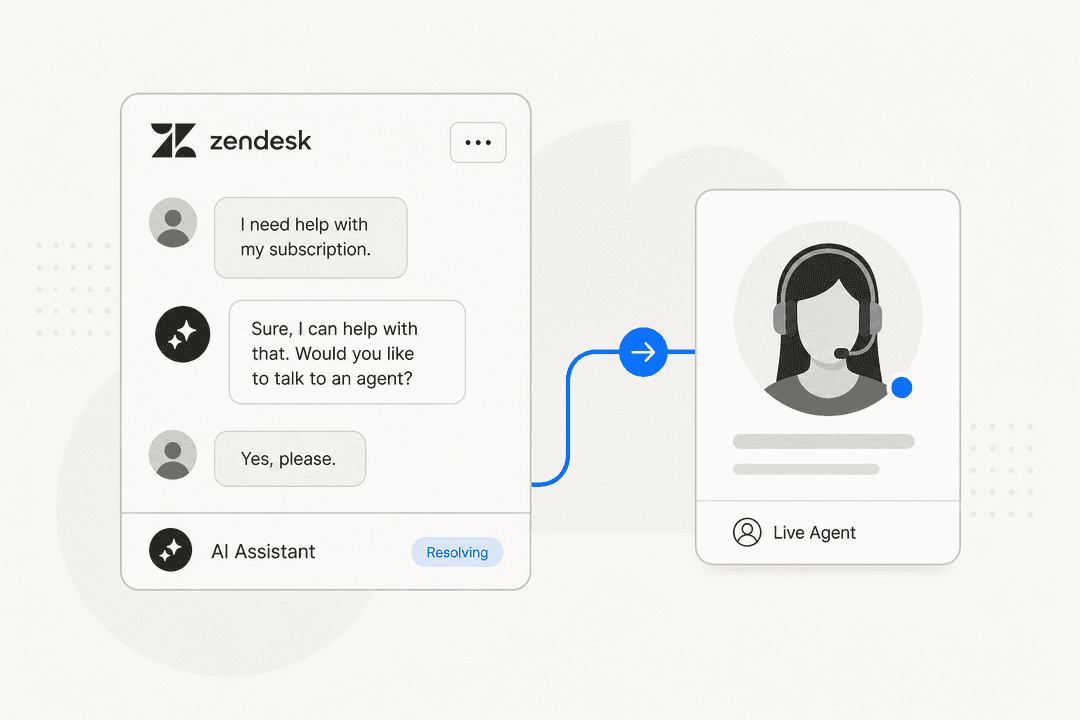
The Responses tab controls what happens when a visitor opens the widget. The most valuable setting here: connecting a Zendesk AI agent via Bot Builder. Once connected, the bot can answer questions from your help center, run generative reply flows, collect pre-chat information, and escalate to a human when needed.
You can also set custom greeting messages and configure which fields (name, email, subject) the widget collects before assigning a conversation to an agent.
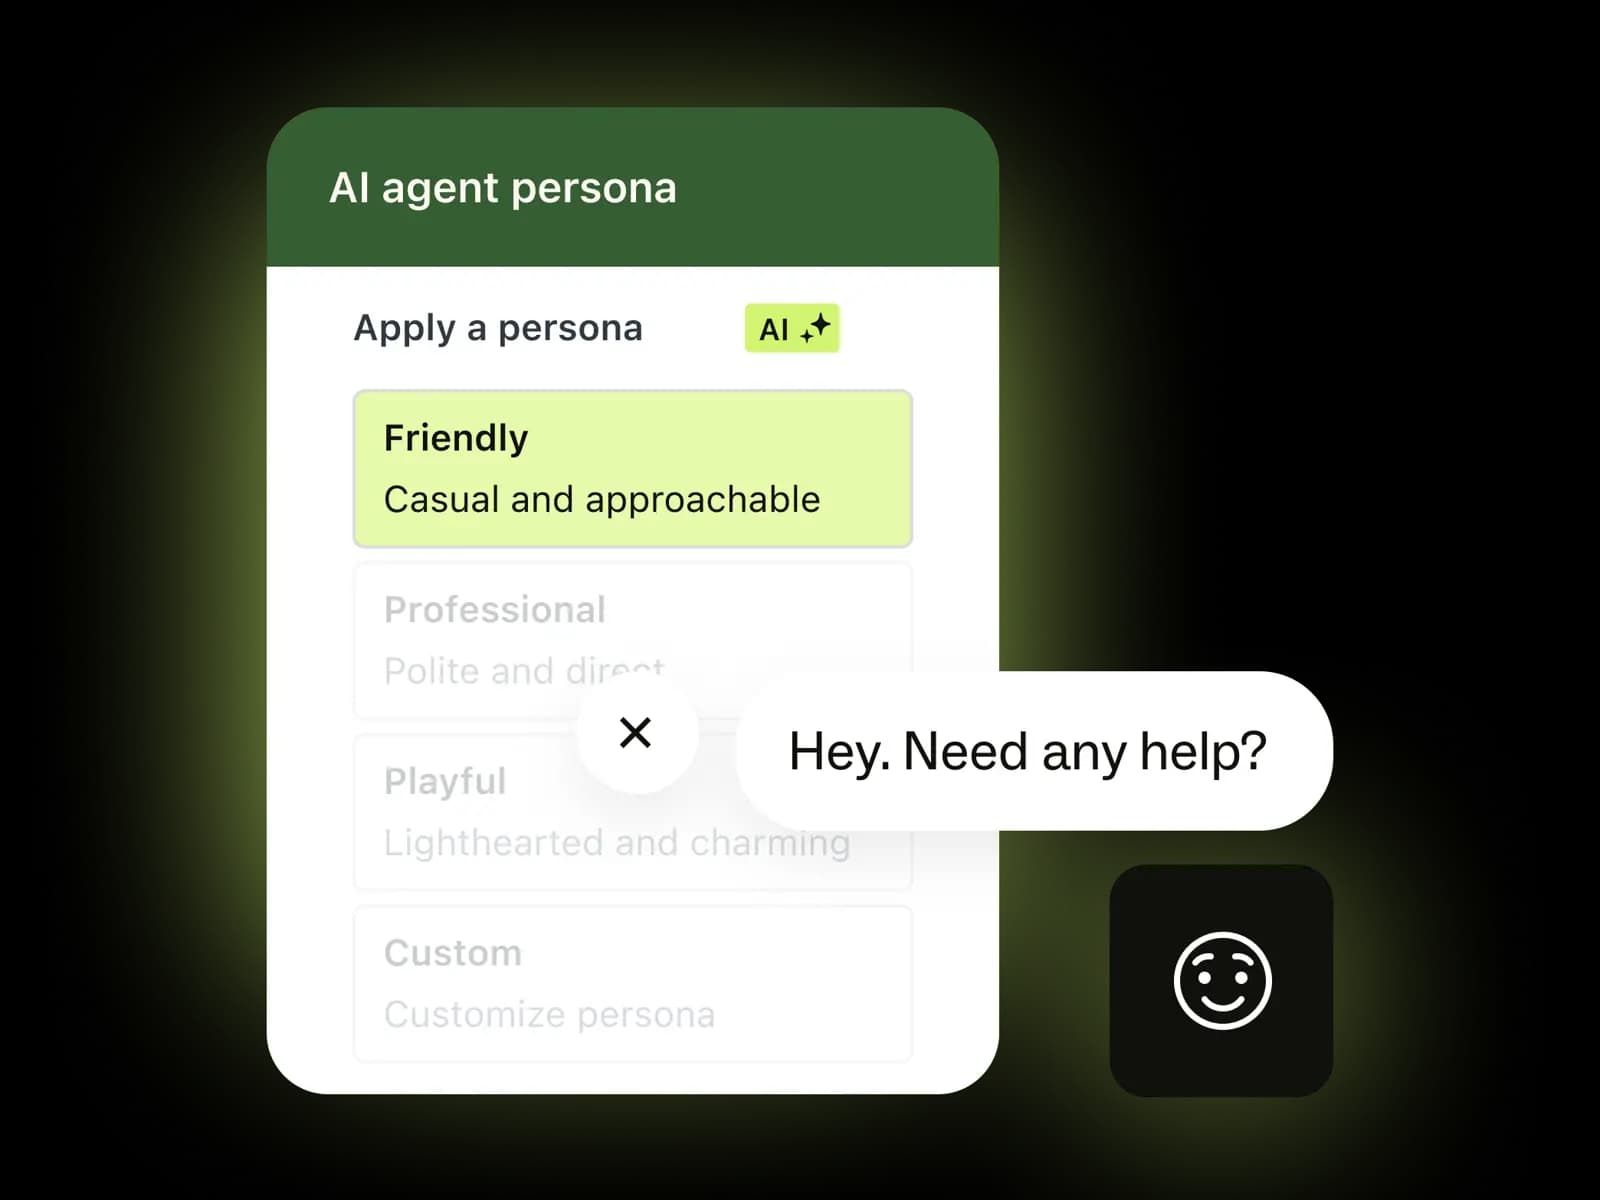
This is also where Zendesk AI agents start to show their limitations - the built-in bot is good for article suggestions and basic triage, but its generative capabilities require the Advanced AI add-on and the per-resolution billing model that's been a recurring Zendesk complaint. More on that below.
Authentication
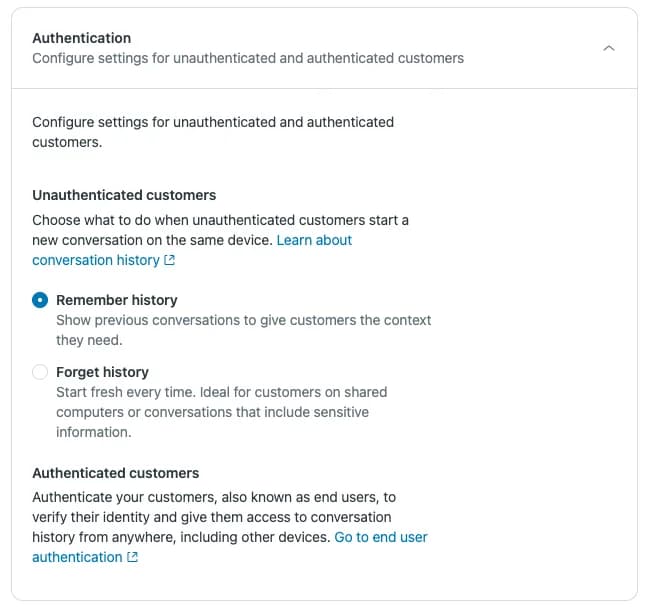
The Authentication tab controls whether returning visitors see their past conversation history.
- Remember history - show previous conversations on return visits (default)
- Forget history - fresh start each session (better for shared computers or sensitive contexts)
- User authentication - enable JWT-based authenticated sessions so logged-in users are automatically identified
The authentication flow is worth setting up if you have a logged-in user base - it means customers never have to identify themselves again, and agents always see the full conversation history regardless of which device or channel the customer used.
Installation tab
The Installation tab is also where you find the Allowlist (domain restriction) field and the Switch to Web Widget (Classic) button - the one-way door back to Classic if you need it.
JavaScript API for advanced control
If you need more control than the Admin Center offers, the Messaging widget exposes a zE global. The most useful commands:
zE('messenger', 'show');   // Show the widget (after hiding it)
zE('messenger', 'hide');   // Hide all widget UI from the page
zE('messenger', 'open');   // Expand the chat panel
zE('messenger', 'close');  // Collapse the chat panel
A few others worth knowing:
// Override browser language
zE('messenger:set', 'locale', 'de');

// Cookie consent - hide widget if user opted out
zE('messenger:set', 'cookies', 'none');

// Tag conversations for routing or reporting
zE('messenger:set', 'conversationTags', ['priority', 'returns']);

// Pass ticket field values automatically
zE('messenger:set', 'conversationFields', [{ id: '123456789', value: 'premium' }]);
The hide + open combination is useful for trigger-based chat flows - hide the launcher by default, then programmatically open the widget when a visitor hits a specific page. The full API reference lives at developer.zendesk.com/api-reference/widget-messaging/web/core/.
For embedded mode (rendering the widget inside a specific container rather than as a floating overlay), use:
window.zEMessenger = { autorender: false };
zE('messenger', 'render', {
  mode: 'embedded',
  widget: { targetElement: '#my-chat-container' }
});
This is what you want for split-layout pages where the chat is always visible rather than triggered from a launcher button.
Common issues to watch for
Page speed impact
This is the most serious operational issue. The Messaging widget has a measurable footprint, and the community has documented the effects thoroughly.
"When we switched from widget classic to messaging, we noticed catastrophical effects on performance of our sites... We fear that using the ZD native messaging widget, without any type of third party help, simply just doesn't work, unless a company is okay with sacrificing website performance."
Enterprise customer (48 seats), Zendesk Community, Jun 2023
A Shopify Plus store documented page loads of 17+ seconds after switching to Messaging (Shopify Community, Dec 2023). As of March 2026, the issue is still reported on r/Zendesk. The recommended workaround: add async or defer to the script tag so the widget loads after the main page content.
Zendesk acknowledged the problem in 2021 and said they were prioritizing package size optimization. Progress has been slow.
Missing Classic features in Messaging
The most-cited gap: agents cannot end a conversation from their side in Messaging. The end-user must close the widget or go inactive before the ticket can move to solved. There is also no real-time visitor list in Messaging - agents can't see who's browsing and initiate a proactive chat the way Classic allowed.
"I cannot figure out how to stop the message getting assigned to an agent when they are not online during business hours... Using the classic chat widget, if no agents were 'Available' for chat, we would receive an 'offline message' which we could reply to via email."
u/Repulsive_Season_147, r/Zendesk, Mar 2024
If those features are non-negotiable, see Zendesk chatbot setup alternatives for third-party options that integrate with Zendesk.
Agent notification failures
A recurring complaint on r/Zendesk: the Messaging widget doesn't always notify agents when a live chat arrives. The issue seems to affect certain configurations and hasn't had a consistent fix. If your team is relying on browser notifications alone, set up Zendesk email triggers as a backup.
Spam via the widget
In May 2024, Classic widget accounts saw an outbreak of spam tickets spoofed as Web Widget submissions. The fix isn't disabling the widget - it's disabling unauthorized API ticket creation in your Zendesk settings. Worth checking if you start seeing unusual ticket volume.
Beyond the native widget: adding AI with eesel
The Zendesk web widget gives you the conversation channel. What you put behind it determines how much work your team actually has to do.
Zendesk's built-in AI agents handle article suggestions and basic triage well. Where they fall short: the Advanced AI tier needed for generative replies costs ~$50/agent/month on top of your base plan, and Zendesk's per-resolution billing model is the most-complained-about pricing change of 2026. There's also no pre-launch simulation - you can't see how the bot would have handled your last 500 tickets before you turn it on.
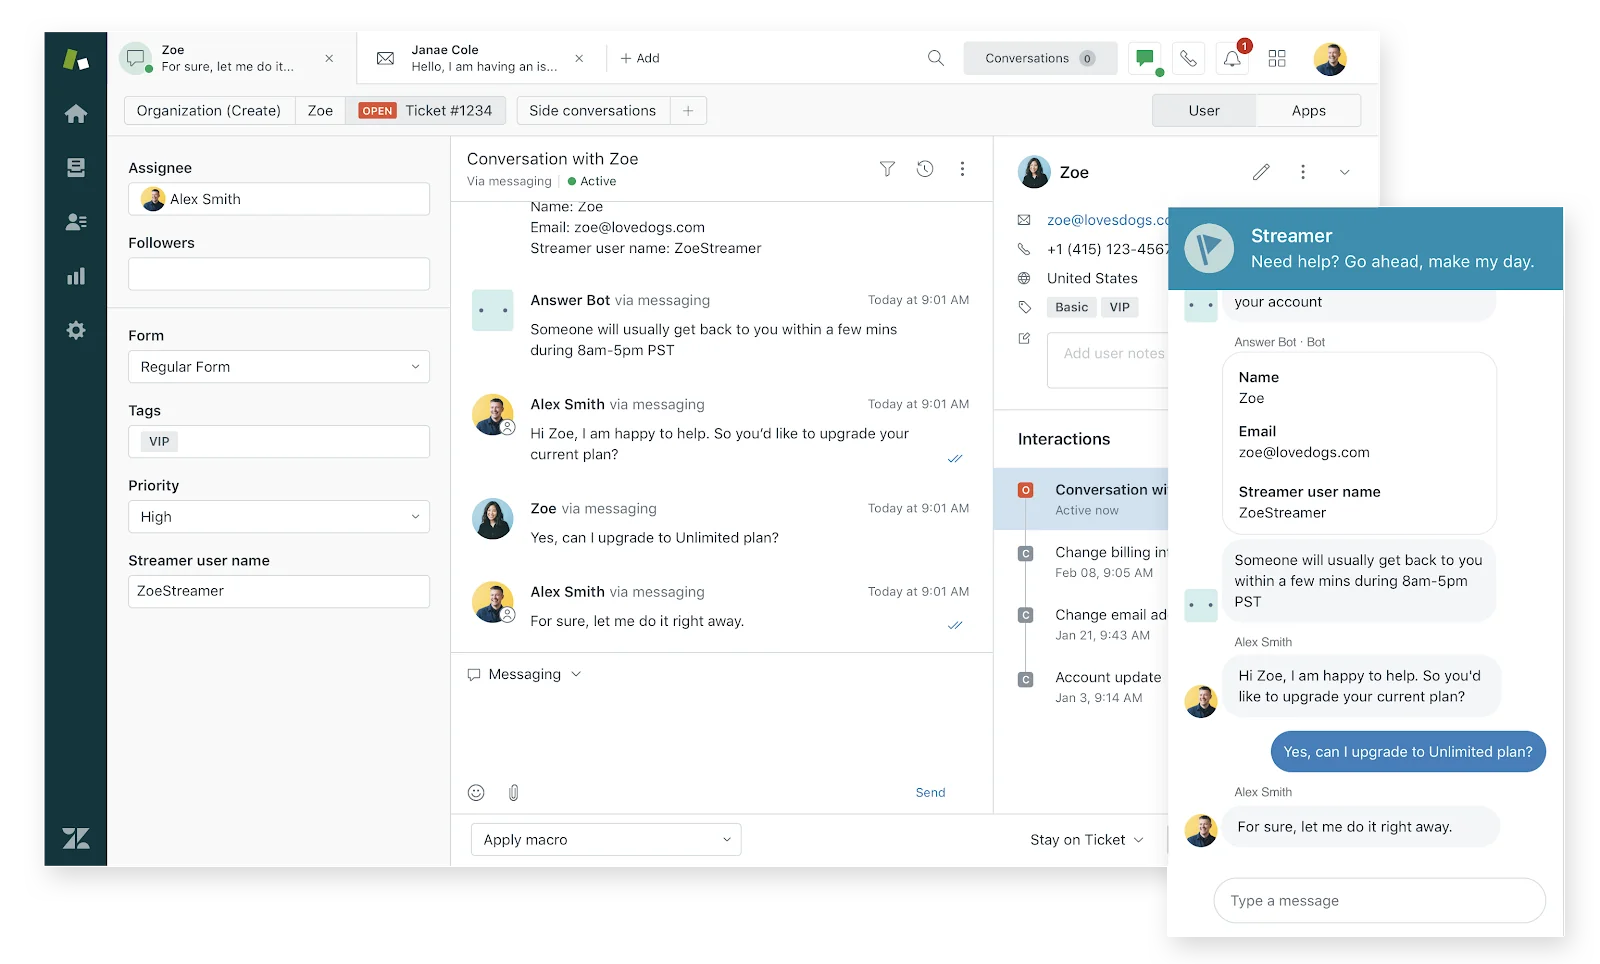
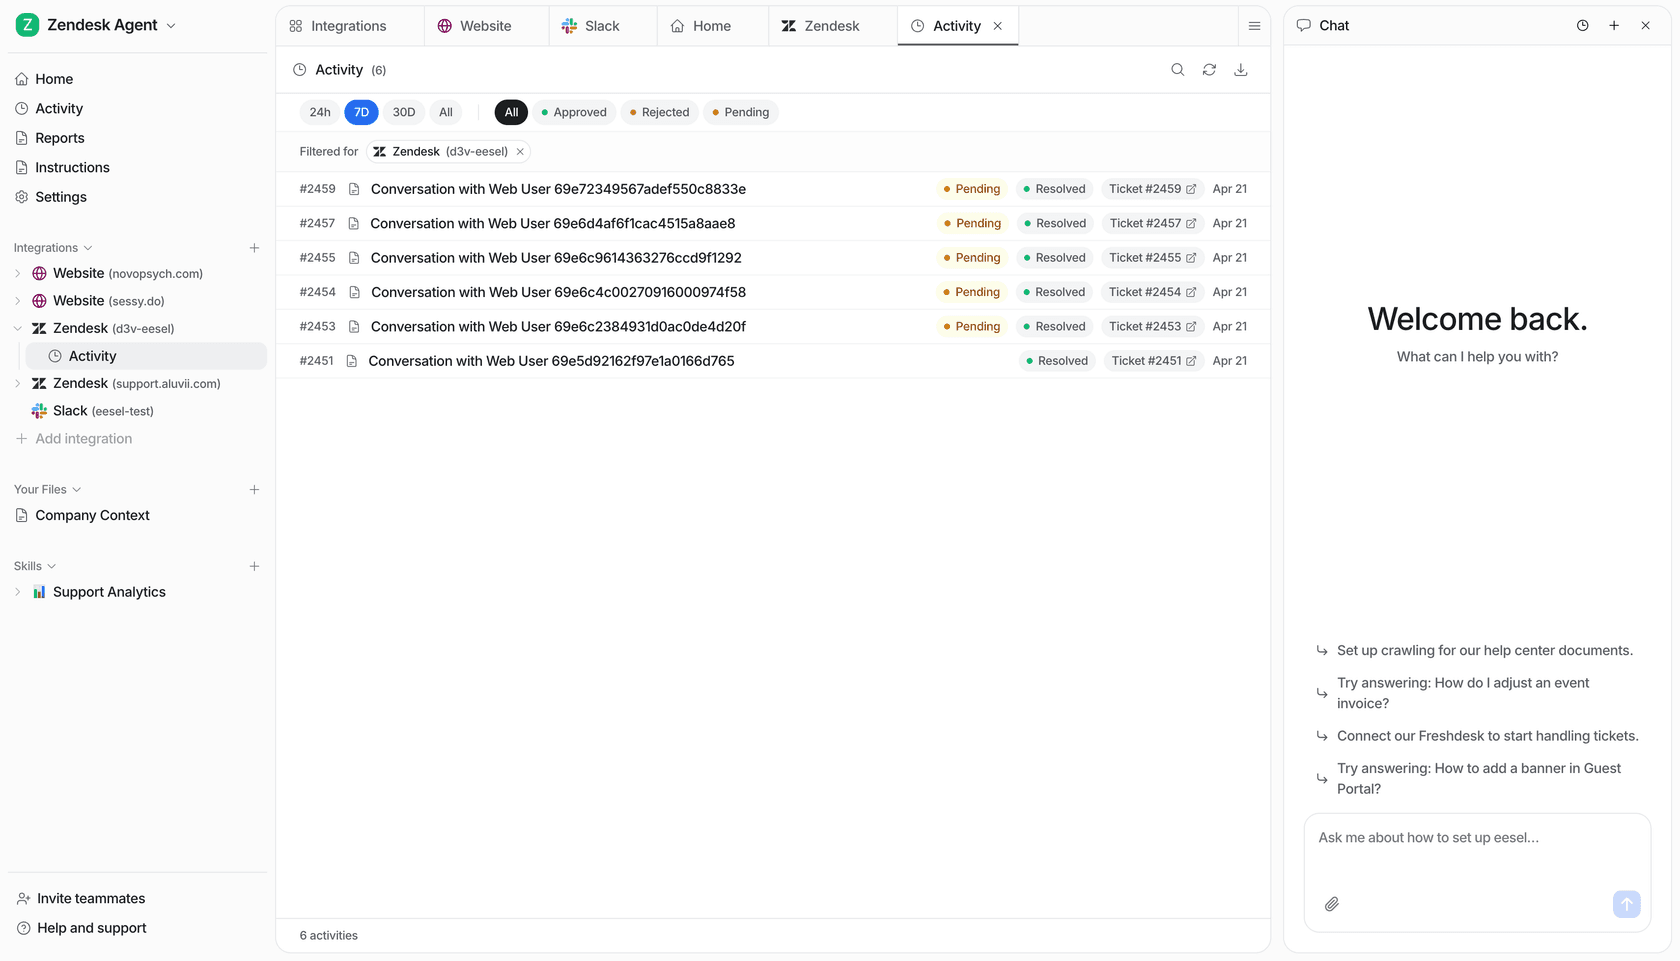
eesel takes a different approach. It connects to Zendesk as a native AI agent - not a separate chatbot layer - and starts working on all your channels, including web messaging, email, and social:
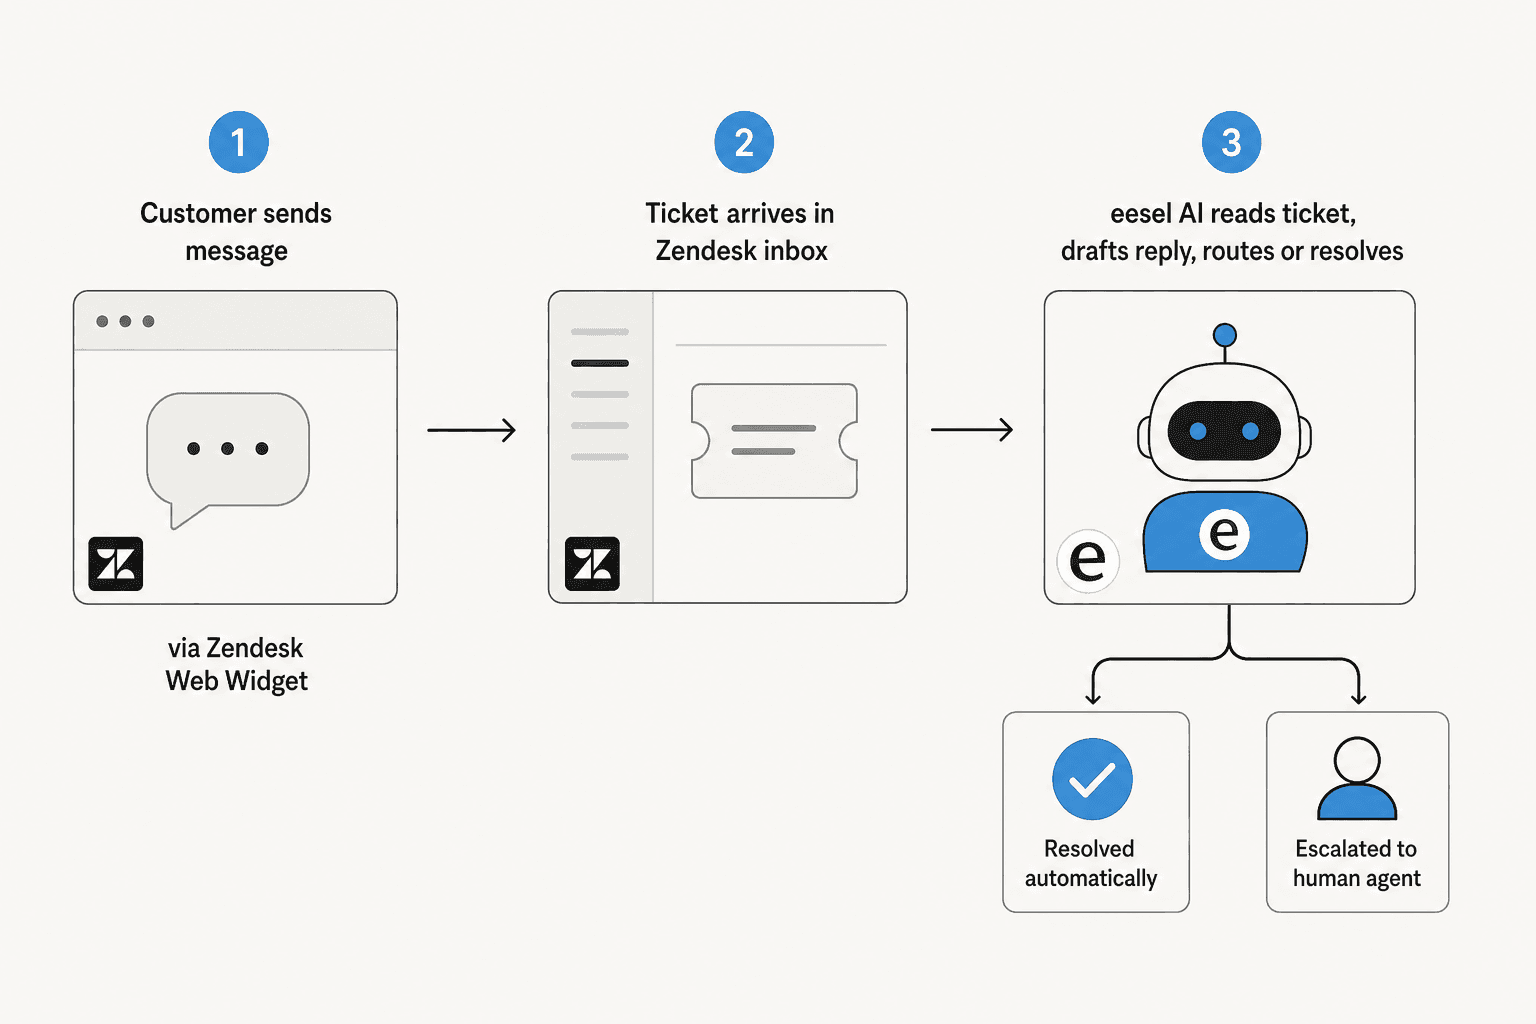
The workflow: customer sends a message via the web widget → ticket lands in Zendesk → eesel reads the full ticket history, drafts a reply grounded in your help center and past tickets, then either sends autonomously or queues for agent approval. No generative guessing - every response is tied to verified knowledge.
"Connecting eesel to Zendesk help center and messaging is ridiculously simple and we managed to get a chatbot and AI assistant that does some pretty complex actions with relative ease."
Richard Westerhof, Cloud86, via eesel.ai/integrations/zendesk
Smava runs 100,000+ support tickets per month through eesel in Zendesk. Ecosa achieves 75% tier 1 resolution at under an hour of integration time. Pricing is $0.40 per ticket handled - no platform fee, no per-resolution billing, no surprise invoices.
For a direct comparison of eesel vs. Zendesk's built-in AI, see how to add AI to Zendesk or Zendesk AI alternatives.
Try eesel
eesel is an AI teammate that lives inside Zendesk and handles tier 1 tickets on every channel - including your web widget conversations. It reads your existing help center, imports past tickets automatically, and starts resolving without any training or data labeling. Setup takes under 30 minutes and the free trial starts at $50 credit with no card required.
Try eesel - or book a demo if you'd rather see it on your actual ticket data first.
Frequently Asked Questions
What is the Zendesk web widget?
Which Zendesk web widget should I use - Classic or Messaging?
How do I add the Zendesk web widget to my website?
</body> tag on every page where you want the widget to appear. For help centers, you can tick Automatically embed Web Widget in your Help Center instead of pasting the snippet manually. Full step-by-step instructions are in our setup guide.How can I add an AI agent to the Zendesk web widget?
Does the Zendesk web widget slow down my website?
async or defer to the widget script tag, or to lazy-load it after the main page content. Third-party Zendesk marketplace apps also offer lighter-weight widget alternatives.
Article by
Alicia Kirana Utomo
Kira is a writer at eesel AI with a Computer Science background and over a year of hands-on experience evaluating AI-powered customer service tools. She focuses on breaking down how helpdesk platforms and AI agents actually work so that support teams can make better buying decisions.