Zendesk messaging triggers let you automate conversations before they ever reach your agents. Unlike standard ticket triggers that fire after a ticket is created, messaging triggers run the moment a customer initiates or interacts with a conversation. This gives you control over greetings, wait time notifications, email collection, and routing, all without manual intervention.
This guide covers everything you need to know about Zendesk messaging triggers: what conditions are available, what actions you can take, how to create triggers step by step, and when you might want something more intelligent than rule-based automation.
For teams looking to go beyond rule-based triggers, tools like eesel AI for Zendesk offer AI-powered automation that understands context and intent rather than just matching conditions.
What are Zendesk messaging triggers?
Zendesk messaging triggers are automated business rules that run when customers request or interact with conversations through messaging channels. They're managed in Admin Center under Objects and rules > Business rules > Messaging triggers.
Here's what makes them distinct from other Zendesk automation:
Messaging triggers vs. ticket triggers:
- Messaging triggers run on conversations before they become tickets (when a customer is chatting in the widget)
- Ticket triggers run after a ticket is created (when the conversation has already been assigned to an agent or group)
Messaging triggers vs. automations:
- Messaging triggers are event-based, firing immediately when conditions are met
- Automations are time-based, running roughly once per hour
Messaging triggers work across several channels:
- Web Widget
- Mobile SDKs (iOS, Android, Unity)
- Social messaging channels (Facebook, Instagram, WhatsApp, and others)
One thing to note: standard messaging triggers don't support social channels, though custom triggers you create can include them.
All Zendesk Suite plans (Team, Growth, Professional, Enterprise, and Enterprise Plus) have access to messaging triggers. However, only admins can create and manage them. Even agents with custom roles that include trigger management permissions can't access messaging triggers.

Messaging trigger firing events and when they run
Every messaging trigger starts with a firing event that determines when the trigger evaluates its conditions. You select this using the "Run trigger" dropdown when creating a trigger.
There are four firing events:
| Firing Event | When It Runs | Common Use Case |
|---|---|---|
| When a customer requests a conversation | When the AI agent hands off and a ticket is created, or when the customer re-engages after agent capacity is released | Welcome messages, initial greetings |
| When a message is sent | When a customer sends a message in the Web Widget | Keyword detection, message-based routing |
| When a conversation is added to the queue | When a messaging conversation enters the omnichannel queue | Queue notifications, wait time alerts |
| When a conversation is assigned from a queue | When a ticket is assigned to an agent via the Accept button or auto-accept | Agent assignment notifications |
The "assigned from a queue" event has an important limitation: it doesn't fire when an agent reassigns a ticket to another agent, or when an agent claims a ticket from a group view. It only fires on initial assignment via Accept or auto-accept.
Understanding when messaging tickets are created helps here: tickets are created when an AI agent hands off control of a conversation, and the conversation gets assigned to a group or live agent.

Each firing event corresponds to a specific moment in the customer journey. The diagram below shows when each event fires and what happens next in the conversation flow.
Complete guide to Zendesk messaging trigger conditions
Conditions determine what criteria a conversation must match for the trigger to fire. You can require that all conditions match ("Check All") or that any single condition matches ("Check Any").
Date and time conditions
These let you target conversations based on when they occur:
| Condition | Description | Notes |
|---|---|---|
| Hour of day | Hour in UTC (0=midnight, 23=11pm) | Uses hour only, not minutes |
| Day of week | Day (0=Monday, 6=Sunday) | Useful for weekend routing |
Customer information conditions
| Condition | Description | Social Support |
|---|---|---|
| Customer name | Customer's name | Yes |
| Customer email | Customer's email | Yes |
| Customer triggered | Flag from Set triggered action (True/False) | Yes |
| Customer page URL | Page where the customer is using the Web Widget | No |
| Customer previous conversations | Number of previous conversations with agents (0=new) | Yes (max 32,000) |
Customer location and device conditions
| Condition | Description | Social Support |
|---|---|---|
| Customer country | Country from IP address | No |
| Customer IP | IP address | No |
| Customer browser | Browser used (no patch updates) | No |
| Customer OS | Operating system (no version) | No |
| Customer platform | Platform used | No |
Online status conditions
| Condition | Values | Description |
|---|---|---|
| Account status | Online, Away, Invisible | Status of your Zendesk account based on agent availability |
| Group status | Online, Away, Invisible | Status of a specific Zendesk group |
The logic works like this: if at least one agent is online (and others are away or invisible), account status is Online. If at least one agent is away (and others are invisible), status is Away. If all agents are invisible, status is Invisible.
Conversation-related conditions
| Condition | Description |
|---|---|
| Brand | Multi-select for your active/inactive brands |
| Customer is in active conversation | True if customer is currently engaged |
| Customer is requesting conversation | True if customer is requesting to start |
| Customer served | True if agent has accepted and sent a message (not supported on social) |
| Group | Name of the assigned group |
| Sender | Name of the message sender |
| Sender Type | Agent or Customer |
| Message | The message content being sent |
| Initial routing | True if first time in queue, False if transferred |
| Tags | Ticket tags |
| Queue Size | Total incoming requests for your account (multi-conversation users count as single request) |
NEW: Messaging session state conditions (January 2025)
Recent updates added session state conditions that let you react to how actively a customer is engaging:
| Session State | Description | Use Case |
|---|---|---|
| Active | Customer actively engaging with the conversation | Reopen tickets when customer returns |
| Inactive | ~10 minutes of no activity (left page, minimized, locked phone) | Set to Pending, pause SLAs, release agent capacity |
| Ended | Agent pressed End Session or ticket was solved | Log session endings, redirect to AI agent |
This is useful for managing agent workload. You can create a trigger that automatically sets inactive conversations to Pending, which pauses running SLAs and releases agent capacity via omnichannel routing.
Trigger operators
When building conditions, you can use these operators:
| Operator | Description |
|---|---|
| is | Exact match |
| is not | Anything except the value |
| Less than / Greater than | Numeric comparisons |
| Contains / Does not contain | String includes/excludes text |
| Contains (case sensitive) | String includes text with exact case |
| Reg Ex | Python regular expression full match |
| Is one of / Is not one of | Multi-select matching |
Available trigger actions and how to use them
Actions define what happens when a trigger's conditions are met. Here's the complete list:
| Action | What It Does | Important Notes |
|---|---|---|
| Send message to customer | Sends an automated message | Shows AI agent avatar if configured, otherwise Web Widget logo |
| Wait | Introduces a delay before the next action | Triggers run simultaneously; add 1+ second delay for sequential triggers |
| Request email | Prompts customer for email | For continuous conversation re-engagement (not supported on social) |
| Set triggered | Applies a flag for the Customer triggered condition | Values: True or False |
| Add tags | Adds tags to the ticket | Useful for categorization and routing |
| Remove tags | Removes tags from the ticket | Workflow cleanup |
| Suspend user | Blocks user from messaging | Must be the final action in the trigger |
A critical note about timing: triggers run simultaneously by default. If you need triggers to fire in a specific sequence, add a Wait action of at least one second between them.

How to create a Zendesk messaging trigger step by step
Before you start, make sure you have admin access. Agents with custom roles (even those with trigger management permissions) can't create or manage messaging triggers.
Step 1: Access messaging triggers in Admin Center
Navigate to Admin Center, then click Objects and rules in the sidebar. Select Business rules > Messaging triggers.
Step 2: Configure basic trigger information
Click Create trigger and fill in the basics:
- Name: Use a consistent naming convention so you can identify triggers easily (e.g., "Welcome - Business Hours" or "Queue Alert - High Volume")
- Description: Optional, but helpful for other admins. This field is searchable.
- Channels: Web Widget & SDKs is included by default. Click the X to remove it, or add social messaging channels.
- Activate this trigger: Check this if you want the trigger active immediately.
- Run only once per ticket: Check this if the trigger should only fire the first time conditions are met.
Step 3: Set firing event and conditions
Use the Run trigger dropdown to select your firing event, then build your conditions:
- Choose whether the trigger requires All conditions to match or Any condition to match
- For each condition, select the Condition, Field operator, and Value
- Click Add condition to add more
Only conditions that apply to all your selected channels appear in the dropdown. If you're including social channels, device metadata conditions won't be available.
Step 4: Configure actions
Add at least one action:
- Select an Action from the dropdown
- Fill in the required information (varies by action type)
- Click Add action to add more
If you're using multiple actions in sequence, add a Wait action between them to make sure they fire in order.
Zendesk's standard messaging triggers
Zendesk includes three default triggers that you can activate, edit, or clone as templates:
First Reply: Sends an automated acknowledgment when a customer requests a conversation.
- Conditions: Customer requesting conversation is True
- Actions: Wait 5 seconds, then send "Thanks for your message, please wait a moment while our agents attend to you."
Request Contact Details: Asks customers for their email when agents are away.
- Conditions: Account status equals Away
- Actions: Send "Hi, sorry we're away at the moment. Please leave your email address and we'll get back to you as soon as possible."
All Agents Offline: Warns customers to expect delayed responses when all agents are invisible.
- Conditions: Customer requesting conversation is True AND Account status is Invisible
- Actions: Send "Hi there! Thanks for reaching out to us. We're offline right now, but we'll respond to your message when we're back online in a few hours."
These standard triggers don't support social channels.
Using placeholders in Zendesk messaging triggers
Placeholders let you insert dynamic information into your trigger messages. When the trigger fires, the placeholder pulls in the current value.
| Placeholder | Type | Description |
|---|---|---|
| @customer_name | String | Customer's name |
| @customer_email | String | Customer's email |
| @hour_of_day | Integer | Current hour UTC (0-23) |
| @day_of_week | Integer | Day of week (0=Monday, 6=Sunday) |
| @queue_size | Integer | Total incoming conversation requests |
| @wait_time_min | Integer | Minimum estimated wait time in minutes |
| @wait_time_max | Integer | Maximum estimated wait time in minutes |
| @bot_name | String | Name of the AI agent on the current channel |
| @message | String | The message that was sent |
| @account_status | String | Account status (Online/Away/Invisible) |
The wait time placeholders (@wait_time_min and @wait_time_max) only work for groups that have had at least one ticket routed in the last 7 days.
Example message using placeholders:
"Hi @customer_name! Our current wait time is approximately @wait_time_min to @wait_time_max minutes. We'll be with you shortly."
Beyond triggers: How eesel AI handles messaging automation
Rule-based triggers are useful, but they have limitations. Users in the Zendesk community have noted several frustrations:
- Limited condition options (no easy way to check if a customer was surveyed, for example)
- No built-in multi-language support for trigger messages
- Triggers can't understand context or intent, only match specific conditions
- Managing complex scenarios needs multiple triggers that can conflict
This is where AI-powered automation offers a different approach. Instead of configuring rules for every scenario, AI agents learn from your existing knowledge and adapt to conversations.
We built eesel AI to work alongside (or instead of) traditional triggers. Here's how it differs:
| Capability | Messaging Triggers | eesel AI |
|---|---|---|
| Setup time | Manual rule creation | Learns from your help center, past tickets, and docs in minutes |
| Language support | Single language per trigger | 80+ languages automatically |
| Context understanding | Keyword/condition matching only | Understands intent and conversation context |
| Complex scenarios | Multiple triggers needed | Single AI handles varied requests |
| Learning | Static rules | Improves from agent corrections |

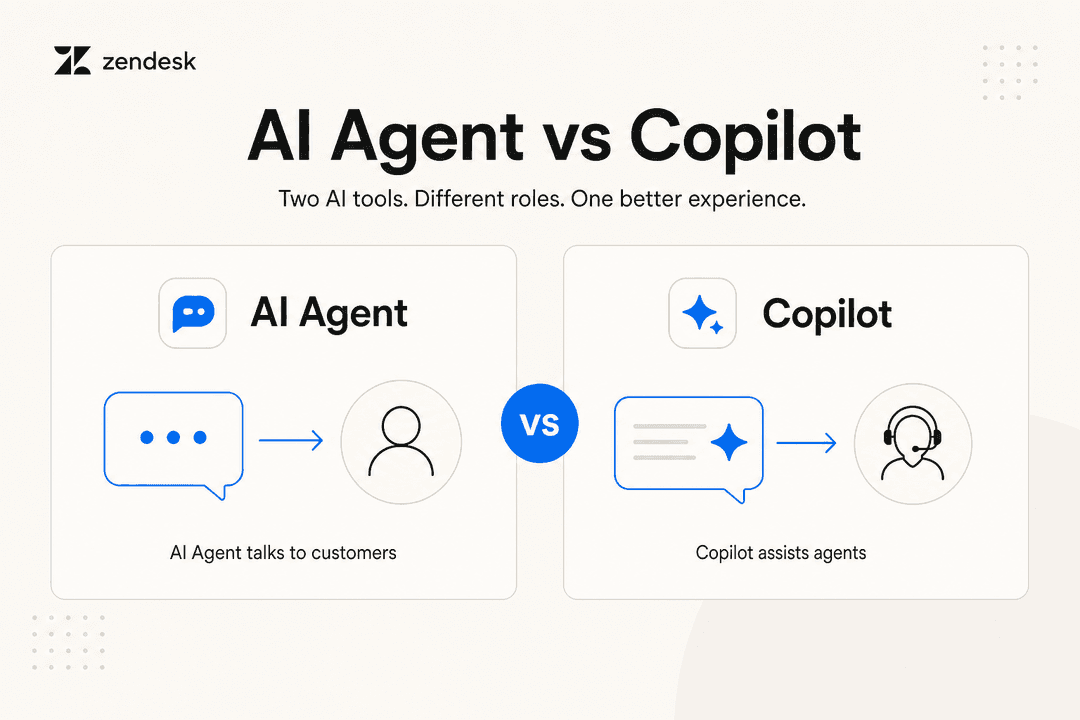
We integrate directly with Zendesk and can operate as a frontline AI Agent (handling tickets autonomously), an AI Copilot (drafting replies for agent review), or both. You define escalation rules in plain English, and the AI follows them.
For teams managing high-volume messaging, this means less time building and maintaining trigger logic and more time focusing on complex customer issues. You can try eesel AI free to see how it compares to rule-based triggers.