How to configure Zendesk request form fields per channel
Stevia Putri
Last edited February 27, 2026
When customers reach out for support, the experience should feel seamless regardless of how they contact you. But here's the catch: not all Zendesk channels support the same form fields. A field that works perfectly in your Help Center might not appear at all in your Web Widget. Understanding these differences is key to building forms that capture the right information across every touchpoint.
This guide walks you through configuring request form fields for each Zendesk channel. You'll learn which fields work where, how to set up channel-specific forms, and best practices for maintaining consistency without sacrificing functionality.

What you'll need
Before diving into configuration, make sure you've got:
- A Zendesk account with administrator access
- Suite Growth+ or Support Enterprise plan if you need multiple ticket forms (Team plans are limited to one form)
- A clear understanding of which channels your customers use most
- A list of the information you need to collect from customers
Understanding Zendesk channels and field visibility
Zendesk supports multiple channels for ticket creation, and each has its own capabilities when it comes to form fields.
The main channels include:
- Help Center Your branded support portal where customers browse articles and submit requests
- Web Widget (Classic) The embeddable chat and contact form that appears on your website
- Messaging Zendesk's newer conversational interface (replaces Web Widget for some plans)
- Email Tickets created when customers send emails to your support address
- API Tickets created programmatically through the Zendesk API
- Chat Tickets generated from live chat sessions
- Mobile SDK Tickets from your mobile app using Zendesk's SDK
Each channel handles form fields differently. For example, the Web Widget (Classic) can't display system fields like Priority, while the Help Center supports all field types including complex ones like multi-select dropdowns.
Field permissions also vary. When you create a custom field, you set who can see and edit it:
- Agents can edit Only your team sees this field (good for internal categorization)
- Customers can view Customers see the field value but cannot change it
- Customers can edit Customers can see and modify the field (use this for form fields)
The key thing to remember is that a field's got to be set to "Customers can edit" to appear on customer-facing forms.
Step 1: Create custom ticket fields in Admin Center
Start by building the fields you'll use across your channels.
Navigate to Admin Center > Objects and rules > Tickets > Fields, then click Add field.
Choose your field type carefully based on where it will be used:
| Field Type | Help Center | Web Widget (Classic) | Best Used For |
|---|---|---|---|
| Drop-down | ✅ Yes | ✅ Yes | Category selection, issue types |
| Multi-select | ✅ Yes | ❌ No | Multiple selections (tags) |
| Text | ✅ Yes | ✅ Yes | Short text entries |
| Multi-line text | ✅ Yes | ✅ Yes | Detailed descriptions |
| Checkbox | ✅ Yes | ✅ Yes | Yes/No confirmations |
| Numeric | ✅ Yes | ✅ Yes | Order numbers, quantities |
| Date | ✅ Yes | ❌ No | Scheduling, deadlines |
| Regex | ✅ Yes | ❌ No | Validated formats (phone, zip) |
| Credit card | ✅ Yes | ✅ Yes | Secure payment info |
| Lookup relationship | ✅ Yes | ✅ Yes | Linking tickets/users |

When configuring each field:
- Enter a display name that customers will understand
- Add a description for your team (optional but helpful)
- Under Permissions, select Customers can edit for fields that should appear on forms
- Set whether the field is required (note: required fields apply globally, not per form)
- Click Save
Drop-down and multi-select fields generate tags automatically. These tags become useful for routing tickets with triggers and automations later.
Step 2: Build channel-specific ticket forms
Now that you've got fields, you'll need forms to organize them. Forms control which fields appear together and in what order.
Navigate to Admin Center > Objects and rules > Tickets > Forms.
Click Add form to create a new form, or select an existing form to edit it.
Configure these key settings:
- Form name What your agents see in the ticket interface
- Editable for end users Check this to make the form available to customers
- Title shown to end users The customer-facing name (can differ from the agent name)
- Brand restrictions Limit which brands can use this form (if you have multiple brands)
Add fields to your form by dragging them from the right panel onto the form canvas. Arrange them in the order customers should complete them.
Important limitation: Field properties like "required" are set at the field level, not the form level. If a field is required, it'll be required on every form where it appears. You can't make the same field required on one form but optional on another.
Step 3: Configure Web Widget form fields
The Web Widget (Classic) has specific limitations you'll need to work around.
First, the limitations:
- System fields like Priority and Type don't appear in the Web Widget
- Regex, Date, and Multi-select fields are not supported
- Reordering fields is not supported in the default contact form (use ticket forms instead)
To configure Web Widget fields:
- Go to Admin Center > Channels > Classic > Web Widget
- Select the Basics tab
- Check the Contact form checkbox
- Under Custom ticket fields, select the fields you want to display
- To enable multiple ticket forms, check the Ticket forms checkbox
- Click Save

When ticket forms are enabled, customers first select which form matches their need, then see the relevant fields for that form.
For advanced customization, you can use the Web Widget JavaScript API to pre-populate fields or limit which forms appear on specific pages. This requires adding code to your website's zESettings object.
Learn more about Web Widget configuration options in the Zendesk documentation.
Step 4: Set up Help Center request forms
The Help Center offers the most flexibility for form fields.
Unlike the Web Widget, Help Center supports all custom field types including:
- Multi-select dropdowns
- Date pickers
- Regex-validated fields
- System fields like Priority
To configure which forms appear in your Help Center:
- Go to Admin Center > Channels > Help Center > Customize design
- Select your theme and click Customize
- Navigate to the Submit a request page settings
- Choose which ticket forms are available to end users

You can also set up conditional fields in Help Center forms. These show or hide fields based on what the customer selects in other fields. For example, selecting "Billing issue" could reveal fields for invoice number and amount.
To add conditions:
- Go to Admin Center > Objects and rules > Tickets > Forms
- Find your form and click Conditions
- Create if-then rules like: "If Department = Billing, then show Invoice Number field"
- Each form supports up to 1500 conditions per user type (agents vs end users)
Read more about conditional ticket fields in Zendesk's documentation.
Step 5: Handle Email and API channel fields
Email and API channels work differently than web-based forms.
Email channel:
When customers email your support address, Zendesk creates a ticket using your default ticket form. You've got limited control over field population:
- Subject line maps to the ticket subject
- Email body becomes the ticket description
- Custom fields are not populated from email content (unless you use triggers or automations to parse the email)
Best practice: Set sensible defaults for fields on your default form, then use triggers to adjust them based on email content patterns.
API channel:
The API gives you full control over ticket creation. When creating tickets via API, you can:
- Specify which ticket form to use
- Set values for any custom field
- Include all the same data customers would provide through a form
Example use case: A custom form on your website that collects specific information, then creates a Zendesk ticket via API with that data mapped to the appropriate custom fields.
Field compatibility by channel
Here's a quick reference for which field types work on which channels:
| Field Type | Help Center | Web Widget (Classic) | API | |
|---|---|---|---|---|
| Drop-down | ✅ | ✅ | ⚠️ Default only | ✅ |
| Multi-select | ✅ | ❌ | ⚠️ Default only | ✅ |
| Text | ✅ | ✅ | ⚠️ Default only | ✅ |
| Multi-line text | ✅ | ✅ | ⚠️ Default only | ✅ |
| Checkbox | ✅ | ✅ | ⚠️ Default only | ✅ |
| Numeric | ✅ | ✅ | ⚠️ Default only | ✅ |
| Date | ✅ | ❌ | ⚠️ Default only | ✅ |
| Regex | ✅ | ❌ | ⚠️ Default only | ✅ |
| Credit card | ✅ | ✅ | ⚠️ Default only | ✅ |
| Lookup relationship | ✅ | ✅ | ⚠️ Default only | ✅ |
| System fields (Priority, etc.) | ✅ | ❌ | ⚠️ Default only | ✅ |
⚠️ Email column: Custom fields cannot be populated directly from email content without parsing rules or API integration.
Best practices for multi-channel forms
Managing forms across multiple channels requires some strategy. Here are approaches that'll work:
Keep core fields consistent
Identify the 3-5 fields you absolutely need on every ticket, and make sure these appear on every form across every channel. This ensures baseline data consistency regardless of how customers contact you.
Use conditional fields for complexity
Rather than creating separate forms for every scenario, use conditional fields to show relevant options based on customer selections. This keeps forms short while still capturing detailed information when needed.
Test on each channel before launch
Submit test tickets through every channel your customers use. Verify that:
- All expected fields appear
- Required fields actually block submission when empty
- Conditional logic works as intended
- Data appears correctly in the agent interface
Document your form strategy
As your form setup grows complex, document which forms are used for which channels and why. This helps when training new admins and prevents accidental changes that break channel-specific configurations.
Troubleshooting common issues
Field not appearing in Web Widget
- Verify the field is set to "Customers can edit" in the field settings
- Check that the field type is supported in Web Widget (not Regex, Date, or Multi-select)
- Confirm the field is selected in the Web Widget admin settings
- If using ticket forms, make sure the form containing the field is enabled for the widget
Required fields blocking ticket creation
Remember that required fields apply globally. If a field is required, customers must complete it even on channels where it might not make sense. Consider making fields optional and using business rules to ensure completion instead.
Conditional fields not working
- Conditions only apply during ticket submission, not when viewing existing tickets
- Verify the conditional field and target fields are both on the same form
- Check that conditions are saved (unsaved conditions are lost when navigating away)
- Each form can have up to 1500 conditions per user type
Streamlining form management with AI
Managing complex form configurations across multiple channels takes time and attention to detail. As your support operation grows, you might find that maintaining intricate forms becomes a burden rather than a help.
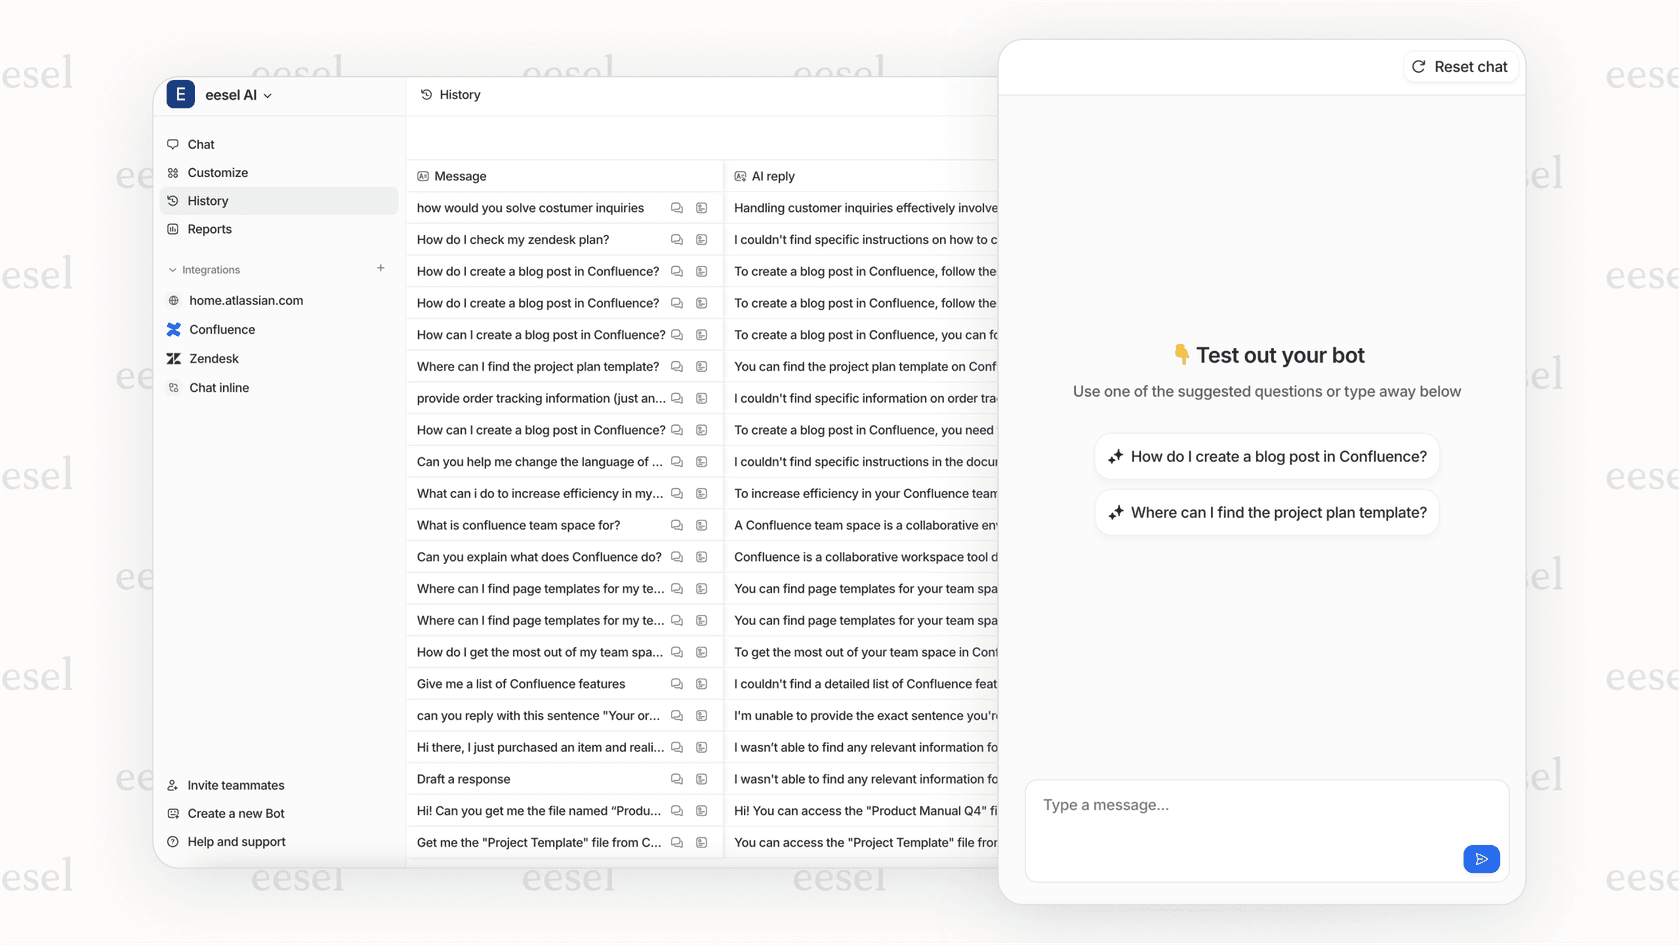
This is where modern AI support tools can change the approach entirely. Instead of building increasingly complex forms to capture every possible detail upfront, eesel AI integrates directly with your Zendesk setup and handles the information gathering through natural conversation.
Rather than forcing customers through rigid forms, an AI teammate can ask follow-up questions contextually, pulling exactly the information needed based on what the customer has already shared. It works across all your channels email, chat, web widget without requiring different form configurations for each.
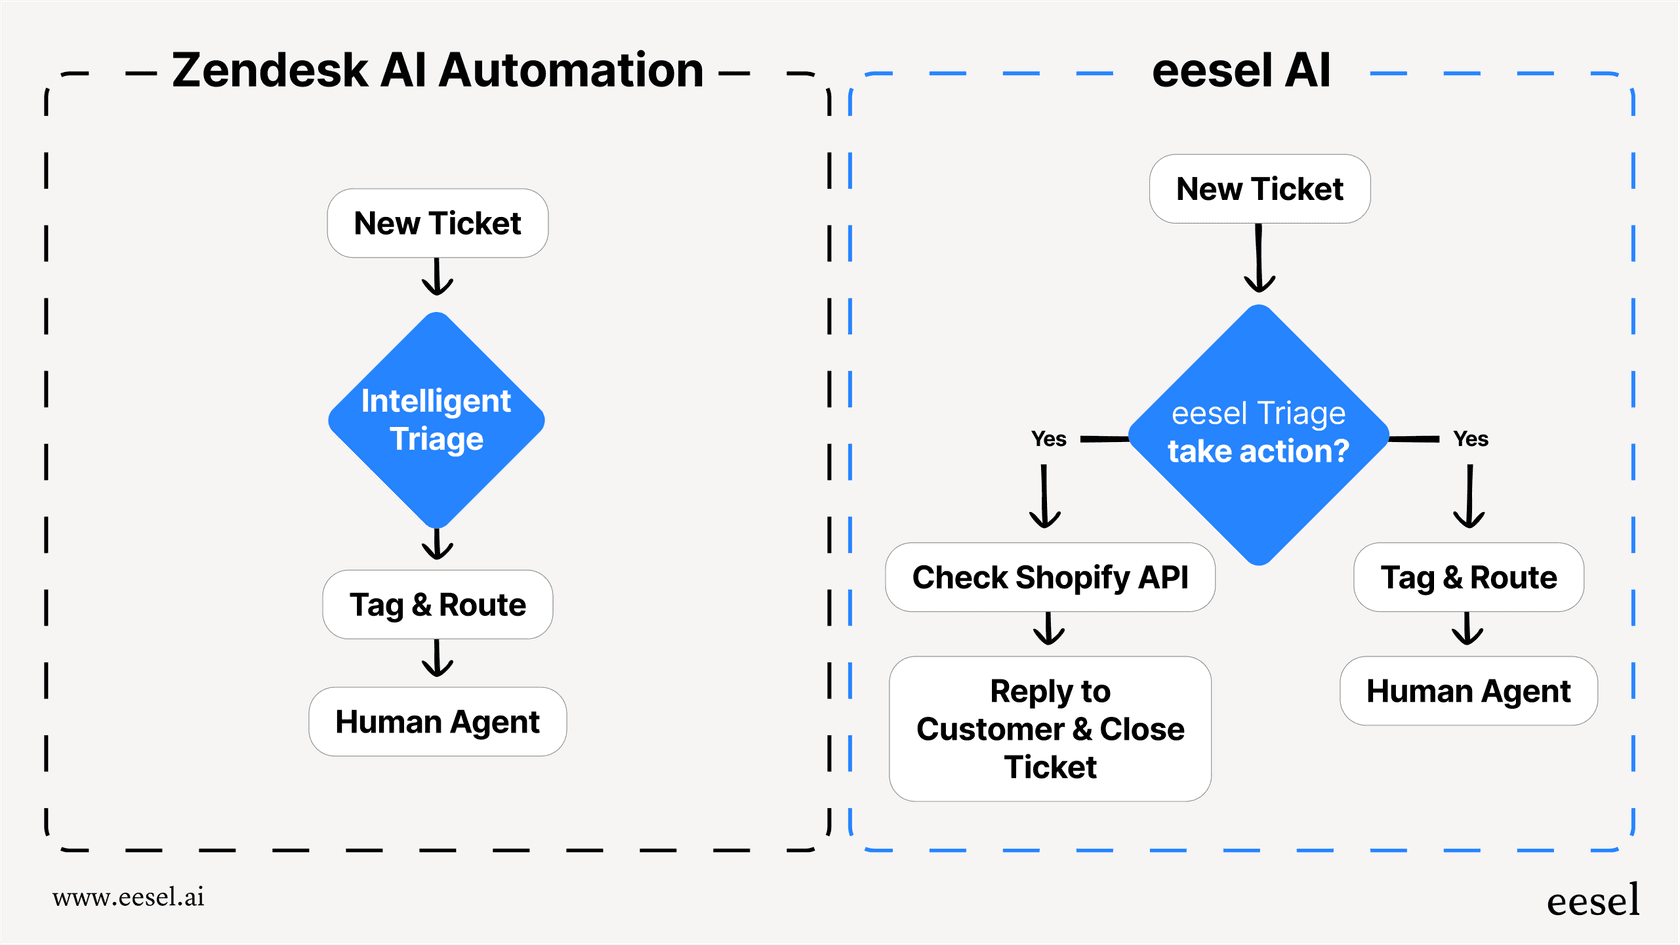
Our AI Triage feature can also reduce your reliance on complex forms by automatically categorizing and routing tickets based on the content itself, not just the fields customers fill out. This means simpler forms for customers and better data for your team.
If you're spending more time managing form logic than improving your actual support experience, it's worth exploring how AI can handle the complexity for you. Check out our Zendesk integration to see how it works alongside your existing forms. You can also explore our AI Agent for end-to-end ticket resolution or AI Copilot to help your human agents draft replies faster.
