How to forward your existing email inbox to Zendesk
Stevia Putri
Last edited February 26, 2026
Setting up email forwarding to Zendesk is one of those tasks that sounds simple until you're staring at DNS records and wondering why your verification emails keep disappearing. Here's the good news: once you understand the process, it's straightforward. This guide walks you through forwarding emails from your existing inbox to Zendesk Support, whether you're using Gmail, Microsoft 365, or another provider.
What you'll need to get started
Before diving in, make sure you've got a few things ready:
- Zendesk account with admin access you'll need to configure support addresses in the Admin Center
- Your existing email address the one customers currently use (like support@yourcompany.com)
- Access to your email provider's settings whether that's Gmail, Microsoft 365, or another service
- Basic understanding of SPF records only if you're using a custom domain (we'll cover this)
- Timing plan forwarding should be one of the last steps before going live with Zendesk
Here's the short version: connecting your email is one of the final steps before launching Zendesk. Hold off on forwarding until you're actually ready to process tickets. Until you add the external address in Zendesk, email traffic is inbound only. Zendesk won't send outbound emails from that address until it's been added and verified. For more details, check out Zendesk's official email forwarding documentation.
Step 1: Add your external support address in Zendesk
First, you'll need to tell Zendesk about the email address you'll be forwarding from. This lets Zendesk verify the address and use it for outbound replies.
- In Admin Center, click Channels in the sidebar, then select Talk and email > Email
- If the Zendesk support address you're forwarding to doesn't exist yet, create one first
- Click Add address, then select Connect external address
- Select Email forwarding, then click Next
- Enter your existing support email address (the one customers currently email)
- Click Save

Important: don't use a distribution group email or an email alias as your external support address. Doing so can cause routing headaches and make troubleshooting difficult. Stick with a dedicated forwarding address.
If you've got multiple brands in Zendesk, select the correct brand before adding the address. And if you're forwarding from multiple external addresses (like billing@, help@, and sales@), you'll repeat this process for each one.
Step 2: Configure forwarding in your email provider
Now for the part that happens outside Zendesk. You'll need to set up automatic forwarding at the server level in your email provider. The exact steps depend on which service you use.
Gmail and Google Workspace setup
If you're forwarding from Gmail or Google Workspace:
- Sign in to the Gmail account you want to forward from
- Click the gear icon, then See all settings
- Go to the Forwarding and POP/IMAP tab
- Click Add a forwarding address
- Enter your Zendesk support address (it looks like support@yoursubdomain.zendesk.com)
- Gmail sends a verification email to that Zendesk address
- In Zendesk, find the verification email and click the confirmation link
- Back in Gmail settings, select Forward a copy of incoming mail to and choose your Zendesk address
- Decide whether to keep copies in Gmail or delete them
- Click Save Changes
Note: if you expect low email volume and use Gmail, Zendesk actually recommends using their Gmail Connector instead of forwarding. It's simpler for smaller operations.
Microsoft 365 and Outlook setup
For Microsoft 365 or Exchange environments:
- In the Exchange admin center, go to Mail flow > Remote domains
- Make sure forwarding is allowed to external domains (specifically zendesk.com)
- Go to Recipients > Mailboxes
- Select the mailbox you want to forward from
- Click the Mailbox features tab
- Under Mail flow, click View details next to Email forwarding
- Enable forwarding and enter your Zendesk support address
- Choose whether to keep a copy of forwarded messages
- Click Save
If you're using the new Outlook interface, the steps are slightly different: go to Settings > Mail > Forwarding, toggle Enable forwarding, enter the address, and save. Microsoft's official guide to Outlook forwarding has additional details if you need them.
Other email providers
For iCloud, Yahoo, Proton Mail, or other providers, the general process is similar:
- Find the forwarding or mail rules section in your account settings
- Add your Zendesk support address as the forwarding destination
- Verify the forwarding address through the confirmation email
- Enable automatic forwarding for all incoming mail
If you can't find these options or don't have admin access, contact your email provider or IT team. Zendesk can't provide support for third-party email configuration. For additional guidance, see Zendesk's troubleshooting guide for email issues.
Step 3: Verify your forwarding setup
Once forwarding's configured in your email provider, return to Zendesk to verify everything works:
- In Admin Center, go back to Channels > Talk and email > Email
- Find your external support address in the list
- Click the options menu (three dots) next to the address
- Select Verify forwarding
Zendesk sends a test email to your external address. If forwarding is set up correctly, the email routes through to Zendesk and the verification succeeds. You'll see a success message.
If verification fails, check these common causes:
- Verification email in suspended tickets some email services send verification emails that Zendesk flags as suspicious. Check your Suspended tickets view and release the email if found
- Forwarding not yet active some email providers take a few minutes to activate forwarding rules
- Wrong forwarding address double-check that you entered the correct Zendesk support address
If you resolve a forwarding issue but don't retry the verification check, emails will still create tickets but Zendesk won't send outbound notifications from that address. Always verify after fixing problems.
Step 4: Configure SPF and email authentication
Here's where many setups hit a snag. If you're using a custom domain (like support@yourcompany.com), you need to add an SPF record so email providers know Zendesk is authorized to send email on your behalf.
Without proper SPF configuration, your replies from Zendesk might end up in spam folders or get rejected entirely.
Add this to your domain's SPF record:
include:support.zendesk.com
Your complete SPF record might look something like:
v=spf1 include:_spf.google.com include:support.zendesk.com ~all
You should also consider digitally signing outbound email from Zendesk using DKIM. This helps combat spoofing and proves emails actually came from your organization.
Common issues and how to fix them
Even with careful setup, things can go wrong. Here are the most common problems and solutions:
Verification emails never arrive Check your spam filters and the Suspended tickets view in Zendesk. Some email providers send verification emails that look suspicious to Zendesk's filters. You may need to allowlist your email provider's domain.
Emails create suspended tickets instead of regular tickets This usually happens when someone manually forwards an email from their email client (like Outlook or Apple Mail) rather than using automatic server-level forwarding. Manually forwarded emails often lose important header information that Zendesk needs. Always set up forwarding at the server level, not the client level. Learn more about Zendesk suspended tickets.
Unrelated conversations thread together on existing tickets This frustrating issue occurs when forwarded emails contain the same Message-ID or In-Reply-To headers. It commonly happens when agents reuse email templates or forward the same email multiple times. Zendesk threads emails based on these headers regardless of subject line changes. The fix: always create brand new emails rather than forwarding or replying to existing threads.
Multi-forwarding breaks requester identification Zendesk doesn't support multi-forwarding (forwarding through multiple locations before reaching Zendesk). If an email goes from customer > address A > address B > Zendesk, the requester might be set incorrectly. Keep forwarding chains simple and direct.
Distribution groups cause routing problems Using a distribution group or email alias as your external support address creates headaches. Zendesk can't properly route tickets or troubleshoot issues when the address isn't a real mailbox. Use a dedicated forwarding mailbox instead.
A simpler alternative to Zendesk email forwarding
Setting up email forwarding works, but it's not the only way to get customer emails into your help desk. If you're looking for a more modern approach, eesel AI offers an alternative through its AI Agent and AI Copilot products.
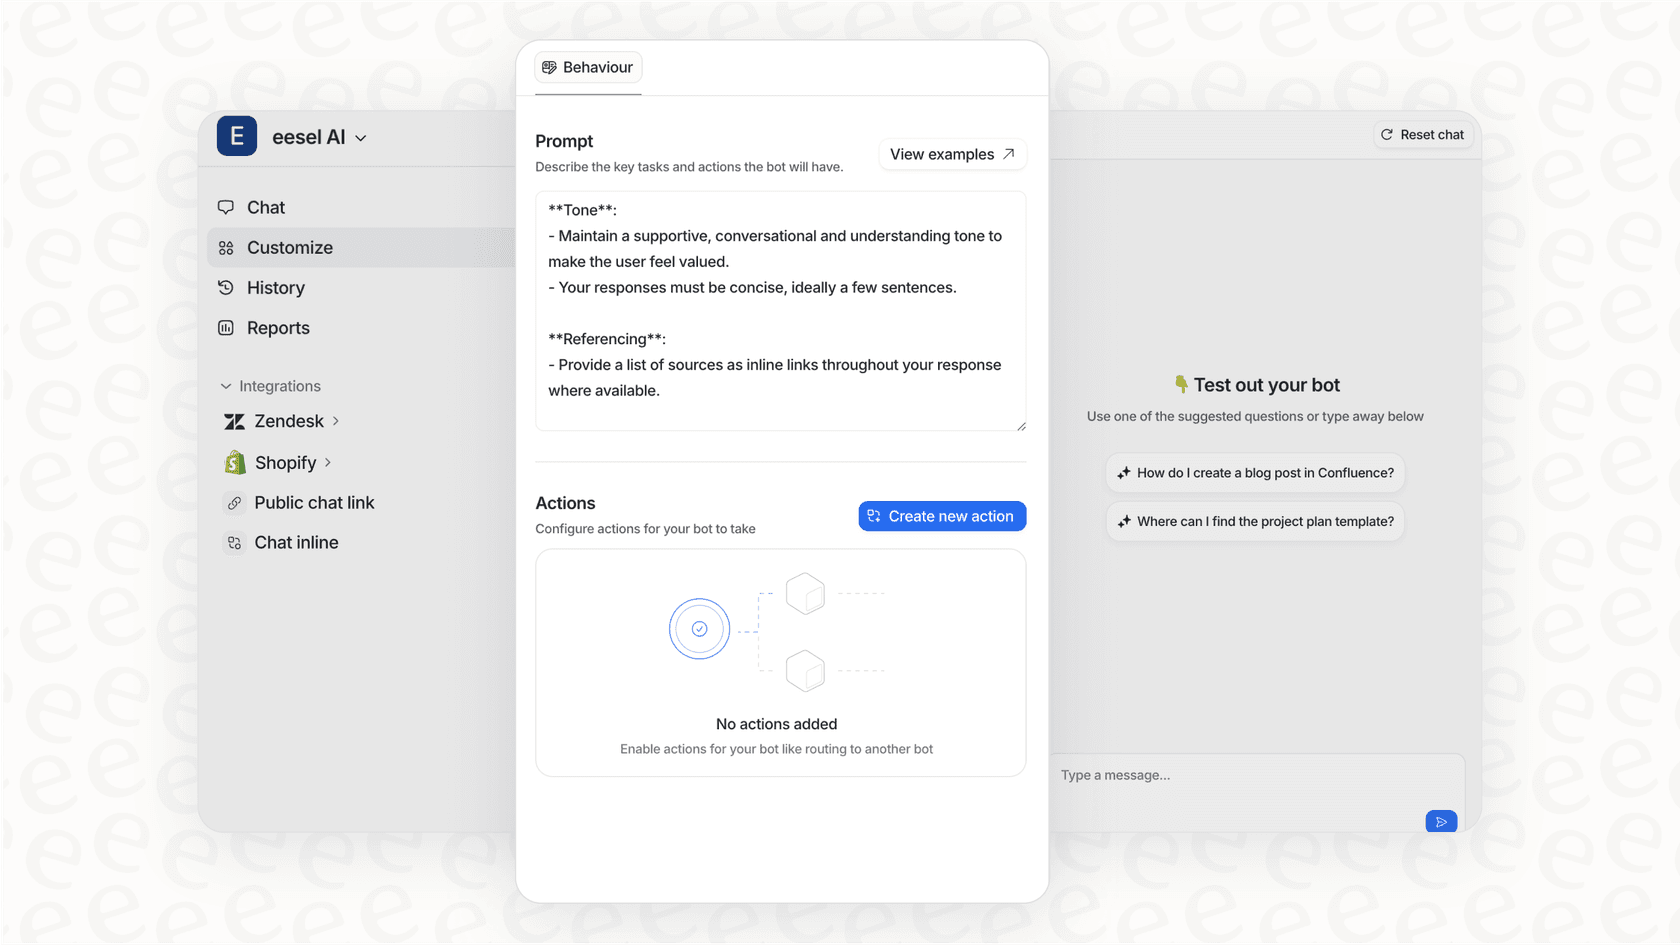
Instead of configuring complex email forwarding rules and DNS records, eesel connects directly to your help desk through native integrations. You invite eesel to your team, and it learns from your existing tickets, help center articles, and connected documentation. No manual forwarding setup required.
Here's how the approach differs:
| Traditional forwarding | eesel AI approach |
|---|---|
| Configure DNS records (SPF, DKIM) | Native API integration |
| Server-level email forwarding rules | Direct platform connection |
| Verification emails and troubleshooting | Minutes to get started |
| Technical setup before going live | Progressive rollout: start with guidance, expand as confidence grows |
With eesel, you can start with AI-drafted replies that agents review before sending. As the AI proves itself, you'll level up to full autonomy. You'll define escalation rules in plain English rather than wrestling with email headers and forwarding configurations.
If you're already using Zendesk, eesel integrates directly and can start helping with ticket routing, response drafting, and automated actions without any email forwarding complexity.
Bottom line? Email forwarding to Zendesk works fine once configured, but it's worth considering whether a direct integration approach might save you time and headaches. Check out eesel AI pricing to see how it compares to your current setup, or try eesel free to test it with your existing Zendesk account.
Frequently Asked Questions
Share this article

Article by
Stevia Putri
Stevia Putri is a marketing generalist at eesel AI, where she helps turn powerful AI tools into stories that resonate. She’s driven by curiosity, clarity, and the human side of technology.