How to use Zendesk triggers to add tags by channel: Complete guide
Stevia Putri
Last edited February 24, 2026
When your support team handles requests from multiple sources, things can get chaotic fast. Emails, chat messages, social media DMs, and web form submissions all land in the same queue. Without a system to identify where each ticket came from, your agents waste time sorting instead of solving.
That's where channel-based tagging comes in. By using Zendesk triggers to automatically tag tickets by their source channel, you create an organized workflow that routes requests to the right team and gives you clear visibility into your support landscape.
This guide walks you through setting up Zendesk triggers to add tags by channel automatically. Whether you're managing a small team or scaling a large operation, these steps will help you build a more efficient support system.
Why tag tickets by channel?
Channel tags serve as the foundation for smarter support workflows. When every ticket carries a label identifying its source, you unlock several operational benefits.
Improved visibility. At a glance, you can see exactly where your volume is coming from. This helps you understand which channels are busiest and spot trends in how customers prefer to contact you.
Faster routing. Once tickets are tagged by channel, you can create views and assignment rules that send social media tickets to your community team, email to your general queue, and chat to your real-time agents. No more manual sorting.
Better reporting. Want to know your average resolution time for email versus chat? Or which channel gets the best CSAT scores? Channel tags make this kind of analysis straightforward in Zendesk Explore.
Tailored responses. Different channels often need different tones. You can use channel tags to trigger specific auto-responses or macros. A casual reply works for social media, while a professional tone fits email better.
What you'll need before starting
Before diving into trigger setup, make sure you have the prerequisites in place.
Zendesk Admin access. You'll need administrator permissions or a custom role with the ability to manage business rules. This lets you create and modify triggers. If you don't have this access, coordinate with your Zendesk admin.
A tag naming plan. Decide on your naming convention before you start. Simple tags like email, web_form, chat, and social work well. Consistency matters because you'll use these tags across views, reports, and other triggers.
About 15 minutes. This is a quick win that pays dividends immediately. Each trigger takes just a few minutes to create, and you can build them one channel at a time.

Step-by-step: Setting up your first channel trigger
Ready to organize your inbox? Let's build your first trigger together.
Step 1: Navigate to the triggers menu
First, find where triggers live in your Zendesk environment.
Log into your Zendesk account and head to the Admin Center. In the left sidebar, follow this path: Objects and rules > Business rules > Triggers. This is your hub for managing all ticket automations.

The Triggers page shows all your existing triggers in the order they run. Take a moment to familiarize yourself with the interface. You'll see active and inactive triggers, organized by category if you've set those up.
Step 2: Create a new trigger
Once you're on the Triggers page, click the Create trigger button in the top-right corner.
Give your trigger a clear, descriptive name. Good naming conventions help as you scale. Something like "Tag Tickets by Channel: Email" or "Auto-Tag: Web Form" makes the trigger's purpose obvious to anyone on your team.
Add an optional description explaining what the trigger does. This helps with documentation and makes the trigger searchable later. You might write: "Automatically adds the 'email' tag to all tickets submitted via the email channel for routing and reporting purposes."
Select or create a trigger category to keep things organized. Categories help you group related triggers together as your automation library grows.
Step 3: Define the conditions
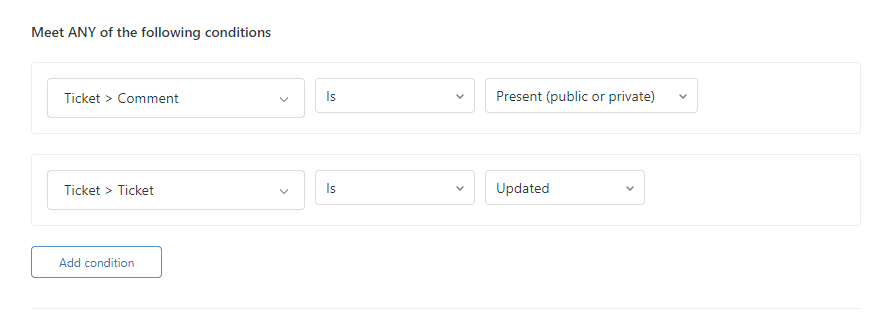
This is where you tell Zendesk when to run the trigger. You'll see a section called Meet ALL of the following conditions. The trigger only fires when every condition you add is satisfied.
For channel tagging, you need two essential conditions:
-
Ticket > Is > Created - This ensures the trigger runs right when a new ticket enters the system, not on every update.
-
Channel > Is > [Channel Name] - This identifies the source. Click the dropdown and select the channel you want to tag.
For example:
- For email tickets: "Channel | Is | Email"
- For web form tickets: "Channel | Is | Web form"
- For chat tickets: "Channel | Is | Chat"
The "Ticket > Is > Created" condition is crucial. Without it, your trigger would run every time someone updates a ticket, potentially adding duplicate tags or creating unexpected behavior.
Step 4: Set the tag action
Now tell Zendesk what to do when those conditions are met. Scroll down to the Actions section.
Click Add action and find Add tags in the dropdown list. Type in the tag you chose earlier, such as email_support or simply email.
Here's an important distinction to understand: Add tags appends your tag to any existing tags on the ticket. Set tags replaces all existing tags with only the ones you specify. For channel tagging, you almost always want Add tags so you don't wipe out other important tags.
You can add multiple tags in a single action by separating them with spaces. For example, you might tag email tickets with both email and async to indicate they don't need immediate response.

Step 5: Save and test
Once your conditions and actions are configured, click the Create trigger button. Your trigger is now active and will run on all new tickets.
Testing is straightforward. Create a ticket through the channel you just configured. For email triggers, send a message to your support address. For web forms, submit a test through your help center. Then check the ticket in Zendesk and verify your tag appears in the Tags field.
If the tag doesn't show up, check the ticket's event log to see if the trigger fired. Common issues include incorrect conditions or permission problems.
Repeat these steps for each channel you want to tag. Before long, you'll have a neatly organized inbox where every ticket carries its source channel as a tag.
Channel-specific considerations
Different channels have unique characteristics that affect how you set up tagging.
Email channel
Email is the most common channel for support teams. When setting up email triggers, consider using the Received at condition alongside or instead of the Channel condition. This lets you differentiate tickets sent to different support addresses (like billing@ versus support@).
You can also combine email channel tags with organization tags for sophisticated routing. VIP customers might get tagged with both email and vip for priority handling.
Web form and Help Center
Self-service submissions through web forms represent customers who tried to solve their own problem first. These tickets often deserve different handling than direct email requests.
If you use embedded forms on your website (through the Web Widget), these typically come through as the Web form channel. Native help center contact forms use the same channel. Tagging them helps you track how many customers convert from self-service to assisted support.
Chat and messaging
Real-time channels like chat and messaging require quick response times. Tagging these tickets helps you identify them in views and prioritize accordingly.
Note that messaging triggers (for live chat) are different from ticket triggers. Messaging triggers run before a conversation becomes a ticket. For post-ticket tagging, use the standard ticket triggers with the Chat or Messaging channel conditions.
Social media (X, Facebook)
Social media tickets often blend public and private conversations. A customer might start with a public tweet, then move to DMs. Consider whether you want the same tag for both, or different tags to track the transition.
Social tickets also tend to have different urgency expectations. Public complaints might need faster response than private messages. Channel tags help you build workflows that account for these nuances.
API and integrations
If you create tickets through third-party integrations or the Zendesk API, these typically come through as the API channel. Tagging API tickets helps you distinguish automated ticket creation from human-submitted requests.
Some integrations let you specify custom channels. If you're using the API directly, you can set the channel during ticket creation and then tag accordingly with triggers.
Best practices for channel tagging
Setting up triggers is just the beginning. Keep these practices in mind as you maintain your automation.
Create one trigger per channel. It's tempting to build a single complex trigger that handles multiple channels, but separate triggers are easier to manage, troubleshoot, and modify without affecting other workflows.
Pay attention to trigger order. Zendesk processes triggers from top to bottom. If a ticket meets conditions for multiple triggers, they fire sequentially. Place your most specific triggers first so they don't get overridden by broader ones.
Avoid trigger conflicts. Make sure your triggers don't undo each other's work. If one trigger assigns tickets based on channel and another assigns based on tags, the last one to fire wins. Use nullifying conditions (like checking that a tag doesn't already exist) to prevent conflicts.
Use consistent naming. Establish a naming convention and stick to it. Whether you use email, email_support, or channel_email, consistency makes your triggers searchable and your reports understandable.
Document your logic. As your trigger library grows, document what each one does and why. Descriptions help, but a separate internal wiki or documentation page becomes essential for teams managing complex workflows.
Troubleshooting common issues
Even simple triggers sometimes don't work as expected. Here's how to diagnose and fix common problems.
Trigger not firing. Check your conditions carefully. The most common culprit is forgetting the "Ticket > Is > Created" condition, which causes the trigger to run on every update instead of just at creation. Also verify that all conditions use the correct operators ("Is" versus "Contains").
Tags not appearing. Confirm you have permission to add tags. Agents in custom roles need specific permissions to modify tags. Also check that your tag format follows Zendesk's rules: only alphanumeric characters, dashes, underscores, colons, and forward slashes are allowed.
Conflicts between triggers. If you have multiple triggers that might affect the same ticket, review their order and conditions. Remember that actions from earlier triggers can change whether later triggers fire. Use the ticket event log to see exactly which triggers ran.
Channel not recognized. Double-check that you're using the exact channel name as it appears in Zendesk. "Chat" and "Messaging" are different channels. "X" and "Twitter" might be labeled differently depending on when your account was set up.
Testing techniques. When debugging, create a test view that shows only tickets with your new tag. This gives you immediate visual confirmation. You can also add a notification action to your trigger temporarily, sending yourself an email whenever it fires.
Taking channel tagging further
Once you have basic channel tagging in place, you can build more sophisticated workflows.
Combine channel tags with other conditions. Tag tickets that come via email AND contain the word "urgent" differently than standard email tickets. Layer conditions to create nuanced routing rules.
Create channel-specific views. Build views that show only tickets tagged with specific channels. Your social media team can focus on social tagged tickets while your billing team monitors email tickets with billing-related tags.
Build channel-based reports. Use Zendesk Explore to analyze performance by channel. Compare first response times, resolution rates, and CSAT scores across email, chat, and social to identify where you excel and where you need improvement.
Apply SLA policies by channel. Different channels often have different service level expectations. Use channel tags to apply appropriate SLAs: 4-hour first response for email, 1-hour for chat, 30 minutes for social.
When to consider AI-powered alternatives. Channel tagging is a solid foundation, but it only tells you where a ticket came from, not what it's about. If you find yourself drowning in tickets that need content-based routing, or if you want to automatically categorize by topic, sentiment, or urgency, AI-powered solutions can help.
At eesel AI, we've built AI Triage that goes beyond channel tagging to understand the actual content and intent of each ticket. It learns from your past tickets and continuously improves its categorization. You can define routing rules in plain English ("always escalate billing disputes to the finance team") and run simulations on historical data before going live.

Start organizing your Zendesk with channel triggers
Channel-based tagging transforms your support queue from a chaotic inbox into an organized workflow. By automatically labeling tickets by their source, you give your team the visibility they need to route requests efficiently and the data they need to optimize performance.
Start with your highest-volume channel. Set up one trigger, test it thoroughly, then move to the next. Within an hour, you'll have a foundation that supports smarter routing, better reporting, and more tailored customer responses.
If you outgrow basic channel tagging and need intelligent content analysis, we're here to help. Our Zendesk integration learns your business and handles the complex categorization that rules-based triggers can't touch. But for most teams, channel triggers are the perfect starting point for building a more organized support operation.
Frequently Asked Questions
Share this article

Article by
Stevia Putri
Stevia Putri is a marketing generalist at eesel AI, where she helps turn powerful AI tools into stories that resonate. She’s driven by curiosity, clarity, and the human side of technology.