Tags are the backbone of organized support workflows. They help you categorize tickets, route them to the right teams, and track trends over time. But manually adding tags to every ticket? That's a recipe for inconsistency and wasted time.
This is where Zendesk triggers come in. With the right trigger configuration, you can automatically add, remove, or set tags based on specific conditions. The trick is knowing which action to use and when.
In this guide, we'll break down the three tag actions available in Zendesk triggers: Add tags, Set tags, and Remove tags. You'll learn how each works, when to use them, and how to avoid common pitfalls that trip up even experienced admins.

What you'll need
Before you start building tag-based triggers, make sure you have:
- A Zendesk Support account on Team plan or higher (triggers aren't available on the Essential plan)
- Administrator permissions or a custom role with permission to create triggers
- Basic familiarity with Zendesk ticket fields and conditions
That's it. No coding's required, no third-party apps needed. Just access to your Zendesk Admin Center.
Understanding the three tag actions
Zendesk gives you three ways to manipulate tags through triggers. They sound similar, but they behave very differently. Let's break down each one.
Add tags
The Add tags action is the safest and most commonly used option. It adds one or more tags to a ticket while preserving all existing tags.
Here's how it works: if a ticket already has tags like "urgent" and "vip_customer", and your trigger adds "escalated", the ticket ends up with all three tags. Nothing gets removed.
This is what you'll want for most tagging scenarios. It builds on existing context rather than replacing it.
Set tags
Now here's where things get tricky. The Set tags action removes ALL existing tags from a ticket and replaces them with whatever tags you specify.
Let's say a ticket's got "urgent", "vip_customer", and "billing_issue" tags. A trigger with Set tags action specifying "escalated" will wipe out those first three tags and leave only "escalated".
This can cause serious problems. Those original tags might have been critical for routing, reporting, or custom field values. The Zendesk community has been vocal about this confusion, with admins accidentally wiping out important tag data.
'Set tags' has very limited utility while having large downstream impacts if it is inadvertently used instead of 'add tags'.
The confusion is so common that there's an active feature request to either rename this action to "Replace all tags" or add a separate "Remove all tags" option.
Remove tags
The Remove tags action lets you delete specific tags from a ticket while leaving all other tags intact.
If a ticket has "urgent", "vip_customer", and "escalated" tags, and your trigger removes "urgent", the ticket keeps "vip_customer" and "escalated".
This is useful for workflow state management. For example, you might add an "awaiting_response" tag when a ticket is created, then remove it when the customer replies.
Step-by-step: Creating a trigger with Add tags
Let's walk through creating a practical trigger that automatically tags high-priority tickets.
Step 1: Navigate to Triggers in Admin Center
You'll see a list of all existing triggers in your account. Triggers run in the order they appear, which matters for tag-based workflows.
Step 2: Create a new trigger
Click Add trigger in the top right corner.
Give your trigger a descriptive name and description. Good naming helps other admins (and future you) understand what the trigger does without opening it.

Step 3: Set your conditions
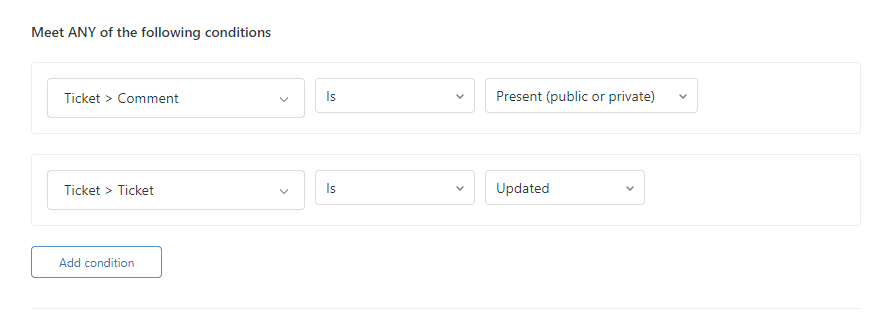
Conditions determine when the trigger fires. You can set multiple conditions that all must be met (Meet ALL) or any one of several conditions (Meet ANY).
For our high-priority tagging example, add these conditions:
- Ticket > Is > Created (so it runs on new tickets)
- Ticket > Priority > Is > High (or Urgent, depending on your needs)

Step 4: Add the Add tags action
Now for the action that makes it all work.
Under Actions, click Add action and select Add tags from the dropdown.
high_priority needs_attention.
Remember, these tags will be added to any existing tags on the ticket. They won't replace or remove anything.
Step 5: Save and test
Click Create to save your trigger.
Now test it. Create a new ticket with High priority and check that the tags appear automatically. You can verify this in the ticket's event log or by checking the Tags field on the ticket.
If the tags don't appear, make sure:
- The trigger's active (not deactivated)
- Your conditions are actually being met
- There isn't another trigger running after yours that might be removing the tags
Common use cases for tag triggers
Once you understand the mechanics, tag triggers become powerful workflow tools. Here are practical ways teams use them.
Auto-tagging by ticket source
Different channels often need different handling. Use triggers to tag tickets based on where they came from:
- Email tickets:
channel_email - Chat tickets:
channel_chat - Web form submissions:
channel_web - API-created tickets:
channel_api
These tags'll help you route tickets to specialized teams and analyze performance by channel.
Priority and escalation workflows
Tags can signal urgency and trigger escalation paths:
- Add
urgent_escalationwhen tickets contain keywords like "outage" or "down" - Tag VIP customer tickets with
vip_customerfor faster routing - Use
sla_at_risktags to flag tickets approaching breach
Other triggers can watch for these tags and take action, like assigning to senior agents or notifying managers.
Customer segmentation
Tags help you segment customers for tailored support:
- Organization-based tags (applied automatically from user/organization records)
- Plan tier tags (
enterprise,pro,starter) - Geography tags for timezone or language routing
These tags can trigger specialized responses, route to regional teams, or exclude certain customers from surveys.
Integration triggers
Tags act as signals between Zendesk and other systems:
- Add
sync_to_crmto trigger Salesforce updates - Use
create_jira_ticketto signal issue tracking integration - Tag
notify_slackfor channel notifications
Third-party apps like AppFollow and Swifteq use this pattern to coordinate actions between systems.
Best practices for trigger tag management
Getting tags right requires more than just knowing the actions. These practices will save you headaches down the road.
Trigger ordering
Triggers run sequentially from top to bottom. When one trigger modifies a ticket, the system restarts from the beginning and checks all triggers again.
This matters for tag workflows. If Trigger A adds a tag that Trigger B depends on, Trigger A must come first. If they're reversed, Trigger B won't see the tag on the first pass.
A common organization approach follows the ticket lifecycle:
- Tier 1: Routing and initial setup (channel detection, priority setting)
- Tier 2: Tagging and categorization (the tags other triggers will use)
- Tier 3: Actions based on tags (notifications, assignments, escalations)
- Tier 4: Cleanup (removing temporary workflow tags)
Zendesk's Trigger Categories feature helps you organize triggers into folders, making this ordering easier to manage.
Tag naming conventions
Consistent naming prevents chaos as your tag list grows:
- Use prefixes to group related tags:
escalation_urgent,escalation_manager,escalation_executive - Avoid spaces in tags (they're technically allowed but cause confusion)
- Be descriptive but concise:
vip_customeris better thanvcorvery_important_customer_requiring_special_handling - Document your conventions so the whole team follows them
Avoiding the Set tags pitfall
The Set tags action has legitimate uses, but it's risky. Here's how to stay safe:
When Set tags might be appropriate:
- You'll truly want to wipe all tags and start fresh (rare)
- You're correcting a tag explosion and need to reset to a known state
- You've got complete control over all tags on the ticket
Safer alternatives:
Instead of Set tags to replace tags, use a two-step approach:
- Remove tags action to delete specific tags you don't want
- Add tags action to add the new tags
This is more verbose but much safer. You explicitly control what's removed rather than nuking everything.
I think 'Set Tags' may be better labeled as 'Replace all tags with'.
Troubleshooting common issues
Even with careful setup, tag triggers sometimes don't work as expected. Here's how to diagnose common problems.
Tags not appearing on tickets
If your trigger isn't adding tags, check that:
- Check trigger status: Make sure the trigger's active, not deactivated
- Verify conditions: Test that your conditions are actually being met. Create a test ticket that matches exactly
- Review trigger order: A later trigger might be removing the tags. Check triggers that run after yours
- Check for errors: Zendesk'll show trigger errors in the event log if actions fail
Unexpected tag removal
If tags disappear mysteriously:
- Search for Set tags: Any trigger using Set tags is a prime suspect
- Check macro usage: Macros can also use Set tags, wiping out trigger-added tags when agents apply them
- Review automation rules: Automations run periodically and can modify tags too
Too many tags on tickets
Tag sprawl makes reporting and management difficult:
- Audit regularly: Review your tag list monthly. Remove unused tags
- Use temporary tags wisely: If a tag only matters during a specific workflow step, remove it when that step completes
- Document tag purposes: Every tag should have a documented reason for existing
Automating tagging with AI: A smarter alternative
Manual trigger configuration works, but it's got limits. You need to predict every scenario, write conditions for each one, and maintain those rules as your business evolves.
This is where AI-powered tagging changes the game. Instead of writing "if X then tag Y" rules, you train an AI on your existing tickets and let it learn what tags belong on what conversations.
With eesel's AI agent for Zendesk, you'll get:
- No trigger setup needed: Connect eesel to your Zendesk and it'll learn your tagging patterns from historical tickets
- More accurate tagging: AI understands context and intent, not just keyword matching
- Automatic adaptation: As your tagging needs change, the AI learns from corrections without manual rule updates
- Edge case handling: AI can recognize nuanced situations that'd require impossibly complex trigger conditions

Our AI Triage product specifically handles auto-tagging, routing, and ticket organization. It integrates directly with Zendesk and starts learning from your existing data immediately.
When does AI tagging make sense over triggers?
- You have hundreds of tag categories or complex classification needs
- Your tagging rules are constantly changing
- You want to reduce the maintenance burden on your admin team
- Keyword-based triggers aren't catching the nuance you need
For simple, stable tagging needs, Zendesk triggers work fine. But if you're spending more time maintaining trigger rules than benefiting from the tags they've created, it's worth exploring AI alternatives.
Start automating your Zendesk tagging today
You now understand the three tag actions in Zendesk triggers: Add tags for safe additions, Remove tags for targeted cleanup, and Set tags for complete replacement (use with caution).
The key's matching the right action to your workflow. Add tags for most scenarios. Remove tags for state management. And think twice before using Set tags, it might delete more than you intended.
If you're ready to take tagging to the next level, try eesel AI. We handle the complexity of intelligent tagging so you can focus on delivering great support, not maintaining trigger rules.
