Exporting ticket data from Zendesk is a common task for support teams. Whether you need to analyze trends, create backups, or prepare for a migration, getting your data out of Zendesk views is often the starting point. But the process isn't always straightforward, and the limitations can catch you off guard if you don't know what to expect.
This guide walks you through everything you need to know about exporting tickets from Zendesk views. We'll cover the native export options, their limitations, and alternative methods for when the built-in tools don't quite cut it.
What you'll need
Before you start, make sure you have the following:
- Administrator access to your Zendesk account (for native export features)
- Knowledge of your plan tier - Team plans have different capabilities than Growth and above
- Data export feature enabled - This requires contacting Zendesk support first
- For API methods: Basic scripting knowledge or access to developer resources
Bottom line? If you're on a Team plan, your options are limited to the API. If you're on Growth or higher, you have more flexibility but still need to jump through some hoops.
Understanding Zendesk export options
Zendesk offers three main ways to get your ticket data out. Each has its own strengths, limitations, and ideal use cases.
Native view export (CSV)
This is the quickest way to pull a targeted list of tickets. You can export any view directly from the Zendesk interface, and you'll get a clean CSV file within minutes.
The catch? You're limited to 1,000 tickets per export, and the CSV only includes metadata. No comments, no conversation history, no attachments.
Full data export (JSON/XML)
When you need everything (tickets, users, organizations, and comments), the full data export is your only native option. It's available on Growth, Professional, and Enterprise plans and can handle large datasets.
The trade-offs are significant: processing can take hours or even days, and the output formats (JSON or XML) require technical expertise to parse and analyze.
API-based export
Available on all plans including Team, the Zendesk REST API lets you extract ticket data programmatically. You can include comments via side-loading, and you have full control over what gets exported.
The downside? You need to write and maintain scripts, handle pagination, and respect rate limits.

How to export tickets from a view (step-by-step)
Let's walk through the most common scenario: exporting tickets from a specific view to a CSV file.
Step 1: Navigate to your ticket view
Log into your Zendesk account as an administrator. In the left sidebar, click the Views icon (it looks like a rectangle with horizontal lines). This opens your list of available ticket views.
Select the view that contains the tickets you want to export. If you don't see the right view, you might need to create one first with the appropriate filters.
Step 2: Verify your view criteria
Before exporting, double-check that your view shows exactly what you need. Look at the ticket count at the top of the view.
Here's the critical part: if your view contains more than 1,000 tickets, your export will be truncated. Zendesk doesn't warn you about this. It simply cuts off at 1,000 tickets, and you might not realize you're missing data.
If you have more than 1,000 tickets, narrow your view using date ranges or additional filters. You can create multiple views and export them separately.
Step 3: Initiate the export
Once your view is ready, look to the top-right corner of the screen. Click the Actions menu (the three vertical dots), then select Export as CSV from the dropdown.
Zendesk will queue the export job and send you an email when it's ready. For small datasets, this usually takes just a few minutes.

Step 4: Download your file
Check your email for a message with the subject line "Your tickets export is ready for download." Click the download link in the email to get your ZIP file.
Important: The download link is only valid for 3 days. If you miss the window, you'll need to run the export again.
Extract the CSV file from the ZIP archive and open it in Excel, Google Sheets, or your preferred analysis tool.
What's included in the CSV export
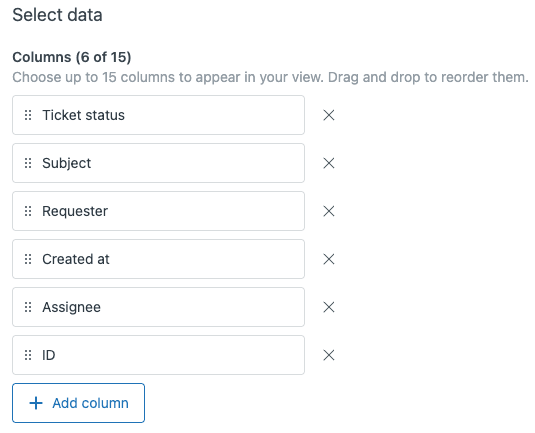
Your exported CSV will contain these fields:
- Ticket ID, Subject, Status, Priority, and Type
- Requester name and email address
- Assignee name
- Creation date and last updated date
- Tags and custom fields
What's missing: The actual conversation. No public comments, no internal notes, no attachments. You get the ticket wrapper without the contents.
Working with export limitations
Zendesk's export features come with several limitations that can impact your workflow. Here's what you need to know.
The 1,000 ticket cap
The view export has a hard limit of 1,000 tickets. There's no warning when you hit this limit. Your CSV simply stops at 1,000 rows, and any additional tickets in your view are silently excluded.
Workaround: Use date ranges or filters to create smaller batches. For example, instead of exporting "all solved tickets," create views for "solved tickets in January," "solved tickets in February," and so on.
No comments in CSV exports
If you need the actual conversation content from tickets, the view export won't help. It only includes metadata.
Alternatives:
- Use the full data export (JSON format) which includes comments
- Use the API with
comment_eventsside-loading - Consider a third-party solution like Knots Export Tickets which exports complete tickets as PDFs
Plan restrictions
Your Zendesk plan determines what export options are available:
| Plan | Native export | API export |
|---|---|---|
| Suite Team | Not available | Available |
| Suite Growth | CSV, JSON, XML | Available |
| Suite Professional | CSV, JSON, XML + Explore | Available |
| Suite Enterprise | All features | Available |
Additionally, the data export feature must be enabled by Zendesk support. The account owner needs to contact support and request activation, which typically takes 24-48 hours.
Alternative export methods
When native exports don't meet your needs, these alternatives can fill the gaps.
For Team plan users: API export
If you're on a Team plan, the API is your only option for bulk exports. Zendesk provides a Python tutorial that walks you through:
- Getting your view ID via the API
- Retrieving tickets from the view
- Formatting the data for CSV output
The tutorial includes complete code samples you can adapt for your needs. Just remember that Team plans have lower API rate limits, so large exports will take longer.
Full data export for complete backups
For comprehensive backups or migrations, use the full data export in Admin Center:
- Go to Admin Center > Account > Tools > Reports > Export
- Choose your format (JSON recommended for large accounts)
- Select date range and data types
- Submit the export request
Processing time varies from minutes to over 24 hours depending on your data volume. You'll receive an email when the export is ready.
Third-party export tools
Several apps and services can simplify Zendesk exports:
-
Knots Export Tickets - Exports tickets as PDFs with comments, attachments, and custom fields. Works on all plans and includes automation features.
-
Help Desk Migration - Offers automated export and migration services with a free demo. Authorized Zendesk partner.
-
ClonePartner - Engineer-led migration service for complex export needs.
What to do with exported ticket data
Once you have your export, what's next? Here are common use cases.
Analyzing your data
Import your CSV into Excel or Google Sheets for basic analysis. Use pivot tables to identify trends:
- Ticket volume by month or week
- Average resolution times by agent or group
- Common tags and issue categories
- Customer satisfaction patterns
When exporting isn't enough
Manual exports have a fundamental problem: they're static snapshots. By the time you analyze the data, it's already outdated.
If you find yourself exporting tickets regularly for reporting, consider whether you're using the right tool for the job. Modern AI-powered solutions can provide real-time insights without the export hassle.
A better approach: AI-powered ticket analysis with eesel AI
Instead of constantly exporting and manually analyzing tickets, AI tools can deliver insights directly from your help desk. At eesel AI, we connect to Zendesk and automatically analyze ticket patterns, identify trends, and surface actionable insights in real time.
Rather than wrestling with CSV files and pivot tables, you get a teammate that learns your business and helps you understand what's happening in your support queue. It handles ticket analysis, identifies knowledge gaps, and even drafts responses based on your historical data.
The result? You spend less time exporting and more time acting on insights.
Start analyzing your Zendesk tickets smarter
Exporting tickets from Zendesk views is straightforward once you understand the limitations. For quick reports under 1,000 tickets, the native CSV export works well. For complete backups or large datasets, you'll need the full data export or API access.
But if you find yourself exporting data regularly just to understand what's happening in your support queue, there's a better way. Modern AI tools can analyze your tickets in real time without the manual export process.
If you're ready to move beyond spreadsheets and get real insights from your support data, explore how eesel AI works with Zendesk. We help teams turn ticket data into actionable intelligence without the export headache.
