Getting sign-off on refunds, software access, or content changes shouldn't mean chasing people through Slack threads and email chains. Zendesk approval workflows exist to solve exactly this problem. They let you build structured authorization processes directly into your tickets.
Whether you're handling customer refund requests that need manager approval, employee leave requests that require HR sign-off, or help center articles that need editorial review before publishing, approval workflows keep everything documented and moving.
This guide walks you through setting up approval workflows in Zendesk. We'll cover what's available natively, workarounds for teams on lower-tier plans, and options for when you need more advanced capabilities.
What are Zendesk approval workflows?
At their core, Zendesk approval workflows are structured processes for getting authorization before taking action on a ticket. They come in two flavors:
Ticket-level approvals let agents request sign-off from other agents or end users directly within a support ticket. Think refund authorizations, exception approvals, or software access requests.
Knowledge base article approvals provide editorial workflows for your help center content. Writers submit articles, editors review them, and nothing goes live until it's approved.
The native approval feature is available on Zendesk's Professional, Enterprise, and Enterprise Plus plans. If you're on Team or Growth, you'll need to build manual workarounds (which we'll cover) or use third-party apps.
Common use cases include:
- Processing refunds above a certain threshold
- Granting software or system access
- Approving employee leave or expense requests
- Publishing help center articles
- Escalating sensitive customer issues
What you'll need to get started
Before diving into setup, make sure you have the following:
- Zendesk Suite Professional plan or higher for native approval requests
- Zendesk Enterprise plan for knowledge base approval workflows
- Admin access to configure approval settings and ticket forms
- Clearly defined approval processes (who approves what, and when)
If you're on Team or Growth plans, you can still build approval-like workflows using groups, macros, and views. We'll cover that approach too.
Setting up native Zendesk approval requests
Let's walk through enabling and configuring Zendesk's built-in approval functionality.
Step 1: Enable approval requests in Zendesk
First, you need to turn on the approval feature in your admin settings.
Navigate to Admin Center > Objects and Rules > Approvals. Toggle the approval requests setting to "On."
While you're here, review the default settings:
- Decide whether agents can withdraw approval requests
- Configure notification preferences
- Set default approval request templates
Once enabled, the approval request feature becomes available in the Agent Workspace for all agents on eligible plans.
Step 2: Add the approval status field to ticket forms
For approvals to work properly, you need to add the "Approval status" field to your ticket forms. This field automatically tracks whether a ticket has a pending, approved, or denied approval request.
In Admin Center > Objects and Rules > Ticket Forms, select the forms where you want approvals available. Add the "Approval status" field to each form.

If your account has multiple ticket forms, you'll need to add this field to each one where approvals should be available. The field is read-only for agents (it updates automatically based on approval activity).
Step 3: Create your first approval request
Now let's see how agents actually use approvals in their daily work.
Open any ticket in the Agent Workspace. Look for the approval request icon in the right-side context panel. Click it, then select Create approval request.
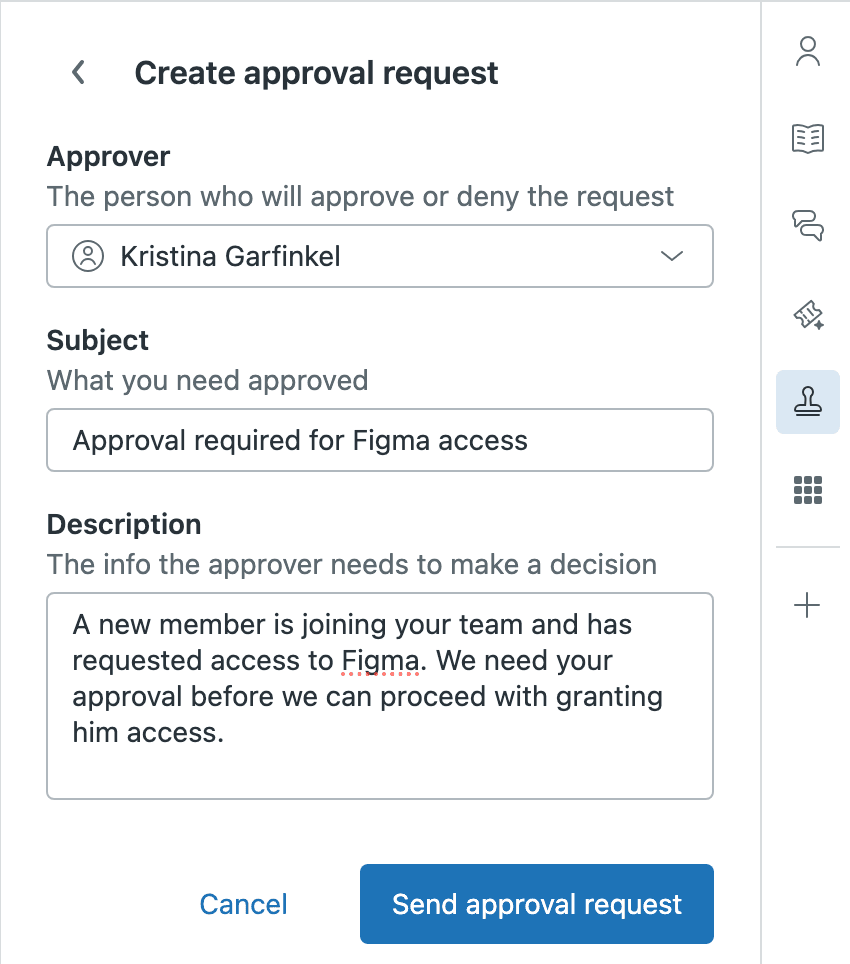
Fill out the approval request:
- Approver: Select an individual agent, a group (groups under 30 agents only), or an end user
- Subject: Brief description of what's being requested (max 500 characters)
- Description: Details the approver needs to make a decision (max 2,500 characters)
Important constraints to keep in mind:
- The approver cannot be the ticket requester
- Groups with more than 30 agents can't be selected as approvers
- Only one active approval request per ticket at a time
- Maximum 50 inactive (completed) approvals per ticket
Click Send approval request. The ticket status changes to reflect the pending approval, and the approver receives an email notification.
Step 4: Respond to and manage approvals
Once an approval request is sent, it needs a response. How that happens depends on who's approving.
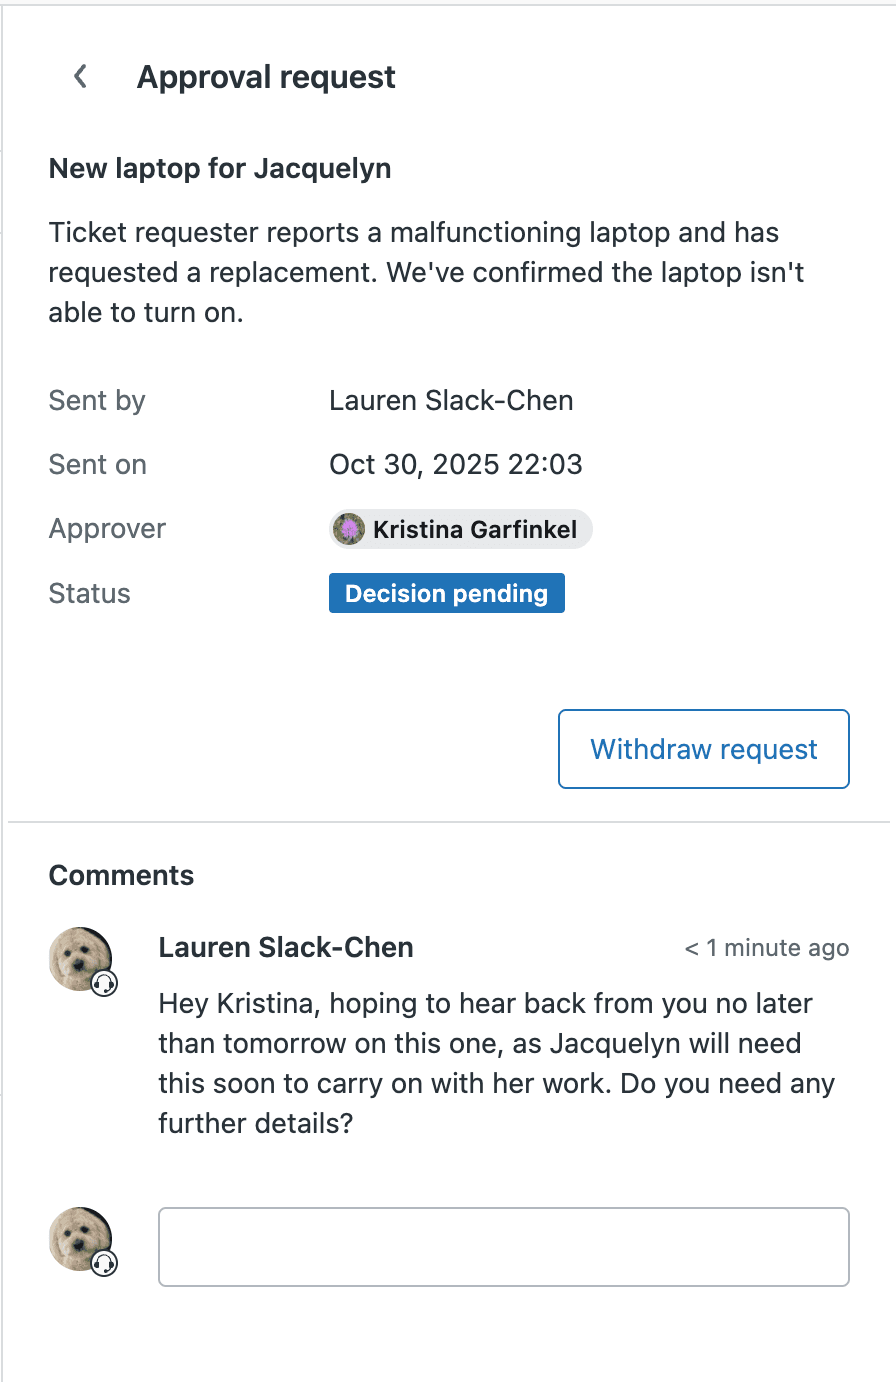
Agent approvers respond directly in the Agent Workspace. They can approve, decline, or add comments (up to 40 comments per request, 500 characters each).
End user approvers respond through the help center. They'll get an email with a link to view and respond to the request. Note that end users need your help center to be on the Copenhagen theme (or a custom theme with approval features enabled) to see approval requests.
The agent who created the request gets notified of the decision. The approval status field on the ticket updates automatically, and the whole process is logged in the ticket events for audit purposes.
Need to cancel a request? Both the requesting agent and the ticket assignee can withdraw an approval request before it's responded to.
Creating manual approval workflows (for all plans)
Not on Professional or Enterprise? You can still build approval-like processes using Zendesk's standard features. Here's a workflow that uses groups, macros, and views to simulate approvals.
This approach works well for inter-departmental approvals. Let's say your Support team needs Finance approval for refunds over $500.
Set up your groups: Create a "Support" group and a "Finance Approval" group.
Create Macro #1 (Request Approval): Build a macro that:
- Adds an internal note explaining what needs approval
- Assigns the ticket to the Finance Approval group
- Adds a tag like "needs_approval"
- Optionally changes status to "On-Hold"
Create a view for approvers: Finance needs to see tickets awaiting their review. Build a view that shows:
- Tickets assigned to the Finance Approval group
- Tagged with "needs_approval"
- Sorted by priority and request date
Create Macro #2 (Approval Response): Finance uses this to respond:
- Adds internal note with approval decision
- Reassigns ticket back to Support group
- Removes "needs_approval" tag
- Adds "approved" or "denied" tag for reporting
This workaround requires more manual coordination than native approvals, but it works on any Zendesk plan. The main downside is that there's no built-in audit trail of approval decisions (you're relying on internal notes).
Knowledge base article approval workflows
If you're using Zendesk for technical documentation or help center content, you might need editorial workflows. Here's what's available.
Native KB workflows (Enterprise plans only):
- Review and approval workflows for articles
- Content blocks for reusable, approved content
- Version history and rollback capabilities
- Scheduled publishing
The catch: Every person involved in the review process needs an agent license. If your subject matter experts aren't Zendesk agents, you can't include them in the workflow without paying for additional seats.
The limitation: Only one person can work on an article at a time. Unlike dedicated documentation tools, there's no collaborative editing.
For teams serious about documentation workflows, consider whether Zendesk's knowledge base is the right tool. As Paligo's analysis notes, Zendesk is built for customer support, not technical documentation. If your content needs are complex, a dedicated CCMS (Component Content Management System) might serve you better.
Extending approvals with third-party apps
When native features don't cut it, third-party apps can fill the gaps. SweetHawk's Approve app is the most popular option, used by over 12,000 organizations including Amazon, eBay, and MongoDB.

The Approve app adds capabilities that Zendesk doesn't offer natively:
| Feature | Native Zendesk | SweetHawk Approve |
|---|---|---|
| Multi-step approvals | ❌ | ✅ |
| Non-agent approvers | ❌ | ✅ |
| Automated triggers | ❌ | ✅ |
| Escalation paths | ❌ | ✅ |
| Field locking during approval | ❌ | ✅ |
| Calendar integration | ❌ | ✅ |
Pricing: The Approve app costs $8 per agent per month. For teams needing advanced workflows, this is often worth it compared to upgrading to Zendesk Enterprise.
Key use case: Employee leave requests. The request goes to the employee's manager first, then to HR if approved. Neither manager nor HR need Zendesk licenses to participate. Once approved, the leave automatically syncs to your company calendar.
Best practices for Zendesk approval workflows
Whether you're using native features or third-party apps, these practices will keep your approval processes running smoothly.
Keep approval chains short. Every additional approver is a potential bottleneck. If a request needs three people's approval, consider whether one person with authority could decide instead.
Use clear, descriptive subjects. Approvers should understand what's being asked without opening the full request. "Refund approval needed: $2,400 enterprise customer" is better than "Please approve."
Set response time expectations. How quickly should approvers respond? Define this clearly and communicate it to your team. The SweetHawk app lets you set automatic escalation if approvers don't respond within a defined timeframe.
Document your processes. Write down what requires approval, who approves it, and what criteria they should use. This helps new team members and ensures consistency.
Track and review metrics. Use the approval status field in your reporting to identify bottlenecks. Are certain approvers consistently slow? Are approval requests piling up at specific times?
Consider AI for routine decisions. Not every approval needs a human. If your criteria are clear and consistent, an AI agent might handle routine approvals automatically.
Streamlining approvals with AI-powered solutions
Here's something worth considering: do you actually need more complex approval workflows, or do you need fewer things requiring approval in the first place?
Many approval requests follow predictable patterns. Refunds under $100 with a valid reason get approved 95% of the time. Standard software access requests are almost always granted. If an AI system can make these decisions consistently and correctly, you eliminate the approval bottleneck entirely.
This is where eesel's AI agent for Zendesk takes a different approach. Instead of building more complex approval chains, we help teams automate the decisions themselves.
Here's how it works:
You start with eesel drafting responses for agent review. As the AI learns your business, it gets better at understanding what needs escalation and what doesn't. Eventually, you can let eesel handle routine requests autonomously, escalating only the edge cases that genuinely need human judgment.
The result? Fewer approval requests clogging your queues, faster resolution times, and your team focused on the complex issues that actually require their expertise.
When to consider AI vs. traditional approvals:
- Use traditional approvals for high-stakes decisions with significant business impact
- Consider AI automation for routine, low-risk decisions with clear criteria
- Many teams use both: AI handles the straightforward cases, humans handle the exceptions
