How to set ticket subjects with Zendesk macros: A complete guide
Stevia Putri
Last edited February 24, 2026
If your support queue is a mess of inconsistent ticket titles, you're not alone. Agents create tickets with vague subjects like "Help" or "Question," and finding specific conversations later becomes a headache. The "Set subject" macro action in Zendesk gives you a way to standardize ticket titles automatically, making your queue more organized and searchable.
This guide walks you through using the Zendesk macro set subject feature to add prefixes, include ticket IDs, and categorize tickets by type. While macros help with manual organization, teams that outgrow them often move to AI alternatives like eesel's AI for Zendesk that handle ticket routing and categorization automatically.

What you'll need
Before you start building macros, make sure you have:
- A Zendesk Support account (Team plan or higher)
- Admin permissions, or a custom agent role with macro creation access
- Basic familiarity with ticket fields and Zendesk placeholders
If you're an agent without admin access, you can still create personal macros for your own use. Admins and agents with the right permissions can create shared macros for the whole team.
Step 1: Access the macro builder
Start by navigating to the macro management area. In Admin Center, click Workspaces in the sidebar, then select Agent tools > Macros.
Click Create macro to start building your new macro. Give it a descriptive name that tells agents exactly what it does. Good names are specific: "Add [URGENT] prefix to subject" or "Prefix ticket ID to title." Avoid vague names like "Subject macro" that force agents to guess the purpose.

You can also add a description to help other admins understand when this macro should be used. This is especially helpful for shared macros that multiple agents will apply.
Step 2: Add the "Set subject" action
In the Actions section, click the dropdown menu and select Set subject. This action replaces the entire ticket subject line with whatever text you enter. It doesn't append to the existing subject, it overwrites it completely.
Enter your desired subject format in the text field. You can use static text, placeholders, or a combination of both. Here are common formats that work well:
[URGENT] {{ticket.title}}adds an urgency prefix{{ticket.id}} - {{ticket.title}}prepends the ticket ID for easy reference[BILLING] {{ticket.title}}categorizes by departmentSupport Request #{{ticket.id}}: {{ticket.title}}formal standardized format
Remember that whatever you enter becomes the new subject. If you want to preserve the original title, you must include the {{ticket.title}} placeholder in your format.
Step 3: Use placeholders for dynamic content
Placeholders make your macros flexible by pulling in ticket data automatically. The most useful placeholders for subject lines are:
{{ticket.title}}the current subject or title of the ticket{{ticket.id}}the unique ticket number{{ticket.requester.name}}the name of the customer who submitted the ticket{{ticket.group.name}}the group currently assigned to the ticket
You can combine placeholders with static text to create standardized formats. For example, Support Request #{{ticket.id}}: {{ticket.title}} produces something like "Support Request #4821: Login issue with admin panel."
One practical use case is adding the ticket ID to the subject. According to Zendesk's documentation, you can create a macro that lets agents add the ticket ID to the ticket subject in Support by setting the subject action to {{ticket.id}} {{ticket.title}}.
Step 4: Save and test your macro
Once you've configured your subject format, click Create to save the macro. Before rolling it out to your team, test it on a ticket that isn't customer-facing.
Apply the macro to a test ticket and verify that:
- The subject changes to exactly what you specified
- Any placeholders resolve correctly (show actual data, not the placeholder text)
- Email notifications sent after the macro is applied show the new subject line
- The change appears correctly in ticket views and search results
If something doesn't work as expected, check the placeholder syntax. Placeholders must use double curly braces and exact field names. A typo like {{ticket.titel}} will not resolve and will appear literally in the subject.
Common use cases for Zendesk macro set subject
The "Set subject" action works well in specific scenarios where standardization helps workflows. Here are the most common use cases support teams implement:
Adding ticket ID prefix. Prepending the ticket ID makes it easy to reference specific tickets in conversations and reports. The format {{ticket.id}} - {{ticket.title}} turns "Login issue" into "4821 - Login issue," which is much easier to track.
Categorizing by urgency. Adding prefixes like [URGENT], [HIGH], or [LOW] helps agents quickly identify priority tickets in their queue views. This works best when combined with clear guidelines about when agents should apply each macro.
Team routing. Prefixes like [BILLING], [TECH], or [SALES] help route tickets to the right specialists, especially when combined with views that filter by subject text.
Proactive outreach. When sending proactive tickets to customers, using "Set subject" ensures the email subject line is clear and professional rather than pulling from the first line of your message.
Standardizing formats. If your team has agreed on a specific subject format, macros enforce that standard automatically. This is helpful for reporting and analytics where consistent naming makes filtering easier.
Troubleshooting common issues
Even with straightforward macros, things can go wrong. Here is how to fix the most common problems:
Subject not displaying in emails. If customers see something other than your set subject, check that the Subject field is visible to end users. In Admin Center, go to Objects and rules > Tickets > Fields, find the Subject field, and ensure it is visible to customers. When the Subject field is disabled or set so only agents can edit it, the {{ticket.title}} placeholder displays the ticket's first public comment instead.
"(No subject)" appearing. This happens when a ticket has no public comments yet. The placeholder needs at least one public comment to display correctly. If you're creating proactive tickets, add a public comment before setting the subject.
Trigger conflicts. If you have triggers that also modify ticket properties, check their order. Notification triggers should run last so all your logic executes before the email goes out. If a notification trigger fires before your macro sets the subject, the email will have the old subject line.
Placeholder not resolving. Double-check your syntax. Placeholders must use double curly braces: {{ticket.id}} not {ticket.id}. Field names are case-sensitive and must match exactly.
Macro not appearing for agents. Check that the macro is active and assigned to the correct category. Also verify that agents have permission to view shared macros in their role settings.
Best practices for organizing subject macros
As your macro library grows, organization becomes critical. Here are practices that keep things manageable:
- Use consistent naming conventions. Start macro names with the action or category: "Subject - Add ID prefix" or "Subject - Urgent tag." This groups related macros together in the list.
- Group related macros into categories. Zendesk lets you organize macros into categories like "Subject Management" or "Ticket Routing."
- Document when to use each macro. Add descriptions that explain the specific scenario for applying the macro, not just what it does.
- Train agents on which macros apply to which scenarios. A macro is only useful if agents know when to click it.
- Review and update your macro library quarterly. Remove unused macros and update formats as your processes evolve.
When to consider AI alternatives
Macros work well for manual standardization, but they still require agents to remember to apply them. If your team is spending significant time organizing tickets instead of solving them, it might be time to look at AI alternatives.
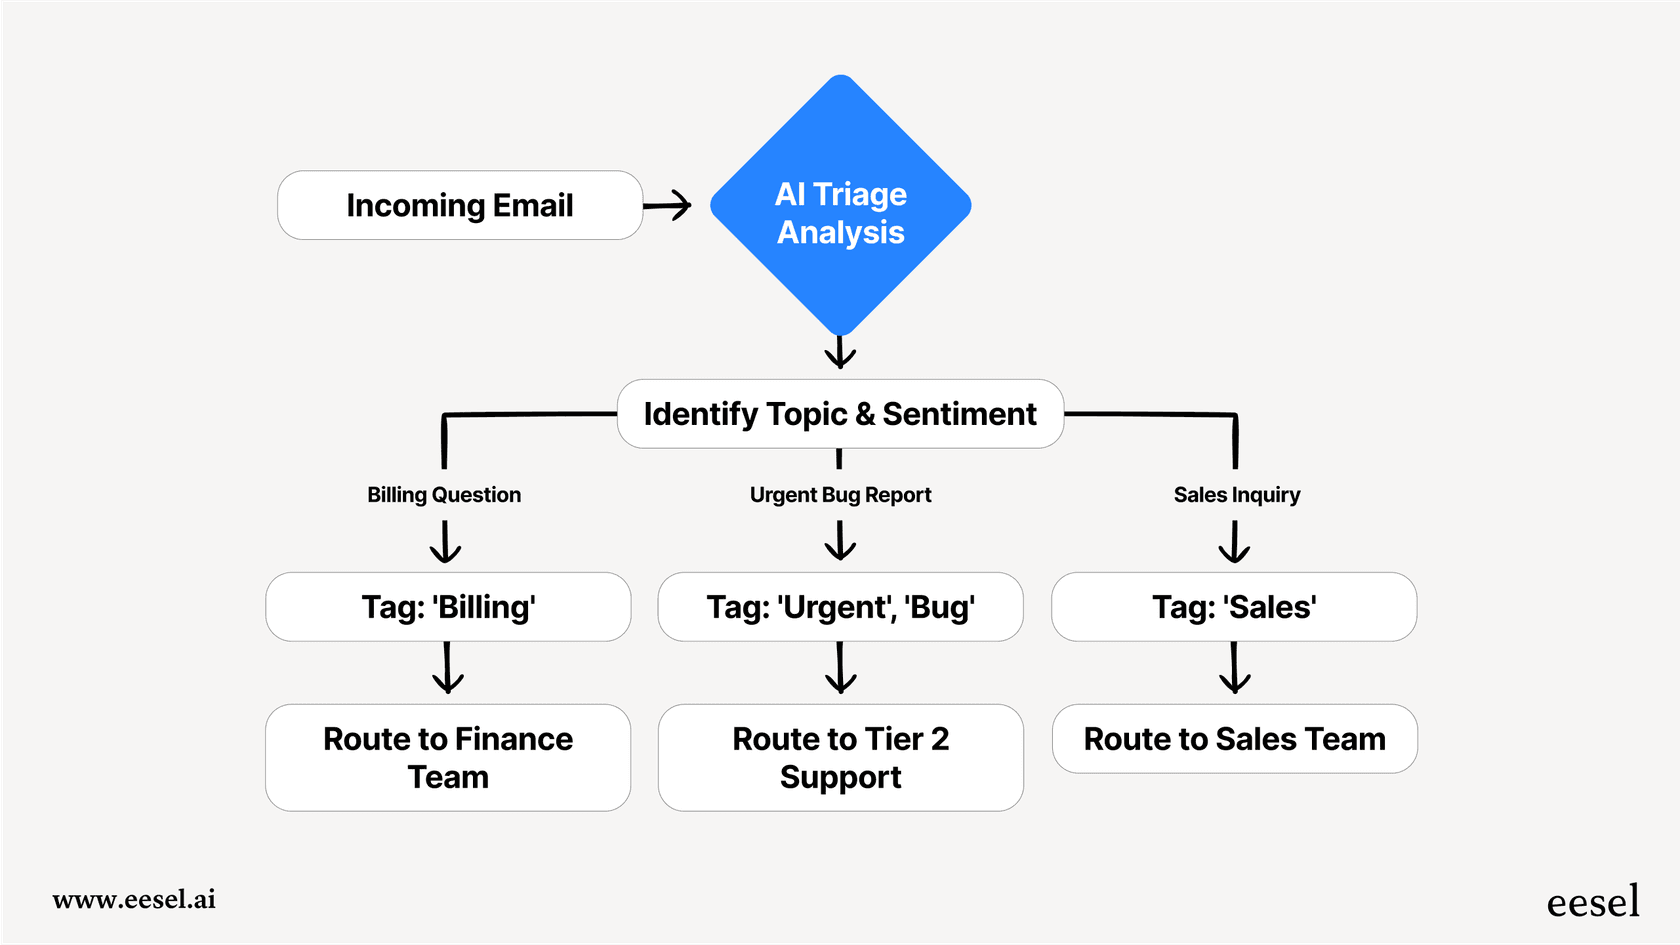
eesel AI integrates directly with Zendesk and can automatically categorize, tag, and route tickets without any manual macro application. Instead of training agents on which macro to use when, you train an AI teammate on your business rules and let it handle the organization automatically.

Our AI Agent learns from your past tickets and help center articles to understand your business context. It can handle frontline support autonomously, draft replies for agent review, or triage tickets by tagging and routing them to the right team. Unlike macros that require manual application, eesel AI works continuously in the background.
For teams already using Zendesk macros extensively, eesel AI can complement your existing setup. Start with AI handling specific ticket types, then expand as it proves itself. This progressive rollout lets you verify quality before full deployment.
Start organizing your Zendesk tickets more efficiently
The "Set subject" macro action gives you a simple way to bring consistency to your support queue. By standardizing ticket titles with prefixes, IDs, and categories, you make it easier for agents to find and prioritize the right conversations.
Start with one or two high-impact macros, test them thoroughly, and train your team on when to use them. As you get comfortable, expand your library to cover more scenarios.
When you're ready to move beyond manual macros to automated ticket handling, explore how eesel AI works with Zendesk. Our AI teammate learns your business in minutes and can start handling tickets with the same guidance you would give a new hire.
