How to set ticket priority using Zendesk macros: A complete guide
Stevia Putri
Last edited February 24, 2026
When your support team faces a flood of tickets, knowing which issues need immediate attention can make the difference between a satisfied customer and a churned account. That's where Zendesk macros come in. They let you set ticket priority with a single click, ensuring urgent issues get the attention they deserve.

Macros are pre-defined actions that agents apply manually to tickets. Unlike triggers, which fire automatically based on conditions, macros give your team control over when to escalate or prioritize. In this guide, you'll learn exactly how to create macros that set ticket priority, organize them effectively, and troubleshoot common issues.
If you're looking to go beyond manual macros, eesel AI integrates with Zendesk to intelligently prioritize tickets based on content analysis. But first, let's master the fundamentals.

Understanding Zendesk macro actions for priority settings
Before diving into the steps, let's clarify how priority works within Zendesk's macro system. The Priority action is one of many available actions you can bundle into a macro, and it plays a crucial role in how tickets flow through your support operation.
Available priority levels in Zendesk
Zendesk offers four priority levels, each serving a specific purpose in your workflow:
- Low Use for non-urgent issues, feature requests, or general feedback that doesn't require immediate attention
- Normal The default for standard support requests that should be handled within your typical response time
- High For important issues that need faster resolution, such as billing problems or service disruptions affecting multiple users
- Urgent Reserve for critical situations: system outages, security incidents, or VIP customers experiencing severe issues
Priority directly impacts your SLA targets. If you've configured SLA policies in Zendesk, they typically reference the Priority field to determine response and resolution timeframes. A ticket marked Urgent might have a one-hour response target, while a Low priority ticket could have a 24-hour window.
How the Priority action works in macros
When you add the Priority action to a macro, you're creating a one-click way to change a ticket's urgency level. But the real power comes from combining actions. A well-designed priority macro doesn't just set the priority; it also updates the status, assigns the ticket to the right team, adds relevant tags, and even inserts a comment explaining the escalation to the customer.
Here's the key distinction to remember: macros are manually applied by agents. This differs from triggers, which automatically set priority based on conditions like keywords in the subject line or the customer's email domain. Both have their place, and we'll touch on when to use each approach later.
Creating a macro to set ticket priority: Step-by-step
Let's walk through the exact process of building a macro that sets ticket priority. These steps apply to both personal macros (visible only to you) and shared macros (available to your entire team).
Step 1: Access the Macros page in Admin Center
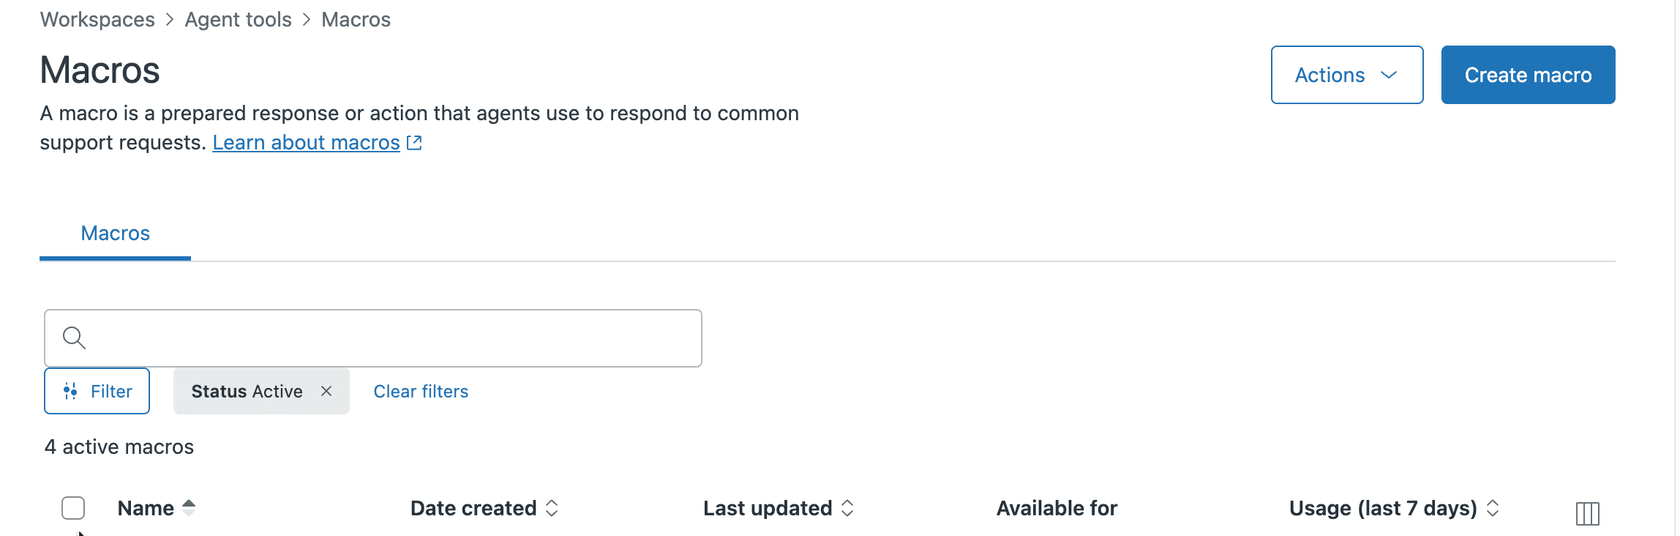
Start by navigating to your Zendesk Admin Center. Click Workspaces in the left sidebar, then select Agent tools > Macros. This opens the macro management interface where you can view, edit, and create macros.
If you don't see the Macros option, verify that your account has the appropriate permissions. Only administrators and agents with specific role permissions can create shared macros. Personal macros can be created by any agent.
Step 2: Create a new macro
Click the Add Macro button to start building your macro. You'll need to provide:
- Macro name: Use a clear, descriptive name that follows a category structure. For example: "Escalations::Set High Priority" or "Priority::Urgent - Technical Issue"
- Description: (Optional but recommended) Explain when agents should use this macro
- Available for: Choose whether this is a personal macro ("Me only") or shared ("All agents" or specific groups)
The double-colon syntax in the name creates categories that make macros easier to find. When agents search for macros, Zendesk uses these categories to group related options together.
Step 3: Add the Priority action
Now for the core functionality. Click Add action and select Priority from the dropdown menu. You'll see four options: Low, Normal, High, and Urgent. Select the priority level that matches this macro's purpose.
At this point, you have a functional macro that sets priority. But a macro that only changes priority wastes much of the potential. Let's add more actions to make it truly useful.
Step 4: Layer additional actions
Click Add action again to include complementary actions. Here are the most effective combinations for priority-setting macros:
Status change: When escalating priority, you typically want the ticket status set to "Open" to ensure it appears in agents' active ticket views.
Assignee or group: Route high-priority tickets to specialized teams. A billing issue marked High priority should go to your billing specialists, not general support.
Tags: Add descriptive tags like "escalated," "high_priority," or "urgent_bug" to make these tickets easy to find in reports and views.
Comment/description: Include a professional message that explains the priority change to the customer. For example: "I've escalated this to our technical team as a high priority issue. You can expect an update within two hours."
Step 5: Save and test
Click Create to save your macro. Before announcing it to your team, test it thoroughly:
- Create a test ticket in your Zendesk instance
- Apply the macro to the ticket
- Verify that all actions executed correctly: priority changed, status updated, assignee set, tags added, and comment posted
- Check that SLA targets updated appropriately based on the new priority
Testing prevents embarrassing mistakes, like a macro that accidentally sets every ticket to Urgent or assigns tickets to a deactivated group.
Practical examples of priority-setting macros
To help you get started, here are three macro configurations that address common support scenarios.
Escalation macro for urgent issues
This macro handles situations requiring immediate attention:
| Action | Setting |
|---|---|
| Priority | Urgent |
| Status | Open |
| Group | Senior Support |
| Add tags | urgent_escalation, needs_attention |
| Comment | "This issue has been escalated to our senior technical team with urgent priority. A specialist will contact you within 30 minutes." |
Use this when a customer reports a critical system failure, security concern, or any issue that threatens their business operations.
Billing priority macro
Billing disputes often require careful handling and faster response times:
| Action | Setting |
|---|---|
| Priority | High |
| Group | Billing Team |
| Add tags | billing_dispute, high_priority |
| Comment | "I've prioritized your billing inquiry and assigned it to our billing specialists. They'll review your account and respond within two hours. To expedite this, please confirm your account number if you haven't already." |
This macro ensures billing issues get attention from the right team while setting appropriate customer expectations.
SLA alignment macro
Sometimes tickets come in without a priority set, which means SLA policies won't apply. This macro fixes that:
| Action | Setting |
|---|---|
| Priority | Normal |
| Add tags | sla_applied, standard_priority |
| Comment | "Thank you for contacting us. We've received your request and assigned it standard priority. Our team will respond according to our service level agreement." |
Apply this to tickets where the priority field is blank to ensure SLA tracking begins correctly.
Best practices for organizing priority macros
As your macro library grows, organization becomes essential. Without a system, agents waste time searching for the right macro or, worse, apply the wrong one.
Naming conventions
Develop a consistent naming pattern that includes:
- Category prefix: Use double-colons to create logical groups like "Escalations::", "Priority::", or "Routing::"
- Priority indicator: Include the priority level in the name for quick identification
- Brief description: Add 2-3 words explaining the use case
Good examples: "Escalations::High - Billing Issue", "Priority::Urgent - System Down", "Routing::Normal - General Inquiry"
Combining with other actions
The most effective priority macros change more than just the priority field. Always consider:
- Does the status need updating? Escalated tickets should usually be Open, not Pending.
- Who should handle this? Route high-priority tickets to experienced agents or specialized teams.
- What tags will help with reporting? Consistent tagging lets you analyze how often each macro gets used.
- Should the customer know? Transparency about prioritization builds trust, so include a comment explaining the escalation.
Macro organization tips
- Deactivate, don't delete: When a macro becomes outdated, deactivate it rather than deleting. This preserves historical data about which macros were used on past tickets.
- Quarterly reviews: Schedule regular audits of your macro library. Update outdated messaging, remove unused macros, and ensure all referenced groups and agents still exist.
- Use filters: Zendesk's macro filtering lets agents quickly find what they need. Train your team to use the search box and category filters instead of scrolling through long lists.
Troubleshooting common priority macro issues
Even well-designed macros sometimes fail. Here's how to diagnose and fix the most common problems.
Priority not applying to tickets
If agents apply a macro but the priority doesn't change, check these potential causes:
- Agent permissions: Does the agent have permission to edit the Priority field on this ticket? Some custom roles restrict field editing.
- Macro status: Verify the macro is active. Inactive macros appear in the list but don't execute their actions.
- Conflicting triggers: A trigger running after the macro might be resetting the priority. Check your trigger list for any that modify the Priority field and ensure their conditions don't overlap problematically.
Cannot deactivate a macro
Sometimes you try to deactivate a macro and Zendesk refuses. This happens when the macro references unavailable values, such as:
- A deleted group or agent in the Assignee field
- A removed custom field value
- A brand that no longer exists
To fix this, edit the macro and update any action statements that reference invalid values. Once all actions point to valid options, deactivation will work normally.
Priority changes not reflecting in SLA
If you set priority via macro but SLA targets don't update:
- Verify SLA configuration: Check that your SLA policies actually use the Priority field as a condition. Some policies might be based on other criteria like ticket tags or organization.
- Check ticket conditions: Does the ticket meet all requirements for the SLA policy? For example, the policy might only apply to certain groups or ticket types.
- Review ticket events: The ticket's event log shows every action applied. Confirm the macro actually ran and that no subsequent actions undid the priority change.
Taking Zendesk automation further with eesel AI
Macros are powerful for manual prioritization, but they rely on agents recognizing which tickets need escalation. That's where AI can help. eesel AI integrates with Zendesk to bring intelligent automation to your priority workflows.

Our AI Triage product analyzes incoming ticket content and automatically suggests or applies priority levels based on what the customer actually wrote. Instead of agents manually scanning each ticket, eesel AI reads the message, identifies urgency indicators, and routes high-priority issues to the right team immediately.
The AI learns from your team's decisions over time. When agents adjust priorities that eesel AI set, the system incorporates that feedback to improve future recommendations. This creates a continuously improving prioritization system that reduces response times for urgent issues while ensuring nothing slips through the cracks.
For teams handling high ticket volumes, this combination of Zendesk macros for manual control and eesel AI for intelligent automation provides the best of both worlds.
Start optimizing your Zendesk priority workflows today
Setting ticket priority via macros is a foundational skill for any Zendesk administrator. You've learned how to create macros that set priority, combine them with other actions for complete workflows, organize your macro library, and troubleshoot common issues.
The key takeaways:
- Use clear naming conventions with category prefixes
- Always combine priority changes with status updates, assignments, and tags
- Test macros thoroughly before deploying to your team
- Review and update your macro library quarterly
For teams ready to move beyond manual prioritization, eesel AI's Zendesk integration adds intelligent automation that learns from your team's expertise. The result is faster response times for urgent issues and more consistent priority assignment across your entire support operation.
