How to add attachments to Zendesk macro comments: Complete guide
Stevia Putri
Last edited February 24, 2026
If your support team sends the same documents over and over, Zendesk macros with attachments can save a lot of time. Instead of hunting for that returns policy PDF or product spec sheet every time, you can attach files directly to your macros and send them with a single click.
This guide walks you through exactly how to add attachments to Zendesk macro comments, what limitations you need to know about, and what to do when static attachments aren't flexible enough for your workflow.
What you'll need
Before you start building macros with attachments, make sure you have:
- A Zendesk Support account (Team, Professional, or Enterprise plan)
- Admin access or permission to create macros in your role
- Files ready to attach (up to 5 per macro, 50 MB each maximum)
- A clear idea of which documents your team sends most often
Agents can create personal macros for their own use, but shared macros that the whole team can access require administrator permissions. If you're not an admin, check with your team lead about getting the right access or having them create the macro for you.
How to add attachments to a Zendesk macro
Step 1: Access the macro builder
Start in the Admin Center. Click Workspaces in the sidebar, then select Agent tools and click Macros. You'll see a list of existing macros if any have been created. Click the Create macro button to start building a new one.

Give your macro a clear, descriptive name. The best practice is to use double colon notation to categorize your macros. For example:
Returns::Policy document + SolvedTechnical::Setup guide + PendingBilling::Invoice template + Open
This naming convention makes it easy for agents to find the right macro quickly, especially as your library grows.
Step 2: Add the comment action
Now define what your macro will actually do. Click Add action and select Comment/description from the dropdown menu.
You'll see two important options:
Comment mode determines who can see the comment:
- Public: The customer sees this comment in their email and ticket view
- Private: Only agents can see this (internal note)
Comment text is where you write the actual message. You can use placeholders to personalize the response. For example:
Hi {{ticket.requester.first_name}},

Thanks for reaching out. I've attached our returns policy for your reference. Let me know if you have any other questions.
Available placeholders include:
{{ticket.requester.first_name}}the customer's first name{{ticket.requester.name}}the customer's full name{{ticket.id}}the ticket number
Step 3: Attach your files
Below the comment text field, click the Attach files button (or the paperclip icon). Browse to the file you want to attach, select it, and click Open.

You can attach up to 5 files per macro, with each file limited to 50 MB. Supported formats include PDFs, images, documents, and spreadsheets.
Important note: If you use macros to bulk update tickets, attachments will not be included in the comments. This is a known limitation of Zendesk's bulk update feature.
Step 4: Save and test your macro
Once you've configured all your actions, click Create to save the macro.
Before rolling it out to your team, test it:
- Open a test ticket (or create a new one)
- Click Apply macro in the bottom toolbar
- Find your new macro and select it
- Review the changes before submitting
- Submit the ticket and verify both the comment and attachment appear correctly

You can also apply macros using the keyboard shortcut: type / in the comment box and start typing your macro name. This can save agents significant time when handling high ticket volumes.
Understanding Zendesk macro attachment limitations
Zendesk macro attachments are useful, but they come with some important constraints you should know about before building your workflow around them.
5-file maximum per macro
Each macro can only include up to 5 attachments. If you need to send more files, you'll need to either create multiple macros or use a different approach like cloud storage links.
50 MB file size limit
Individual files cannot exceed 50 MB. This is generally sufficient for PDFs, images, and documents, but may be limiting for video files or large design assets.
Bulk update exclusion
Here's a frustrating one: when you apply macros to multiple tickets at once using bulk update, attachments aren't included. The comment text applies, but the files don't. This means agents need to apply macros individually if they want the attachments included.
Static attachments only
Macro attachments are static. You cannot dynamically select attachments based on ticket field values, customer type, or any other condition. Every time the macro runs, it sends the same files.
This is a real limitation for teams who want to send different documentation based on the product a customer purchased, their subscription tier, or other variables.
Single comment type restriction
A macro can only add one comment type (public OR private), not both. If you need to add a public response for the customer AND an internal note for your team, you'll need to apply two separate macros or add the second comment manually.
Workarounds for dynamic attachment needs
When static macro attachments aren't flexible enough, here are some approaches that can help:
API solution
For teams with development resources, Zendesk's API provides the /api/v2/macros/{macro_id}/attachments endpoint. This allows you to programmatically upload and manage macro attachments. You could build custom workflows that update macro attachments based on external triggers or schedules.
Link-based approach
Instead of attaching files directly to macros, store your documents in cloud storage (Google Drive, Dropbox, SharePoint) and include links in your macro text. This approach:
- Bypasses the 5-file limit entirely
- Allows you to update documents without editing macros
- Lets you use access controls and version management from your storage platform
- Works with bulk updates (since links are just text)
The tradeoff is that customers need to click a link rather than receiving the file directly.
Multiple macros strategy
Create separate macros for different attachment scenarios. For example:
Returns::Standard policy PDFReturns::Extended warranty PDFReturns::International returns PDF
This approach works well if you have a manageable number of variations, but can become unwieldy if you need dozens of different attachment combinations.
Third-party automation tools
Platforms like Windmill and Zapier offer scripts and workflows that can help manage macro attachments at scale. These tools can automate the process of updating macro attachments across your Zendesk instance based on triggers from other systems.
Best practices for macro attachments
To get the most out of Zendesk macro attachments, follow these guidelines:
Use descriptive file names. Agents should be able to tell what a file contains without opening it. "Returns_Policy_2026.pdf" is better than "doc_v3_final.pdf".
Organize attachments by use case. Group related macros and attachments together using consistent naming conventions. This makes it easier for agents to find the right macro quickly.
Regularly audit and update attachments. Set a reminder to review your macro attachments quarterly. Remove outdated documents and update files when policies or products change.
Consider file accessibility. Avoid attachments that require special software to open. PDFs and common image formats work best since virtually anyone can open them.
Document which macros include attachments. Create an internal reference guide that lists macros with attachments so agents know what files they're sending. This prevents surprises and helps with training new team members.
Preview before applying. Zendesk's macro preview feature shows attachments that will be included. Train your team to use this to verify they're sending the right files.
When macro attachments aren't enough: AI-powered alternatives
Macros work well for standardized responses with static attachments. But they can't adapt to context, learn from past interactions, or handle nuanced situations where the right attachment depends on the specific ticket content.
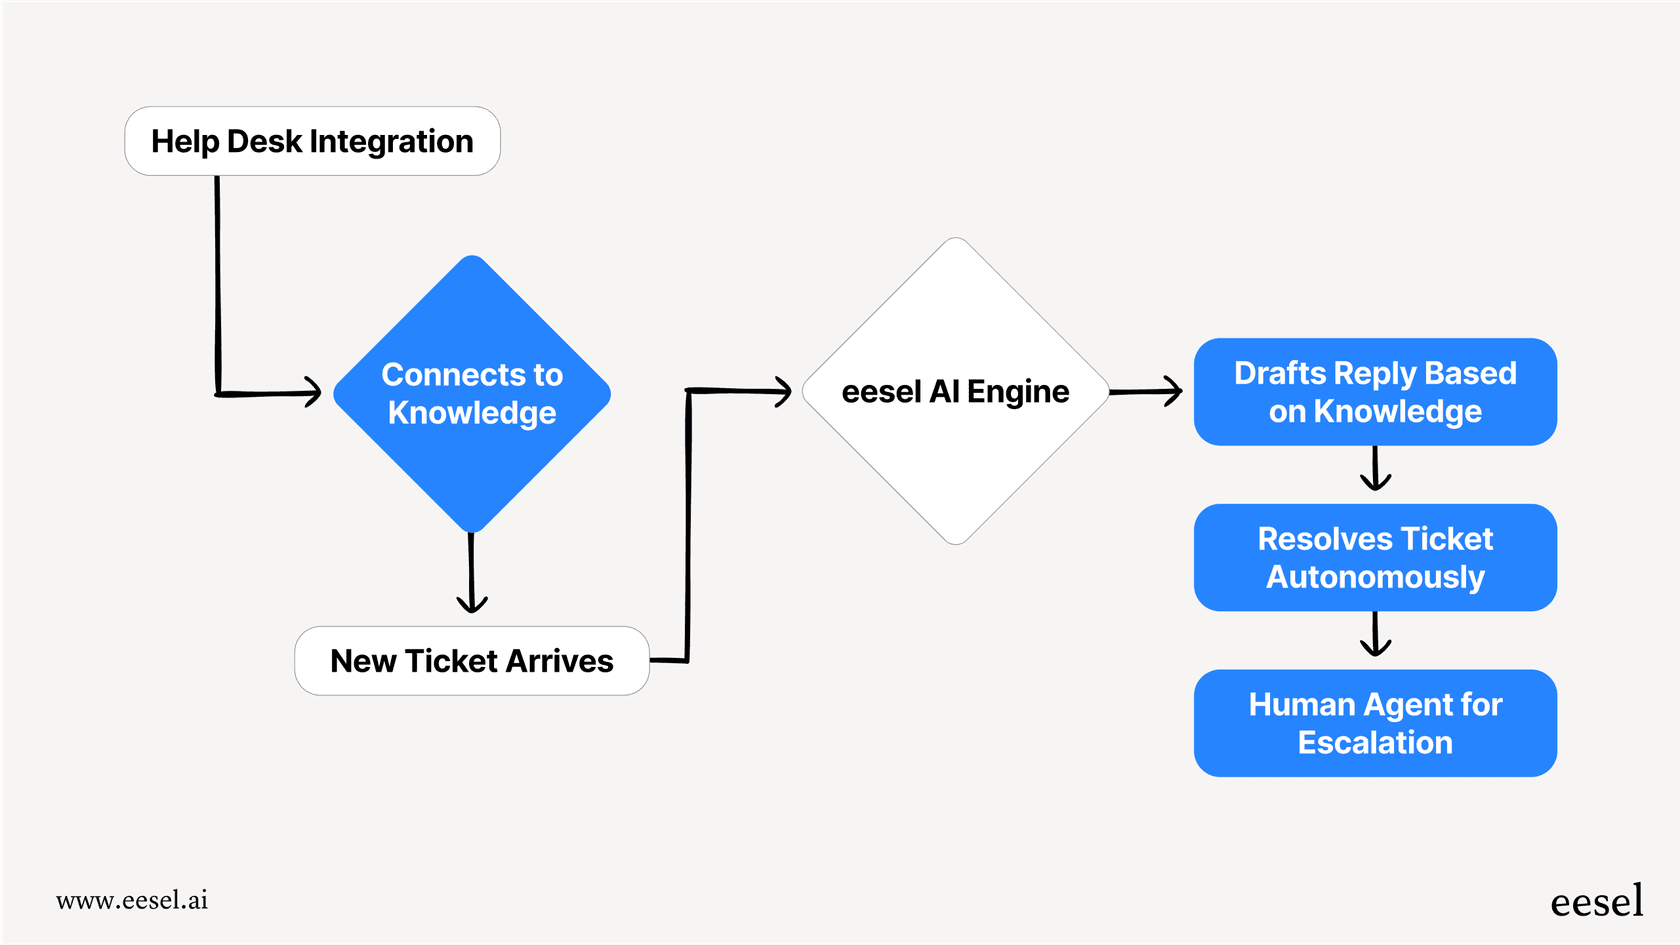
This is where eesel AI comes in. We integrate directly with Zendesk and offer a different approach to handling file sharing and customer responses:

Dynamic, context-aware responses. Instead of sending the same attachment to every customer, our AI analyzes each ticket and can pull the most relevant documentation from your knowledge base. A customer asking about returns for a specific product gets the right policy document automatically.
No attachment limits. Since we work with your existing document storage and help center, there's no 5-file restriction. The AI can reference any document, guide, or resource you've made available.
Learning from past tickets. The system learns which responses and attachments resolve issues fastest. Over time, it gets better at matching the right resources to each customer question.
Automatic file retrieval. When a customer mentions an order number, account detail, or product name, the AI can pull relevant files and include them in responses without any manual work from your agents.
We can run in simulation mode on your past tickets, so you can see exactly how we'd perform before going live. This lets you validate quality and measure potential time savings with real data from your own support history.
Streamline your Zendesk workflow with smarter automation
Zendesk macro attachments work well for teams that need to send the same files repeatedly. They're easy to set up, work reliably, and save agents from hunting through folders for the right document.
But the limitations are real. The 5-file cap, bulk update exclusion, and lack of dynamic selection mean macros alone won't solve every attachment workflow.
For teams ready to move beyond static templates, AI-powered alternatives offer a path forward. The ability to automatically match the right documentation to each customer's specific situation, without the manual work of selecting and attaching files, represents a significant step up in efficiency.
If you're curious about what AI could do for your attachment workflows, try eesel AI with your Zendesk integration. See how it performs on your historical tickets before making any changes to your live support process.
