Getting tickets to the right agents quickly is one of the most impactful things you can do for your support operation. When customers wait hours for a response because their ticket sat in the wrong queue, or when agents waste time cherry-picking tickets instead of working on what they're best at, everyone suffers.
This is where Zendesk group routing comes in. It lets you automatically direct incoming tickets to specific agent groups based on criteria like the customer's organization, the support email address they used, or even the content of their message.
In this guide, we'll walk through three ways to set up group routing in Zendesk: simple group mapping for straightforward organization-based routing, trigger-based routing for conditional logic, and omnichannel routing for advanced needs like skills-based assignment and capacity management. We'll also look at how our AI triage can help when rule-based routing starts to feel limiting.
Understanding groups and organizations in Zendesk
To set up routing effectively, you need to understand the difference between groups and organizations. These are two distinct concepts that work together.

Groups are collections of agents. You might create groups based on expertise (Technical Support, Billing), geography (Americas, EMEA), or product lines. Every agent in Zendesk must belong to at least one group, and you can designate one group as your account default for new agents.
Organizations are collections of end users (your customers). You might organize customers by company name, subscription tier, or region. On Team plans, each user can only belong to one organization. On Professional and Enterprise plans, users can belong to up to 300 organizations.
Here's the key connection: routing works by linking organizations to groups. When a ticket comes in from a user in Organization A, Zendesk can automatically route it to Group B. This happens either through direct group mapping (available on Professional+) or through trigger rules (available on all plans).
Method 1: Group mapping for automatic assignment
Group mapping is the simplest approach. You map an organization directly to a group, and all tickets from users in that organization automatically route to that group. No triggers needed.
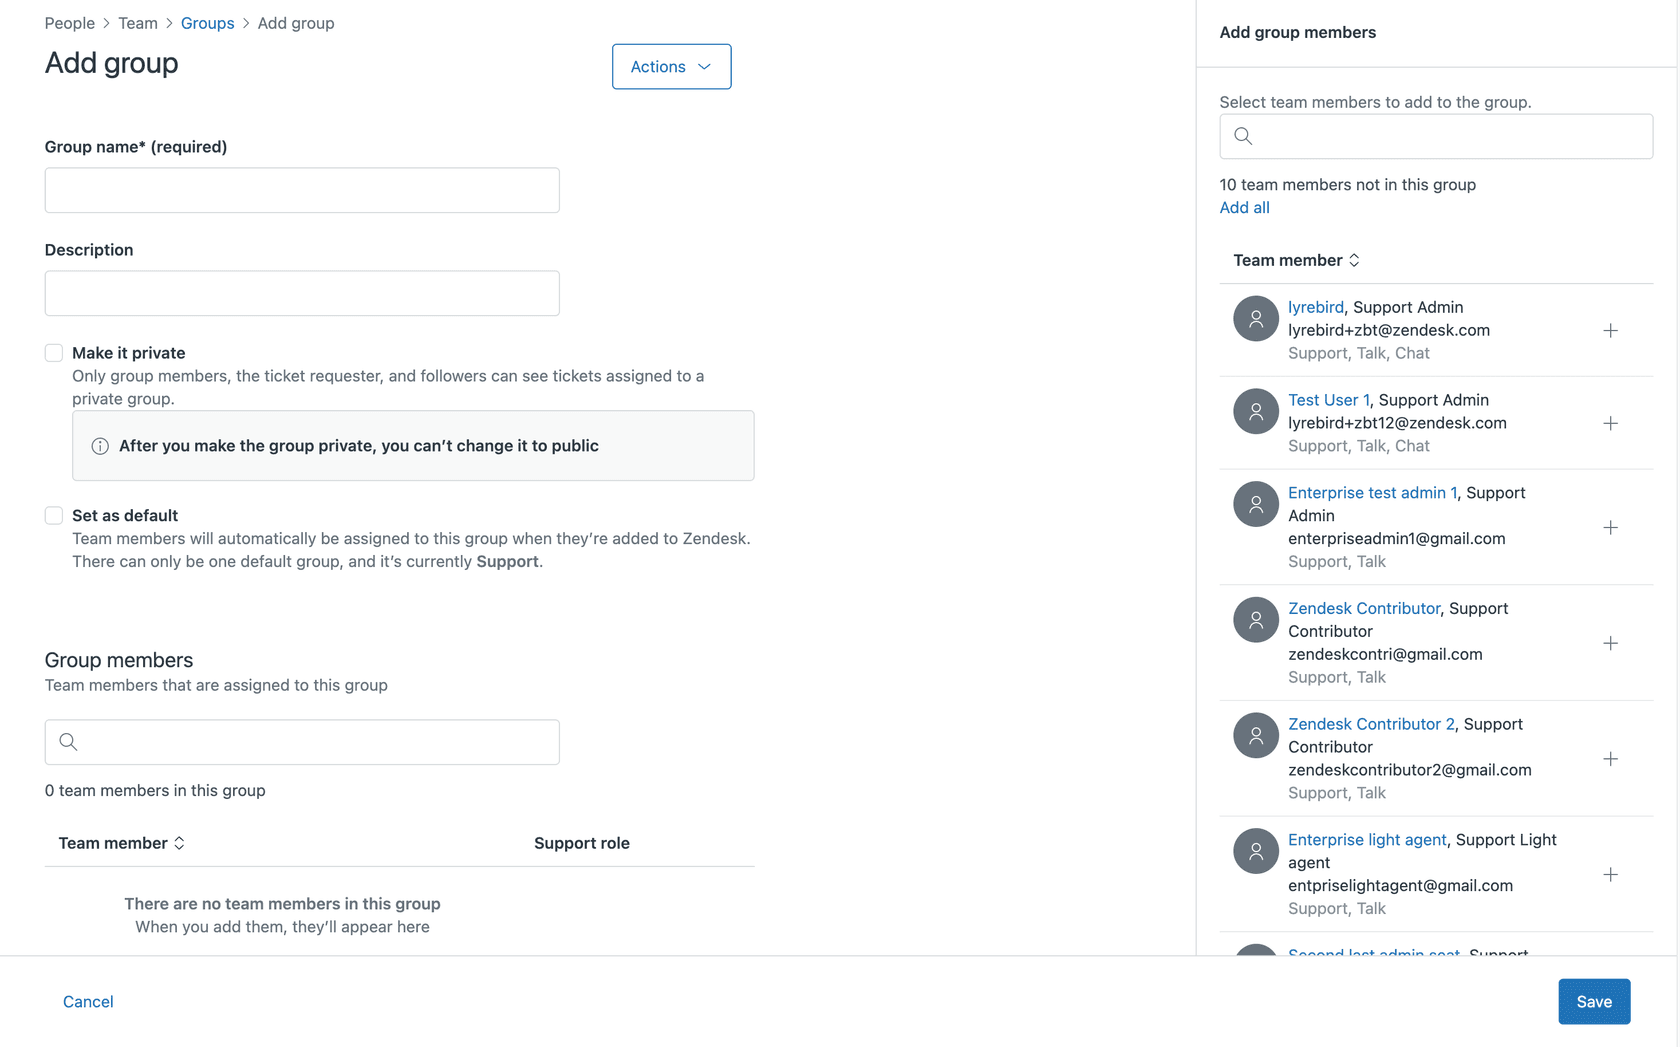
Step 1: Create your agent group
Navigate to Admin Center > People > Team > Groups and click "Add group." Give it a clear name like "Enterprise Support" or "Billing Team." Add the agents who should receive tickets in this group.
Step 2: Set up the organization
Go to Admin Center > People > Configuration > Organizations. Either create a new organization or open an existing one. Make sure the users you want to route are members of this organization.

Step 3: Configure the group mapping
In the organization settings, look for the "Group" field under "Ticket assignment." Select the group you created in Step 1. Save the organization.
That's it. Now whenever a user from this organization submits a ticket, it will automatically be assigned to your mapped group.
When to use this method: Group mapping works best for simple 1:1 routing scenarios. If Acme Corp always needs to go to your Enterprise Support team, this is perfect. It requires no trigger maintenance and runs before most triggers fire, so it won't conflict with other automation.
Method 2: Trigger-based routing for conditional logic
Triggers give you more flexibility than group mapping. You can route based on multiple conditions, not just organization membership. This is available on all Zendesk plans.
Step 1: Access the triggers page
Navigate to Admin Center > Objects and rules > Business rules > Triggers. You'll see a list of your existing triggers. Click "Create trigger" to start.

Step 2: Create the routing trigger
Give your trigger a descriptive name like "Route Acme Corp to Enterprise Support." Then set up your conditions and actions.
For organization-based routing, your conditions might look like:
- Ticket | Is | Created
- Requester | Organization | Is | Acme Corp
Your action would be:
- Group | Enterprise Support
For email-based routing (routing based on which support address the customer emailed):
- Ticket | Is | Created
- Received At | Is | billing@yourcompany.com
Action:
- Group | Billing Team
Step 3: Organize trigger order
Triggers run from top to bottom, and later triggers can overwrite earlier ones. This matters for routing. If you have a general "Route all tickets to Level 1" trigger at the top, and a specific "Route VIP customers to Level 2" trigger below it, the VIP routing won't work. The general trigger will assign the ticket first.
Use trigger categories to organize your routing triggers. Create a category called "Routing" and place all routing triggers there. Within that category, put your most specific triggers at the top and your catch-all triggers at the bottom.
Common use cases:
- Routing by support email address (billing@, support@, sales@)
- VIP customer routing with automatic priority escalation
- Conditional routing based on ticket form or custom fields
- Language-based routing using requester locale
For more details on trigger-based organization routing, see our guide on setting groups by organization using triggers.
Method 3: Omnichannel routing for advanced needs
Omnichannel routing is Zendesk's most sophisticated routing system. It assigns tickets based on agent availability, capacity limits, and skills. This requires Professional or Enterprise plans.
Step 1: Enable omnichannel routing
First, make sure Agent Workspace is activated (it's required for omnichannel routing). Then go to Admin Center > Objects and rules > Omnichannel routing and toggle it on.
For email tickets to enter the omnichannel queue, they need the auto_routing tag. Set up a trigger that adds this tag to incoming tickets based on your criteria.
Step 2: Set up agent statuses and capacity rules
Omnichannel routing uses a unified agent status across all channels. Agents set themselves as Online, Away, or Offline. Online agents can receive tickets from any channel. Away agents only receive email tickets.
Configure capacity rules to limit how many tickets each agent can handle at once. Go to Admin Center > Objects and rules > Omnichannel routing > Capacity rules. You can set different limits for email, messaging, and calls. You can also choose whether to measure capacity as a fixed number or a percentage of maximum workload.

Step 3: Configure skills-based routing (optional)
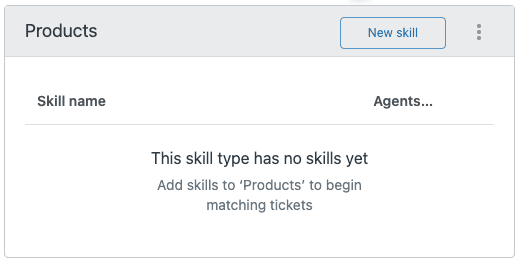
On Professional and Enterprise plans, you can create skills and assign them to agents. Skills might include languages (Spanish, German), product expertise (API, Mobile App), or certifications (Level 2 Support).
When a ticket comes in, triggers can assign the appropriate skills. Omnichannel routing then matches tickets to agents who have those skills.
Step 4: Set up custom queues (optional)
Custom queues let you create specialized routing paths. For example, you might create a "VIP Queue" that routes to your senior agents first, then overflows to your general team if no senior agents are available.
Tickets in custom queues are prioritized over the standard queue. You can set up primary and secondary groups for each queue, creating an overflow mechanism.
When to use this method: Omnichannel routing is worth the complexity when you need skills-based assignment, want to prevent agent cherry-picking, or need overflow routing between teams. It's also essential if you're handling high volumes across multiple channels (email, chat, phone) and want unified workload balancing.
Choosing the right routing method for Zendesk group routing members
With three approaches available, how do you decide which to use? Here's a quick comparison:
| Factor | Group Mapping | Triggers | Omnichannel |
|---|---|---|---|
| Setup complexity | Low | Medium | High |
| Flexibility | Low | Medium | High |
| Skills-based routing | No | No | Yes |
| Capacity management | No | No | Yes |
| Plan requirement | Professional+ | All plans | Professional+ |
Quick decision guide:
- If you have simple organization-to-group routing needs, use group mapping. It's the cleanest solution with no trigger maintenance.
- If you need conditional logic, multiple criteria, or email-based routing, use triggers. They give you the flexibility to handle complex scenarios.
- If you need skills-based assignment, capacity limits, overflow routing, or unified workload balancing across channels, use omnichannel routing.
Common routing issues and how to fix them
Even with the best setup, routing issues happen. Here are the most common problems and how to solve them.
Trigger order conflicts: If tickets aren't routing as expected, check your trigger order. Remember that triggers run from top to bottom, and later triggers can overwrite earlier group assignments. Put specific routing triggers above general ones.
Multiple organizations: When a user belongs to multiple organizations, Zendesk uses their primary organization for routing decisions. Make sure the primary organization is the one you want to route from. On Professional and Enterprise plans, you can set primary organizations per user.
API-created tickets: Tickets created via API sometimes lack organization data, even if the requester belongs to an organization. Make sure your API calls include the organization_id parameter, or set up a fallback trigger that routes unassigned tickets to a default group.
Fallback routing: Always create a catch-all trigger at the bottom of your routing category. If a ticket makes it through all your specific routing triggers without being assigned, this trigger should assign it to a default group. This prevents tickets from sitting unassigned in your system.
Taking routing further with eesel AI
Rule-based routing works well for clear-cut scenarios. But what happens when your routing logic gets complex? When you have dozens of triggers, conflicting conditions, and edge cases that don't fit neatly into "if this, then that" rules?
This is where AI-powered triage can help. Instead of manually writing trigger conditions for every scenario, you can train an AI on your historical tickets. It learns from patterns in your data: which types of tickets went to which groups, how long they took to resolve, and what outcomes they produced.

Our AI triage integrates with Zendesk and handles the nuanced routing decisions that are hard to capture in triggers. You can give it natural language instructions like "Route billing disputes to the Finance team, but only if they're over $500 and the customer has been with us for more than a year." No complex trigger logic required.
You can also test routing accuracy before going live. Run the AI on your past tickets and see where it would have routed them. Compare that to where they actually went and how they were resolved. This lets you refine the routing logic without experimenting on real customers.
If you're interested in exploring how AI can complement your Zendesk routing, eesel's AI triage for Zendesk handles nuanced routing decisions that are hard to capture in triggers, using natural language instructions you can update any time.
Start optimizing your Zendesk group routing today
Now that you understand the three routing methods, here are your next steps:
-
Audit your current setup. Look at your existing triggers and group assignments. Are there conflicts? Are tickets routing where you expect?
-
Implement trigger categories. If you haven't already, organize your routing triggers into a dedicated category. Order them from most specific to most general.
-
Create fallback triggers. Make sure every ticket gets assigned to a group, even if it doesn't match any of your specific routing criteria.
-
Schedule monthly reviews. Routing needs change as your business evolves. Set a recurring reminder to review your routing setup and adjust as needed.
-
Consider AI triage when rules get too complex. If you find yourself writing increasingly complicated triggers to handle edge cases, it might be time to explore AI-powered routing.
Getting routing right takes some upfront work, but the payoff is significant. Agents spend less time searching for tickets and more time solving problems. Customers get faster responses from agents who are actually equipped to help them. And you spend less time manually reassigning misrouted tickets.
