If you're a support manager, you've probably spent more time than you'd like manually pulling reports from Zendesk Explore. The good news is that you can automate this. Scheduled dashboard deliveries let you email reports to your team on a recurring basis without anyone having to remember to send them.
The challenge is understanding how Zendesk Explore schedule report frequency works and setting it up correctly. Get the timing wrong and your reports show outdated data. Choose the wrong plan and you might not have access to the feature at all.
This guide walks through everything you need to know: how data refresh intervals work by plan, step-by-step setup instructions, and common pitfalls to avoid. We'll also look at when you might want to consider alternatives like eesel's AI agent for Zendesk for teams that need more than static scheduled reports.
Understanding Zendesk Explore data refresh frequencies
Before you schedule any reports, you need to understand a critical distinction: data sync frequency isn't the same as scheduled delivery frequency.
Data sync is how often Zendesk updates the underlying data in Explore. Scheduled delivery is how often that data gets emailed out. You can schedule daily emails, but if your data only syncs once per day, some of those emails contain the same information.
Data refresh intervals by plan
Your data sync frequency depends entirely on your Zendesk plan:
| Plan | Data Refresh Interval | Scheduled Delivery Access |
|---|---|---|
| Suite Team, Suite Growth | Daily (midnight in account timezone) | Not available |
| Suite Professional | Hourly (one hour after last sync) | Zendesk users only |
| Suite Enterprise/Enterprise Plus | Hourly + near real-time live dashboards | Zendesk users + end users |
| Explore Lite (legacy) | Daily | Not available |
| Explore Professional/Enterprise | Hourly | Available |
Source: Zendesk data refresh intervals documentation
The 30-day inactivity rule
Here's something that catches teams off guard: if nobody accesses your reports or dashboards for more than 30 days, Zendesk automatically reduces your refresh frequency to weekly. This is a cost-saving measure on their end, but it means your scheduled reports might suddenly start showing stale data.
The fix is simple: accessing any dashboard or running a scheduled delivery counts as activity and restores your normal refresh frequency. But if you've got monthly reports scheduled, you might hit this limit without realizing it.
Live dashboards for Enterprise plans
If you're on Suite Enterprise or Enterprise Plus, you also get access to live dashboards that refresh every 5-10 seconds. These are separate from scheduled reports and are designed for real-time monitoring rather than email delivery. Think of them as wallboards for your support center, not replacements for scheduled summaries.
What you need before scheduling reports
Scheduled dashboard deliveries aren't available on all plans. Before you try to set this up, confirm you have:
- Suite Professional, Enterprise, or Enterprise Plus (Suite Team and Support Team don't include this feature)
- Edit permissions on the dashboard you want to schedule
- A shared dashboard (you can't schedule private dashboards)
- Zendesk Explore Professional or Enterprise add-on enabled
For end-user deliveries (sending reports to customers), you need Enterprise or Enterprise Plus. You also need to add the explore tag to each end user profile who should receive reports, and enable the feature in your Explore settings.
Step-by-step: Scheduling your first dashboard delivery
Once you've confirmed your plan supports scheduling, here's how to set it up.
Step 1: Open your dashboard and access scheduling
Navigate to your dashboard library in Zendesk Explore. Find the dashboard you want to schedule and open it. Once inside, click the Share button in the top navigation, then select Schedule delivery from the dropdown menu.
If you don't see the Schedule delivery option, double-check that you have edit permissions for this dashboard and that your Explore add-on is active. Also verify you're on a supported plan.
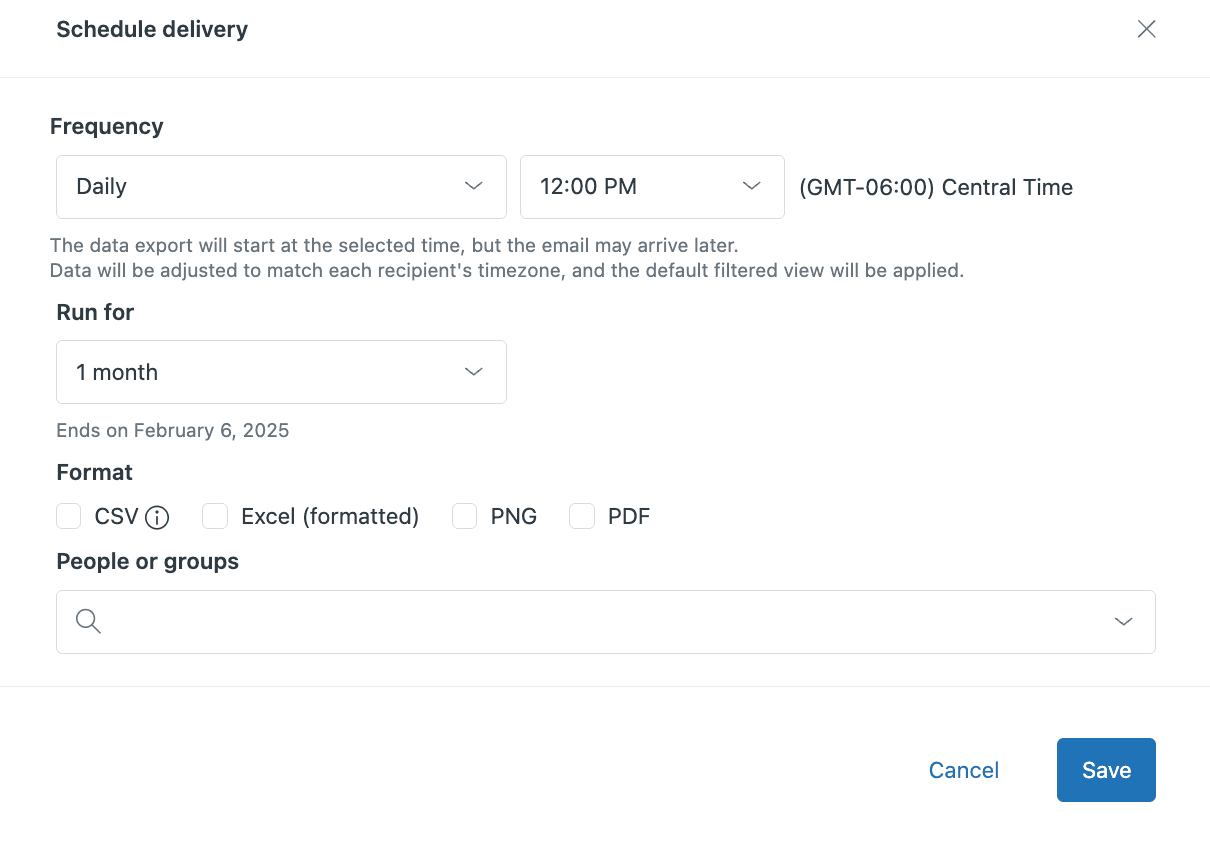
Step 2: Configure delivery frequency and timing
On the Schedule delivery page, you'll set when and how often the dashboard runs. Use the frequency dropdown to choose from:
- Once: Single delivery at a specific date and time
- Daily: Repeats every day
- Weekly: Repeats on selected days of the week
- Monthly: Repeats monthly on a specific date
Critical timing tip: The scheduled time is when Zendesk starts calculating your dashboard data, not when the email actually arrives. Explore needs time to sync and process the data, especially for complex reports.
For dashboards showing the previous day's metrics, schedule them for 2 AM or later. This ensures the data sync (which can take up to two hours) completes before the dashboard generates. If you schedule for 9 AM, the data reflects what existed at 9 AM, but the email might not arrive until 10 or 11 AM depending on processing time.
You can also set how long the schedule should run, up to 12 months in the future. The schedule owner and all Explore admins receive reminder emails one week and one day before the schedule expires.
Step 3: Select delivery formats
Zendesk gives you four format options for your scheduled deliveries:
| Format | Best For | File Type | Size Impact |
|---|---|---|---|
| CSV | Data analysis, importing into other tools | .csv files zipped per tab | Smallest |
| Excel | Sharing formatted reports, further manipulation | .xlsx per tab | Medium |
| PNG | Quick visual reference, presentations | .png images per tab | Large |
| Executive reports, printing, archiving | Single .pdf with all tabs | Largest |
Keep the 25 MB attachment limit in mind. If your dashboard is large, avoid selecting both Image and PNG formats together. Large exports get split across multiple emails marked sequentially (1/3, 2/3, 3/3), but any single export over 25 MB won't be sent at all.
Step 4: Add recipients
Choose who should receive these scheduled reports. Start typing in the People or groups field to search for:
- Individual agents or admins
- Groups of users
- End users (Enterprise plans only, with explore tag)
Recipients are automatically grouped by language and time zone, with one email sent to each group. For security, each recipient only sees their own email address in the To field. Other recipients remain hidden.
Note that you can't schedule deliveries to users with Limited viewer or Limited editor permissions. If someone needs to receive reports but shouldn't have full Explore access, consider adding them as a standard agent.
Step 5: Save and verify
Review all your settings one more time, then click Save. The schedule appears on the Scheduled deliveries page where you can monitor it, make changes, or delete it if needed.
To verify everything is working, you can wait for the first scheduled run or check the Scheduled deliveries page for status updates. If a scheduled delivery ever fails, the schedule owner receives a notification email with details about what went wrong.
Common scheduling pitfalls and how to avoid them
Even with proper setup, scheduled deliveries sometimes hit snags. Here's how to fix the most common problems.
Outdated data in reports
If the data in scheduled emails seems outdated, remember that Explore's data sync can take up to two hours. If you schedule a dashboard for 9 AM, it calculates using data as of 9 AM, but the email might not arrive until 10 or 11 AM depending on sync time.
For previous day's complete data, always schedule for 2 AM or later to ensure the sync finishes first.
Attachment size errors
The 25 MB limit per email catches many teams off guard. If you're hitting this limit:
- Switch to CSV format only (smallest file size)
- Avoid combining Image and PDF formats
- Split large dashboards into multiple smaller dashboards
- Schedule separate deliveries for different tabs
Permission issues
Scheduled deliveries fail silently when permissions change:
- You can't schedule to light agents
- Limited viewer and Limited editor permissions are excluded
- If an agent is downgraded, all their scheduled deliveries are immediately deleted
- End users need the explore tag before they appear in recipient search
Legacy dashboard builder transition
As of early 2025, Zendesk is transitioning customers to a new dashboard builder. If you previously scheduled deliveries using the legacy builder, you need to recreate those schedules in the new builder. The old schedules won't carry over automatically.
Missing emails
If recipients are not getting scheduled emails:
- Ask recipients to check spam or junk folders (automated reports often get filtered)
- Verify the recipient's email address is correct in Zendesk
- Confirm the dashboard is still shared and has not been deleted
- Check that the schedule has not expired
Best practices for different reporting scenarios
Getting the most from scheduled deliveries requires some planning:
Morning standups: Schedule daily snapshots to arrive before your team starts work. Include key metrics like ticket volume, first response time, and backlog size so everyone starts the day informed.
Executive summaries: Weekly or monthly PDF reports work best for leadership. Focus on high-level trends rather than daily fluctuations.
Handover reports: For teams across time zones, schedule snapshots at shift change times. The incoming team gets a clear picture of queue status, escalations, and ongoing issues.
End-of-day wrap-ups: Send summaries 30 minutes before shift end showing tickets solved, CSAT scores, and SLA performance.
Keep recipient lists current: Review your scheduled deliveries quarterly. Remove recipients who've changed roles and add new stakeholders who need visibility.
Monitor expiration dates: With schedules running up to 12 months, it's easy to forget they're ending. The reminder emails help, but consider adding a calendar reminder to review and extend important schedules before they lapse.
When to consider alternatives to Zendesk Explore scheduling
Zendesk's native scheduling works well for basic email delivery, but it has limitations:
- No Slack or Microsoft Teams delivery options
- No custom email message body (subject line only)
- Static reports without AI-generated insights
- Limited to hourly data refreshes (unless on Enterprise)
Geckoboard for real-time dashboards
If you need faster refresh rates or TV displays, Geckoboard offers an alternative. Their Zendesk integration refreshes every 10 minutes for Support data, 1 minute for Chat, and 30 seconds for Talk. They also provide native TV wallboard mode and can send scheduled snapshots to Slack and Teams.
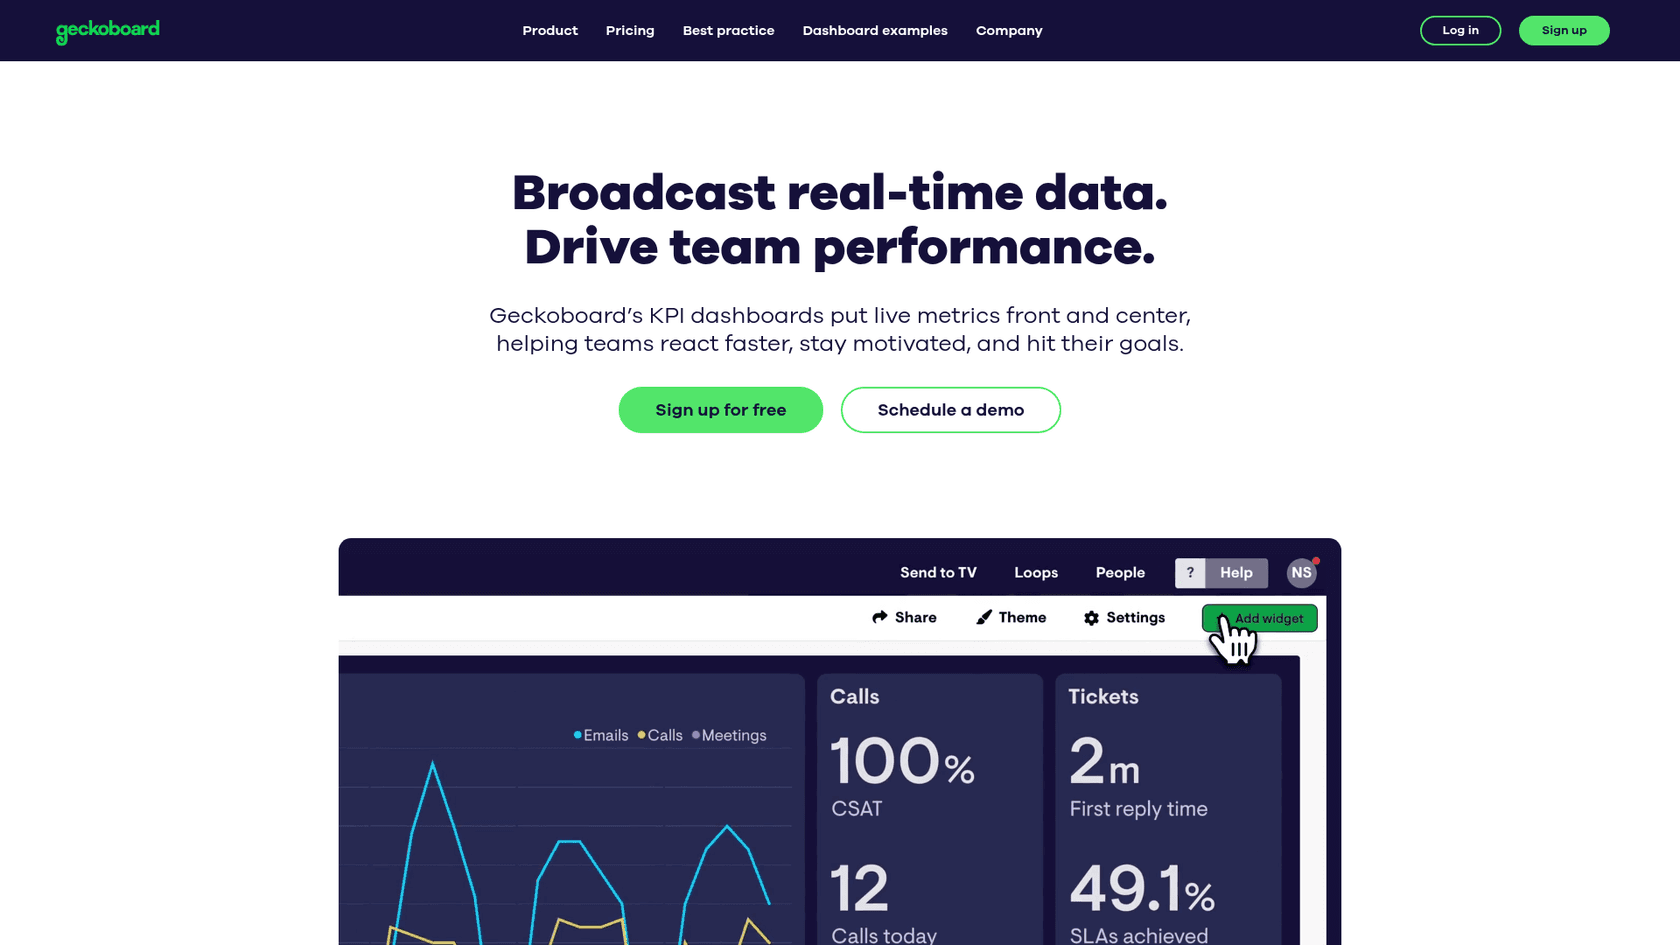
Pricing starts at $60/month for their Essential plan, which includes 1 dashboard and 10 viewers. For Slack/Teams delivery, you need their Core plan at $175/month.
eesel AI for intelligent reporting
If you want your reporting to do more than just show numbers, eesel AI offers a different approach. Instead of static scheduled reports, you get:
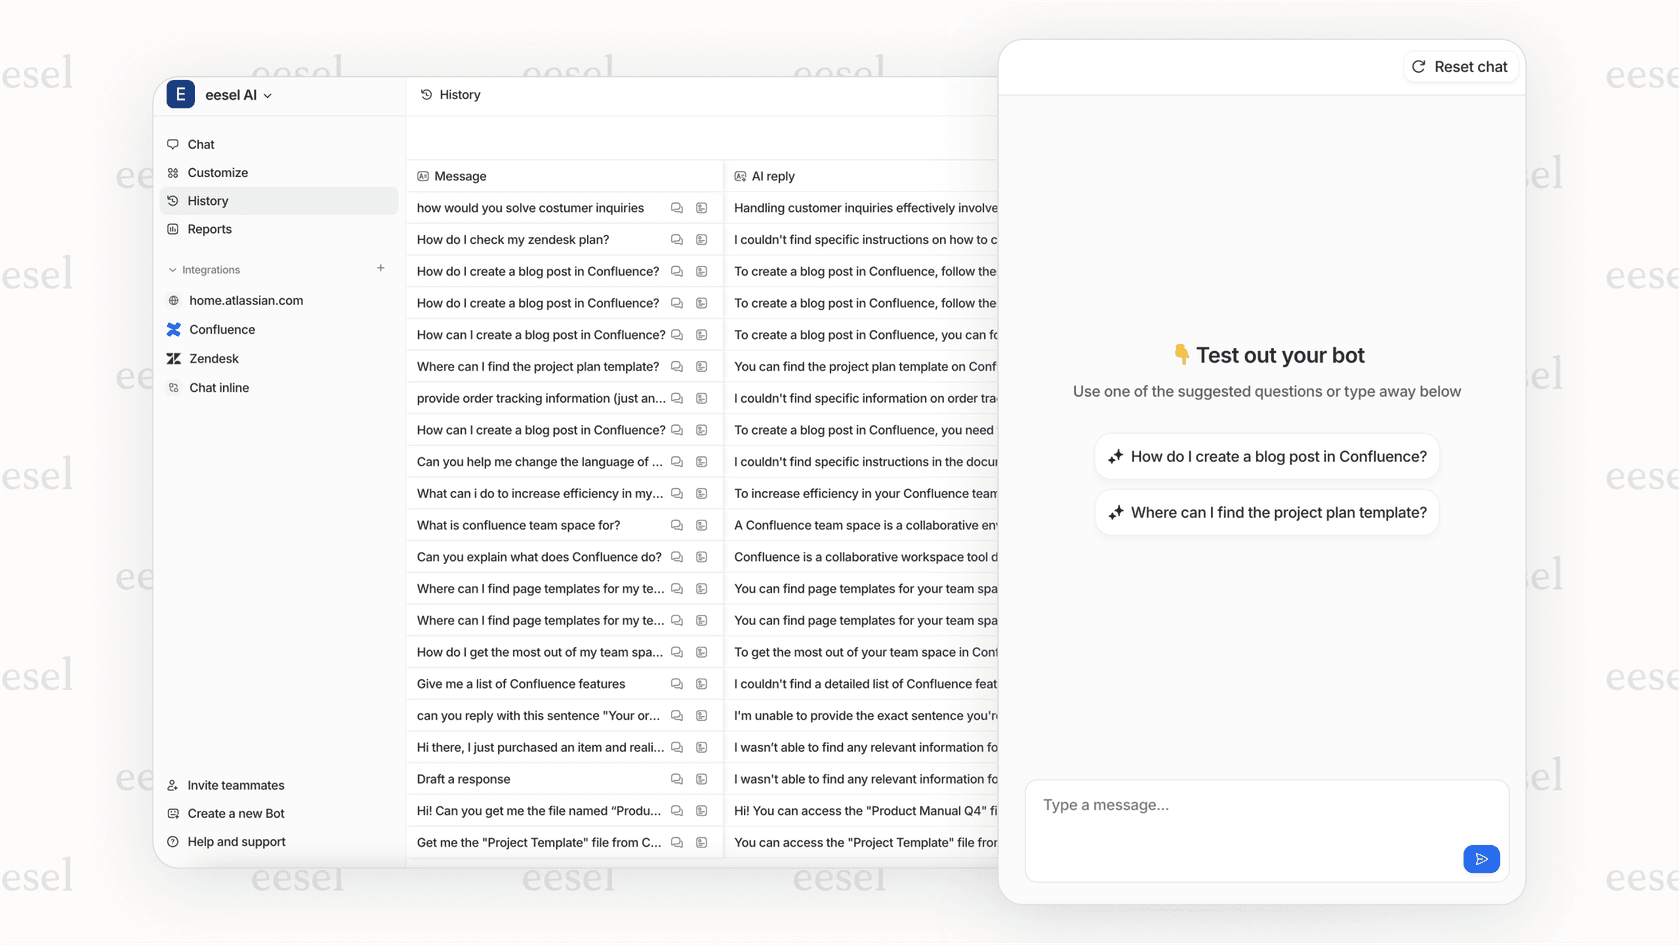
- AI-generated summaries of support trends delivered to Slack or email
- Natural language queries (ask "What was our CSAT last week?" instead of building a report)
- Proactive alerts when metrics shift unexpectedly
- Insights that connect ticket data with knowledge base gaps
eesel AI connects directly to your existing Zendesk setup and starts providing insights within minutes. For teams that want their reporting to be actionable rather than just informational, this can be a valuable complement to Zendesk's native scheduling.
Start automating your Zendesk reporting today
Scheduled dashboard deliveries in Zendesk Explore remove the manual work from keeping your team informed. The key things to remember:
- Data refresh frequency depends on your plan (daily for Team, hourly for Professional+)
- Schedule reports for 2 AM or later if you need complete previous-day data
- Watch the 25 MB attachment limit when selecting formats
- Review and update recipient lists quarterly
- Consider alternatives like eesel AI when you need AI-powered insights beyond static reports
Start with one or two critical dashboards. Pick a daily morning delivery for your support team and a weekly summary for leadership. Once you see the value, expand to cover more metrics and audiences.
If you want to go beyond static reports and explore how AI can help you understand and act on your support data, try eesel AI's Zendesk integration. It learns from your existing tickets, macros, and help center content to provide contextually relevant insights.
