If you're managing a support team in Zendesk, you've probably faced the question: should this view be personal or shared? It's a decision that seems small but can affect how your team works.
Views are the primary way agents access tickets in Zendesk. They're essentially filtered lists that organize tickets based on specific criteria like status, assignee, or priority. Get your view strategy right, and your team works efficiently. Get it wrong, and agents waste time hunting for tickets or working from outdated lists.
At eesel AI, we work alongside Zendesk to help support teams automate ticket management. But before you can optimize your workflow, you need to understand the foundation. Let's break down the differences between personal and shared views, when to use each, and how to organize them effectively.
What are Zendesk views and why do they matter?
Views in Zendesk are filtered lists of tickets that help agents find and prioritize their work. Instead of scrolling through an endless inbox, agents open a view and see only the tickets that match specific criteria.
There are three types of views in Zendesk:
- Default views Pre-defined by Zendesk and always available (like "Your unsolved tickets")
- Shared views Created by admins for team-wide use
- Personal views Created by individual agents for their own workflow
Views matter because they determine what work agents see and in what order. A well-organized view setup ensures urgent tickets get attention first and agents aren't overwhelmed by irrelevant tickets. A poorly organized setup leads to missed SLAs, duplicated work, and frustrated agents.
Understanding personal views in Zendesk
Personal views are exactly what they sound like: views created by an individual agent for their own use. Any agent (or admin) can create them, but only the creator can see and use them.
When personal views make sense
Personal views work well when an agent has developed their own approach to handling specific ticket types. Maybe they've crafted a particular way of tracking follow-ups, or they need a filtered view for a side project that doesn't apply to the rest of the team.
Here are scenarios where personal views are the right choice:
- Testing new approaches Before rolling out a new view to the whole team, an agent can test it personally
- Individual workflows Agents develop their own shortcuts for how they like to work
- Draft views Personal views can serve as drafts that might become shared later
- Niche expertise An agent who specializes in a particular area might need views that don't apply to the broader team
The limitations to keep in mind
Personal views have some important constraints. They can't be shared with teammates, so if an agent creates a brilliant workflow, others won't benefit unless an admin converts it to a shared view. And if the agent leaves the organization, their personal views disappear unless they've been cloned.
Admins can see personal views in the Admin Center and clone them to create shared versions. This is useful when you spot a personal view that'd benefit the whole team.
Personal views are also limited. Each agent can have up to 10 personal views (increased from the previous limit of 8), according to Zendesk's documentation.
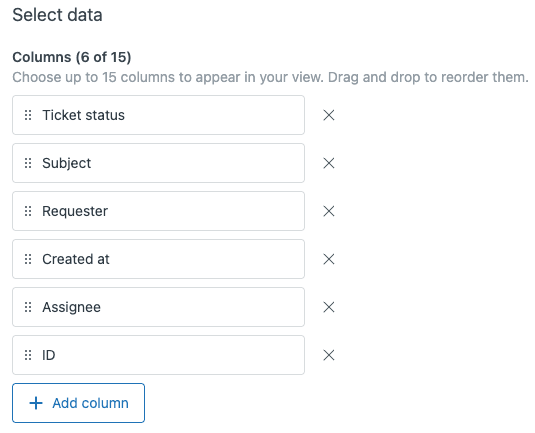
How to create a personal view
Creating a personal view is straightforward, as detailed in Zendesk's view creation guide:
- In Admin Center, click Workspaces in the sidebar, then select Agent tools > Views
- Click Create view
- Enter a name for your view
- Under Who has access, select Me only
- Set your conditions (status, assignee, group, etc.)
- Click Create
Understanding shared views in Zendesk
Shared views are the backbone of consistent team-wide support. Only administrators can create them (though agents with custom role permissions can also be granted this ability), and they can be made available to all agents or restricted to specific groups.
When shared views are the right choice
Shared views are ideal for any workflow that multiple agents need to follow. They're how you ensure that every agent's working from the same queue, seeing tickets in the same priority order, and not missing important work.
Use shared views for:
- Standardized workflows Ensuring all agents see tickets in SLA priority order
- Team consistency Everyone works from the same set of views
- Onboarding New agents have approved views ready from day one
- Quality control Pre-approved views for specific ticket types
Understanding the visibility options
When creating a shared view, you have two visibility options:
| Option | Who Can Use It | Best For |
|---|---|---|
| All agents | Everyone on your team | Universal views like "Open tickets" |
| Agents in specific groups | Specific agent groups only | Specialized views for subsets of your team |
The "Agents in specific groups" option lets you create views for specific teams, like a set of refund-related views only your billing team should see.
View limits
Zendesk has increased view limits significantly. You can now have up to 100 active shared views per account (up from the previous 12), according to Zendesk's documentation. However, only 12 shared views appear in the sidebar by default. Additional views are accessible through "Manage Views" but require an extra click to access.
How to create a shared view
The process is similar to personal views, with one key difference in the availability setting, as explained in Zendesk's shared views documentation:
- In Admin Center, navigate to Workspaces > Agent tools > Views
- Click Create view
- Enter a name and set your conditions
- Under Who has access, choose All agents or Agents in specific groups
- Click Create

Zendesk view personal vs shared: Key differences at a glance
Here's a quick comparison to help you decide which type you need:
| Feature | Personal Views | Shared Views |
|---|---|---|
| Who can create | Any agent or admin | Admins only (or custom roles) |
| Who can use | Creator only | All agents or specific groups |
| Visibility to admins | Yes (can clone) | Yes (full management) |
| Account limit | 10 per agent | 100 per account |
| Best for | Individual productivity | Team consistency |
| Modification rights | Creator only | Any admin |
When to use personal views vs shared views
Making the right choice comes down to understanding your use case. Here's a simple framework:
Use personal views when:
- You're testing a workflow and aren't ready to share it yet
- The view is specific to how you personally handle tickets
- You need a quick shortcut that wouldn't make sense for others
- You're drafting something that might become a shared view later
Use shared views when:
- Multiple agents handle the same type of ticket
- Consistency matters (which is almost always)
- You're onboarding new agents who need approved workflows
- You want to track and optimize processes across the team
Best practices for organizing views in Zendesk
A well-organized view setup is a joy to use. A messy one just slows agents down. Here are practices that'll help:
The 8 core views approach
Expert Zendesk consultants recommend starting with eight essential shared views, as outlined in Internal Note's guide to Zendesk views:
- My Tickets Tickets assigned to the current agent, sorted by SLA
- Open Tickets All new and open tickets, sorted by SLA (filtered by agent's groups)
- Pending Tickets Tickets waiting for customer response
- On Hold Tickets Tickets waiting for internal action
- Active Problem Tickets All open problem tickets for crisis management
- Recently Updated Tickets updated in the last two days (for team leads)
- Recently Solved Tickets solved in the last three days
- Recent Feedback Tickets with recent CSAT scores, sorted by rating
This approach ensures agents have what they need without view bloat. For more on organizing Zendesk workflows, check out our guide on Zendesk macro personal vs shared.
Using categories and subcategories
Zendesk supports a clever naming convention using double colons (::) to create automatic folder structures. Name your views like this:
Tier 2::Returns::Standard refundsTechnical::Login issues::Password resetsBilling::Invoices::Payment failures
When agents open their view list, they'll see expandable folders. This works for both personal and shared views and makes finding the right view much faster. You can nest up to three levels deep, according to Zendesk's categorization documentation.
Scoping views to agent groups
Instead of creating separate views for each team ("First Line Open Tickets," "Second Line Open Tickets"), create one shared view scoped to the agent's groups. An agent in the First Line group sees only First Line tickets. An agent in both groups sees both. This reduces view count while keeping the interface clean.
Working within view limits
Even with the increased limits, you might hit constraints. Here are workarounds:
- Use Zendesk Explore for insights and reporting instead of creating views for data analysis
- Create browser bookmarks for views that don't need to be in the sidebar
- Consider third-party apps like Viewer, Better Views, or Lovely Views if you need more flexibility
View ordering limitations
One common frustration: shared views always appear above personal views in the sidebar. You can't reorder them. If agents complain about scrolling to reach their personal views, consider whether those views should actually be shared, or if the shared views could be better organized with categories.
It appears that changing the order of the View trees is not possible, and by default, the Shared views tree is positioned above the Personal views tree. As someone who created personal views, I would expect to access them without having to scroll down.
Converting personal views to shared views
Sometimes a personal view becomes so effective that the whole team should use it. Here's how that conversion works:
Why convert personal views to shared
- An agent is leaving and their workflow should be preserved
- A personal view proves so effective that the whole team should benefit
- You want to standardize a workflow that started as an individual experiment
Step-by-step conversion process
- Temporarily elevate permissions (if needed) If the agent doesn't have permission to create shared views, adjust their role in Admin Center > People > Roles
- Clone the view The agent (or an admin) opens the personal view, clicks Clone, and changes the availability to shared
- Set appropriate visibility Choose "All agents" or "Agents in specific groups" depending on who needs access
- Revert permissions Return the agent to their original role if you changed it
Governance tips
Establish some basic guidelines for your team:
- When should an agent create a personal view versus asking for a shared one?
- How often should you audit and clean up unused views?
- Who approves new shared views before they're published?
Regular audits matter. Deactivate views that are outdated or rarely used. You can always reactivate them later if needed.
Going beyond views: AI-powered ticket management with eesel AI
Views are powerful, but they've got a fundamental limitation: they're static. A view shows the same list based on fixed criteria, regardless of the specific details in each ticket.
This is where AI can complement your view strategy. At eesel AI, we've built an AI teammate that works alongside Zendesk to intelligently route and prioritize tickets.

How eesel AI complements Zendesk views
Our AI Triage product automatically tags, routes, and prioritizes tickets based on their content. Instead of manually sorting tickets into views, the AI analyzes each ticket and ensures it lands in the right queue with the right priority.
Here's how it works:
- Our AI learns from your past tickets, help center articles, and existing views
- When a ticket arrives, the AI analyzes its content and intent
- Tickets are automatically tagged, routed to the right team, and prioritized
- Agents see properly organized work without complex view configurations
Unlike static views, the AI can handle variations it hasn't seen before. It doesn't need rigid criteria for every possible scenario. It learns what matters from your team's history and makes intelligent decisions on demand.
For teams drowning in view management, or those handling complex issues where every ticket is different, this approach can reduce the overhead of maintaining a massive view library while improving ticket routing accuracy.
Our AI Agent can even handle frontline tickets autonomously, and our AI Copilot drafts personalized responses for agents to review. Both integrate directly with Zendesk. If you're looking for more ways to enhance your support workflow, check out our guide on the best AI chatbots for Zendesk.
Choosing the right view strategy for your team
The personal versus shared view decision isn't really an either/or choice. Most effective support teams use both.
Start with shared views for consistency on your core workflows. This ensures every agent sees the same ticket queues and works from the same priorities. Then let agents create personal views for their individual experiments and optimizations.
Build a culture where great personal views get promoted to shared status. And when your view library starts feeling unwieldy, or when you find yourself creating views for situations that are too nuanced to capture in static criteria, that's a good sign it might be time to explore AI-powered alternatives.
The goal is simple: give your agents the tools to find and prioritize work efficiently, while maintaining the flexibility to handle the unique situations that make customer support interesting.
If you're interested in seeing how AI could complement your current Zendesk setup, you can explore our Zendesk integration or check our pricing to see how we compare. You can also try eesel free to see how it works with your existing setup.
