If your support team handles dozens or hundreds of tickets daily, you have probably noticed something annoying. Every time an agent replies to a ticket, they need to manually change the status to "Pending." It is a small click, but it adds up. Over thousands of tickets, those extra seconds become hours of wasted time.
Here is the good news: you can automate this. Zendesk triggers let you automatically set ticket status to Pending when agents submit replies. No more dropdown menus. No more forgotten status changes. Just smooth, automatic workflow.

In this guide, we will walk through creating a Zendesk trigger when status changed to pending. We will cover the exact conditions you need, the common mistakes that break triggers, and how to test everything before going live. We will also look at how modern AI tools like eesel AI can handle status management without any trigger configuration at all.
What you will need
Before you start building your trigger, make sure you have the following:
- A Zendesk Support account on Team plan or higher (triggers are included in all plans)
- Admin permissions or trigger management rights in your Zendesk instance
- A clear understanding of when your team wants tickets set to Pending
- About 5-10 minutes to configure and test
That is it. You do not need coding skills or technical expertise. Zendesk triggers are built for administrators, not developers.
Understanding Zendesk ticket statuses
To build an effective trigger, you need to understand how Zendesk statuses work. Think of ticket statuses as a simple workflow pipeline:

New means the ticket just arrived and has not been assigned yet. Once an agent takes it, the status changes to Open. This tells everyone the ticket is being worked on.
Pending is where things get interesting. This status means the agent has replied and is now waiting for the customer to respond. It is a crucial status because most SLA policies pause countdowns while tickets are pending. That means your team is not penalized for time spent waiting on customers.
Solved indicates the agent believes the issue is resolved. Closed is the final state, usually triggered automatically after a ticket has been solved for several days.
The difference between triggers and automations matters here. Triggers fire immediately when conditions are met, like when an agent submits a reply. Automations run on a schedule, checking conditions every hour. For status changes based on agent actions, you want triggers.
Step 1: Access the triggers admin page
Let us get started. First, you need to navigate to where triggers live in Zendesk.
- Click the Admin Center icon in the top navigation bar
- In the left sidebar, find Objects and rules
- Hover over it, then select Business rules
- Click Triggers
- Make sure you are on the Tickets tab (not Messaging triggers)
You will see a list of your existing triggers. Zendesk creates several standard triggers for new accounts, like "Notify requester of comment update." Take a moment to review what is already there. You want to avoid creating triggers that conflict with existing ones.
Step 2: Create a new trigger
Now let us build your trigger.
Click the Add trigger button in the top right. You will see a form with several fields:
Trigger name: Use something descriptive that your team will understand. "Auto-set to pending on agent reply" works well. Avoid vague names like "Trigger 1" or "Pending status."
Description: Add a brief explanation of what this trigger does and why it exists. This helps future administrators understand the logic without reverse-engineering the conditions. Something like: "Automatically changes ticket status to Pending when an agent submits a public comment. Saves agents from manually selecting status on every reply."
Category: If your Zendesk instance uses trigger categories, assign it to an appropriate one like "Status Management" or "Agent Workflow."
Leave the trigger inactive for now. You will test it before activating.
Step 3: Configure trigger conditions for Zendesk trigger when status changed to pending
This is where the logic comes together. The conditions tell Zendesk exactly when to fire your trigger.

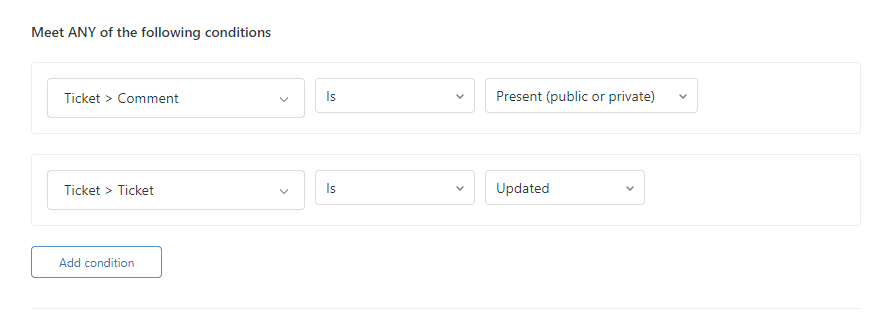
Under Meet ALL of the following conditions, add these three conditions:
Condition 1: Ticket > Status | Is | Open
This ensures the trigger only runs on tickets that are currently Open. It prevents the trigger from firing on New tickets (which should become Open first) or tickets already in Pending, Solved, or Closed status.
Condition 2: Ticket > Comment | Is | Public
This condition checks that the update includes a public comment, meaning the agent actually replied to the customer. Without this, the trigger might fire on internal notes or other updates that do not represent agent replies.
Condition 3: Current User | Is | (Agent)
Here is the critical one. This condition ensures the trigger only fires when an agent makes the update, not when a customer replies. Without this condition, you will have a serious problem: when a customer responds to a Pending ticket, the trigger would keep setting it back to Pending instead of letting it become Open.
Let us break down why each condition matters. The Status condition defines which tickets are eligible. The Comment condition ensures there is actual communication happening. The Current User condition prevents the trigger from interfering with customer actions.
Some administrators prefer using "Status | Changed to | Open" instead of "Status | Is | Open." The difference is subtle. "Is" checks the current state, while "Changed to" checks if the status just transitioned. For most use cases, "Is" works fine and is less restrictive.
Step 4: Set the trigger action
Conditions define when the trigger fires. Actions define what happens.
Under Actions, add:
Action: Ticket > Status | Set to | Pending
That is the core action. But you can add more if your workflow needs them:
- Add tags: Tag the ticket with "agent_replied" for reporting
- Remove tags: Clear an "awaiting_agent" tag if you use one
- Notify target: Send a webhook to an external system
- Add comment: Insert an internal note for other agents
Actions execute in the order they appear. If you have multiple actions, drag them into the right sequence.
Before saving, double-check your conditions and actions. One misplaced setting can cause unexpected behavior across your entire ticket workflow.
Step 5: Test and activate your Zendesk trigger when status changed to pending
Never activate a trigger without testing it first. Here is how to verify everything works:
-
Save the trigger as inactive. Click the dropdown next to the save button and select "Create as inactive."
-
Create a test ticket. Submit a ticket as an end-user, then open it as an agent.
-
Submit a public reply. Type a comment and submit it as Open (the default).
-
Check the ticket events. Scroll to the bottom of the ticket and click Events. You should see your trigger listed with a checkmark, indicating it fired successfully.
-
Verify the status changed. The ticket status should now be Pending.
-
Test the negative case. Have someone submit a ticket as an end-user, then reply to it as that end-user. The status should change to Open (not stay Pending), proving the "Current User is Agent" condition is working.
Once you are confident everything works, edit the trigger and activate it. Monitor your tickets for the first few days to catch any edge cases you missed.
Common mistakes and how to avoid them
Even experienced Zendesk administrators make these mistakes. Here is what to watch for:
Mistake 1: Forgetting "Current User is Agent"
This is the most common error. Without this condition, when customers reply to Pending tickets, the status stays Pending instead of becoming Open. Agents never see the update. Tickets languish unnoticed. Always include this condition.
Mistake 2: Using "Status Changed" incorrectly
"Status | Changed to | Open" only fires when a ticket transitions into Open status. If a ticket is already Open and gets a comment, this condition is not met. For most auto-pending use cases, "Status | Is | Open" works better.
Mistake 3: Creating conflicting triggers
If you have multiple triggers that change status, they can conflict. One trigger sets status to Pending, another sets it to something else. Check your trigger list for overlapping conditions. Zendesk processes triggers in the order they appear, so position matters.
Mistake 4: Not testing with different user types
Test as an agent, as an end-user, and as an admin. Each user type can behave differently depending on your permissions settings.
Troubleshooting tip: When a trigger misbehaves, check the ticket Events log. It shows every trigger that fired and whether conditions were met. This is your first stop for debugging.
Advanced variations for your Zendesk trigger when status changed to pending
Once you have the basic trigger working, consider these enhancements:
Conditional auto-pending by ticket type: Add a condition like "Ticket > Type | Is | Question" to only auto-pending certain ticket types. Technical issues might need to stay Open for tracking.
Group-specific triggers: Add "Ticket > Group | Is | [Specific Group]" so only certain teams get auto-pending behavior. Your sales team might want different workflows than your support team.
Business hours only: Add "Ticket > Within business hours? | Is | Yes" to prevent status changes outside working hours. This can help with SLA calculations.
Tag-based workflows: Combine your status trigger with tags. When the trigger fires, add a tag like "pending_sent." Then create a view that shows all tickets with that tag but status Open (indicating the trigger failed or was bypassed).
Messaging channel support: If you use Zendesk Messaging, you can create similar triggers using the Messaging Session State conditions. Set inactive conversations to Pending automatically after a period of inactivity.
Alternative: Automating status management with eesel AI
Triggers work, but they have limitations. They are rule-based, meaning they follow exact conditions you specify. They cannot interpret context or understand conversation nuance.
This is where eesel AI takes a different approach. Instead of configuring triggers, you hire eesel as an AI teammate that learns your workflow.

Here is how it works: eesel connects to your Zendesk instance and reads your past tickets, help center articles, and macros. It learns how your team communicates and what status changes mean in your context. Then it handles tickets autonomously, including status management.
The key difference: eesel reads the actual conversation and decides the appropriate status based on content, not just actions. If an agent asks a question, eesel knows to set Pending. If an agent provides a solution, it might set Solved instead. No trigger configuration required.
You can start with eesel drafting replies for your agents to review, then level up to full autonomy as it proves itself. Our AI Agent handles the entire ticket lifecycle, including intelligent status changes, escalation decisions, and follow-ups.

Pricing starts at $299 per month for the Team plan, which includes up to 3 bots and 1,000 interactions. Unlike per-seat pricing, you pay for what you use, not how many agents you have.
Managing your Zendesk workflow more efficiently
Creating a trigger to auto-set status to Pending is just one piece of an efficient support workflow. Here are a few best practices to consider:
Organize your views: Create a view that shows tickets that have been Pending for more than 48 hours. This helps you identify stale tickets that might need a gentle nudge to the customer.
Set up SLA policies: Configure your SLAs to pause or slow down the clock while tickets are in Pending status. This prevents customer response time from hurting your metrics.
Use On-hold for internal waits: Remember that Pending is for waiting on customers. If you are waiting on a third party (engineering, a vendor, another department), use On-hold status instead. Customers see On-hold as Open, so they know you are still working on it.
Combine triggers with automations: Triggers handle immediate actions. Automations handle time-based follow-ups. Use an automation to send a reminder email to customers who have not responded to a Pending ticket in 72 hours.
The goal is reducing manual work while maintaining visibility into your support queue. A well-configured trigger saves agents time. A well-designed workflow saves the entire team headaches.
