How to use Zendesk automation conditions after hours: Complete guide
Stevia Putri
Last edited February 24, 2026
If you're trying to set up time-based rules in Zendesk, you might have hit a confusing wall. You search for "Zendesk trigger condition hours since status change" but keep finding references to automations, not triggers. Here's the short version: triggers and automations are completely different tools, and "hours since" conditions only work in automations.
This guide will walk you through everything you need to know about Zendesk automation conditions after hours. You'll learn how these time-based rules actually work, how to set them up correctly, and the common pitfalls that trip up even experienced admins. We'll also look at how modern AI tools can complement these automations to create a more intelligent support workflow.
Understanding triggers vs automations in Zendesk
Let's clear up the confusion first. Triggers and automations are both automation tools in Zendesk, but they operate on completely different timelines.
Triggers are event-based. They fire the instant something happens to a ticket. When a ticket's created, updated, or changed in any way, triggers evaluate their conditions immediately and act within seconds. If a customer submits a ticket with "urgent" in the subject, a trigger can immediately assign it to your priority queue and notify a senior agent.
Automations are time-based. They run on a schedule, typically once per hour, and check for conditions that involve the passage of time. This is where "hours since" conditions live. Automations handle those "follow up after X days" scenarios that triggers can't manage.
The key difference? Triggers respond to events. Automations respond to time. If you need something to happen immediately based on a ticket event, use a trigger. If you need something to happen after a certain amount of time's passed, use an automation with "hours since" conditions.
Here's a simple way to think about it: triggers are reactive (something happened, act now), while automations are patient (wait for the right time, then act).
Available "hours since" conditions
Zendesk offers a comprehensive set of time-based conditions you can use in automations. These conditions measure elapsed time from specific ticket events:
Status-based conditions:
- Hours since created
- Hours since open
- Hours since pending
- Hours since on-hold
- Hours since solved
- Hours since status category [category name]
Assignment and update conditions:
- Hours since assigned
- Hours since update
- Hours since requester update
- Hours since assignee update
Task and SLA conditions:
- Hours since due date (for task tickets)
- Hours until due date
- Hours since last SLA breach
- Hours until next SLA breach
One important limitation: there's no "hours since closed" condition. Once a ticket's closed, it becomes a permanent record and can't be modified by automations. This is by design to preserve data integrity.
Business hours vs calendar hours
If you're on a Professional or Enterprise plan, you can configure business hours and holidays in your Zendesk account. This gives you an important choice when setting up time-based conditions.
Calendar hours count every hour that passes, 24/7. If you set an automation to act after 48 hours, it'll fire exactly 48 hours later regardless of weekends or holidays.
Business hours only count the hours within your defined business schedule. If your support team works 9 AM to 5 PM on weekdays, and you set an automation for 24 business hours, it won't fire until three business days have passed.
Which should you use? It depends on your support model. If you promise customers a response within business hours, use business hours for your SLAs and escalation automations. For general housekeeping like closing old tickets, calendar hours usually make more sense.

How Zendesk counts hours: the automation cycle
Understanding the automation cycle is crucial for setting up reliable time-based rules. Here's how it actually works:
Automations run once every hour on all non-closed tickets. They don't run immediately when a condition's met, and they don't necessarily run at the top of the hour. Your automations will start at some point during each hour, maybe five minutes past or thirty-eight minutes past.
The first time an automation runs after a condition's met counts as "zero" hours. Each subsequent hourly run counts as one additional hour. This means if a ticket becomes pending at 9:15 AM and your automation runs at 9:47 AM (32 minutes later), that first run counts as hour zero. The next run at 10:47 AM counts as hour one, and so on.
You can only specify whole hours in conditions, not fractions. This hourly cycle explains why timing can sometimes feel slightly off. If you expect an automation to fire exactly 24 hours after an event, it might actually fire between 24 and 25 hours later depending on when the automation cycle runs.
Each automation can act on a maximum of 1,000 tickets per hour. If you've more than 1,000 tickets meeting your conditions, the remaining tickets wait for the next cycle. For most teams this isn't an issue, but large support operations should keep it in mind.
Setting up your first "hours since" automation
Let's walk through creating a practical automation that solves pending tickets after customers haven't responded for 48 hours. This is one of the most common use cases for time-based conditions.
Step 1: Navigate to Admin Center > Objects and rules > Business rules > Automations
Start by opening your Zendesk Admin Center. Under "Objects and rules," find "Business rules" and then click on "Automations." This shows you a list of all existing automations in your account, including any default ones Zendesk's created.

Step 2: Create new automation and set conditions
Click "Add automation" to create a new one. You'll see two sections: "Meet all of the following conditions" and "Perform these actions." In the conditions section, start building your rule.
For our auto-solve example, add these conditions:
- Ticket: Status category | Is | Pending
- Ticket: Hours since status category pending | Greater than | 48
- Ticket: Tags | Contains none of the following |
auto_solved
The status condition ensures we only look at pending tickets. The hours condition sets our 48-hour threshold. The tag condition's our nullifier, ensuring this automation only runs once per ticket.
Step 3: Configure nullifying conditions
The nullifying condition's what prevents your automation from running repeatedly on the same ticket. Without it, a ticket that meets "Hours since pending greater than 48" would trigger the automation every single hour it remains pending.
The standard pattern's simple:
- Check that a specific tag's NOT present (e.g., "Contains none of the following: auto_solved")
- Add that same tag as an action when the automation fires
Once the tag's added, the ticket no longer meets the conditions, so the automation won't fire again. This pattern's essential for almost every time-based automation you'll create.
Step 4: Define actions
In the "Perform these actions" section, add what you want to happen:
- Ticket: Add tags |
auto_solved - Ticket: Status category | Solved
- Notifications: User email | (requester and CCs) | [Your custom message]
The notification's optional but recommended. Letting customers know their ticket was automatically resolved (and that they can reply to reopen it) provides a better experience than silently closing tickets.

Click "Create automation" and you're done. The automation will start running on its next hourly cycle.
Common use cases for Zendesk automation conditions after hours
Time-based automations are incredibly versatile. Here are the most common ways support teams use them:
Auto-solving pending tickets. When you've asked a customer for information and they don't respond, automatically solve the ticket after 48-72 hours. This keeps your queue clean while allowing customers to reopen by replying.
Sending reminder emails. Before auto-solving, send a friendly reminder at 24 hours: "Just checking in to see if you still need help with this. We'll automatically close this ticket in 24 hours if we don't hear back."
Escalating stale tickets. If a ticket sits open (not pending) for 4-8 hours depending on priority, automatically bump it to a senior agent or notify a manager. This ensures nothing falls through the cracks.
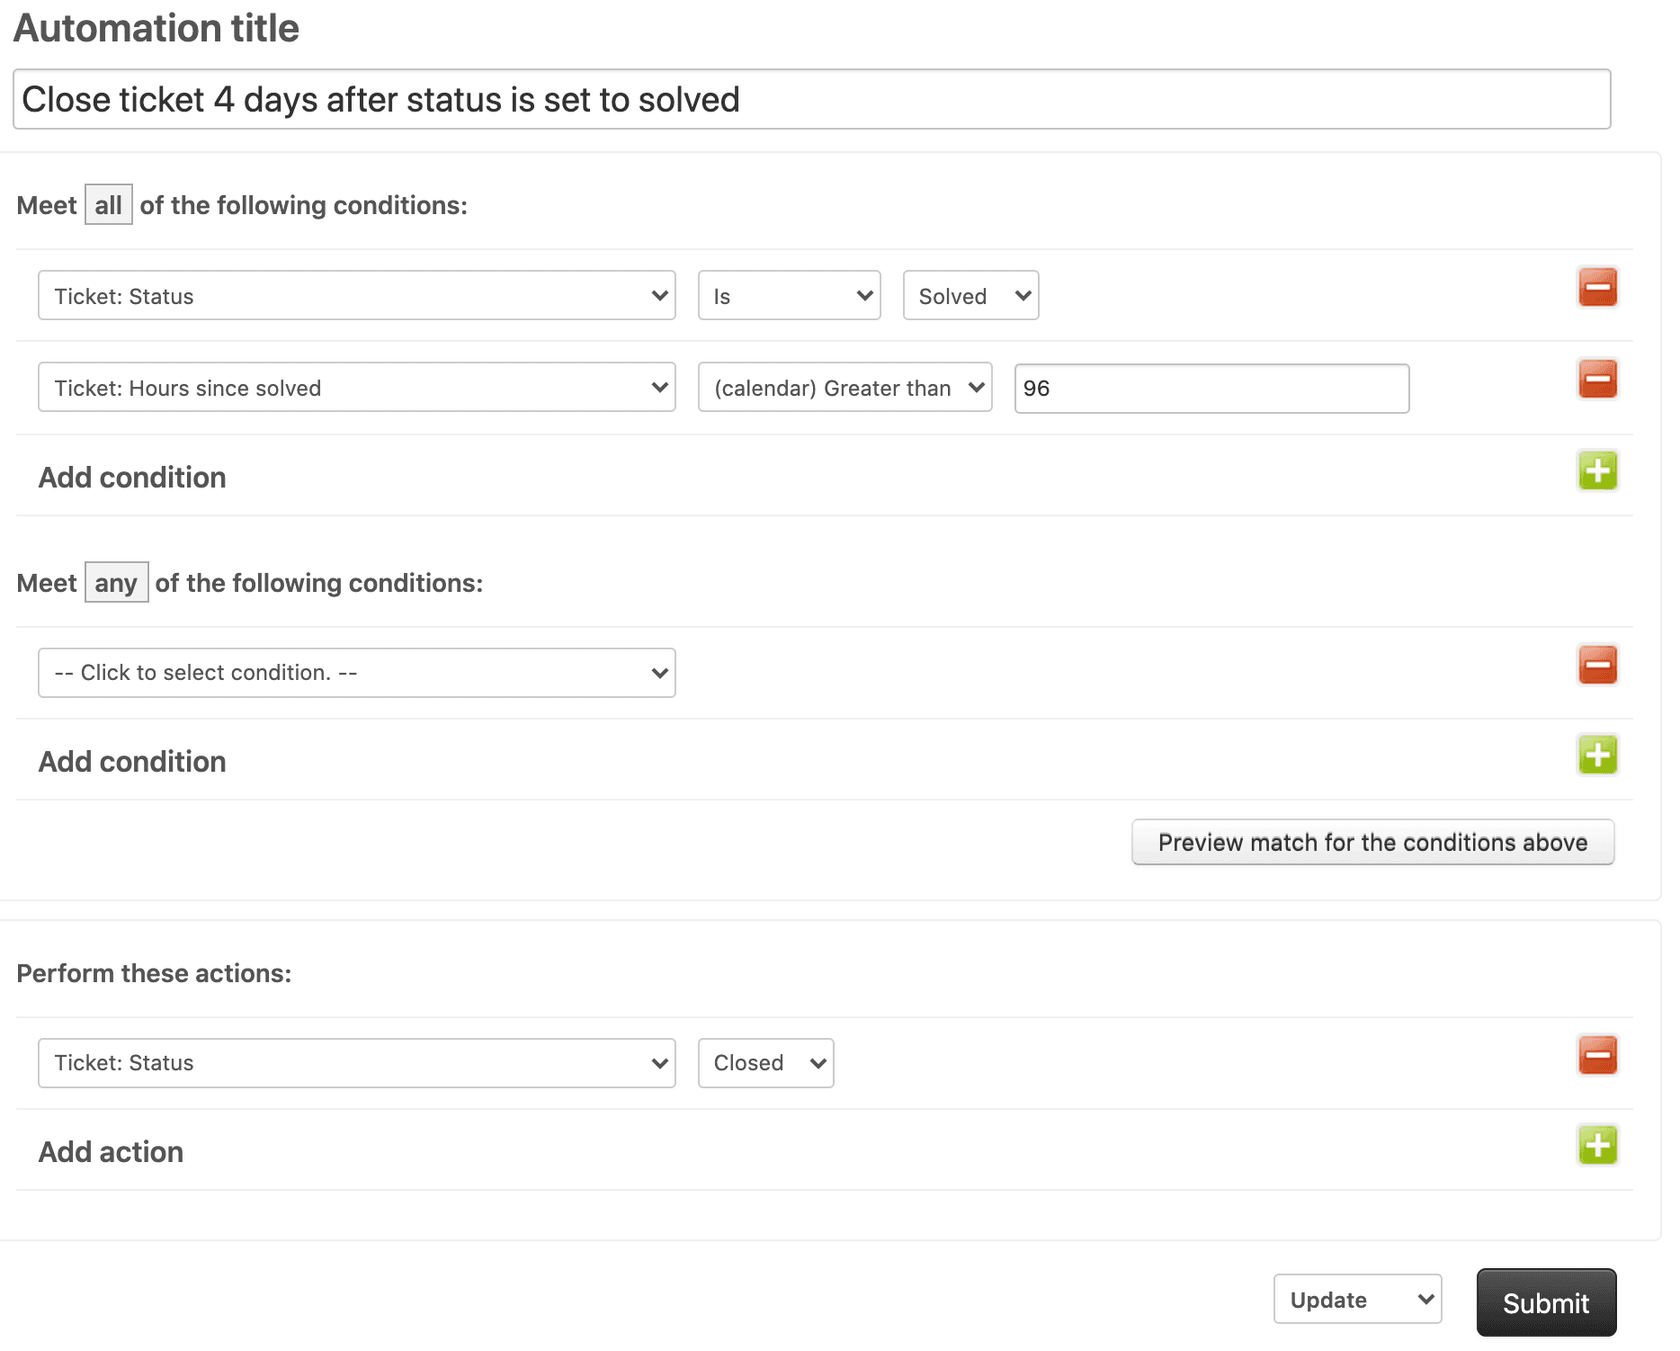
Closing solved tickets. A common automation configuration closes solved tickets after 96 hours (4 days). You can customize this timing or add additional actions like sending satisfaction surveys before closure.
Following up on on-hold tickets. When you're waiting for a third party, tickets often get forgotten. Set an automation to notify the assignee after 48 hours of on-hold status.
SLA breach warnings. Use "Hours until next SLA breach" conditions to send warnings to agents when tickets are approaching their SLA limits, giving them time to respond before breaching.
Best practices and common pitfalls
After setting up hundreds of automations, experienced Zendesk admins have learned a few lessons the hard way. Here's what to watch out for.
Use "Greater than" not "Is"
This is the most common mistake with time-based conditions. When you use "Hours since solved is 24," you're asking Zendesk to catch that ticket at exactly the 24-hour mark. But because automations run hourly (and not always at predictable times), that exact window's easy to miss.
If the automation runs at 23.5 hours, the condition isn't met. If it then runs at 24.5 hours, the "is 24" condition's no longer true. The ticket'll never trigger the automation.
"Greater than 24" solves this. It evaluates to true for any ticket that's been solved for 24 hours or more, giving your automation a wide window to catch it on the next hourly run.
Always include nullifying conditions
Without a nullifying condition, your automation will run repeatedly on the same ticket. Imagine an automation that adds a tag and notifies a manager when "Hours since open greater than 8." Without a nullifier, that manager gets notified every single hour until the ticket status changes.
The tag pattern (check for absence, then add as action) is the most reliable nullifier. Tags persist on tickets even when status changes, so your automation only runs once.
Understanding the 1,000 ticket limit
Zendesk automations can only process 1,000 tickets per automation cycle. If you have more than 1,000 tickets meeting your conditions, the remaining tickets wait for the next hourly cycle.
This rarely affects small teams, but large support operations should keep this in mind. The 1,000-ticket limit is per automation, not per account, so having multiple automations can help distribute the load.
Business hours vs calendar hours
Be explicit about which you're using. If you set "Hours since pending greater than 24" and you're using business hours, that actually means three 8-hour business days, not one calendar day. This can confuse both agents and customers if expectations aren't aligned.
Document which automations use business hours vs calendar hours, particularly if you've different schedules for different brands or teams.
Other pitfalls to avoid
Closed tickets cannot be updated. Automations don't run on closed tickets. If your conditions would match a closed ticket, the automation simply won't act on it.
Only whole hours are supported. If you set "Hours since pending is 1.5," Zendesk interprets this as 1 hour. Work within the whole-hour constraint.
Time-based conditions have placement restrictions. They can only be used in the "Meet all of the following conditions" section, not in "Meet any of these conditions."
Troubleshooting when automations don't work
When an automation isn't working as expected, here's how to diagnose the issue:
Check if conditions are actually met. Open a ticket that should've triggered the automation and verify every condition manually. Is the status what you expect? Has enough time actually passed? Are there tags present that might be blocking it?
Verify nullifying conditions aren't blocking execution. If you added a nullifying tag but the automation never ran, check if that tag was added through some other means (another automation, a trigger, or manually).
Check the ticket's events. Open the ticket that should have triggered the automation and view its event log. You can see exactly when the ticket was updated and whether any automation actions were applied. This helps identify if the automation is running but not finding matching tickets.
Watch out for these common mistakes:
- Using "is" instead of "greater than" as the operator
- Missing or incorrect nullifying conditions
- The ticket being closed, which prevents any automation from updating it
- Decimal hours (round down to whole numbers)
- Time-based conditions in the wrong section
Enhancing Zendesk workflows with eesel AI
Zendesk's native automations are powerful for time-based actions, but they work best when tickets are already properly categorized and routed. That's where we can help.
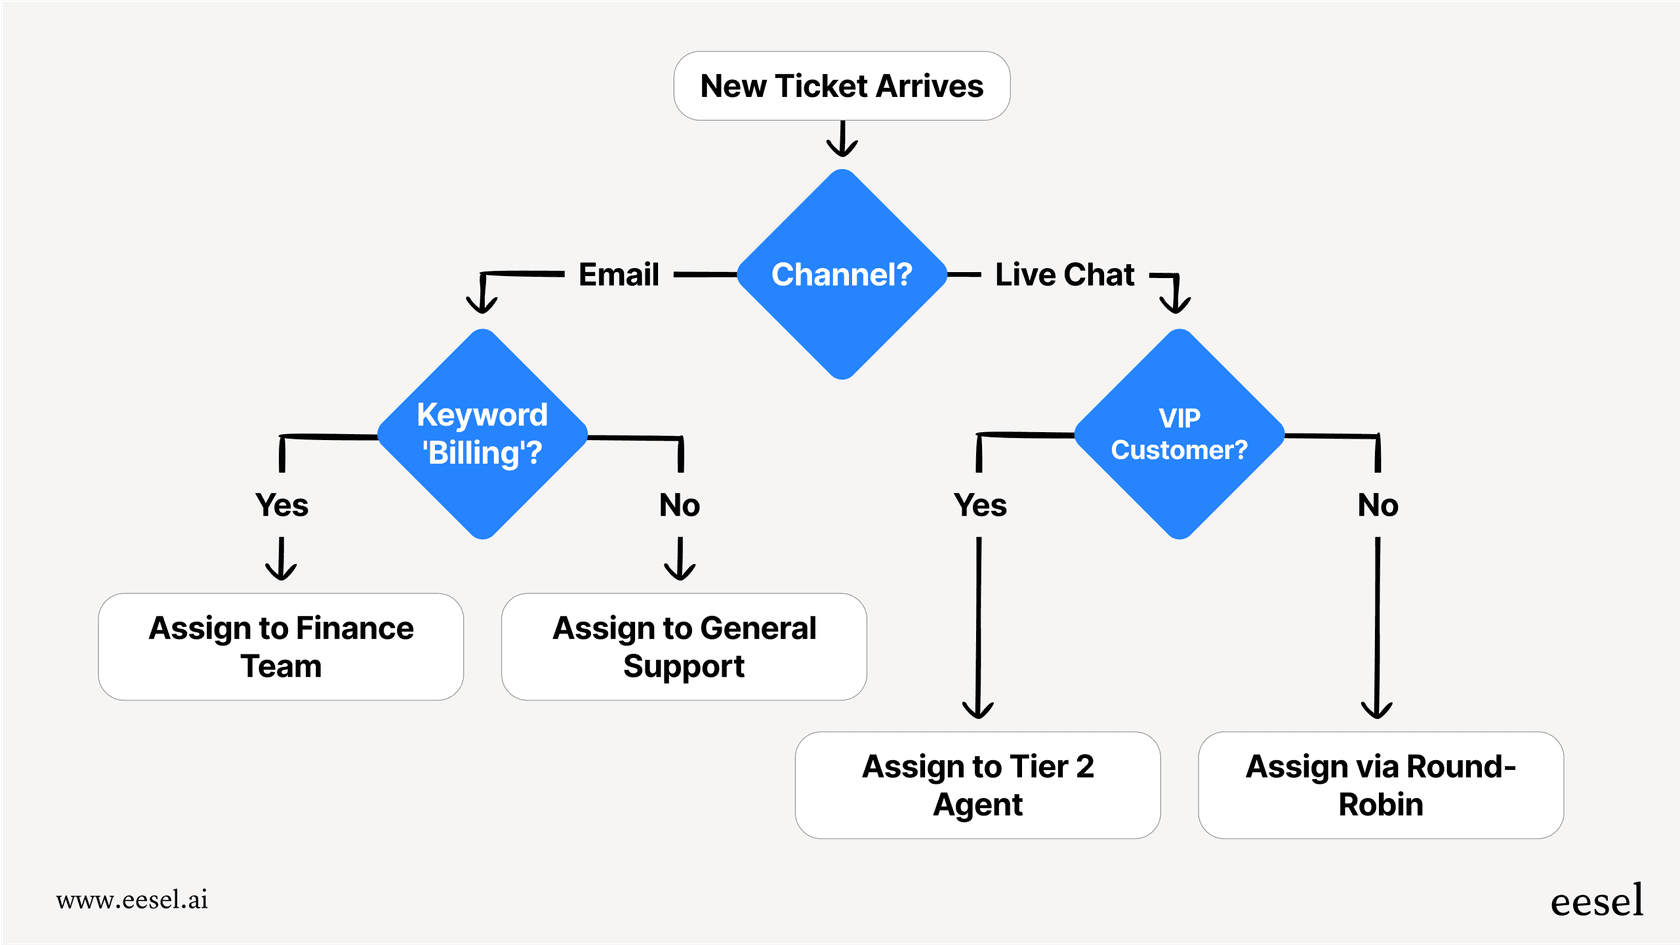
At eesel AI, we've built an AI teammate that integrates directly with Zendesk to handle the intelligence layer before your automations kick in. Instead of relying solely on time-based rules, our AI Agent can analyze ticket intent, sentiment, and urgency to make smart routing decisions immediately.
Here's how it works together: our AI Triage reads incoming tickets and routes them to the right team based on what the customer actually needs. Then your time-based automations handle the follow-ups, reminders, and escalations according to your schedule. The result is a workflow where tickets reach the right people faster, and your automations handle the timing.
For example, instead of just escalating any ticket that's been open for 4 hours, you could have our AI Triage identify high-priority issues immediately and route them to senior agents, while your automations handle the standard follow-up sequences for everything else.
If you're looking to add intelligence to your Zendesk workflows beyond what time-based rules can provide, try eesel AI and see how it complements your existing automations.
Start automating your Zendesk workflow today
Setting up Zendesk automation conditions after hours is one of the most effective ways to keep your support queue manageable without constant manual intervention. By understanding how the hourly cycle works, using "greater than" instead of "is," and always including nullifying conditions, you'll build reliable automations that run exactly when you need them.
Start with a simple automation, like auto-solving pending tickets after 48 hours. Once you're comfortable with the mechanics, expand to more sophisticated workflows like escalation rules and SLA warnings. Remember that automations work best when combined with good ticket categorization, whether that's through careful trigger setup or intelligent AI triage.
The key is to start small, test thoroughly, and build up your automation library over time. Your future self (and your support team) will thank you.
Ready to enhance your Zendesk setup with intelligent automation? Try eesel AI free and see how AI-powered triage and response can work alongside your time-based automations. Or book a demo to see it in action with your specific workflows.
