Your practical Zendesk setup guide for a seamless rollout
Kenneth Pangan
Stanley Nicholas
Last edited January 12, 2026
So, you’ve decided it’s time to graduate from a shared inbox and get serious about customer service with Zendesk. That’s a great call. Getting started with a robust platform like Zendesk is an exciting step, and a thoughtful setup is what ensures you get the most out of this powerful platform for your support operation.
This isn’t just another checklist. We’ve designed this practical Zendesk setup guide to walk you through the big decisions you’ll face, from the absolute basics to smart automation. We'll cover the core pieces and show you how to build a support system that can grow with you.
What is Zendesk?
At its heart, Zendesk is a mature, industry-leading customer service platform that stops customer conversations from getting lost. It’s a ticketing system that pulls in requests from email, chat, phone, and social media, putting them all into one organized workspace for your support agents.
But it's more than just a ticketing tool. The full Zendesk Suite gives you a way to build a knowledge base (what they call a Help Center), create community forums, and dig into your support data with reports. The main goal is to bring order to your support channels and give your team a structured, reliable way to track, prioritize, and solve customer issues.
Phase 1: Getting the basics right
Before you can explore advanced automation, you need a solid foundation. This first phase is all about deciding who does what, how your team is organized, and which channels customers can use to get in touch. Setting this up correctly from the start ensures a smooth transition for your team.
Your team: Users, groups, and roles
Your support team is the core of your Zendesk account. The first step is to add your agents and admins, making sure each person has their own login so you can see who did what. From there, you'll organize them into Groups. This is key for automatically sending tickets to the right people. For example, you could have groups like "Frontline Support," "Billing Questions," or "Tech Escalations."

Roles then determine what each user is allowed to do. Zendesk comes with standard roles like Agent and Admin, but if you're on an Enterprise plan, you can create custom roles for more specific permissions to match your team size.
Connecting your customer channels
How are your customers going to reach you? Zendesk can pull conversations from various sources. Most people start with email. You’ll need to connect your support addresses (like "support@yourcompany.com") and set up forwarding so new emails automatically become tickets.
Beyond email, you should think about other channels:
-
Web Widget: A handy contact form or chat bubble you can pop onto your website.
-
Social Media: You can link your company's Facebook and X (formerly Twitter) accounts to handle DMs and public posts as tickets.
-
Voice: If you have phone support, Zendesk Talk can be integrated to manage calls seamlessly.
Defining your hours of operation
Unless you have a team working 24/7, you'll want to set up your business hours and holidays. This lets customers know when you're around, and it helps control your automations and Service Level Agreements (SLAs). For instance, with business hours set, the clock on a ticket that arrives late Friday won’t start ticking until Monday morning, giving your team a fair opportunity to hit their response time goals.
While Zendesk’s built-in channels provide a robust starting point, you can also connect knowledge from other tools. An AI tool like eesel AI can complement your Zendesk instance by learning from your company knowledge, no matter where it lives. This allows you to provide consistent support across every channel, right from the beginning.
Phase 2: Making Zendesk do the heavy lifting
Okay, your foundation is in place. Now it's time to make Zendesk work for you. This part is all about setting up business rules to handle repetitive tasks, send tickets to the right agents, and make sure customers get timely replies. This is where Zendesk's scalability really shines.
Understanding triggers vs. automations
Zendesk has two main types of rules: triggers and automations. Knowing how to use each will help you build a more efficient workflow:
-
Triggers are based on events and happen immediately after a ticket is created or updated. A classic example is a trigger that instantly sends a confirmation to a customer. Another could be one that assigns a high priority if a ticket contains the word "urgent."
-
Automations are based on time and run on a schedule (roughly every hour). You use these for things that depend on time passing, like sending a follow-up on a pending ticket or automatically closing a solved ticket after a set period.

Zendesk provides powerful tools here; taking a moment to test your triggers ensures they work exactly as intended for your specific workflow.
Establishing service level agreements (SLAs)
SLAs are essentially the service promises you make to your customers. In Zendesk, you can set up SLA policies that apply to tickets based on their priority, the channel they came from, or customer type. For example, you could set a one-hour first-reply-time SLA for high-priority tickets. These policies are a huge help for agents, as they make it clear which tickets should be prioritized.
Optimizing ticket routing
As you grow, manual routing becomes a task you'll want to automate. Zendesk's triggers are a great way to handle this through keyword-based rules. These rules allow you to maintain control over how tickets move through your system.
While many teams start with manual rules, some look for additional ways to enhance this as they scale. This is where complementary AI tools can be considered. For example, eesel AI’s Triage can work alongside your Zendesk setup, learning from your past tickets to assist with intent and language detection. Instead of relying solely on "if-then" rules, this AI option can help intelligently route tickets and add tags based on your team's history. It's a way to add an extra layer of intelligence to your routing setup.

Phase 3: Helping customers help themselves
The last major piece of the puzzle is giving customers the power to find their own answers. A good self-service setup can deflect many common questions, which frees up your agents to focus on more complex issues. This involves building out your knowledge base and using AI to make information accessible.
Setting up your help center
Your Zendesk Help Center is a professional, public-facing knowledge base where you can publish articles, how-to guides, and FAQs. The structure is logical and easy to manage:
-
Categories: Your main buckets, like "Getting Started" or "Billing & Accounts."
-
Sections: Sub-folders inside categories, like "Creating Your Account."
-
Articles: The actual content that answers the questions.
Building a comprehensive knowledge base is an investment that pays off. A good way to start is to look at your most frequent tickets and write articles that address those common inquiries first.
Using Zendesk's native AI
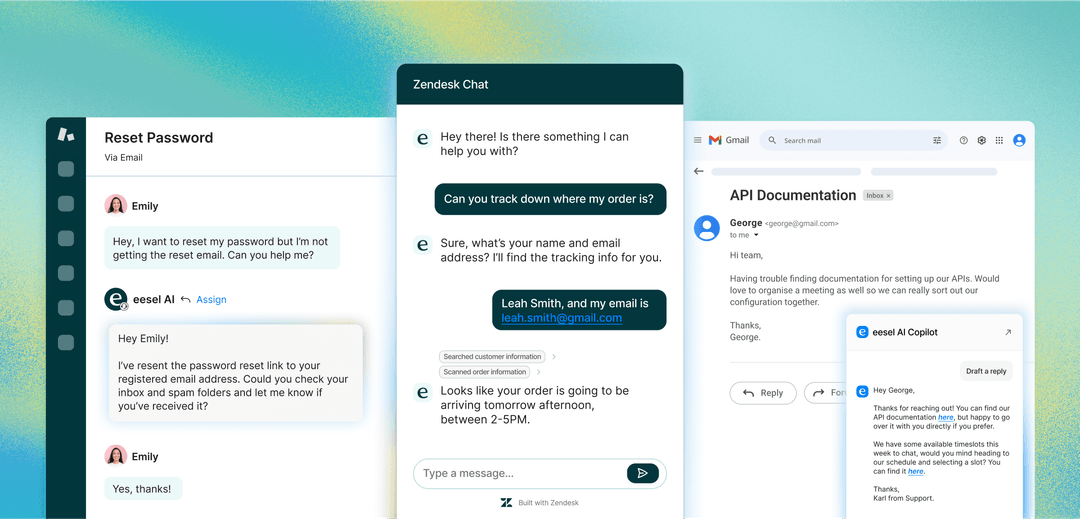
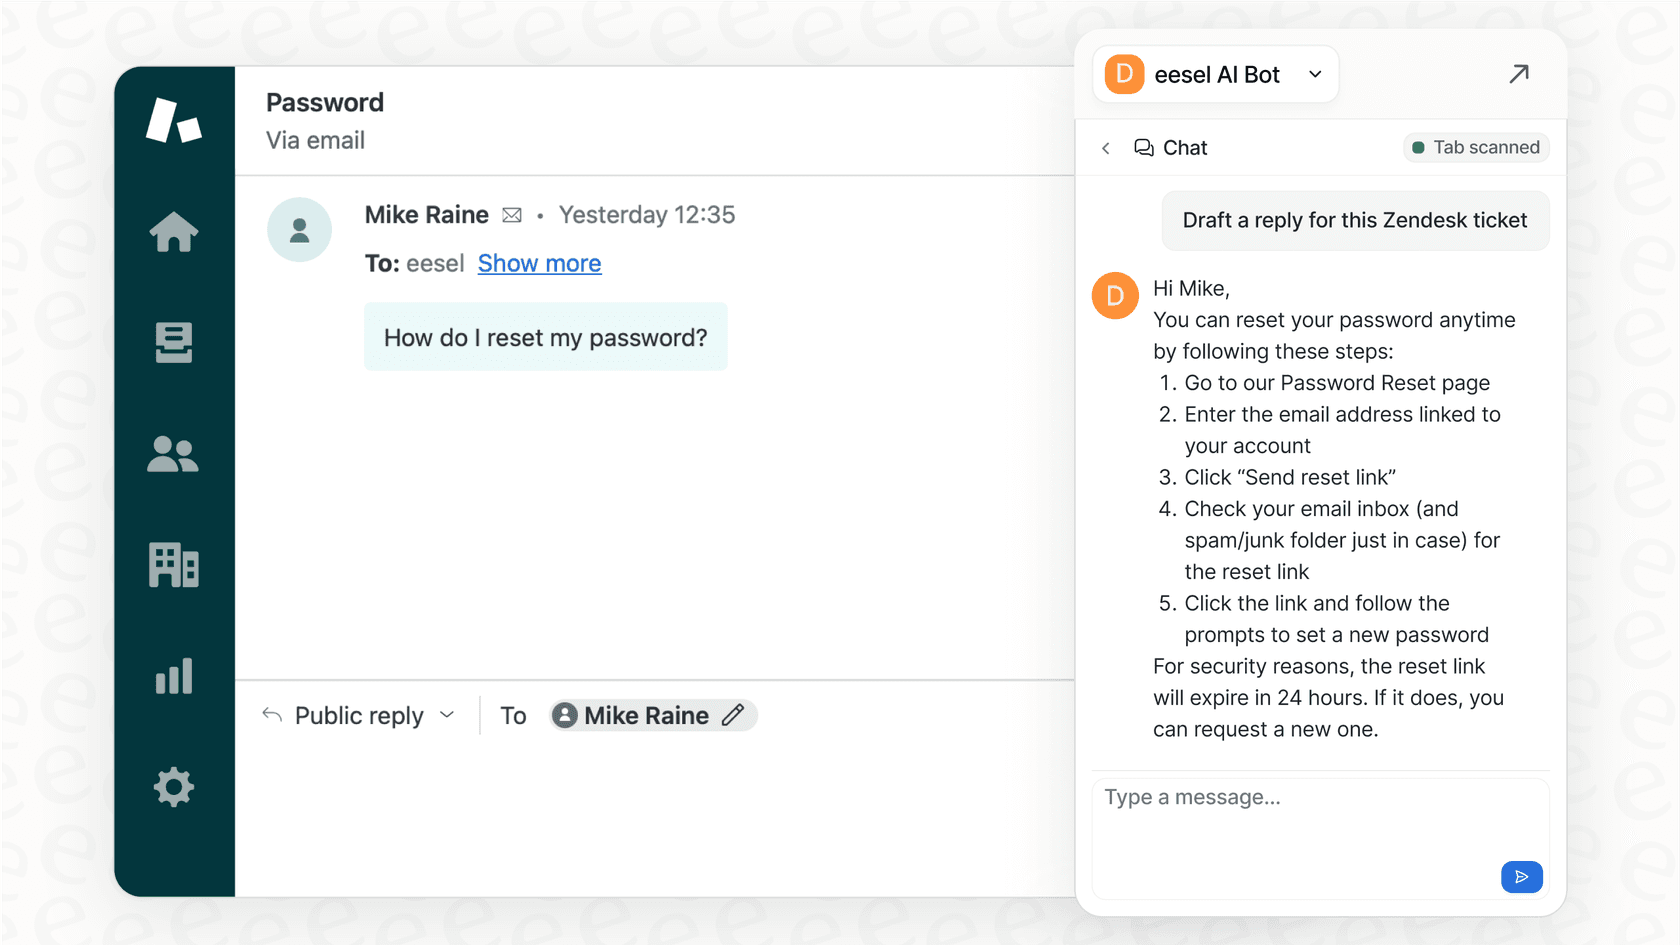
Zendesk offers robust AI features built directly into the platform. These include bots that can suggest Help Center articles to customers in chat, which can help resolve issues before a ticket is created. For agents, the AI can suggest pre-written responses (macros) or summarize conversations.
These tools are designed to work seamlessly with the knowledge base you build. When you have a well-structured set of articles, Zendesk's native AI can guide customers to the right answers efficiently.
A complementary approach: A unified AI platform
For teams looking for even more ways to leverage their company knowledge, a third-party AI platform like eesel AI can be a helpful addition.
eesel AI is designed to work within the Zendesk ecosystem and can connect to various places where your knowledge lives:
-
Past Tickets: It can analyze your previous conversations to learn how your team solves problems.
-
Internal Docs: It can connect to knowledge in Confluence, Google Docs, and Notion.
-
Automated Article Generation: eesel AI can even draft new knowledge base articles for you based on resolved tickets, helping you expand your Help Center efficiently.
With eesel AI's simulation mode, you can see how it would have responded to past tickets, allowing you to test additional automation layers with confidence.
Understanding Zendesk pricing plans
Zendesk offers tiered plans to match different team sizes and needs. Whether you need standard ticketing or advanced SLAs, there is a plan that fits. Here’s a breakdown of their current service plans.
| Feature | Support Team | Suite Team | Suite Professional | Suite Enterprise |
|---|---|---|---|---|
| Price/Agent/Month | $19 | $55 | $115 | $169 |
| Core Ticketing | Yes | Yes | Yes | Yes |
| Messaging & Live Chat | No | Yes | Yes | Yes |
| Help Center | No (Add-on) | Yes (1) | Yes (up to 5) | Yes (up to 300) |
| SLA Management | No | No | Yes | Yes |
| CSAT Surveys | No | No | Yes | Yes |
| AI Agents (Essential) | No (Add-on) | Yes | Yes | Yes |
| Side Conversations | No | No | Yes | Yes |
| Custom Agent Roles | No | No | No | Yes |
| Sandbox Environment | No | No | Add-on | Yes |
Note: This pricing is based on annual billing as of 2026. For the latest info, it's always best to check the official Zendesk pricing page.
Your Zendesk setup guide: Build a foundation, then automate smartly
Setting up Zendesk properly is about making strategic choices that will define your customer experience. By starting with a solid foundation, building thoughtful workflows, and empowering customers through self-service, you’ll create a professional system that makes support easier for everyone.
Zendesk provides an impressive ecosystem and marketplace to help you succeed. While Zendesk's native tools are incredibly capable, you can always explore complementary options as your needs evolve. With a tool like eesel AI, you can add an extra layer of automation to your frontline support and assist your agents by unifying your company knowledge.
Ready to see how AI could fit into your Zendesk setup? You can try eesel AI for free.
Frequently asked questions
Begin by adding your agents and organizing them into groups and roles. Next, connect essential customer channels like email and web widgets to start pulling in conversations. These foundational steps ensure your team is ready to receive and manage tickets effectively.
Organize your team by adding users and assigning them to relevant Groups (e.g., "Frontline Support," "Billing"). Define Roles to control what each user can do within Zendesk, limiting the number of admins for security and control.
Triggers execute immediately after an event (like a ticket creation) to perform actions such as sending confirmations or setting priority. Automations, however, run on a time-based schedule (hourly) for tasks like following up on pending tickets or automatically closing solved ones.
Defining business hours ensures customers know when to expect responses and accurately controls SLA timers, preventing late penalties for off-hours tickets. SLAs themselves establish clear service promises, helping agents prioritize and meet response time goals.
Start by identifying your most common customer questions from past tickets and create clear, concise articles to answer them. Structure your Help Center logically with categories and sections to make content easy for customers to find.
While Zendesk offers native AI, consider a unified AI platform like eesel AI that learns from all your company knowledge, including past tickets and internal docs. This enables intelligent ticket routing, priority setting, and automated article generation without constant manual rule creation.
Share this article

Article by
Kenneth Pangan
Writer and marketer for over ten years, Kenneth Pangan splits his time between history, politics, and art with plenty of interruptions from his dogs demanding attention.