If you're managing customer support across multiple teams or companies, you've probably run into situations where tickets need to be shared. Maybe you're a retailer working with a manufacturer on product issues. Or perhaps you're an agency handling support for multiple clients who each have their own Zendesk accounts.
This is where Zendesk organization ticket sharing comes in. But here's the thing: when people search for this topic, they're usually looking for one of two different features. Let's break it down.
Ticket sharing between accounts lets you collaborate with external Zendesk accounts. Think of it as creating a bridge between two separate help desks. Shared organizations, on the other hand, allows users within the same company to see each other's tickets. It's about internal visibility, not external collaboration.
Both features solve real problems, but they work differently. This guide walks you through setting up each one, when to use them, and what to watch out for.
What you'll need
Before diving in, make sure you've got:
- Administrator access to your Zendesk account (agents can't set up sharing agreements)
- Professional or Enterprise plan for ticket sharing between accounts (Team plans don't support this)
- Enterprise plan if you want to automate sharing with triggers
- Partner contact at the external Zendesk account (for cross-account sharing)
If you're on a Team plan, you can still use shared organizations for internal visibility, but cross-account sharing won't be available. Check Zendesk's pricing and plans to compare features across different tiers.
Setting up ticket sharing between Zendesk accounts
Let's start with the more complex scenario: sharing tickets with another Zendesk account entirely. This is useful when you need to collaborate with a partner company, vendor, or client who also uses Zendesk.
Step 1: Create a sharing agreement
First, you'll need to establish a formal sharing agreement with the other account. This isn't just a setting you toggle on; it's a two-way handshake that requires both parties to agree.
Navigate to Admin Center > Channels > Ticket sharing. From here, you can send a sharing agreement invitation to another Zendesk subdomain. You'll need the exact subdomain of the account you want to share with (the part before ".zendesk.com" in their URL).
Here's the important part: sharing agreements are one-way. When you send an agreement, you're setting up the ability for your account to share tickets to their account. If they want to share tickets back to you, they'll need to send a separate agreement from their side.
Once you send the agreement, the receiving admin gets a notification to accept or decline. You can check the status anytime in your sharing agreements list (pending, accepted, declined, or inactive).

Step 2: Configure sharing permissions
After the agreement is accepted, you need to decide what actually syncs between accounts. Not everything transfers automatically, and you have control over what the receiving account can see and do.
The key permissions to configure:
- Comment syncing whether public and private comments flow between accounts
- Status syncing if ticket status changes (Open, Pending, Solved) stay in sync
- Field syncing which custom fields transfer with the ticket
Be thoughtful here. If you're sharing with a client, you'll probably want to limit private comments so your internal notes don't become visible to them. On the flip side, if you're collaborating closely with a partner, full sync might make sense.
You can set different permissions for each sharing agreement, so your retail partner might get different access than your manufacturing vendor.
Step 3: Share tickets manually
With the agreement in place, agents can now share individual tickets. Here's how it works:
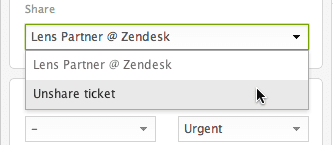
Open any ticket and look for the Share ticket with dropdown in the ticket properties panel (right sidebar). Select the partner account from the list, then submit the ticket update.
Once shared, the ticket gets an indicator below the title showing it's been shared. "Outbound" means you shared it to another account. If you're on the receiving end, it shows as "inbound."
The receiving account gets a copy of the ticket in their queue. Depending on your sync settings, comments and status updates can flow back and forth. You'll see notifications in the ticket's event history when updates happen through sharing.
To unshare a ticket, simply select Unshare from the same dropdown. But heads up: unsharing doesn't delete the ticket from the receiver's account. It becomes an "orphan" ticket that they'll need to manage separately. Read more about sharing and unsharing tickets in Zendesk's documentation.
Automating ticket sharing with business rules
Manually sharing tickets works fine for occasional collaboration, but what if you need to route hundreds of tickets automatically? That's where business rules come in, though there's a catch: you'll need an Enterprise plan. See Zendesk's guide on using business rules to share tickets for more details.
Setting up automatic sharing with triggers
Triggers in Zendesk are event-based actions ("when X happens, do Y"). You can create triggers that automatically share tickets based on specific conditions.
For example, let's say you want all tickets tagged "warranty_claim" to automatically share with your manufacturing partner. You'd create a trigger with:
- Condition: Ticket is created + Tag contains "warranty_claim"
- Action: Share ticket with [Partner Subdomain]
You can get more sophisticated with multiple conditions. Maybe you only want to auto-share tickets from Enterprise customers, or tickets created during business hours, or tickets with specific product categories.
Creating views for shared tickets
Once you have sharing set up (manual or automated), you'll want to track what's being shared. Create dedicated views to monitor:
- All tickets shared with a specific partner
- All tickets received from partners
- Tickets shared in the last 24 hours
- Orphaned tickets (tickets that were unshared)
Use the "Received from" and "Sent to" conditions in view filters to organize shared tickets.
Setting up shared organizations for internal visibility
Now let's look at the other type of "sharing" allowing users within the same organization to see each other's tickets. This is completely different from cross-account sharing and is actually more commonly what people need.
Step 1: Create and configure organizations
Organizations in Zendesk are collections of users, typically representing companies or departments. Start by navigating to Admin Center > People > Organizations. Learn more about organizations and groups in Zendesk.
Create a new organization and give it a clear name. The key configuration here is adding email domains. When you add a domain like "@yourcompany.com," any new user who submits a ticket with that email address gets automatically added to the organization.
You can also add users manually or through bulk import if you have a CSV file. On Professional and Enterprise plans, users can belong to up to 300 organizations simultaneously, which is useful for complex B2B scenarios where a single contact works with multiple departments.

Step 2: Enable organization sharing
Here's where it gets interesting. Edit your organization and look for the checkbox labeled "Users can view all tickets in this organization." Enable this, and suddenly every user in that organization can see tickets submitted by their colleagues.
Why would you want this? A few scenarios:
- Enterprise B2B support: Your client's employees can see that someone else already reported the outage, preventing duplicate tickets
- Internal help desks: Employees can track IT requests submitted by their team members
- Family accounts: In education or consumer scenarios, parents can see tickets submitted by their children
Users need to be signed into Zendesk (or your Help Center) to see shared tickets. The shared view typically appears in their ticket history or a dedicated organization view. For more on organizing tickets and users, see Zendesk's tutorial on ticket organization.
Step 3: Map groups to organizations
For a complete workflow, connect your organizations to agent groups. This is called group mapping, and it automatically routes tickets from specific organizations to the right support team.
For example, tickets from your "Enterprise Clients" organization might automatically assign to your "Premium Support" group, while "Basic Plan" customers go to "General Support."
You can also use organizations in triggers to apply tags, set priorities, or route based on organization-specific business rules.
Use cases and best practices
When should you actually use these features? Here are the most common scenarios:
External collaboration (ticket sharing between accounts):
- Retailers sharing warranty claims with manufacturers
- Agencies collaborating with client support teams
- White-label support where the front-line team escalates to the product team
- Partner ecosystems where multiple companies support the same customer
Internal visibility (shared organizations):
- B2B companies supporting enterprise clients with multiple users
- Internal IT help desks where employees should see team requests
- Educational institutions where administrators track student issues
- Family plans or group accounts in consumer businesses
What to watch out for:
- Security: Be careful about what syncs to external accounts. Private comments with sensitive data should usually stay internal.
- Orphan tickets: When you unshare, the receiver keeps their copy. They have to manage it out of their queue manually.
- Plan limitations: Don't promise automated sharing to stakeholders if you're on Professional (it requires Enterprise).
- User confusion: Shared organization users sometimes don't realize others can see their tickets. Set clear expectations.
Limitations and plan requirements
Here's what's available on each plan:
| Feature | Team | Growth | Professional | Enterprise |
|---|---|---|---|---|
| Shared organizations | ✅ | ✅ | ✅ | ✅ |
| Manual ticket sharing | ❌ | ❌ | ✅ | ✅ |
| Auto-sharing via triggers | ❌ | ❌ | ❌ | ✅ |
| Multiple organizations per user | ❌ | ❌ | ✅ (up to 300) | ✅ (up to 300) |
| Sharing agreements API | ❌ | ❌ | ✅ | ✅ |
Other limitations to know:
- Sharing agreements are admin-only to set up (agents can't create them)
- Not all ticket fields sync between accounts (custom fields depend on configuration)
- Unsharing creates orphans that clutter the receiver's queue
- You can't selectively share individual comments; it's all-or-nothing based on permissions
Enhancing Zendesk with AI-powered support
Ticket sharing and organization management solve collaboration problems, but they don't address the underlying volume challenge. Every shared ticket still needs to be worked by a human agent. That's where AI comes in.
At eesel AI, we approach this differently. Instead of just routing tickets between teams, we help you resolve them automatically. Our AI Agent for Zendesk learns from your past tickets, help center articles, and macros to handle frontline support autonomously.

Here's how it works: you connect eesel AI to your Zendesk account, and it immediately starts learning your business. You can run simulations on historical tickets to see how it would perform before going live. Start with eesel drafting replies for review, then level up to full autonomy as it proves itself.
The key difference? Ticket sharing moves tickets around. AI actually resolves them. Mature deployments using eesel AI achieve up to 81% autonomous resolution, with a typical payback period under two months.
We also offer AI Copilot for teams that want agent assistance without full automation, and AI Triage to automatically tag, route, and prioritize tickets before they even reach a human.

If you're already investing in Zendesk's collaboration features, adding AI is the logical next step. You've organized your teams now let AI handle the routine work so those teams can focus on what actually requires human judgment.
Ready to see how AI can transform your Zendesk workflow? eesel AI's Zendesk integration makes it easy to get started. Try eesel AI free or book a demo to see it in action on your own tickets.
