How to create Zendesk pending reminder automations in 2026
Stevia Putri
Last edited February 24, 2026
Managing pending tickets is one of those tasks that quietly eats up agent time. You have probably seen it: tickets sitting in "Pending" status, waiting for a customer response that never comes. Agents waste time manually checking these tickets, sending "just checking in" emails, and eventually closing them out.
The good news? You can automate this entire workflow in Zendesk. Using a simple pattern called "bump-bump-solve," you can set up automations that send reminder emails at specific intervals and eventually close tickets automatically if customers do not respond.
This guide walks you through the complete setup. We'll cover everything from understanding the difference between triggers and automations to building your first reminder workflow. And if you're looking to take this further, we'll also look at how eesel AI can enhance these automations with intelligent responses.

What you'll need to get started
Before diving into the setup, make sure you have the basics covered:
- A Zendesk plan that includes automations. Automations are available on Support Team plans and above, as well as all Suite plans. If you're on a basic plan, you may need to upgrade.
- Administrator access. You'll need admin rights to access the Admin Center and create business rules.
- A clear follow-up schedule. Decide how long you want to wait before sending reminders. Common patterns are 24 hours for the first reminder and 72 hours before solving.
You can check your current plan and upgrade options on the Zendesk pricing page.
Triggers vs. automations: Understanding the difference
One of the most common mistakes when setting up reminders is using the wrong type of business rule. Zendesk has two main tools for automating ticket actions: triggers and automations. They sound similar, but they work very differently.
Triggers are event-based. They fire immediately when something happens to a ticket, like when it's created, updated, or assigned. For example, a trigger might notify a manager the moment a high-priority ticket comes in.
Automations are time-based. They run on a schedule (once per hour) and check if tickets meet specific time-based conditions. This makes them perfect for reminders, because you want to wait a certain amount of time before taking action.
Here is a quick comparison:
| Feature | Triggers | Automations |
|---|---|---|
| When they run | Immediately on ticket events | Once per hour on a schedule |
| Best for | Instant actions (notifications, routing) | Time-based actions (reminders, escalations) |
| Example | Assign new tickets to a group | Send reminder after 24 hours pending |
For pending reminders, you want automations because you need to wait for time to pass. You can't send a reminder the moment a ticket goes pending. You need to wait 24 hours (or whatever interval you choose) before nudging the customer.
The bump-bump-solve workflow explained
The "bump-bump-solve" pattern is Zendesk's recommended approach for managing pending tickets. It is a three-step process that gives customers multiple chances to respond before automatically closing the ticket.
Here is how it works:
- First bump: Send a friendly reminder after the ticket has been pending for a set time (typically 24-48 hours).
- Second bump: Send a final reminder if the customer still has not responded (typically 48-72 hours after the first bump).
- Solve: Automatically mark the ticket as solved after a final waiting period (typically 72+ hours total), with a message explaining how to reopen if needed.
The benefits are clear. Your agents no longer waste time on manual follow-ups. Your ticket queue stays clean. And customers get consistent, professional communication without falling through the cracks.
Zendesk's official documentation recommends this pattern, and it is the same approach we use with our own eesel AI automations.
Step 1: Create the first reminder automation
Let's build the first automation that sends an initial reminder to customers.
First, navigate to Admin Center > Objects and rules > Business rules > Automations. Click Add automation to create a new one.
Give your automation a clear name like "Send pending reminder after 24 hours."
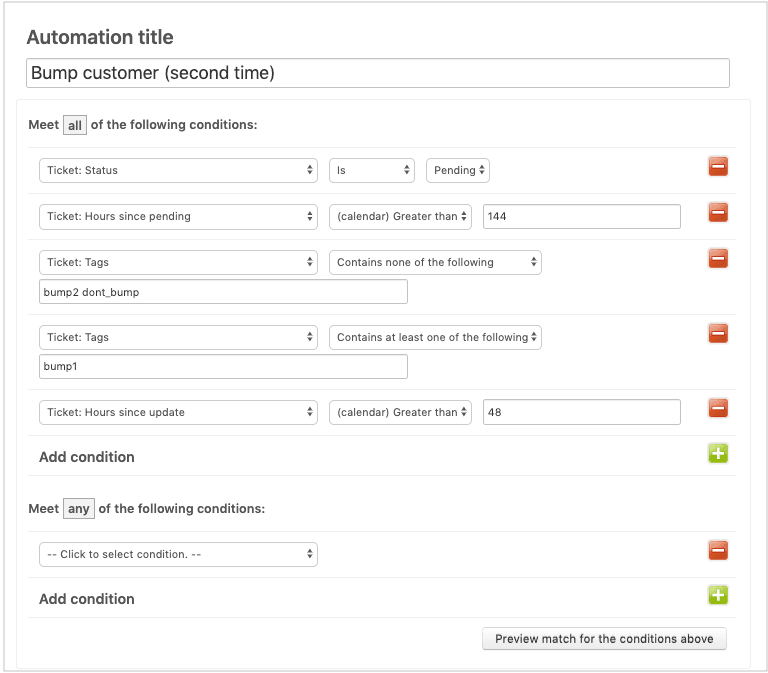
Now set up the conditions. Under "Meet ALL of the following conditions," add:
- Ticket: Status | Is | Pending
- Ticket: Hours since pending | Greater than | 24
- Ticket: Tags | Contains none of the following | pending_reminder_1
The tag condition is crucial. It ensures the automation only runs once per ticket. Without it, your customer would get a reminder every hour.
For the actions, add:
- Notifications: Email user | (requester)
- Email subject: "Re: {{ticket.title}} - Just checking in"
- Email body: "Hi there, I just wanted to quickly check in to see if you had a chance to look at our last message. We're waiting on your reply to move forward. Let us know if you have any questions!"
- Ticket: Add tags | pending_reminder_1

The tag action marks the ticket so this automation won't run again. When you're done, click Create automation.
Step 2: Create the solve automation
Now let's create the automation that closes the loop. This one sends a final message and solves the ticket.
Create another automation and name it "Solve pending ticket after 72 hours."
Set these conditions:
- Ticket: Status | Is | Pending
- Ticket: Hours since pending | Greater than | 72
- Ticket: Tags | Contains at least one of the following | pending_reminder_1
Notice we check for the tag from the first automation. This ensures we only solve tickets that have already received a reminder.
For actions, add:
- Notifications: Email user | (requester)
- Email subject: "Re: {{ticket.title}} - Closing this for now"
- Email body: "Hi, since we haven't heard back, we're going to mark this ticket as solved for now. If you still need help, just reply to this email and we'll be happy to reopen it for you!"
- Ticket: Status | Solved
Click Create automation when finished.
Step 3: Create the reset trigger
There is one piece missing. What happens if a customer replies after receiving a reminder? You want the whole process to start over so they get reminders again if they go silent.
This requires a trigger (not an automation) because you want an immediate action when the customer responds.
Go to Admin Center > Objects and rules > Business rules > Triggers and click Add trigger.
Name it "Reset pending reminder tags."
Set these conditions:
- Ticket: Status | Changed to | Open
- Ticket: Current user | Is | (end-user)
- Ticket: Tags | Contains at least one of the following | pending_reminder_1
For the action, add:
- Ticket: Remove tags | pending_reminder_1
This trigger fires when a customer replies (changing the status from Pending to Open) and removes the reminder tag. If an agent later sets the ticket back to pending, the automation cycle starts fresh.
Testing and validating your automations
Before letting these automations run on real tickets, test them.
Create a test ticket in your Zendesk account. Set it to pending and wait. Remember, automations run once per hour, so you may need to wait up to an hour to see results.
Check that:
- The reminder email sends after your specified time
- The tag is applied correctly
- The solve automation runs after the second waiting period
- The reset trigger works when you reply as a customer
If something isn't working, check the automation conditions carefully. The most common issue is missing the tag condition, which causes automations to run repeatedly.
Alternative timing patterns
The 24-hour and 72-hour pattern works for many teams, but you can adjust the timing to fit your needs.
48-hour first bump: Some teams prefer a longer initial wait, especially for B2B support where customers may need more time to gather information.
5-day extended pattern: Zendesk includes a standard automation for pending notification after 5 days. This works well for teams with longer response cycles.
Priority-based intervals: You can create multiple automation sets with different timing for different ticket priorities. Urgent tickets might get a 4-hour reminder, while low-priority tickets wait 48 hours.
Business hours vs. calendar hours: Zendesk lets you choose whether to count business hours only or calendar hours. Business hours respect your schedule settings, while calendar hours count continuously.
Best practices for pending reminders
A few tips to make your reminder workflow effective:
- Keep emails friendly. Reminders should feel helpful, not pushy. Acknowledge that the customer is busy.
- Include clear next steps. Tell the customer exactly what you need from them to move forward.
- Reference the last comment. Use placeholders like
{{ticket.latest_comment_formatted}}to include context from your previous message. - Monitor your metrics. Check how many tickets are being solved by automation versus customer replies. If solve rates are too high, your timing might be too aggressive.
- Don't over-message. Two reminders are usually enough. More than that risks annoying your customers.
How eesel AI enhances Zendesk automations
Zendesk's built-in automations handle the basics well, but they have limits. They send emails. They change statuses. What they can't do is actually respond intelligently when customers reply.
eesel AI integrates directly with Zendesk to add an AI layer on top of your existing workflows.
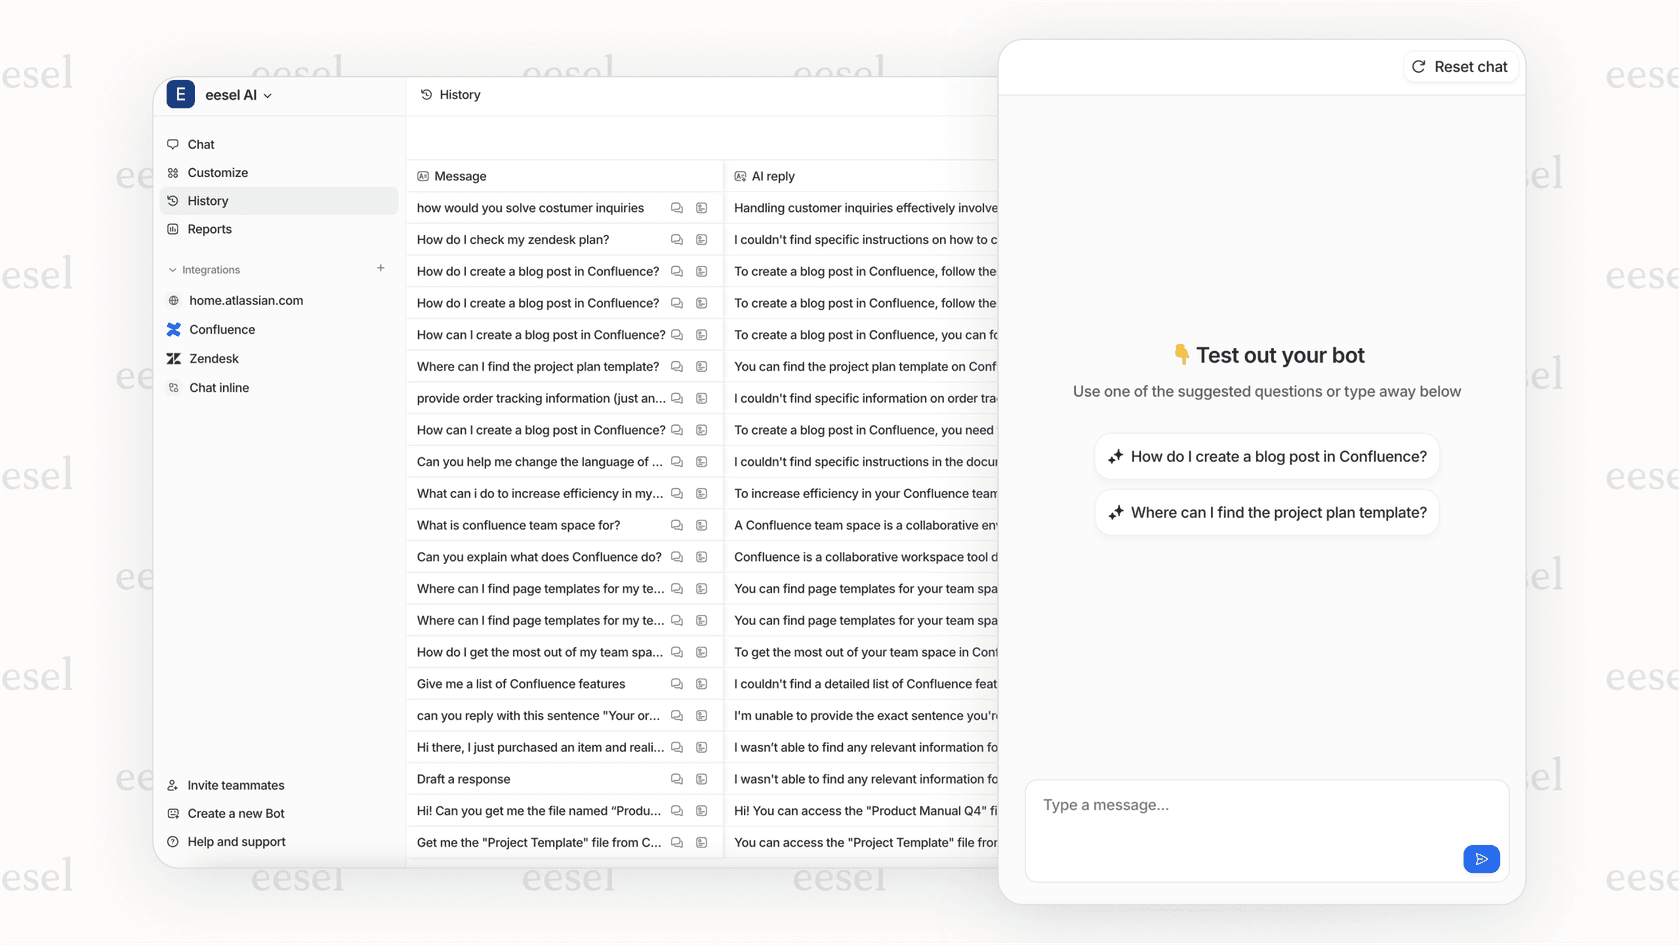
Here's what that means in practice:
When a customer replies to your reminder, eesel AI can draft a response based on your knowledge base and past tickets. Your agents review and send, or let the AI respond directly for common questions.
The AI also categorizes and routes tickets automatically. If a customer replies to a reminder with an urgent issue, eesel AI detects the priority and escalates appropriately.
Most importantly, eesel AI learns from your team's patterns. The more you use it, the better it gets at matching your tone and handling your specific types of requests.

You can start with our AI Copilot to draft replies for agent review, then level up to full AI Agent mode for autonomous responses on routine tickets.
Set up your Zendesk pending reminder automation today
You now have everything you need to build a fully automated pending reminder workflow in Zendesk. The bump-bump-solve pattern keeps your queue clean, saves agent time, and ensures customers get consistent follow-up.
Start with the basic automations outlined here. Test them thoroughly. Once they're running smoothly, consider how eesel AI could take your automation even further by handling the responses that come back.
If you're ready to explore AI-powered support automation, check out our Zendesk integration or view our pricing to find a plan that fits your team.
Frequently Asked Questions
Share this article

Article by
Stevia Putri
Stevia Putri is a marketing generalist at eesel AI, where she helps turn powerful AI tools into stories that resonate. She’s driven by curiosity, clarity, and the human side of technology.