Getting messaging conversations to the right agent at the right time sounds straightforward until you actually try configuring it. Zendesk's routing system has multiple layers, and if you don't understand how they work together, you'll end up with conversations sitting in queues while agents wonder why they aren't getting notified.
This guide walks through exactly how to configure Zendesk messaging conversation assignment rules, from the basic routing methods to advanced options like omnichannel capacity management. Whether you're setting up messaging for the first time or troubleshooting why conversations aren't reaching your team, you'll find the specific steps you need.
What you'll need to get started
Before diving into configuration, make sure you've got the prerequisites in place:
- A Zendesk Suite plan (Team, Growth, Professional, Enterprise, or Enterprise Plus)
- Agent Workspace activated
- Admin access to either the Chat dashboard or Admin Center
- A clear understanding of your team's structure (which groups or departments handle which types of conversations)
- A list of agents who will be handling messaging conversations
One detail that's easy to miss: messaging users must ensure Chat departments are enabled for notification routing rules to work. If agents aren't receiving notifications even though everything looks configured correctly, this is often why.
Understanding Zendesk's two-layer routing system
Here's where many administrators get confused. Zendesk messaging doesn't use a single routing mechanism. It uses two distinct layers that work in sequence:
Layer 1: Ticket triggers apply to tickets created when a messaging conversation is passed to an agent. These work like standard Zendesk triggers but fire specifically on messaging tickets.
Layer 2: Chat routing rules determine which agents get notified that a conversation is waiting. These live in the Chat dashboard and control the notification behavior.
The flow looks like this: a customer starts a conversation → an AI agent or messaging trigger handles the initial interaction → a ticket is created → ticket triggers route the ticket to a specific group or agent → chat routing rules notify eligible agents → an agent accepts and begins serving the customer.

Understanding this sequence matters because configuration at one layer affects what happens at the next. If your ticket trigger assigns a conversation to the Billing group but your chat routing rules only notify the Technical Support group, nobody gets notified. The ticket trigger runs first, then the chat routing rules kick in based on who can actually accept that ticket.
Step 1: Choose your routing method for Zendesk messaging conversation assignment rules
Zendesk offers three approaches for getting conversations to agents. Your choice depends on team size, structure, and whether you're using omnichannel features.
Broadcast routing (the default)
With Broadcast routing, all available agents receive a notification for every incoming conversation. The first agent to click "Serve Request" gets the conversation. This works well for small teams where anyone can handle any issue, but it creates notification noise for larger ones.
Key limitation: Broadcast cannot be used with omnichannel routing.
Assigned routing
Assigned routing distributes conversations evenly among online agents. The system assigns each incoming request to one agent at a time based on workload and availability. This reduces notification fatigue and keeps workloads balanced.
The assignment logic follows a specific priority:
- Agent with the fewest ongoing conversations
- If tied: agent with no missed assignments in the last 15 minutes
- If still tied: agent with the oldest last assignment timestamp
- If all agents are new: random selection
Omnichannel routing
Available on Professional and Enterprise plans, omnichannel routing directs tickets from multiple channels (email, calls, messaging) based on agent availability and capacity. It can also route by priority and skills on higher tiers.
When omnichannel routing is active, it overrides the Chat routing settings described in this article.
| Routing Method | Best For | Key Limitation |
|---|---|---|
| Broadcast | Small teams, simple setups | Cannot use with omnichannel |
| Assigned | Medium teams needing balanced workload | Requires agent status management |
| Omnichannel | Large teams, multi-channel support | Professional+ plans only |
If you're just starting with messaging, Assigned routing usually makes the most sense. It scales better than Broadcast and gives you more control over agent workload.
Step 2: Configure notification routing in the Chat dashboard
Once you've chosen your routing method, it's time to configure the settings.
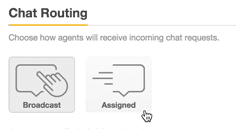
Navigate to the Chat dashboard, then select Settings > Routing. You'll see the Chat Routing section with your notification routing options.
Select either Broadcast or Assigned as your routing method, then click Save changes.
Setting notification limits
Notification limits cap how many conversations an agent can handle simultaneously. You can set these at the account level (one limit for everyone) or the agent level (individual limits per person).
To activate limits:
- In the Routing settings, next to Chat limit, select On
- Next to Apply to, choose Account or Agent
- If you selected Account, enter a value in the Maximum chats field
- If you selected Agent, configure limits in each agent's profile under Manage > Agents
A conversation counts as "active" if it's received a response in the last 10 minutes. Inactive conversations don't count against the limit. This matters because an agent could theoretically have more conversations assigned than their limit if some've gone inactive.
Step 3: Set up ticket triggers for intelligent assignment
Chat routing rules determine who gets notified, but ticket triggers determine where the ticket goes. For intelligent assignment, you need both working together.
Navigate to Admin Center > Objects and rules > Triggers > Create trigger.
Basic messaging trigger setup
Create a trigger with these conditions:
- Channel is Messaging (this ensures it only fires on messaging tickets)
- Ticket is Created (fires when a new messaging ticket is created)
For the action, select Group or Assignee and choose where conversations should route.
Advanced routing with custom fields
For more sophisticated routing, collect information during the conversation and route based on that data. You can use:
- Custom ticket fields populated during the conversation (order type, issue category, customer tier)
- Tags added by your AI agent during escalation
- Channel source (web widget vs. mobile vs. social messaging)
Example trigger for VIP customers:
- Condition: Channel is Messaging AND Custom field "Customer Tier" is VIP
- Action: Assign to group "Priority Support"
Example trigger for technical issues:
- Condition: Channel is Messaging AND Tags contain "technical_issue"
- Action: Assign to group "Engineering Support"
The key is ensuring your AI agent or messaging flow captures the necessary information before the handoff happens. Without that data, your triggers can't make intelligent routing decisions.

Step 4: Configure advanced Assigned routing options
If you're using Assigned routing, several advanced settings give you more control.
Hybrid Assignment Mode
This setting allows agents who have reached their chat limit to voluntarily pick up additional conversations. Instead of being blocked from new assignments, agents see a "Serve Request" button they can click when they have capacity.
To enable:
- Go to Settings > Routing
- In the Hybrid Assignment Mode section, check Allow Hybrid Assignment
- Save changes
This is useful for teams where agent workload varies through the day. An agent might be at their limit technically but have several inactive conversations they aren't working on.
Reassignment timing
When an agent doesn't respond to an assigned request within a set time, the system can automatically reassign it to another agent.
To configure:
- In Routing settings, next to Reassignment, select On
- Enter a timeout value in seconds (15-30 seconds is typical)
- Save changes
If you don't enable reassignment, once a notification is assigned to an agent, it stays with them even if they don't respond.
Automatic idle status
This optional setting automatically changes an agent's status to Away or Invisible after they miss a specified number of assignments. This prevents inactive agents from continuing to receive new conversation requests.
Enable this only if you have reassignment turned on, since it relies on that mechanism to detect missed assignments.
Step 5: Set up Omnichannel routing for Zendesk messaging conversation assignment rules
For teams on Professional or Enterprise plans, omnichannel routing offers the most advanced assignment capabilities.
Activating omnichannel routing
- Navigate to Admin Center > Objects and rules > Omnichannel routing
- Toggle omnichannel routing on
- Configure your routing rules
Important: Once omnichannel routing is active, it overrides your Chat routing settings. The Broadcast and Hybrid Assignment modes from Chat routing are not supported in omnichannel.
Configuring agent capacity
Omnichannel routing uses capacity rules to determine how many conversations an agent can handle. Unlike Chat routing's simple limits, omnichannel capacity can be configured separately for each channel type.
You can also configure how inactive messaging conversations affect capacity. By default, inactive conversations don't count against capacity, but you can change this if your workflow requires it.
Skills-based routing
On Enterprise plans, you can route based on agent skills (languages, product expertise, certifications). However, note that skills-based routing is not available specifically for messaging conversations, even though it works for other channels.
Common assignment issues and how to fix them
Even with proper configuration, assignment problems still happen. Here's how to diagnose and fix the most common ones.
Agents aren't receiving notifications
Check that Chat departments are enabled. Go to Settings > Departments in the Chat dashboard and verify all departments show as enabled. This is the most common cause of routing failures.
Wrong team receives tickets
Review your trigger conditions. If a trigger assigns tickets to a specific group but your chat routing rules notify a different group, agents see notifications for tickets they can't claim. Make sure triggers and routing rules align.
Customers can't start new conversations
This happens when tickets stay in Solved status too long. Zendesk's default automation waits 4 days before closing a solved ticket. Until it's Closed (not just Solved), the customer can't start a new conversation. Reduce this timing in Admin Center > Objects and rules > Automations.
Agents missing context after handoff
Configure custom ticket fields during escalation to capture key information. The full conversation transcript is attached automatically, but agents need structured data visible in the ticket sidebar, not buried in chat history.
Conversations stuck in queue
Verify agent status is Online, not Away or Invisible. Also check that agents haven't hit their conversation limits. If all eligible agents are at capacity, new conversations queue until someone becomes available.
Optimizing assignment rules with eesel AI
If you've gotten this far, you've probably noticed something: Zendesk's routing system is powerful but complex. Multiple layers, conditional logic, and state management create a steep learning curve.

We built eesel AI to simplify this. Instead of configuring routing through multiple dashboards and trigger conditions, you define escalation and assignment rules in plain English.
For example, instead of building triggers, setting up custom fields, and configuring chat routing rules, you write:
- "If the refund request is over 30 days old, politely decline and offer store credit"
- "Always escalate billing disputes to a human agent"
- "For VIP customers tagged 'enterprise', route to the dedicated support team"
Our AI interprets these instructions and handles the routing logic automatically. We integrate directly with Zendesk and can operate as a frontline AI agent that follows your assignment rules, or as an AI copilot that drafts replies for human agents.
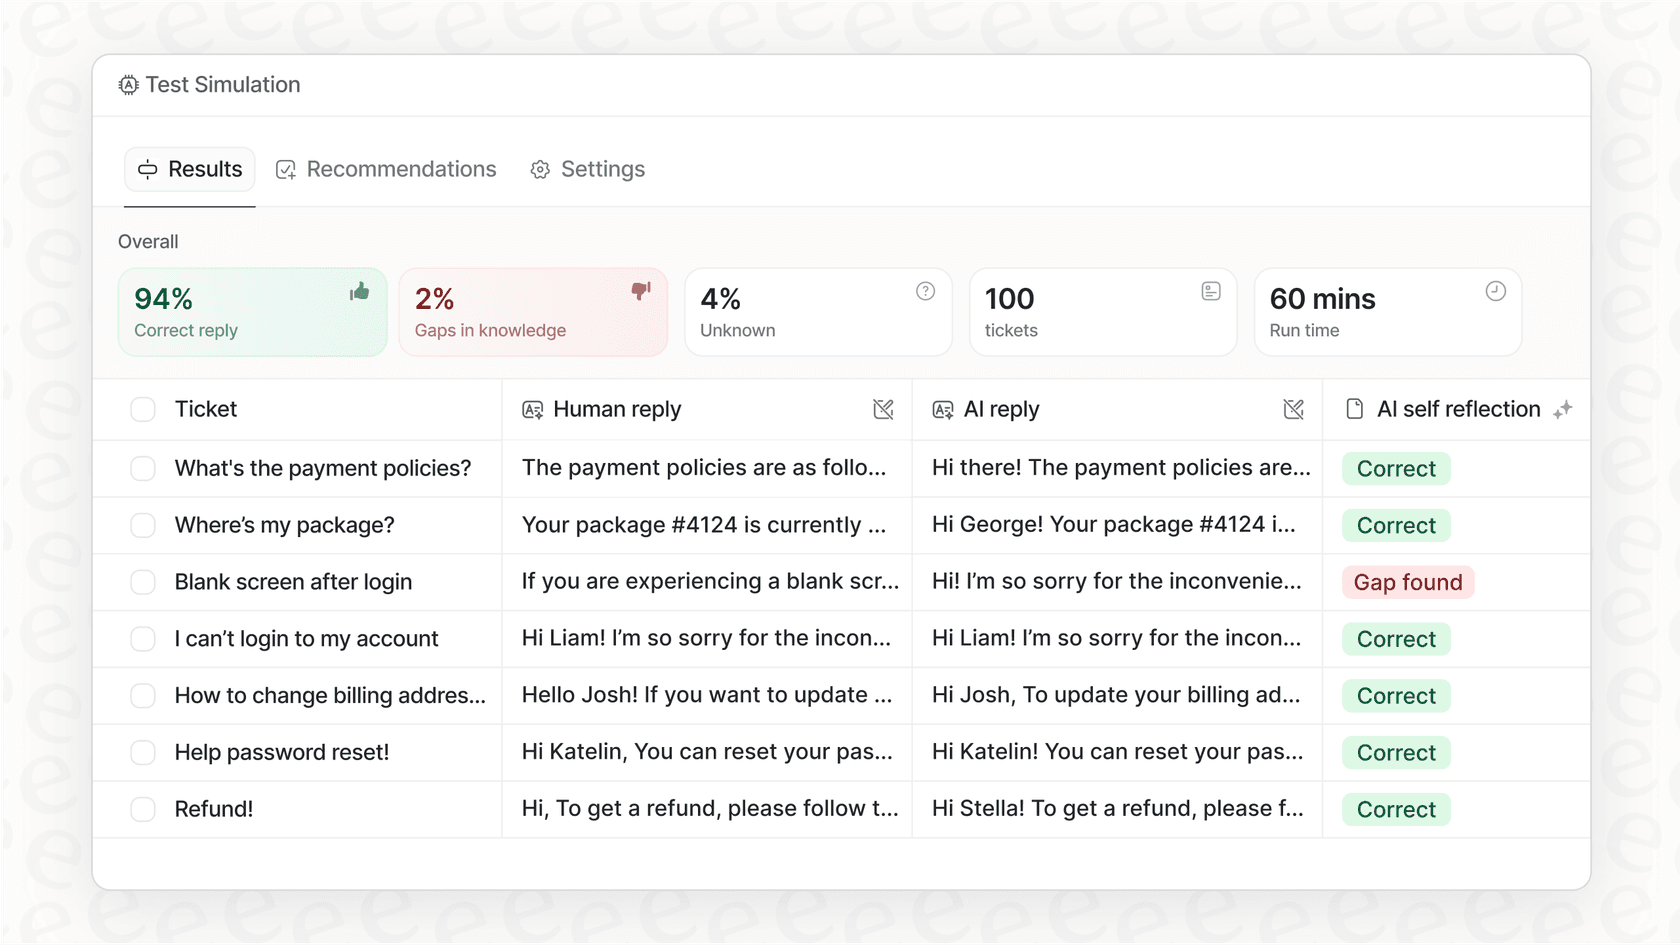
The key difference: we learn from your existing tickets, macros, and documentation (not just Zendesk Help Center, but Confluence, Google Docs, Notion, and more). And before you go live, you can run simulations on your historical tickets to see exactly how conversations would have been routed.
If the complexity of Zendesk's native routing is slowing down your implementation, try eesel AI as an alternative.
