How to use Zendesk triggers for branded email notifications
Stevia Putri
Last edited February 24, 2026
If you're managing customer support for multiple brands in Zendesk, you've probably hit a frustrating wall. Zendesk gives you exactly one email template for your entire account. That single template gets applied to every outgoing notification, regardless of which brand the customer actually contacted.
This creates a real problem. Your premium brand shouldn't send emails with your budget brand's logo. Your enterprise customers shouldn't see support contact info meant for your consumer line. Yet Zendesk's default setup forces exactly that.
The workaround? Zendesk triggers. By using triggers strategically, you can create brand-specific email notifications that override the generic template. It's not perfect (we'll get to the limitations), but it's the standard approach support teams have used for years.
Let's walk through how to set this up properly.
The challenge of branding in Zendesk
Here's the core issue: Zendesk's email template is global. Think of it as the skeleton that wraps around every message your help desk sends. It contains your header, footer, and styling that applies to all notifications.
For single-brand companies, this works fine. You customize the template once with your logo, colors, and contact info, and every email looks on-brand. But if you support multiple brands (say, after an acquisition or if you run separate product lines), you're stuck. That one template gets applied to Brand A, Brand B, and Brand C equally.
The official solution, documented in Zendesk's help center, is to strip brand-specific elements from the global template entirely. Make it neutral. Then use triggers to inject brand-specific content into individual notifications.
This approach works, but it comes with trade-offs:
- More triggers to maintain - You'll need separate triggers for each brand
- Complexity increases with brand count - Three brands means three versions of every notification trigger
- Guide notifications remain problematic - Zendesk's Help Center (Guide) emails don't respect trigger-based branding, which remains a known limitation
If you're finding this setup cumbersome, you're not alone. Many teams eventually look for alternatives that handle multi-brand support more elegantly. We integrate with Zendesk to provide AI-powered responses that automatically adapt to each brand's voice and requirements without complex trigger chains.

What you'll need before you start
Before diving into trigger configuration, gather these prerequisites:
- Admin access to Zendesk - You'll need to modify email templates and business rules
- Brand assets ready - Logo files hosted somewhere accessible, hex color codes, brand-specific contact information
- List of notification types to customize - Which emails need brand differentiation? (ticket created, agent replied, solved, etc.)
- Basic HTML knowledge - For embedding logos and styling email content
You'll also want to document your current trigger setup. Take screenshots or export your trigger list. If something breaks, you'll want a way to roll back.
Step-by-step: Setting up branded email triggers
Step 1: Prepare your email template
First, you need to neutralize your global email template. This template applies to every notification, so any brand-specific elements here will show up for all brands.
Navigate to Admin Center → Channels → Email → Templates.
Remove or neutralize these elements:
- Colors - Switch to grays or neutral tones that work for all brands
- Logos - Remove brand logos from the template header
- Footer content - Strip out brand names, phone numbers, or addresses
- Custom styling - Avoid brand-specific fonts or design elements
Keep these placeholders intact (Zendesk needs them):
{{header}}- Where Zendesk inserts header content{{content}}- The actual ticket comment or notification body{{footer}}- Footer links and unsubscribe options

If you've heavily customized your template, consider reverting to the default and starting fresh. The default template is intentionally bland, which is exactly what you want as a foundation.
Step 2: Clone default notification triggers
Now you'll create brand-specific versions of your notification triggers. Start with the most important ones:
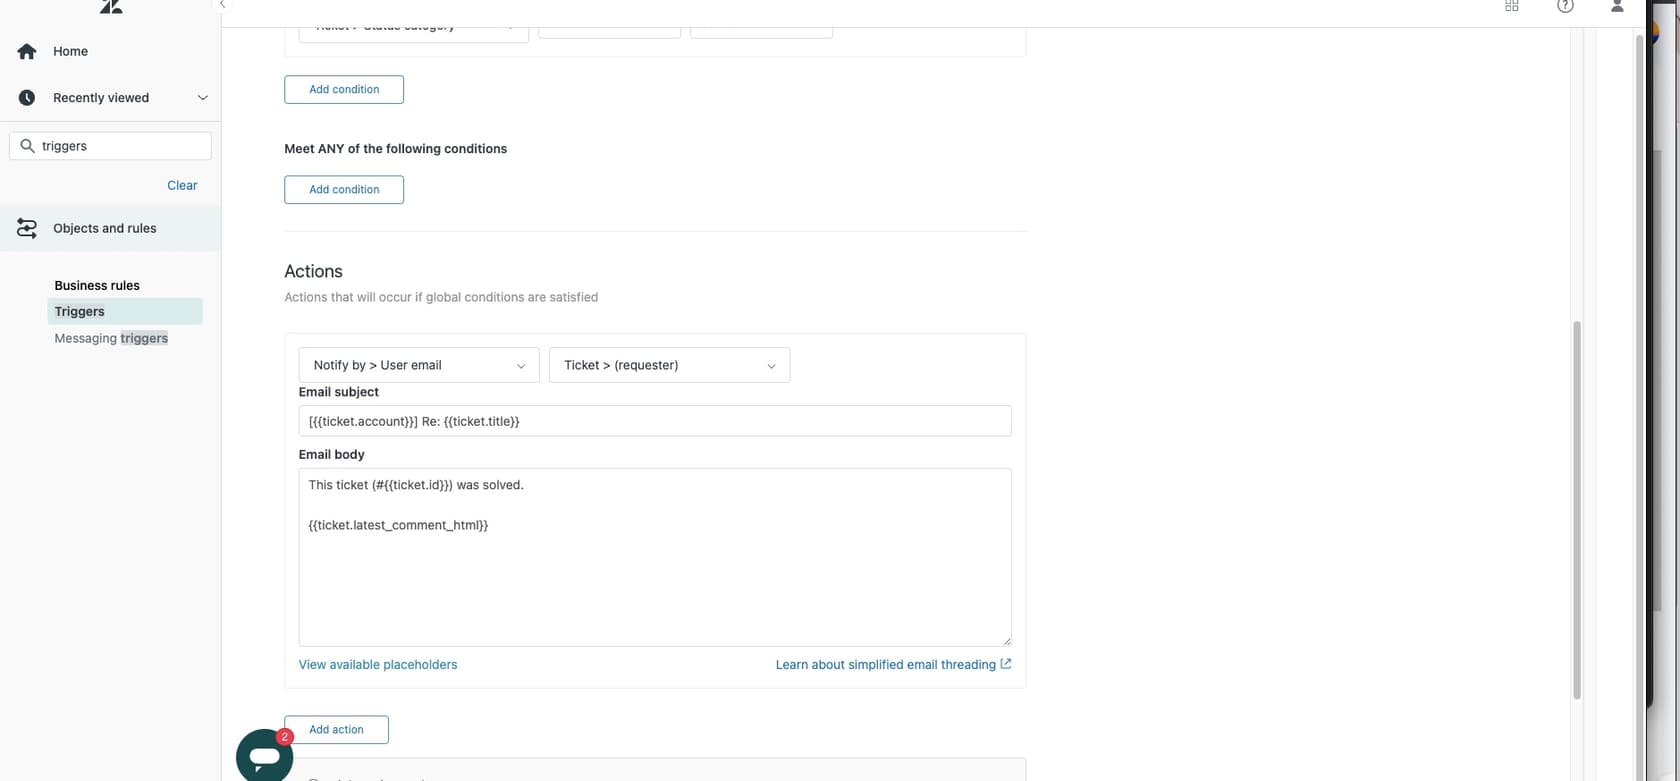
- Go to Admin Center → Objects and rules → Business rules → Triggers
- Find "Notify requester of received request" (sends when a ticket is created)
- Find "Notify requester of comment update" (sends when an agent replies)
For each trigger, you'll create one copy per brand. So if you support three brands, you'll end up with three versions of each trigger.
To clone a trigger:
- Hover over the trigger name
- Click Clone
- Rename it clearly: "Notify requester of received request - Brand A"
- Click Create trigger
Repeat this for every brand you support. Yes, it creates more triggers to manage. But as the experts at Internal Note emphasize, "one trigger does one job." This separation makes troubleshooting and updates much easier than trying to bundle everything together.
Step 3: Add brand conditions
Now configure each cloned trigger to fire only for its specific brand.
Edit your first cloned trigger and add this condition:
- ALL conditions must be met:
- Brand is [Your Brand Name]
This ensures the trigger only fires for tickets belonging to that brand. Tickets created through Brand B's support email or help center won't trigger Brand A's notification.
Trigger order matters. Zendesk processes triggers from top to bottom, and all matching triggers fire. Place your brand-specific notification triggers before any generic notification triggers. This prevents the generic version from firing alongside your branded one.
Test your conditions before saving. Create a test ticket for each brand and verify the right trigger fires. You can check trigger execution in the ticket events log.
Step 4: Customize email content per brand
This is where the branding happens. In each trigger's actions, you'll modify the email body to include brand-specific content.
The email body action uses HTML. Here's a basic template structure:
<div style="font-family: Arial, sans-serif; max-width: 600px;">
  <div style="padding: 20px 0;">
    <img src="https://yourdomain.com/brand-a-logo.png" alt="Brand A" style="max-width: 200px;">
  </div>

  <p>Hi {{ticket.requester.first_name}},</p>

  <p>An update was made to your ticket by one of our Brand A support reps.</p>

  <div style="background: #f5f5f5; padding: 15px; margin: 20px 0;">
    {{ticket.latest_comment_formatted}}
  </div>

  <p>You can reply to this email if you need more information or reach us during business hours by phone at +1-888-123-4567.</p>

  <p>Best regards,<br>The Brand A Support Team</p>

  <div style="border-top: 1px solid #ddd; padding-top: 20px; margin-top: 30px; font-size: 12px; color: #666;">
    Brand A, Inc. | 123 Brand Street | support@branda.com
  </div>
</div>
Key elements to customize per brand:
- Logo image - Host logos on your own server or CDN for reliable delivery
- Brand name references - Update "Brand A" throughout the text
- Contact information - Phone numbers, email addresses, physical addresses
- Voice and tone - Some brands are formal, others casual
- Colors - Use inline CSS for brand-appropriate styling

For the logo, use an absolute URL (https://...) not a relative path. Email clients need to fetch the image from a public location.
HTML template examples for branded emails
Here are copy-paste ready templates for common scenarios:
Simple branded notification
<div style="font-family: Helvetica, Arial, sans-serif; line-height: 1.6; color: #333;">
  <img src="{{brand.logo_url}}" alt="{{brand.name}}" style="max-height: 60px; margin-bottom: 20px;">

  <p>Hi there,</p>

  <p>We've updated your support request. Here's the latest:</p>

  <div style="background: #f9f9f9; border-left: 4px solid {{brand.primary_color}}; padding: 15px; margin: 20px 0;">
    {{ticket.latest_comment_formatted}}
  </div>

  <p>Need help? Reply to this email or call us at {{brand.phone}}.</p>

  <p>Thanks,<br>The {{brand.name}} Team</p>
</div>
Multi-section professional template
<table width="100%" cellpadding="0" cellspacing="0" style="font-family: Arial, sans-serif;">
  <tr>
    <td style="padding: 30px 0; border-bottom: 3px solid #0066cc;">
      <img src="https://company.com/logo.png" alt="Company" style="max-width: 180px;">
    </td>
  </tr>
  <tr>
    <td style="padding: 30px 0;">
      <h2 style="color: #0066cc; margin: 0 0 20px 0;">Ticket Update</h2>
      <p style="font-size: 16px; line-height: 1.5;">Hi {{ticket.requester.first_name}},</p>
      <p style="font-size: 16px; line-height: 1.5;">Our team has added a response to your support ticket (#{{ticket.id}}).</p>
    </td>
  </tr>
  <tr>
    <td style="background: #f5f7fa; padding: 25px; border-radius: 8px;">
      {{ticket.latest_comment_formatted}}
    </td>
  </tr>
  <tr>
    <td style="padding: 30px 0; color: #666; font-size: 14px; border-top: 1px solid #ddd; margin-top: 30px;">
      <p>Company Name | support@company.com | 1-800-555-0123</p>
      <p><a href="{{ticket.url}}" style="color: #0066cc;">View ticket online</a></p>
    </td>
  </tr>
</table>
Mobile-responsive considerations
Email clients vary widely in HTML support. Stick to these safe practices:
- Use tables for layout (old school, but reliable)
- Inline all CSS (don't use
<style>blocks) - Keep image widths under 600px
- Test in multiple email clients before deploying
- Provide alt text for all images
Best practices for trigger organization
As your trigger count grows, organization becomes critical. The "one trigger does one job" philosophy, advocated by experienced Zendesk consultants, keeps things manageable.
Recommended trigger order:
- Set defaults - Brand, priority, type, schedule
- Categorize - Set category, custom fields
- Enrich - Add followers, update user data
- Route and assign - Assign to groups, set status
- Notify - Send branded emails (only after all context is set)
This sequence ensures tickets have full context before any customer-facing notifications go out.
Naming conventions matter too. Use clear, descriptive names:
- ✅ "Notify requester - Brand A - Comment update"
- ❌ "Brand A trigger"
Use Zendesk's trigger categories to group related triggers. Create categories like "Brand A Notifications," "Brand B Notifications," and so on.
Document your setup. Create an internal wiki page or shared doc explaining:
- Which triggers handle which brands
- What the standard notification flow looks like
- Who to contact if something breaks
Common issues and troubleshooting
Even with careful setup, things go wrong. Here are the most common problems:
Guide notifications ignore brand logic
This is the biggest limitation. Zendesk Guide (your Help Center) sends its own notification emails for article comments, subscriptions, and community posts. These don't pass through your trigger system, so they won't respect your brand customizations.
A Zendesk community post highlights this exact issue. Users report that Guide emails display "all branding elements; header image, footer links etc." regardless of brand logic.
Workarounds are limited. Some teams:
- Use generic branding in the global template specifically for Guide emails
- Accept that Guide notifications won't match ticket notifications perfectly
- Use third-party tools to handle Guide notifications differently
Trigger ordering conflicts
If your brand-specific trigger fires but the generic one fires too, check the order. Brand-specific triggers should appear before generic ones in the trigger list.
Also verify your nullifying conditions. Every trigger should have a condition that prevents it from firing twice on the same ticket update. Common patterns include checking that a tag is not present, then adding that tag in the action.
HTML rendering issues
Email clients render HTML differently. What looks perfect in Gmail might break in Outlook. Test in multiple clients before going live.
Common fixes:
- Use table-based layouts instead of divs
- Specify widths in pixels, not percentages
- Avoid CSS shorthand (use
margin-top: 10px; margin-bottom: 10px;notmargin: 10px 0;)
Testing strategies
Before deploying to production:
- Create test tickets for each brand
- Check the ticket events log to verify the right triggers fired
- Review the actual emails received (not just the preview)
- Test replies to ensure the conversation flows correctly
- Have colleagues review from a customer perspective
Streamlining branded notifications with AI
If this all feels like a lot of work to maintain, that's because it is. Every new brand means new triggers. Every branding update means editing multiple triggers. Every new notification type means cloning and customizing for each brand.
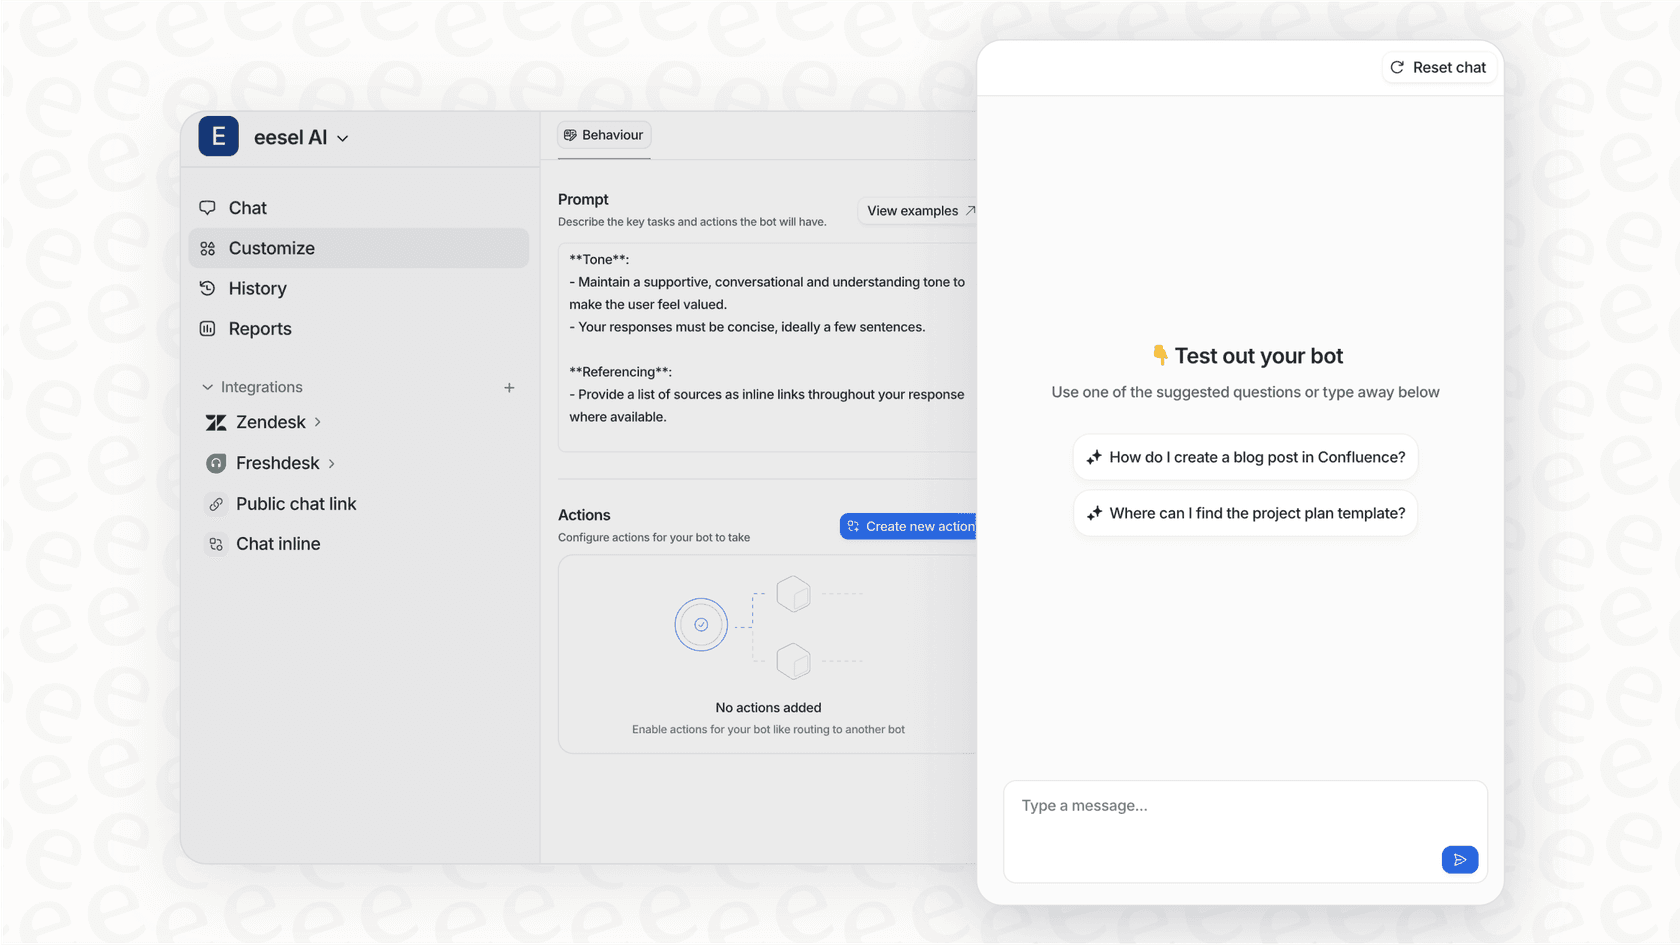
There's a simpler approach. Our AI agent for Zendesk handles multi-brand support without complex trigger chains. Here's how it works differently:
Automatic brand detection - The AI reads the ticket and identifies which brand the customer contacted, based on the incoming email address, ticket fields, or even the tone of the request.
Brand-appropriate responses - Instead of hard-coding HTML templates, the AI generates responses that match each brand's voice, terminology, and requirements. Your premium brand gets formal language. Your casual brand gets friendly responses.
No trigger maintenance - Add a new brand? Just tell the AI about it. No cloning triggers, no reordering, no testing trigger logic. The AI learns your brands from your existing tickets and documentation.
Consistent across channels - Whether the customer emails, chats, or reaches out via your help center, the AI maintains the right brand voice. No more Guide notification limitations.
Our AI Copilot works alongside your existing Zendesk setup, drafting brand-appropriate responses that your agents can review before sending. It's a way to get the benefits of automated branding without rebuilding your entire trigger system.
For teams managing multiple brands, the time savings add up quickly. Instead of maintaining dozens of triggers, you focus on training the AI once and letting it handle the variations.
Setting up branded email notifications in Zendesk takes effort, but it's doable. Strip the global template, clone your triggers, add brand conditions, and customize the HTML. Keep your triggers organized, document everything, and test thoroughly.
Just remember the limitations. Guide notifications won't respect your trigger branding. Every new brand adds complexity. And someone has to maintain all those triggers when branding changes.
If you're looking for a simpler way to handle multi-brand support, check out how we approach it. Sometimes the best solution isn't better triggers, it's removing the need for so many of them.
Frequently Asked Questions
Share this article

Article by
Stevia Putri
Stevia Putri is a marketing generalist at eesel AI, where she helps turn powerful AI tools into stories that resonate. She’s driven by curiosity, clarity, and the human side of technology.