A well-designed community forum can transform how customers interact with your brand. Instead of waiting for support tickets, they help each other, share solutions, and build relationships. But to make this happen, you need the right foundation. That's where Zendesk Guide community templates come in.
This guide walks you through everything you need to know about creating and customizing community templates in Zendesk Guide. Whether you're starting from scratch or refining an existing setup, you'll learn the technical skills and best practices to build a community that actually engages your users.

What is a Zendesk Guide community template?
A Zendesk Guide community template is a layout file that controls how your community forum pages look and function. Think of it as the blueprint for your community's user interface. These templates determine where elements appear, how posts are formatted, and what features users can access.
It's important to distinguish between two related concepts that often get confused:
-
Article templates are content templates for knowledge base articles. They provide a consistent structure for your help center content, like standardized headers or formatting.
-
Theme templates (including community templates) are HTML layout files that control the visual presentation of pages. They use Zendesk's Curlybars templating language to dynamically display content.
Zendesk's community functionality is called Gather. It is included in Suite Team plans and above, starting at $55 per agent per month when billed annually. The Suite Professional plan at $115 per agent adds community moderators, content moderation queues, and AI spam protection. Gather enables user discussions, Q&A forums, and idea exchanges directly within your help center.
Why do community templates matter? Because the default layouts only get you so far. Custom templates let you:
- Highlight important community content
- Create visual hierarchies that guide users
- Add branding elements that match your company identity
- Implement features that encourage participation
While you're building out your community, consider how AI tools can complement your efforts. We've found that combining community forums with intelligent automation helps teams handle repetitive questions while letting humans focus on complex discussions that need a personal touch. Tools like eesel AI can monitor discussions, suggest responses to common questions, and escalate issues that need human attention.
Community template files you need to know
Zendesk Guide uses a set of Handlebars-based template files to render community pages. Each file controls a specific page type or view. Here are the key templates you will work with:
| Template File | Purpose |
|---|---|
community_post_list_page.hbs | Lists all community posts across topics |
community_post_page.hbs | Displays individual posts with comments |
community_topic_list_page.hbs | Shows available topics/categories |
community_topic_page.hbs | Displays posts within a specific topic |
new_community_post_page.hbs | The form for creating new posts |
contributions_page.hbs | Shows user activity and contributions |
user_profile_page.hbs | Community member profile pages |
These templates work together to create a cohesive community experience. When a user navigates from the topic list to a specific post, they move from community_topic_page.hbs to community_post_page.hbs, with each template handling its part of the display. You can learn more in Zendesk's community template documentation.
To access and edit these templates, you need Guide admin permissions. Navigate to Guide admin, then click the Customize design icon. From there, you can edit your theme's template files directly. For detailed documentation, see Zendesk's guide to customizing help center themes.
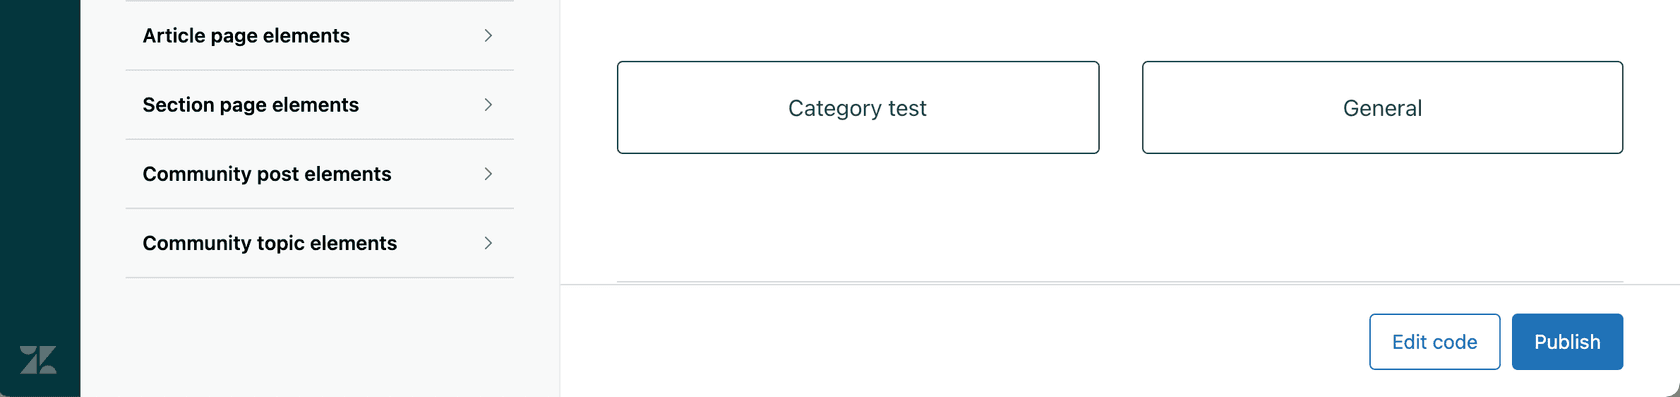
The theme editor shows all available templates in a sidebar. Click any template name to open it in the code editor. You'll see the Curlybars markup that controls the page structure. Changes you make here affect how the community appears to end users.
Getting started with Curlybars templating
Curlybars is Zendesk's templating language, built on Handlebars.js. It uses double curly brackets to insert dynamic content into your templates. If you have worked with other templating systems, the syntax will feel familiar. For complete documentation, see Zendesk's Curlybars reference.
Here's the basic syntax you need to know:
- Variables:
{{property}}inserts a value - Conditionals:
{{#if condition}}...{{/if}}shows content only when a condition is true - Loops:
{{#each items}}...{{/each}}repeats content for each item in a list - Comments:
{{! This is a comment }}adds notes that do not render
Community templates have access to specific properties that contain post, topic, and user data. Here are the most commonly used ones:
| Property | What it contains |
|---|---|
post.title | The post's headline |
post.body | The post content |
post.author.name | Username of the person who created the post |
post.author.avatar_url | URL to the author's profile image |
topic.name | The topic/category name |
topic.description | Topic description text |
user.name | Current user's name |
user.avatar_url | Current user's avatar |
Curlybars also provides helpers for common tasks:
{{excerpt post.body length=100}}truncates content to a specified length{{date post.created_at format='short'}}formats dates consistently{{link 'new_post' role='button'}}generates URLs to specific pages
Here is a practical example. This code displays a list of recent community posts with excerpts:
{{#each posts}}
  <div class="post-preview">
    <h3><a href="{{url}}">{{title}}</a></h3>
    <p class="meta">By {{author.name}} on {{date created_at}}</p>
    <p>{{excerpt body length=150}}</p>
  </div>
{{/each}}
The {{#each posts}} loop iterates through available posts. For each one, it outputs the title as a link, the author's name, the creation date, and a 150-character excerpt of the content.

Understanding these basics gives you the foundation to customize any community template. The key is knowing which properties are available for each template type and how to structure the logic to display them effectively.
Customizing your community topic page template
The topic page is often the first community view your users see. It shows all posts within a specific category, making it a critical touchpoint for engagement. Let's walk through customizing community_topic_page.hbs step by step.
Step 1: Access the theme editor
In Guide admin, click the Customize design icon, then select the theme you want to edit. This opens the template editor where you can modify all theme files.
Step 2: Locate and open community_topic_page.hbs
Find the file in the template list on the left side of the editor. Click it to open the code view. You'll see the default template structure, which includes sections for the topic header, post list, and pagination.
Step 3: Understand the default structure
The default template typically includes:
- A header section with the topic name and description
- A "New Post" button
- A list of posts with titles, authors, and metadata
- Pagination controls for navigating between pages
Take time to read through the existing code before making changes. Understanding what's already there helps you modify rather than break the functionality.
Step 4: Add custom elements
Now you can enhance the page. Common additions include:
- Topic banners: Add a visual header with the topic description
- Featured posts: Highlight important or popular discussions
- Subscription prompts: Encourage users to follow the topic
Here is an example of adding a styled topic header:
<div class="topic-header">
  <h1>{{topic.name}}</h1>
  {{#if topic.description}}
    <p class="topic-description">{{topic.description}}</p>
  {{/if}}
</div>
Step 5: Style with CSS variables
Zendesk themes support CSS custom properties (variables) for consistent styling. Define your colors, spacing, and typography in the theme's CSS, then reference them in your templates:
.topic-header {
  background: var(--brand-color);
  padding: var(--spacing-lg);
  border-radius: var(--border-radius);
}
Step 6: Preview and publish changes
Before going live, use the preview function to see how your changes look with real data. The preview mode shows your community with actual posts and topics, so you can verify everything renders correctly. Once satisfied, click Publish to make the changes live.

Other customizations to consider:
- User reputation badges: Show top contributors or verified experts
- Custom post layouts: Change how post metadata displays
- Topic-specific styling: Apply different designs to different community sections
Building a custom community post page
The individual post page (community_post_page.hbs) is where the actual conversation happens. This template needs to handle the post content, comments, voting, and user interactions. Let's look at how to customize it effectively.
The default template structure includes:
- Post header with title and author information
- Post body content
- Voting controls (upvote/downvote)
- Comment thread
- Reply form
To customize the comment display, you might want to change how author information appears or add visual distinction between comment levels. Here is an example of a styled comment:
<div class="comment {{#if official}}comment-official{{/if}}">
  <div class="comment-author">
    <img src="{{author.avatar_url}}" alt="" class="avatar">
    <span class="author-name">{{author.name}}</span>
    {{#if author.badges}}
      <span class="badges">
        {{#each author.badges}}
          <span class="badge">{{name}}</span>
        {{/each}}
      </span>
    {{/if}}
  </div>
  <div class="comment-body">
    {{body}}
  </div>
  <div class="comment-actions">
    {{vote 'up' role='button'}}
    {{vote 'down' role='button'}}
    {{subscribe role='button'}}
  </div>
</div>
This adds author badges and organizes the comment into clear sections. The {{#if official}} conditional applies special styling to official responses from your team.
For voting and rating functionality, Zendesk provides built-in helpers. The {{vote}} helper creates upvote/downvote buttons that automatically handle the interaction. You can style these with CSS to match your design.
When implementing @mentions and user tagging, you will need to work with JavaScript in addition to templates. The templating layer handles the display, but the interaction logic lives in your theme's JavaScript files.
Mobile responsiveness is crucial for community pages. Many users access forums from their phones, so your templates should use flexible layouts that adapt to screen size. Use CSS Grid or Flexbox for post listings, and ensure touch targets (buttons, links) are large enough for mobile interaction.
Here is a responsive post layout example:
<article class="post">
  <header class="post-header">
    <h1>{{post.title}}</h1>
    <div class="post-meta">
      <img src="{{post.author.avatar_url}}" alt="" class="avatar">
      <span>{{post.author.name}}</span>
      <time datetime="{{post.created_at}}">{{date post.created_at}}</time>
    </div>
  </header>
  <div class="post-content">
    {{post.body}}
  </div>
</article>
With appropriate CSS, this stacks vertically on mobile and expands to a more complex layout on larger screens.
Best practices for community template design
Creating effective community templates requires more than just technical knowledge. You need to design for user engagement, accessibility, and performance. Here are the practices we've found most valuable.
Mobile-first design principles
Start your design with mobile layouts, then expand for larger screens. This ensures the core experience works everywhere. Community users often check discussions on their phones, so mobile optimization is not optional.
- Use relative units (rem, em) instead of fixed pixels
- Test touch interactions on actual devices
- Ensure text remains readable at small sizes
- Keep navigation accessible with thumbs
Accessibility considerations
Your community should work for everyone. Follow WCAG guidelines to ensure users with disabilities can participate fully.
- Use semantic HTML elements (article, nav, button)
- Add alt text to all images
- Ensure color contrast meets AA standards
- Support keyboard navigation
- Test with screen readers
Performance optimization
Slow-loading pages kill engagement. Optimize your templates for speed:
- Minimize CSS and JavaScript
- Use efficient Curlybars queries
- Lazy-load images below the fold
- Limit the number of posts shown per page
Consistent branding
Your community should feel like part of your product, not an afterthought. Apply your brand colors, typography, and voice throughout the templates. This builds trust and reinforces your identity.
User engagement features
Design templates that encourage participation:
- Make the "New Post" button prominent
- Show related posts to keep users browsing
- Highlight unanswered questions
- Display user reputation to motivate contributions
Moderation tools integration
Community health requires moderation. Ensure your templates support:
- Flagging inappropriate content
- Hiding posts pending review
- Displaying moderator badges
- Showing community guidelines
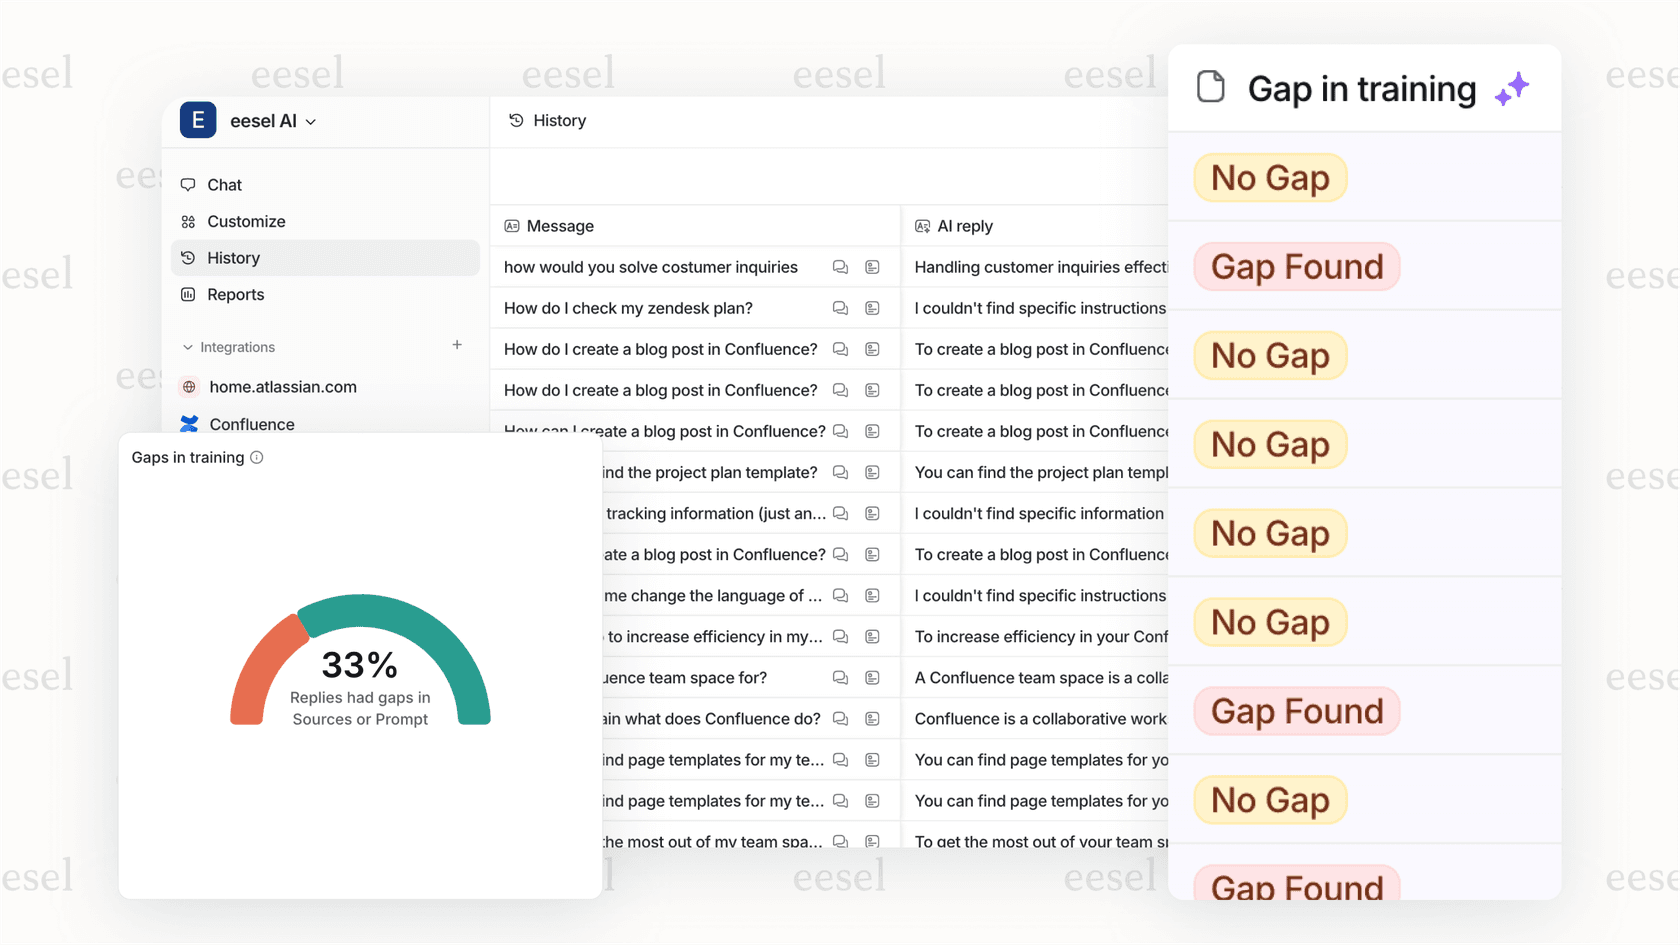
As your community grows, managing it becomes more complex. We've seen teams benefit from adding AI-powered assistance to handle routine moderation tasks. eesel AI can monitor discussions, suggest responses to common questions, and escalate issues that need human attention. This lets your team focus on building relationships rather than chasing spam.
Third-party theme options for communities
Building custom templates from scratch is not always the best approach. Sometimes purchasing a pre-built theme makes more sense, especially if you need professional results quickly.
Here's how the leading providers compare:
| Provider | Starting Price | Key Strength |
|---|---|---|
| Lotus Themes | $299 | Proven track record with 5,800+ customers |
| Zenplates | $489 | Extensive customization without coding |
| Diziana | $299 | Budget-friendly options |
When to consider premium themes:
- You need results quickly without development time
- Your team lacks front-end development expertise
- You want professional design without hiring a designer
- You need features that would take weeks to build yourself
Pros of purchased themes:
- Immediate professional appearance
- Tested, bug-free code
- Regular updates and support
- Often include community-specific features
Cons of purchased themes:
- Less flexibility than custom builds
- May require workarounds for unique needs
- Ongoing costs for updates or support
- Risk of looking similar to other sites using the same theme
Migration considerations:
Switching themes requires planning. Document your current customizations before migrating. Check whether your existing content will display correctly in the new theme. Most providers offer migration assistance or documentation to help with the transition.
Start building your Zendesk community today
You now have the knowledge to create and customize Zendesk Guide community templates. Let's recap the key steps:
- Understand the difference between article templates and theme templates
- Familiarize yourself with the seven core community template files
- Learn Curlybars syntax for dynamic content
- Customize topic and post pages to match your needs
- Apply best practices for mobile, accessibility, and performance
- Consider third-party themes if custom development is not feasible
The best communities evolve over time. Start with the basics, gather feedback from your users, and iterate on your design. Pay attention to which topics generate the most engagement and adjust your templates to highlight that content.
As you build out your community, think about how automation can support your goals. eesel AI works alongside community forums, answering routine questions and routing complex issues to the right people. If you're looking to scale your community support without scaling your team, try eesel AI free and see how it complements your Zendesk setup.
