If you're building a Zendesk app, you'll eventually need to make API requests. Maybe you're pulling data from an external service, creating tickets programmatically, or integrating with another platform. The Zendesk app request API gives you several ways to do this, but the documentation is spread across multiple pages and the authentication options can be confusing.
This guide consolidates everything you need to know about making API requests from Zendesk apps. We'll cover the ZAF Client request() method, the Requests API endpoint, authentication strategies, and common pitfalls developers run into. If you're looking for a simpler way to automate Zendesk workflows without writing custom code, we'll also touch on how eesel AI integrates with Zendesk to handle ticket management through AI agents.
What is the Zendesk app request API?
When developers search for "Zendesk app request API," they're usually looking for one of two things:
- The ZAF Client request() method - A JavaScript function that lets your Zendesk app make HTTP requests to external APIs or the Zendesk API itself
- The Requests API endpoint - A REST API that lets end users create and view tickets from their perspective
The ZAF request() method is what you use when building apps that run inside Zendesk. It handles authentication, avoids cross-domain restrictions, and manages the complexity of making secure API calls from a browser environment. The Requests API is what you call when you want to let customers submit tickets without giving them full agent access.
Let's break down how each works and when to use them.
Understanding the ZAF Client request() method
The Zendesk Apps Framework (ZAF) provides a JavaScript client that runs inside your app. The client.request() method is your gateway to making HTTP requests from within the Zendesk environment.
Here's why it exists: browsers block cross-origin requests for security reasons. If your app tries to call an external API directly, you'll hit CORS errors. ZAF solves this by routing your requests through a Zendesk proxy server. The proxy makes the actual request and returns the response to your app.
The request() method returns a JavaScript Promise, so you handle responses with .then() or async/await:
const client = ZAFClient.init();

client.request({
  url: 'https://api.example.com/data',
  type: 'GET',
  headers: {
    'Authorization': 'Bearer {{setting.api_token}}'
  }
}).then(data => {
  console.log('Response:', data);
}).catch(error => {
  console.error('Error:', error);
});
Key capabilities of the request() method:
- Proxy server routing - Avoids CORS by making requests server-side
- Secure settings - Hide API keys from browser dev tools using manifest.json placeholders
- OAuth token management - Handle third-party OAuth flows without exposing tokens
- JWT encoding - Sign requests with JSON Web Tokens for added security
One limitation to note: the request() method doesn't support binary file uploads. If you need to attach files, you'll need to use a different approach (more on that later).
Authentication methods for Zendesk app requests
Authentication is where most developers get stuck. Zendesk offers multiple auth methods, and choosing the right one depends on what you're trying to do.
Basic authentication with API tokens
The simplest approach for calling the Zendesk API itself. Format your credentials as {email}/token:{api_token}, base64 encode them, and include them in the Authorization header with the "Basic " prefix:
const credentials = btoa('agent@company.com/token:abc123xyz');
const authHeader = `Basic ${credentials}`;
Common mistake: forgetting the "Basic " prefix. The header must start with "Basic " followed by a space, then the base64-encoded string. Many developers encode the credentials correctly but omit the prefix, resulting in 401 Unauthorized errors.
Secure settings
If you're calling a third-party API, you don't want to expose API keys in your JavaScript where anyone can see them in the browser console. Secure settings solve this by storing sensitive data server-side.
In your manifest.json:
{
  "parameters": [
    {
      "name": "api_token",
      "type": "text",
      "secure": true
    }
  ],
  "domainWhitelist": ["api.example.com"]
}
Reference the setting in your code with double curly braces:
headers: {
  'Authorization': 'Bearer {{setting.api_token}}'
}
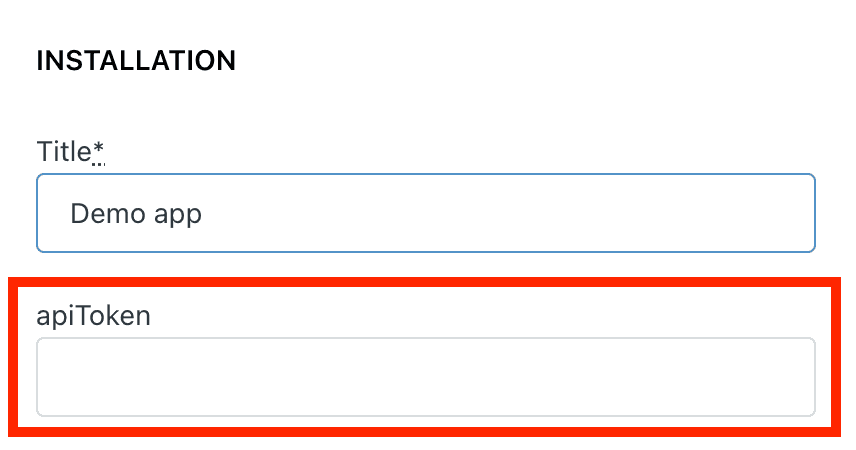
The actual token value is stored on Zendesk's servers and injected at request time. Users configure it during app installation, and it's never exposed in the browser.
OAuth 2.0
For integrations with services like Salesforce, Slack, or Google, OAuth is the standard. ZAF supports the authorization code flow:
- Your app redirects the user to the OAuth provider
- The user authorizes access
- The provider redirects back with an authorization code
- Your app exchanges the code for an access token
- ZAF stores the token securely and refreshes it automatically
The setup requires registering your app with the OAuth provider and configuring the redirect URLs. Once set up, token management is handled automatically.
JWT tokens
For signed requests, ZAF supports JWT encoding with the HS256 algorithm. You provide a secret key, and ZAF generates tokens with claims like expiry time. This is useful when you need to verify that requests came from your Zendesk app and haven't been tampered with.
Browser cookie authentication
When calling the Zendesk API from within your app, you can skip explicit authentication entirely. The ZAF client automatically uses the browser's Zendesk session cookie to authenticate requests. This only works for Zendesk API endpoints, not external APIs.
Which authentication method should you use?
| Scenario | Recommended Method |
|---|---|
| Calling Zendesk API from your app | Browser cookies (automatic) |
| Calling Zendesk API from external code | Basic auth with API token |
| Calling third-party APIs | Secure settings or OAuth |
| Need signed/verified requests | JWT |
For more details on working with Zendesk APIs, check out our guide on the Zendesk ticket API.
Making requests to third-party APIs
By default, ZAF routes requests through its proxy server. This is controlled by the cors option:
// Default behavior - uses proxy (cors: false)
client.request({
  url: 'https://api.example.com/data',
  type: 'GET'
});

// Direct request - requires CORS support on the API
client.request({
  url: 'https://api.example.com/data',
  type: 'GET',
  cors: true
});
The proxy approach works with any API but adds latency. Direct requests are faster but require the API to support CORS headers. Most production apps use the proxy for reliability.
Here's a complete working example that fetches data from an external API using secure settings:
const client = ZAFClient.init();

async function fetchCustomerData(customerId) {
  try {
    const response = await client.request({
      url: `https://api.example.com/customers/${customerId}`,
      type: 'GET',
      headers: {
        'Authorization': 'Bearer {{setting.api_key}}',
        'Content-Type': 'application/json'
      }
    });

    return response;
  } catch (error) {
    console.error('Failed to fetch customer:', error);
    throw error;
  }
}
Error handling is important. The Promise rejects if the request fails, so always wrap calls in try/catch or use .catch().
Working with the Zendesk Requests API
The Requests API is separate from the ZAF request() method. It's a REST API endpoint that lets end users (customers) interact with tickets from their perspective.
Key differences from the Tickets API:
- End-user view - Only sees public comments and fields the user has access to
- Anonymous support - Can be called without authentication (rate limited)
- Simplified permissions - No need for agent credentials
Common endpoints:
| Endpoint | Method | Description |
|---|---|---|
/api/v2/requests | GET | List requests for the authenticated user |
/api/v2/requests | POST | Create a new request (ticket) |
/api/v2/requests/{id} | GET | Get details of a specific request |
/api/v2/requests/{id} | PUT | Update an existing request |
Creating a request:
curl https://company.zendesk.com/api/v2/requests.json \
  -d '{"request": {"subject": "Help needed", "comment": {"body": "I have a question"}}}' \
  -H "Content-Type: application/json" \
  -X POST
For authenticated requests, include the Authorization header. For anonymous requests (like a contact form), omit authentication. Anonymous requests are rate limited to 5 per hour for trial accounts.
If you're building integrations that create tickets, you might also find our guide on creating Zendesk tickets using the API helpful.
Common errors and troubleshooting
Even with good documentation, things go wrong. Here are the most common issues developers encounter:
401 Unauthorized
The authentication header is malformed. Double-check:
- The "Basic " prefix is present (with a space after it)
- The credentials are base64 encoded correctly
- The email format is
{email}/token:{api_token}(note the "/token" suffix) - The API token is active and hasn't expired
CORS errors
You're trying to make a direct request to an API that doesn't support CORS. Either enable the proxy by omitting cors: true, or ask the API provider to add CORS headers.
429 Rate Limit Exceeded
Zendesk has multiple rate limits. Apps have their own limit (usually 100 requests per minute), and your account has a separate limit (700 requests per minute for most endpoints). If you hit a 429, check the Retry-After header and wait before retrying. See the official rate limits documentation for complete details.
422 Unprocessable Entity
Your JSON is malformed. Common causes:
- Missing quotes around property names
- Trailing commas in objects
- Single quotes instead of double quotes
- Invalid escape sequences
File upload issues
The ZAF request() method doesn't support binary uploads. Workarounds include:
- Using a separate server to handle uploads
- Encoding files as base64 and decoding server-side
- Using a library like RestSharp for binary handling
For more integration examples, see our guide on connecting Zendesk to Slack using third-party apps.
Building Zendesk app integrations without code
Custom API integrations take time to build and maintain. You need to handle authentication, error retry logic, rate limiting, and ongoing maintenance as APIs change.
If your goal is to automate ticket workflows rather than build a custom app, consider whether you actually need to write code. eesel's Zendesk integration handles ticket creation, routing, and responses without any development work, connecting AI-powered automation to your existing Zendesk setup in minutes.

Here's the difference: with the API approach, you're writing scripts to move tickets around that humans will still need to respond to. With an AI agent, you're training a system to understand your business and handle the entire ticket lifecycle. You connect it to your Zendesk account, and it learns from your past tickets, help center articles, and macros.
The progressive rollout model means you start with the AI drafting responses for review, then expand to full automation as it proves itself. For teams looking to reduce ticket volume rather than just automate API calls, this often delivers faster results than custom development.