Zendesk API OAuth scopes: A complete developer guide
Stevia Putri
Last edited February 27, 2026
When you're building integrations with Zendesk, controlling what your application can and cannot do is critical. OAuth scopes act as permission gates, letting you specify exactly which parts of the Zendesk API your application can access.
Unlike API tokens, which grant broad access to your entire Zendesk account, OAuth scopes let you follow the principle of least privilege. You request only the permissions you need, nothing more. This makes your integrations more secure and easier to audit.
In this guide, we'll walk through everything you need to know about Zendesk API OAuth scopes: what they are, which ones are available, how to implement them, and best practices for keeping your integrations secure.
What are Zendesk API OAuth scopes?
OAuth scopes in Zendesk are permission declarations that control access to API resources. When you create an OAuth token, you specify scopes that determine what actions your application can perform: reading tickets, writing to user records, managing help center content, and so on.
Think of scopes as keys to specific rooms in a building. Instead of having a master key that opens every door (like an API token), you request keys only for the rooms you need to enter. If your integration only needs to read ticket data, you request read or tickets:read scope. You won't get access to delete users or modify triggers.
This granular approach matters for several reasons:
- Security: If a token is compromised, the damage is limited to the scoped permissions
- Compliance: You can demonstrate exactly what data your application accesses
- User trust: End users see exactly what permissions they're granting during OAuth authorization
- Debugging: When something breaks, you know exactly which permissions are involved
Zendesk supports two main scope formats depending on how you create your tokens. The OAuth Tokens API uses an array format ("scopes": ["read"]), while the grant-type token endpoint uses a space-separated string ("scope": "read write"). We'll cover both approaches in the implementation section. For a deeper comparison of OAuth versus API tokens, see Zendesk's authentication guide.
Available OAuth scopes in Zendesk
Zendesk organizes scopes into two categories: broad scopes that apply across resources, and resource-specific scopes that target individual API endpoints.
Broad scopes
These three scopes control access across all Zendesk resources:
| Scope | Access Level | Best For |
|---|---|---|
read | GET endpoints and sideloading | Reporting tools, analytics dashboards, read-only integrations |
write | POST, PUT, DELETE endpoints | Sync tools, automation platforms, two-way integrations |
impersonate | Requests on behalf of end users | Customer portals, embedded support widgets, proxy applications |
The impersonate scope deserves special mention. It lets administrators make API requests on behalf of end users, which is useful when building customer-facing applications that need to create tickets or access request history without exposing admin credentials. This scope requires admin privileges and should be used carefully.
Resource-specific scopes
For more granular control, Zendesk lets you scope permissions to specific resources using the syntax resource:scope. Here are the resources that support scoped access:
| Resource | Read Scope | Write Scope | Notes |
|---|---|---|---|
| tickets | tickets:read | tickets:write | Core ticketing functionality |
| users | users:read | users:write | User management and profiles |
| organizations | organizations:read | organizations:write | Organization records |
| auditlogs | auditlogs:read | N/A | Read-only by design |
| hc (help center) | hc:read | hc:write | Articles, categories, sections |
| apps | apps:read | apps:write | App marketplace management |
| triggers | triggers:read | triggers:write | Business rules automation |
| automations | automations:read | automations:write | Time-based automations |
| targets | targets:read | targets:write | Notification targets |
| webhooks | webhooks:read | webhooks:write | Webhook configuration |
| macros | macros:read | macros:write | Canned responses |
| requests | requests:read | requests:write | End-user ticket interface |
| satisfaction_ratings | satisfaction_ratings:read | satisfaction_ratings:write | CSAT data |
| dynamic_content | dynamic_content:read | dynamic_content:write | Dynamic content items |
| any_channel | N/A | any_channel:write | Write-only |
| web_widget | N/A | web_widget:write | Write-only |
| zis | zis:read | zis:write | Zendesk Integration Services |
The flexibility here is powerful. You can mix and match scopes to create precise permission sets. For example, "scopes": ["tickets:read", "users:write", "organizations:read"] gives you read access to tickets and organizations, plus the ability to update user records.
OAuth scope syntax and format
Getting the syntax right matters because Zendesk returns tokens even with invalid scope formats, but API calls with those tokens will fail with "Forbidden" errors.
Non-grant-type tokens (scopes array)
When using the OAuth Tokens API to create tokens directly (typically for internal use or admin-created tokens), use the array format:
{
  "token": {
    "client_id": 1234,
    "scopes": ["tickets:read", "users:read"]
  }
}
Key points:
- Parameter name is
scopes(plural) - Value is a JSON array of strings
- Each scope is a separate array element
- Endpoint:
POST /api/v2/oauth/tokens
Grant-type tokens (scope string)
When implementing the OAuth authorization flow (authorization code, refresh token, or client credentials), use the space-separated string format:
{
  "grant_type": "authorization_code",
  "code": "7xqwtlf3rrdj8uyeb1yf",
  "client_id": "your_client_id",
  "client_secret": "your_client_secret",
  "scope": "tickets:read users:write"
}
Key points:
- Parameter name is
scope(singular) - Value is a space-separated string
- Multiple scopes go in the same string
- Endpoint:
POST /oauth/tokens
Common scope combinations
Here are practical scope combinations for typical use cases:
Read-only reporting:
"scopes": ["read"]
Ticket management with user lookup:
"scopes": ["tickets:read", "tickets:write", "users:read"]
Help center content management:
"scopes": ["hc:read", "hc:write", "tickets:read"]
Full admin access (use sparingly):
"scopes": ["read", "write"]
How to implement OAuth scopes in your application
Let's walk through the complete implementation, from creating an OAuth client to making your first scoped API request.
Step 1: Create an OAuth client in Zendesk
Before you can request scoped tokens, you need to register your application as an OAuth client in Zendesk.
-
Log into your Zendesk account as an administrator
-
Navigate to Admin Center > Apps and integrations > APIs > OAuth clients
-
Click Add OAuth client
-
Fill in the required fields:
- Name: Your application name (users will see this during authorization)
- Description: Brief description of what your app does
- Client kind: Choose Public for mobile/SPA apps, Confidential for server-side apps
- Redirect URLs: Your callback URLs (must be HTTPS except for localhost)
-
Click Save
-
Copy the Secret value immediately (it's only shown once fully)
-
Note your Unique Identifier (this is your
client_id)
Important: If you select Public as the client kind, you must implement PKCE (Proof Key for Code Exchange) for security. Confidential clients can use PKCE, client secret, or both.
Step 2: Request authorization with scopes
Send your users to Zendesk's authorization endpoint with your requested scopes:
https://{subdomain}.zendesk.com/oauth/authorizations/new?
  response_type=code&
  redirect_uri=https://your-app.com/callback&
  client_id=your_unique_identifier&
  scope=read%20write&
  state=random_state_string
Required parameters:
response_type=code: Indicates you want an authorization coderedirect_uri: Must match one of the URLs registered in Step 1client_id: Your OAuth client's unique identifierscope: Space-separated list of requested scopes
Recommended parameters:
state: Random string to prevent CSRF attacks (validate this matches when the user returns)code_challengeandcode_challenge_method=S256: Required for PKCE with public clients
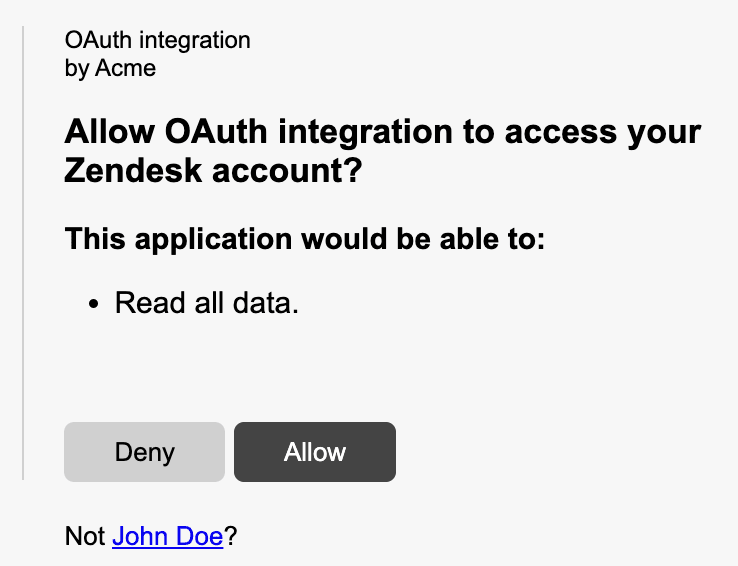
The user will see an authorization screen listing the scopes you're requesting. They'll approve or deny access.
Step 3: Exchange authorization code for access token
When the user approves, Zendesk redirects to your callback URL with an authorization code:
https://your-app.com/callback?code=7xqwtlf3rrdj8uyeb1yf&state=random_state_string
Exchange this code for an access token:
curl https://{subdomain}.zendesk.com/oauth/tokens \
  -H "Content-Type: application/json" \
  -d '{
    "grant_type": "authorization_code",
    "code": "7xqwtlf3rrdj8uyeb1yf",
    "client_id": "your_unique_identifier",
    "client_secret": "your_client_secret",
    "redirect_uri": "https://your-app.com/callback",
    "scope": "read write"
  }'
Important: The authorization code expires in 120 seconds. Exchange it promptly.
The response includes your access token and refresh token:
{
  "access_token": "gErypPlm4dOVgGRvA1ZzMH5MQ3nLo8bo",
  "refresh_token": "31048ba4d7c601302f3173f243da835f",
  "token_type": "bearer",
  "scope": "read write",
  "expires_in": 172800,
  "refresh_token_expires_in": 800000
}
Step 4: Use the access token in API requests
Include the token in your API requests as a Bearer token:
curl https://{subdomain}.zendesk.com/api/v2/tickets.json \
  -H "Authorization: Bearer gErypPlm4dOVgGRvA1ZzMH5MQ3nLo8bo"
The token only works for endpoints matching your scopes. A token with tickets:read scope can fetch tickets but cannot create them (that would require tickets:write).
Common scope configurations for typical use cases
Different integrations need different permission sets. Here are configurations we see frequently:
Reporting and analytics tools
These tools only need to read data:
"scope": "read"
Or more restrictive:
"scope": "tickets:read users:read organizations:read"
Two-way sync integrations
Sync tools need to read and write across multiple resources:
"scope": "tickets:read tickets:write users:read users:write organizations:read organizations:write"
Help Center content management
For managing knowledge base articles:
"scope": "hc:read hc:write"
Customer-facing portals
When your application acts on behalf of end users:
"scope": "requests:read requests:write impersonate"
Automation and workflow tools
For tools that manage business rules:
"scope": "triggers:read triggers:write automations:read automations:write webhooks:read webhooks:write"
Troubleshooting scope-related errors
Even with proper implementation, you'll encounter errors. Here's how to handle the most common ones:
"Forbidden" errors (403)
This is the most common scope-related error. It means your token lacks permission for the requested endpoint.
Causes:
- Missing required scope for the endpoint
- Invalid scope format (array vs string mismatch)
- User's role doesn't have permission (OAuth scopes are constrained by user permissions)
Solution: Check which scope the endpoint requires in the Zendesk API documentation, then verify your token includes it. Remember that some endpoints require admin privileges regardless of OAuth scopes. For more details on creating and managing tokens, see Zendesk's OAuth token tutorial.
401 Unauthorized
This indicates an expired or revoked token:
{
  "error": "invalid_token",
  "error_description": "The access token provided is expired, revoked, malformed or invalid for other reasons."
}
Solution: Use your refresh token to obtain a new access token, or redirect the user through the authorization flow again if the refresh token has also expired.
Invalid scope format
If you pass scopes in the wrong format (array when string expected, or vice versa), Zendesk may still issue a token, but API calls will fail.
Solution: Double-check which endpoint you're using:
/api/v2/oauth/tokensuses"scopes": []array format/oauth/tokensuses"scope": ""string format
Scope vs. role mismatch
OAuth scopes are filtered by the user's role. An agent's OAuth token cannot access admin-only endpoints, even if the token has write scope.
Solution: Ensure the user authorizing your application has the necessary role permissions for your integration's requirements.
Best practices for OAuth scope security
Following these practices will keep your Zendesk integrations secure:
Request minimal scopes
Only ask for the permissions you absolutely need. If your integration only reads tickets, don't request write scope. This limits exposure if a token is compromised.
Use confidential clients when possible
Server-side applications should use confidential clients with client secrets. Public clients (mobile apps, SPAs) must implement PKCE.
Implement token refresh logic
Access tokens expire. You'll want to build automatic refresh logic into your application:
response = requests.get(api_url, headers=headers)
if response.status_code == 401:
    new_token = refresh_access_token(refresh_token)
    headers['Authorization'] = f'Bearer {new_token}'
    response = requests.get(api_url, headers=headers)
Store tokens securely
Treat access tokens and refresh tokens like passwords. Store them encrypted, never log them, and don't expose them in client-side code.
Validate state parameters
Always include and validate the state parameter in your OAuth flow to prevent CSRF attacks.
Consider using a secure integration platform
Building OAuth integrations securely requires careful attention to token storage, refresh logic, and error handling. If you're building customer support integrations, consider using a platform like eesel AI that handles Zendesk OAuth securely with proper scope management built in. Our AI Agent integrates with Zendesk using minimal required scopes, following the principle of least privilege by default. Learn more about how eesel's Zendesk integration manages authentication and permissions out of the box. You can also learn more about viewing and managing your OAuth tokens in Zendesk's documentation.

Conclusion
Zendesk API OAuth scopes give you precise control over what your integrations can access. By understanding the available scopes, implementing them correctly, and following security best practices, you can build integrations that are both powerful and secure.
The key takeaways:
- Use broad scopes (
read,write) for simple integrations, resource-specific scopes for granular control - Match your scope format to your token endpoint (array vs string)
- Always request minimal permissions
- Handle token expiration gracefully with refresh logic
- Remember that user roles constrain OAuth scopes
Whether you're building a simple reporting tool or a complex two-way sync, proper scope configuration is the foundation of a secure Zendesk integration.
