How to give partners access to tickets in Zendesk: 4 methods
Stevia Putri
Last edited March 2, 2026
If you're trying to figure out how to give partners access to tickets in Zendesk, you've probably discovered something frustrating: there isn't one single way to do it. Depending on what "partner" means in your context, and what kind of access they need, Zendesk offers four completely different approaches.
Let's break it down. Maybe you need external vendors to see tickets in your Zendesk account. Or perhaps you want to restrict your own agents to only see tickets for specific brands. You might need customers to track their own tickets through a portal. Or you could be looking to share tickets with another company that also uses Zendesk.
Each scenario requires a different feature. Here's the short version of what this guide covers:
| Method | Use Case | Plan Required |
|---|---|---|
| Department spaces | Restrict agents to specific brands | Enterprise |
| Ticket sharing | Collaborate with external Zendesk accounts | Professional+ |
| Shared organizations | Let users see each other's tickets | All plans |
| Client portal | End-user self-service access | All plans |
Let's look at each method in detail so you can choose the right one for your situation.
What "Zendesk partner portal ticket access" actually means
Search for "Zendesk partner portal ticket access" and you'll find fragmented information. That's because the term covers multiple distinct features. Before diving into setup steps, you need to understand which problem you're actually trying to solve.
Department spaces solves internal access control. If you run multiple brands in one Zendesk account and want agents to only see tickets for their assigned brands, this is what you need.
Ticket sharing solves external collaboration. When your partner, vendor, or client has their own Zendesk account and you need to collaborate on tickets together, this creates a bridge between the two systems.
Shared organizations solves internal visibility. Users within the same company can view each other's tickets without needing full agent access.
Client portal solves self-service. External customers or partners can submit and track tickets through a branded help center without accessing your internal Zendesk workspace.
The confusion makes sense. All four features involve giving someone access to tickets. But they serve completely different purposes, require different plan levels, and work in fundamentally different ways.
Method 1: Department spaces for multi-brand access control
Department spaces (officially called "restricting agent ticket access by brand") lets you control which tickets your agents can see based on brand membership. It's designed for companies running multiple brands in a single Zendesk account who need to segment access.

When to use department spaces
This feature makes sense when:
- You operate multiple brands from one Zendesk account
- Agents should only handle tickets for specific brands
- You need to prevent cross-brand data visibility for privacy or operational reasons
- You're managing different product lines or regional divisions
Plan requirements
Department spaces requires an Enterprise plan. It's available on Enterprise and Enterprise Plus suites, and requires Zendesk Support Enterprise specifically.
Source: Zendesk help documentation
How to set up department spaces
Step 1: Check your plan Verify you're on an Enterprise plan. This feature won't appear in Admin Center on lower tiers.
Step 2: Assign agents to brands Navigate to Admin Center > People > Team > Team members. Select the agents you want to restrict, then click "Manage brand membership." Choose which brands each agent can access.
Step 3: Configure default settings Go to Admin Center > Account > Brand management > Brands > Manage settings. Here you control how new team members get assigned to brands by default. You can set them to manually assign, assign to all brands, or assign based on previous membership for upgraded users.
Step 4: Require brand selection To prevent tickets from being created without a brand (which would make them invisible to restricted agents), configure your ticket forms to require brand selection before saving.

Important limitations
Department spaces has some significant constraints you need to know about:
- It cannot be used with legacy messaging through Chat or legacy Talk plans
- Triggers can still assign tickets to agents who don't have brand access (the agent will see an access error)
- Upgraded agents initially belong to no brands and need manual assignment
- Tickets shared via direct link are inaccessible if the agent isn't a member of that ticket's brand
- Admins cannot be removed from brands; they always have access to all tickets
Bottom line? Department spaces is powerful for multi-brand segmentation, but it requires careful configuration to avoid access issues.
Method 2: Ticket sharing for external partner collaboration
Ticket sharing lets you collaborate on tickets with another Zendesk account entirely. If your partner, vendor, or client uses Zendesk and you need to work together on support issues, this creates a formal sharing relationship between the two accounts.
When to use ticket sharing
This method works best when:
- Your external partner also uses Zendesk
- You need to collaborate on specific tickets together
- Both parties need to see updates and comments
- You want to maintain separate Zendesk instances while sharing select tickets
Plan requirements
Ticket sharing requires a Professional or Enterprise plan. If you want to automate sharing with triggers (highly recommended for scale), you'll need Enterprise.
Source: Zendesk help documentation
How to set up ticket sharing
Step 1: Create a sharing agreement Go to Admin Center > Channels > Ticket sharing. Click to send a sharing agreement invitation to your partner's Zendesk subdomain (the part before ".zendesk.com" in their URL).
Step 2: Wait for acceptance Your partner receives a notification to accept or decline the agreement. You can check status anytime in your sharing agreements list (pending, accepted, declined, or inactive).
Step 3: Configure permissions Once accepted, configure what syncs between accounts:
- Comment syncing (public and/or private comments)
- Status syncing (Open, Pending, Solved)
- Field syncing (which custom fields transfer)
- Tag synchronization
Be thoughtful here. Sharing private comments with external partners might expose internal notes you don't want them to see.
Step 4: Share tickets Agents can now share individual tickets by opening a ticket and selecting "Share ticket with" from the ticket properties panel. Choose the partner account and submit the update.
Step 5: Set up automation (Enterprise only) For high-volume sharing, create triggers that automatically share tickets based on conditions. For example, auto-share any ticket tagged "vendor_escalation" with your manufacturing partner.
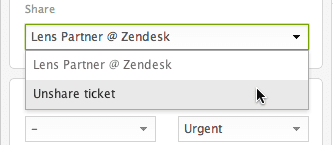
The orphaned ticket problem
Here's a critical gotcha: when you unshare a ticket, it doesn't disappear from the receiving account. It becomes an "orphaned" ticket that exists independently in their system. They'll need to manage it separately from that point forward.
Also remember that sharing agreements are one-way by default. If you want bidirectional sharing, your partner needs to send a separate agreement from their side.
Method 3: Shared organizations for internal visibility
Organizations in Zendesk group users together, typically representing companies or departments. When you enable sharing within an organization, users can view each other's tickets. This is completely different from ticket sharing; it's about internal visibility within your own Zendesk account.
When to use shared organizations
This approach fits when:
- Users from the same company want to see each other's tickets
- You need internal visibility without giving users full agent access
- You want automatic organization assignment based on email domains
- Teams need to track collective support history
Plan requirements
Organizations work on all Zendesk plans. However, the ability for users to belong to multiple organizations (up to 300) requires Professional or Enterprise plans.
Source: Zendesk help documentation
How to set up shared organizations
Step 1: Create an organization Navigate to Admin Center > People > Organizations. Click "Add organization" and give it a clear name.
Step 2: Add email domains Add email domains to the organization for automatic assignment. Any user who submits a ticket with an email matching that domain gets automatically added to the organization.
Step 3: Configure sharing settings Set the organization access level:
- Users can view own tickets only
- Users can view all tickets in the organization
Step 4: Add existing users You can add users manually or through bulk CSV import for existing contacts.
Step 5: Set up organization fields (optional) Create custom organization fields to track additional data like account tier, renewal date, or assigned account manager.
Organizations vs. ticket sharing
Don't confuse these two features. Organizations keep everything within your single Zendesk account. Ticket sharing crosses account boundaries to external Zendesk instances. If your "partner" is actually just another department in your company, use organizations. If they're a separate company with their own Zendesk, use ticket sharing.
Method 4: Client portal for end-user self-service
The Zendesk Help Center (often called the client portal) is a branded self-service portal where end-users submit tickets, track status, and access knowledge base articles. This is what most people picture when they think of a "partner portal."
When to use a client portal
This solution works when:
- External customers or partners need to submit and track tickets
- You want to provide self-service through a knowledge base
- Partners don't need to see internal agent workspace or other customers' tickets
- You want customizable branding and authentication options
Plan requirements
The Help Center is available on all Zendesk plans: Team, Growth, Professional, Enterprise, and Enterprise Plus.
Source: Zendesk help documentation
How to configure client portal access
Step 1: Choose your access model Zendesk offers three access configurations:
- Open: Anyone can see your help center and submit tickets
- Closed: Only users you add to your account can sign in and submit
- Restricted: Only approved email domains can submit (others are rejected)
Step 2: Configure registration options Decide whether users must register before submitting tickets. Registration requires users to provide name and email address before they can create tickets or sign in.
Step 3: Set up authentication (optional) For enhanced security, configure SSO via SAML, OAuth, or JWT. You can also enable social login through Google, Microsoft, and other providers.
Step 4: Customize branding Apply your company's branding to the Help Center including colors, logos, and custom themes.
Step 5: Organize content Structure your knowledge base with categories and sections. Enable AI-powered search to help users find answers quickly.
The restricted access sweet spot
For partner portals specifically, the "restricted" access option often works best. It lets you specify which email domains can submit tickets (like "@partnercompany.com") while still allowing public visibility of your help center content. This strikes a balance between openness and control.
Choosing the right Zendesk partner portal ticket access method
With four different approaches available, how do you choose? Here's a decision framework:
Choose department spaces if: You're a single company running multiple brands and need to restrict agent visibility by brand.
Choose ticket sharing if: You're collaborating with an external partner who also uses Zendesk, and you need to work together on specific tickets.
Choose shared organizations if: You want users within the same company to see each other's tickets for visibility and continuity.
Choose client portal if: You need a customer-facing portal for ticket submission and self-service.
For more details on ticket sharing specifically, check out our complete guide to Zendesk organization ticket sharing.
Streamlining partner support with AI
Managing partner access to tickets is just one piece of the support puzzle. Once you've configured your Zendesk partner portal ticket access, you might find yourself dealing with new challenges: routing tickets to the right team, maintaining consistent responses across partners, or scaling support as partner volume grows.
This is where an AI teammate can help. At eesel AI, we've built an AI support agent that integrates directly with Zendesk to handle the heavy lifting.

Here's how it works: you connect eesel AI to your Zendesk account, and it learns from your past tickets, help center articles, and macros. Within minutes, it understands your business context and can start handling tickets. You begin with eesel drafting replies for review, then level up to full autonomous responses as it proves itself.
For partner support specifically, eesel AI can:
- Route partner tickets to the right team based on content analysis
- Draft responses grounded in your partner-specific knowledge base
- Maintain consistent tone and policy across all partner interactions
- Escalate complex issues to humans with full context
The result? Your team spends less time on repetitive partner inquiries and more time on strategic relationships. Mature deployments achieve up to 81% autonomous resolution with a typical payback period under two months.
If you're setting up partner access in Zendesk and want to make the experience smoother for everyone involved, invite eesel AI to your team. It works alongside your existing Zendesk setup, including department spaces, ticket sharing, and client portals.
