How to set Zendesk priority by organization: A complete guide
Stevia Putri
Last edited March 6, 2026
Not all customers are equal. Your enterprise accounts pay more, have stricter SLAs, and expect faster responses. But out of the box, Zendesk treats every ticket the same unless you configure it otherwise. If you're looking for an AI-powered alternative that integrates seamlessly with Zendesk, check out my Zendesk AI integration.
Setting ticket priority based on organization membership is one of the most effective ways to ensure VIP customers get the attention they deserve. Whether you're managing a handful of key accounts or thousands of organizations with different service tiers, automating priority assignment keeps your team focused on what matters most.
This guide walks you through two native Zendesk approaches: triggers (available on all plans) and group mapping (Professional+). I'll also look at when rule-based systems hit their limits and how AI-powered alternatives like me can handle more complex routing decisions.

What You'll Need
Before you start, make sure you've got:
- A Zendesk Support account (any plan works for triggers, but you'll need Professional or higher for group mapping)
- Admin access to create triggers and manage organizations
- A clear list of which organizations need priority handling
- Defined priority levels that your team understands (what constitutes "High" vs "Urgent" in your team's context)
Understanding Organizations and Priority in Zendesk
Organizations in Zendesk are collections of end users, typically grouped by company, department, or service tier. They are the foundation for organization-based priority workflows.
Zendesk offers four priority levels: Low, Normal, High, and Urgent. These are standard ticket fields that cannot be customized. You cannot add new priority values or rename existing ones. If you need additional granularity, you can create custom ticket fields, but this affects your SLA policies and reporting, so it is not recommended as a replacement for the default priority field.
The workflow connection is straightforward: when a ticket arrives, Zendesk checks the requester's organization membership. If they belong to a priority organization, a trigger or group mapping rule automatically elevates the ticket priority. This happens before an agent even sees the ticket.
On Team plans, users can only belong to one organization. On Professional and Enterprise plans, users can belong to up to 300 organizations, with one designated as primary for routing purposes.
Method 1: Using Triggers to Set Zendesk Priority by Organization
Triggers are the most flexible way to set priority by organization and work on all Zendesk plans. They run immediately when tickets are created or updated and can combine multiple conditions for sophisticated routing logic.
Step 1: Access the Triggers Page
Navigate to Admin Center > Objects and rules > Business rules > Triggers. This is where you'll create and manage all your automation rules.
Step 2: Create a New Trigger
Click "Add trigger" and give it a descriptive name. Use a consistent naming convention that makes the trigger's purpose obvious at a glance. Format: [Reason] - [Workflow]. For example: "VIP Priority - Enterprise Org" or "High Priority - Platinum Customers".
Add a description explaining what the trigger does and why it exists. Future you (and other admins) will appreciate the context.

Step 3: Set Your Conditions
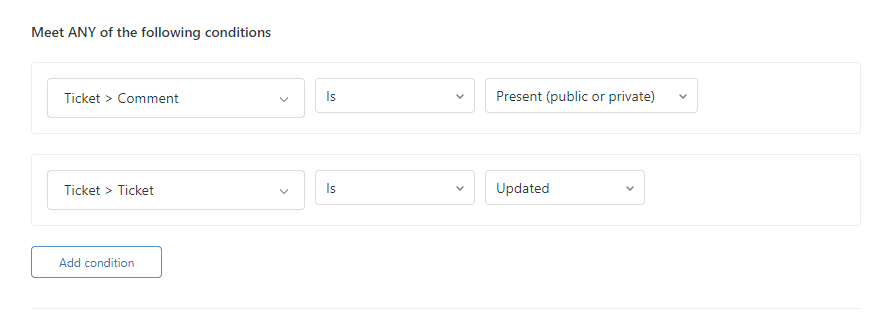
In the "Meet all of the following conditions" section, add:
- Ticket > Is > Created (or "Created or Updated" if you want this to run on ticket changes)
- Requester > Organization > Is > [Select your organization]
Optionally, add Group > Is > "-" (meaning not set). This prevents your trigger from overwriting assignments made by other triggers or group mapping.
Step 4: Configure Priority Actions
In the Actions section, add:
- Priority > High (or Urgent, depending on the organization tier)
You can add additional actions here:
- Set Group to route to a specialized team
- Add tags like "vip_customer" or "enterprise" for reporting
- Send email notifications to alert senior agents

Step 5: Position and Activate
Click "Create trigger," then find your new trigger in the list. Use the drag handles to position it correctly in your trigger order. Triggers run from top to bottom, and order matters: a trigger that runs later can overwrite changes made by an earlier one.
Test your trigger using Zendesk's trigger preview feature before relying on it in production.
Method 2: Group Mapping for Automatic Assignment
Group mapping is a simpler alternative available on Professional and Enterprise plans. Instead of using triggers, you directly associate an organization with a specific agent group.
When group mapping is configured, any ticket from a user in that organization automatically gets assigned to the mapped group. This happens before most triggers run, so you can still use triggers to modify the ticket further (set priority, add tags, send notifications).
To set up group mapping:
- Go to the Organizations page in Zendesk Support
- Find your organization and click Edit
- Select the target group from the Group dropdown
- The change saves automatically
Group mapping works best for straightforward routing scenarios where you simply want tickets from Organization A to go to Group B. It requires less maintenance than triggers but offers less flexibility. You cannot add conditions (like time of day or ticket content) or multiple criteria.
Many teams use both approaches: group mapping for the initial assignment, then triggers for priority setting and additional actions. This hybrid approach gives you the simplicity of automatic assignment with the flexibility of conditional logic.
Best Practices for Organization-Based Priority
Organize Triggers by Category
Trigger order determines execution sequence. Zendesk recommends organizing triggers into categories that reflect the ticket lifecycle:
- Categorization triggers run first. These set defaults and identify what the ticket's about.
- Routing and assignment triggers come next. This is where your organization-based group assignment happens.
- Workflow automation triggers handle escalations, field updates, and integrations.
- Notification triggers run last to send emails and alerts.
To create categories, go to Triggers and click the Add trigger dropdown, then select Add category.
Use Meaningful Naming Conventions
Consistent naming makes troubleshooting easier. Format: [Reason] - [Workflow].
Examples:
- "Route VIP - Enterprise Org"
- "Priority High - Platinum Customers"
- "Notify Escalation - Urgent Tickets"
Prevent Trigger Conflicts
Always include a condition like "Group is not set" in your routing triggers. This prevents accidentally reassigning tickets that've already been routed by group mapping or earlier triggers.
Document your trigger order and review it when adding new triggers. Conflicts often emerge when multiple triggers try to set the same field.
Create Fallback Triggers
Add a final routing trigger that catches any tickets still without a group assignment and routes them to a default group with a "fallback" tag. This ensures nothing gets lost, and the tag helps you identify gaps in your routing logic.
Monitor and Iterate
Review your trigger performance monthly. Check which fallback tags are appearing, look for tickets that got misrouted, and adjust conditions as your business evolves. Routing is never "set and forget" it requires ongoing attention.
Common Issues and Troubleshooting
Trigger Not Setting Priority
If your trigger isn't working:
- Check trigger order. Is another trigger overwriting your priority setting?
- Verify the requester actually belongs to the organization you've specified
- Use Zendesk's trigger simulation to test the exact conditions
- Confirm the trigger's active (not set to inactive)
Multiple Organizations Per User
If a user belongs to multiple organizations, Zendesk uses their primary organization for routing decisions. You can set the primary organization in the user's profile. On Team plans, users can only belong to one organization.
API-Created Tickets Missing Organization Data
Tickets created via API or from external systems like AWS SNS may not have organization data populated correctly. If your routing depends on organization, these tickets might fall through to your fallback trigger.
Solutions include:
- Using the requester's email domain to determine organization via user mapping
- Including organization identifiers in ticket subjects or custom fields
- Using webhooks to look up and set organization data after ticket creation
- Using an AI triage tool that can infer organization from ticket content even when metadata is missing
Priority Being Overwritten
Later triggers can override priority settings from earlier ones. This is powerful when used intentionally (like VIP overrides) but frustrating when accidental. Check your trigger order and use nullifying conditions to prevent unwanted overwrites.
Taking It Further: AI-Powered Priority with eesel AI
Rule-based triggers work well for fixed scenarios, but they have limits. They cannot learn from patterns in your historical tickets, handle nuanced routing decisions, or adapt as your business changes.
This is where I can help. My AI triage goes beyond simple if-then rules:
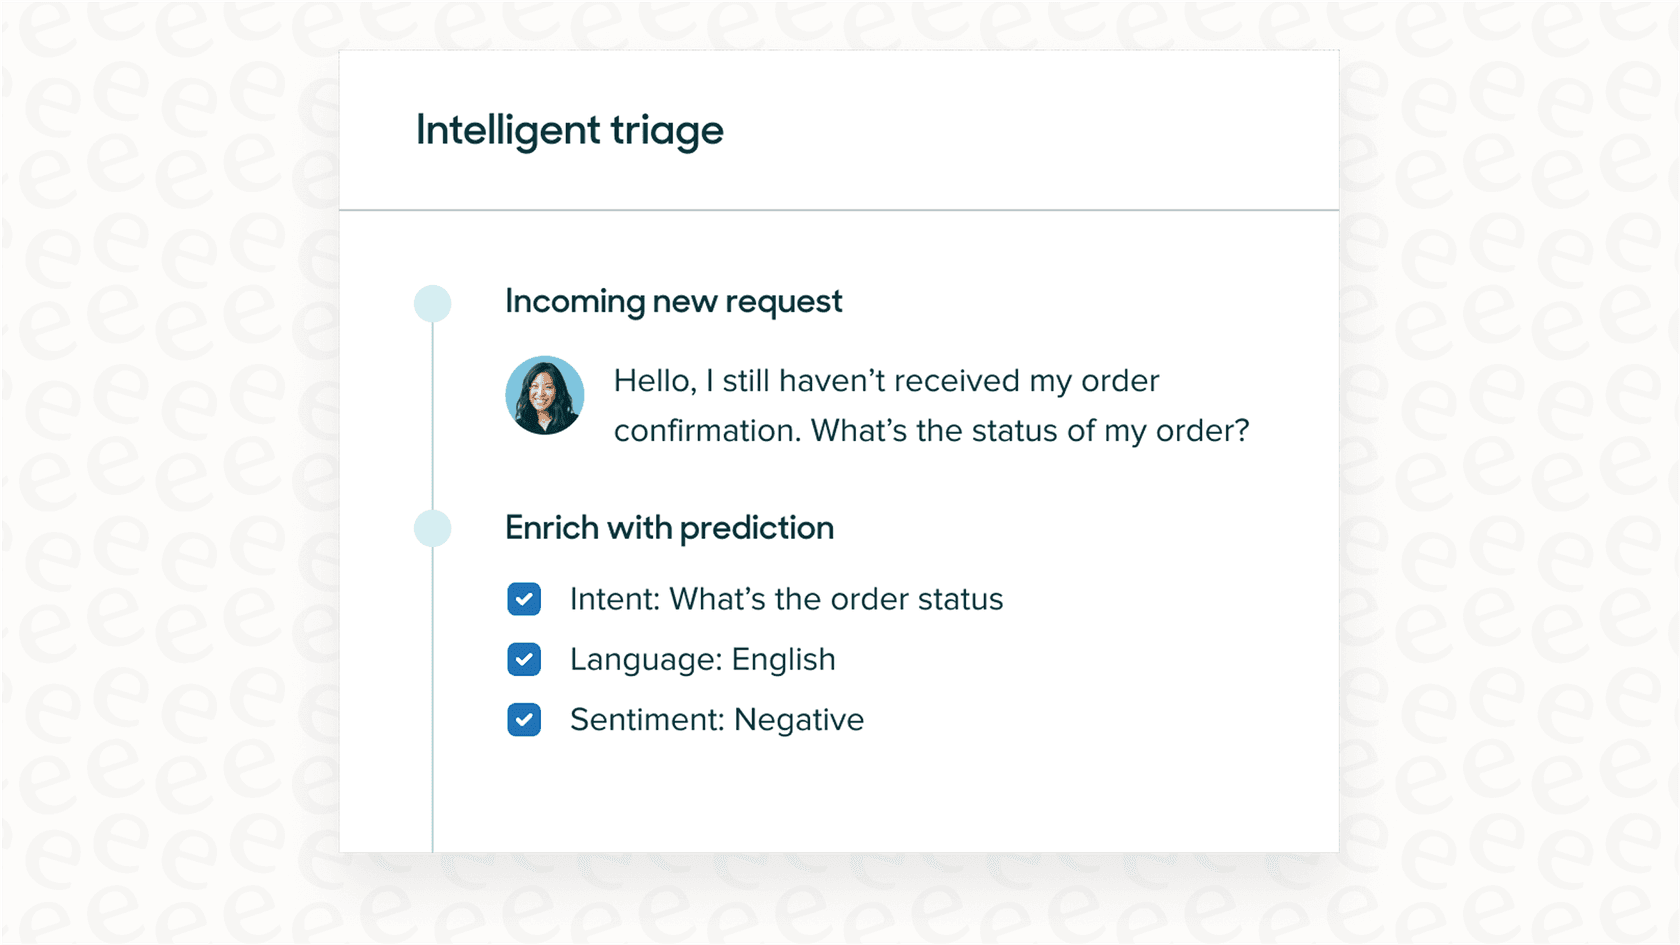
- Learns from your history: I analyze past tickets to understand routing patterns you might not have explicitly defined
- Handles complex decisions: I route based on multiple factors simultaneously (organization, content sentiment, urgency signals, agent workload)
- Natural language instructions: Tell me "Route angry customers from enterprise accounts to senior agents" instead of building complex trigger conditions
- Test before deploying: Simulate routing decisions on historical tickets to see accuracy before going live
Consider AI-powered routing when:
- You've got dozens of triggers that are hard to maintain
- Routing depends on multiple factors that are difficult to express as rules
- Your business logic changes frequently
- You want to reduce the manual triage work your team does
For teams looking to transform their support operations with AI, explore AI for customer service solutions that go beyond basic automation.
Start Optimizing Your Zendesk Priority by Organization Today
You now have two solid approaches for setting ticket priority based on organization: triggers for flexibility and group mapping for simplicity. The key is choosing the right tool for each routing need and organizing your setup so it stays maintainable.
Here's your action plan:
- Audit your current routing setup. Are tickets going to the right groups?
- Implement trigger categories if you haven't already. Future you will thank present you.
- Review your trigger names and descriptions. Would a new admin understand what each one does?
- Create that fallback trigger to catch anything that slips through
- Test your changes with Zendesk's trigger simulation before going live
Remember that routing is never "set and forget." As your customer base grows and changes, your routing logic needs to evolve too. Schedule a monthly review to catch issues before they impact customers.
If you are ready to move beyond rule-based routing to intelligent, learning-driven ticket assignment, try me and see how AI-powered triage can complement your Zendesk setup.
Frequently Asked Questions
Share this article

Article by
Stevia Putri
Stevia Putri is a marketing generalist at eesel AI, where she helps turn powerful AI tools into stories that resonate. She’s driven by curiosity, clarity, and the human side of technology.


