How to set up different ticket forms for multiple brands in Zendesk
Stevia Putri
Last edited March 2, 2026
Managing customer support for multiple brands is a common challenge for growing businesses. Whether you have acquired a company, launched a new product line, or operate several distinct business units, you need a way to keep each brand's support experience separate while maintaining operational efficiency. This is where Zendesk's Multibrand feature comes in.
In this guide, we will walk through setting up different ticket forms for multiple brands in Zendesk. You will learn how to configure branded forms, assign them to specific brands, and customize your Help Center so customers see only the forms relevant to them. We will also cover how an AI layer can help you scale this setup as your operations grow.
Understanding Zendesk multibrand and ticket forms
What is Zendesk Multibrand?
Zendesk Multibrand is a feature that lets you create separate, customer-facing support channels for each of your business lines while keeping your internal team in one place. Think of it as having multiple storefronts that all connect to the same back office.

With Multibrand, you can:
- Create unique help centers with their own branding, logos, and colors
- Set up dedicated email addresses and web widgets for each brand
- Apply brand-specific business rules and ticket forms
- Keep all your agents working from a single unified dashboard
The feature is available on Zendesk Suite Professional and Enterprise plans. Suite Professional supports up to 5 brands, while Suite Enterprise handles up to 300. If you're on Support Enterprise (the older plan structure), you get up to 5 brands.
Why use different ticket forms per brand?
Different brands often serve different purposes, which means they need to collect different information from customers. A technical support form for a SaaS product needs different fields than a refund request form for an e-commerce store.
Here's why brand-specific ticket forms matter:
- Different products need different data: A hardware warranty form needs serial numbers; a billing inquiry form needs account details
- Workflow efficiency: Route tickets to the right team automatically based on the form selected
- Brand consistency: Maintain distinct identities in customer communications
- Customer experience: Show only relevant options so customers don't get overwhelmed
Zendesk lets you create up to 300 ticket forms per account, and you can restrict each form to specific brands. This means customers of Brand A only see forms designed for Brand A, even though everything runs through the same Zendesk instance. Learn more about creating multiple ticket forms in Zendesk's documentation.
Setting up multiple brands in Zendesk
Before you can assign different forms to different brands, you need to set up the brands themselves. Here's what you need and how to do it.
What you'll need
- Plan: Suite Professional or higher (or Support Enterprise)
- Permissions: Administrator access
- Information: Brand name, subdomain, and support email for each brand
Step 1: Create a new brand
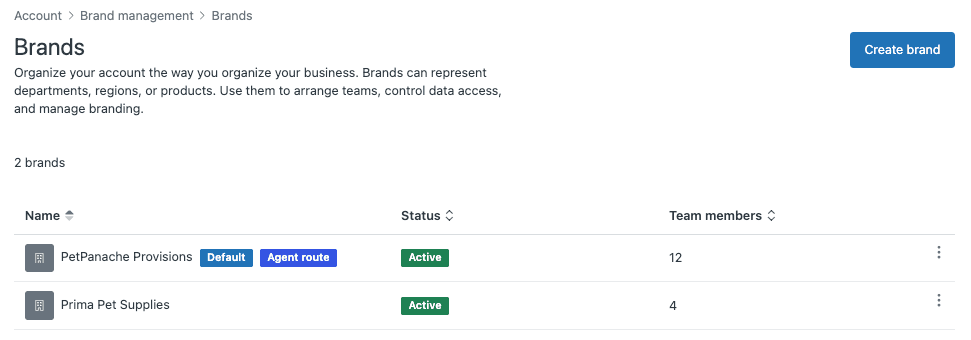
Start by navigating to Admin Center > Account > Brand management > Brands.
Click Add brand and fill in the details:
- Brand name: The internal name your agents will see
- Subdomain: The URL where customers access this brand's help center (e.g., brandname.zendesk.com)
- Support email: The email address customers use to contact this brand
- Brand colors and logo: Upload assets to match your brand identity
You can also enable host mapping if you want to use a custom domain (like support.yourbrand.com) instead of the default zendesk.com subdomain. This requires SSL certificate configuration, which Zendesk can auto-generate for you.
Step 2: Configure brand channels
Once your brand is created, set up the channels customers will use:
- Email: Each brand gets its own support email address
- Help Center: Customize the theme, colors, and content for each brand's help center
- Web Widget: Create separate widgets for each brand with distinct branding
- Social channels: Connect brand-specific social media accounts
Each brand operates independently from the customer's perspective, but your agents see everything in one place. Agents can be assigned to specific brands through brand membership, or you can let them access all brands.
Creating and assigning branded ticket forms
Now that your brands are set up, let's create ticket forms and assign them to the right brands.
Step 3: Create ticket forms for specific brands
Navigate to Admin Center > Objects and rules > Tickets > Forms.
Click Add form to create a new ticket form. Here's what to configure:
- Form name: Give it a clear name agents will recognize (e.g., "Brand A - Technical Support")
- End-user visibility: Check "Editable for end users" if customers should see this form
- End-user title: The name customers see (can be different from the internal name)
- Brand association: Deselect "Apply to all brands" and choose the specific brands that should use this form

Drag and drop the ticket fields you need from the right sidebar. Remember that field properties (like whether a field is required) are set at the field level, not the form level. If you make a field required, it'll be required on every form where it appears.
Pro tip: Use conditional ticket fields to show or hide fields based on what the customer selects. This keeps forms clean while still collecting all the information you need.
Step 4: Assign existing forms to brands
If you already have ticket forms set up, you can edit them to add brand restrictions:
- Go to Admin Center > Objects and rules > Tickets > Forms
- Click the form name you want to update
- Deselect "Apply to all brands"
- Select the brands that should have access to this form
- Click Save
Important: Zendesk recommends keeping your default ticket form assigned to all brands. If a brand can't access the default form, Zendesk will use the first available form alphabetically, which might not be what you want.
Understanding form visibility rules
Here's how Zendesk decides which forms to show:
- If a customer is on Brand A's help center, they see forms assigned to Brand A
- If a form isn't assigned to any specific brand, all brands can see it
- Agents always see all forms, regardless of brand restrictions
- The default form should always be accessible to prevent confusion
When an agent changes the brand on a ticket, the form doesn't automatically change (even if the new brand can't access that form). This prevents data loss in ticket fields.
Customizing Help Center to display the right forms
Sometimes the native brand restrictions aren't enough. You might want a form available for Web Widget but not in Help Center, or you may need to show different forms to different customer segments on the same brand. This is where Help Center customization comes in.
The challenge: forms appearing on wrong brands
By default, if a form is assigned to a brand, it appears everywhere that brand appears. But what if you want:
- A form for VIP customers only?
- Different forms for different products within the same brand?
- A form available via direct link but not in the dropdown?
The workaround involves custom JavaScript in your Help Center theme.
Step 5: Find your form IDs
Before you can hide or show specific forms, you need their IDs:
- Go to Admin Center > Objects and rules > Tickets > Forms
- Click the form name you want to target
- Look at the URL in your browser address bar
- The form ID is the number at the end (e.g.,
/forms/360000123456)
Write down the IDs for all forms you want to hide or target. You'll need these for the code.
Step 6: Add custom code to Help Center
To customize which forms appear, you'll edit your Help Center theme:
- Go to Guide Admin > Customize design
- Click Edit code on your active theme
- Open the script.js template
- Add your custom JavaScript inside the
$(document).ready(function(){block
Here is an example that hides specific forms from the dropdown:
// Hide forms with IDs 12775 and 31495 from the dropdown
$('#request_issue_type_select option[value="12775"]').remove();
$('#request_issue_type_select option[value="31495"]').remove();

// Also remove from the nesty-input after it's created
$('.nesty-panel').on('DOMNodeInserted', function(e){
    $(this).children('ul').children().remove('#12775');
    $(this).children('ul').children().remove('#31495');
});
If you have many forms to hide, use an array approach:
$.each([12775, 31495, 45231], function(index, formValue) {
  $('#request_issue_type_select option[value="' + formValue + '"]').remove();

  $('.nesty-panel').on('DOMNodeInserted', function(e){
    $(this).children('ul').children().remove('#' + formValue);
  });
});
Direct linking to specific forms
Instead of hiding forms, you can link customers directly to a specific form using Zendesk's Curlybars templating language:
<a href="{{page_path 'new_request' ticket_form_id='17369'}}">Submit a Technical Support Request</a>
This creates a link that goes straight to the form with ID 17369, bypassing the form selection dropdown entirely. You can place this link anywhere in your Help Center templates.
Managing multibrand support at scale
Once you have multiple brands and forms set up, keeping everything organized becomes critical.
Best practices for multibrand ticket forms
- Use consistent naming: Include the brand name in the form name (e.g., "Brand A - Billing Inquiry")
- Document your setup: Keep a spreadsheet mapping forms to brands, with form IDs for reference
- Audit regularly: Review form-brand assignments quarterly to catch misconfigurations
- Train your team: Make sure agents understand which forms belong to which brands
- Test end-user experience: Submit test tickets through each brand's Help Center to verify the right forms appear
Common pitfalls to avoid
- Removing default form access: Always keep the default form available to all brands
- Overcomplicating forms: Too many forms confuse customers; consolidate where possible
- Inconsistent field requirements: If the same field appears on multiple forms, it must have the same settings
- Forgetting mobile: Test form display on mobile devices, not just desktop
Enhancing multibrand support with AI
Managing multiple brands with different forms, help centers, and workflows creates administrative overhead. As you scale, you might find yourself spending more time on configuration and less on actually improving customer support. This is where AI can help.
At eesel AI, we've built an AI layer that works alongside Zendesk to simplify multibrand operations. Our AI Agent learns from your help centers, past tickets, and internal documentation to handle customer inquiries autonomously while respecting brand boundaries. You can create multiple AI agents with different personalities to match each brand's voice, all managed from one dashboard.
The scaling challenge
With a multibrand setup, you face:
- Knowledge management: Keeping help center content consistent yet brand-appropriate across multiple centers
- Agent training: Ensuring agents know which forms and workflows apply to which brands
- Quality control: Maintaining consistent service quality across different brand experiences
- Reporting complexity: Aggregating data across brands while still being able to drill down by brand
How eesel AI helps with multibrand support
At eesel AI, we've built an AI layer that works alongside Zendesk to simplify multibrand operations. Here's how it complements your Zendesk setup:
Central knowledge reference: Connect our AI to all your help centers, internal wikis, and past tickets. It learns from every brand's content to provide consistent answers while respecting brand boundaries.
Brand-specific AI agents: You can create multiple AI agents, each with its own personality and tone to match your brands. One can be casual and friendly for your consumer brand; another can be formal and technical for your B2B brand. All managed from one dashboard.
Intelligent triage across brands: Our AI can read incoming tickets, understand which brand they belong to, and apply the appropriate routing rules automatically. This reduces the manual work of sorting tickets by brand.
If you're looking to scale your multibrand support without scaling your administrative burden, our Zendesk integration might be worth exploring. We've also written about managing multiple brands in Zendesk with more detailed strategies.
Start scaling your multibrand support
Setting up different ticket forms for multiple brands in Zendesk takes some initial configuration, but the payoff is worth it. Your customers get a tailored experience that matches their expectations for each brand, while your team operates from a single, efficient workspace.
Here's a quick recap of what we covered:
- Set up your brands in Admin Center with proper subdomains and channels
- Create ticket forms with brand-specific fields and assign them to the right brands
- Customize Help Center with JavaScript if you need more control over form visibility
- Document and audit your setup to keep it organized as you scale
- Consider AI enhancement when manual management becomes too time-consuming
If you're ready to take your multibrand support to the next level, you can try eesel AI free or book a demo to see how AI can streamline your operations. Our pricing is straightforward, and we integrate directly with the Zendesk setup you've already built.
Frequently Asked Questions
Share this article

Article by
Stevia Putri
Stevia Putri is a marketing generalist at eesel AI, where she helps turn powerful AI tools into stories that resonate. She’s driven by curiosity, clarity, and the human side of technology.


