Zendesk routing explained: A practical guide to ticket assignment (2026)
Stevia Putri
Last edited March 3, 2026
Routing is the invisible engine that keeps support teams moving. When it works well, customers get fast answers from the right people. When it doesn't, tickets pile up in the wrong queues and agents waste time cherry-picking work.
This guide covers everything you need to know about Zendesk routing. We'll walk through push and pull models, dive into omnichannel and skills-based routing, and show you how to set up a system that actually works for your team. We'll also look at how AI can enhance Zendesk's native routing capabilities.
What is Zendesk routing?
At its simplest, Zendesk routing is how tickets get from your customers to the agents who can help them. It's the decision-making layer that determines who works on what, and in what order.
Zendesk offers two fundamental approaches:
Push routing automatically assigns tickets to agents based on rules you define. The system decides who gets the work and pushes it to them.
Pull routing lets agents choose their own work from filtered views. Agents grab tickets when they're ready for the next one.
Both approaches have their place. Push routing works well for larger teams with predictable ticket types. Pull routing suits smaller teams or situations where agents need to evaluate tickets before committing.
Why does this matter? Good routing directly impacts your key metrics. First response times drop when tickets reach capable agents immediately. Resolution times improve when complex issues bypass junior staff. Agent satisfaction rises when people work on tickets that match their skills.

Push routing: Automated assignment
Push routing is Zendesk's most sophisticated option. The system evaluates each ticket against your rules and assigns it to the best available agent. No manual intervention required.
Omnichannel routing
Omnichannel routing is the flagship push routing feature. It handles tickets from email, messaging, voice, and social channels through a single unified system.
Here's how it works. Agents set one status (Online, Away, or Offline) that applies across all channels. You define capacity limits per channel, say 5 emails and 2 chats simultaneously. When a ticket arrives, Zendesk checks who's available, who has capacity, and who has the right skills. Then it assigns the ticket automatically.
The benefits are clear. Agents can't cherry-pick easy tickets. Work distributes based on actual availability, not who refreshes their view fastest. Customers reach agents faster because there's no queue-surfing delay.
Omnichannel routing is available on all Zendesk Suite plans, with core features like unified agent status and capacity rules on all tiers. Advanced capabilities including skills-based routing, priority routing, SLA-based routing, and custom queues require Professional plans or higher.

Skills-based routing
Skills-based routing adds intelligence to the assignment process. Instead of just checking availability, Zendesk matches tickets to agents who have specific skills.
You might create skill types like Language (English, Spanish, German), Product (Product A, Product B), or Technical Level (Tier 1, Tier 2, Tier 3). Each agent gets assigned relevant skills. Tickets receive skills through triggers based on their content.
When a ticket needs both German language and Tier 2 technical skills, only agents with both qualifications receive it. This dramatically improves first-contact resolution rates.
Skills-based routing requires Professional, Enterprise, or Enterprise Plus plans on Zendesk Suite. For Zendesk Support standalone plans, it requires the Enterprise tier. You can create up to 10 skill types with 30 skills each.
Round robin assignment
Round robin is the simplest push method. Tickets rotate evenly through your agent pool regardless of content. Agent A gets ticket 1, Agent B gets ticket 2, Agent C gets ticket 3, then back to Agent A.
This works when tickets are fairly uniform and all agents have similar capabilities. It's easy to set up but lacks the nuance of skills-based approaches.
Priority and SLA-based routing
On Professional plans and above, you can route based on urgency. High-priority tickets jump the queue. Tickets nearing SLA breach get assigned first. This prevents service level failures and keeps VIP customers happy.
Pull routing: Self-assignment
Pull routing flips the model. Instead of the system pushing work, agents pull tickets from views when they're ready.
This approach works well in specific scenarios. Small teams where everyone handles everything. Specialized workflows where agents need to evaluate ticket complexity before committing. Training situations where supervisors want new hires to choose appropriate difficulty levels.
The standard setup uses Zendesk views. You create filtered lists like "Unassigned Tier 2 Technical Issues" or "Spanish Language Tickets." Agents open the view, scan the list, and click to assign themselves tickets.
Play mode adds structure to pull routing. Agents click a play button and Zendesk automatically assigns them the next available ticket from a specific view. This prevents cherry-picking while keeping the simplicity of self-assignment.
Many teams use a hybrid approach. Push routing handles the bulk of incoming tickets automatically. Pull views catch edge cases and overflow work that doesn't fit standard routing rules.
Setting up Zendesk routing: Step-by-step
Let's walk through a practical setup for omnichannel routing with skills-based assignment.
Step 1: Plan your routing strategy
Before touching any settings, map out your approach. What ticket types do you receive? What skills do agents have? Which tickets need immediate attention?
List your common ticket categories. For each one, identify the required skills. A billing dispute might need "English" and "Billing System Access." A technical bug might need "English," "Product X," and "Tier 2 Technical."
Define capacity limits realistically. An agent can probably handle more emails than simultaneous chats. Voice calls consume full attention. Start conservative and adjust based on performance data.
Choose your assignment method. Spare capacity routes to the agent with most available bandwidth. Round robin rotates evenly. Most teams prefer spare capacity for efficiency.
Step 2: Configure skills
Navigate to Admin Center > Objects and rules > Business rules > Skills.
Create your skill types first. These are categories like Language, Product, or Technical Level. You can have up to 10 skill types.
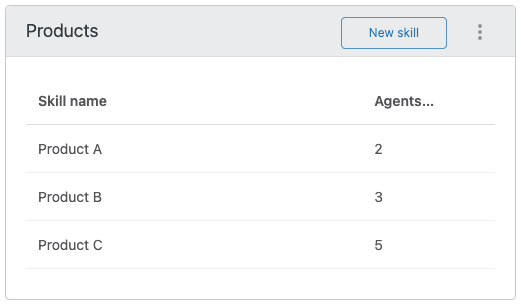
Add specific skills to each type. Under Language, add English, Spanish, French. Under Product, add Product A, Product B, Product C. Each skill type holds up to 30 skills.
Assign skills to agents. You can bulk-assign from the Skills page or add skills to individual agent profiles. Each skill gets a priority level (Normal or High). Agents receive high-priority skill matches before normal ones.
Set up triggers to automatically tag tickets with skills. For example: "If ticket subject contains 'refund,' add Billing skill." This automation keeps skills current without manual work.
Step 3: Set up omnichannel routing
Before you begin, ensure Agent Workspace is activated for your account. This is a required prerequisite for omnichannel routing. If you use live chat, you also need messaging activated.
Enable omnichannel routing in Admin Center > Channels > Omnichannel routing.
Configure capacity rules next. Set maximum tickets per channel for each agent. Consider starting with 5 emails, 2 chats, and 1 call as defaults, then adjust based on actual performance.
Set up unified agent statuses. The defaults are Online, Away, and Offline. On Professional plans, you can add custom statuses like "In Training" or "Out to Lunch."
Create custom queues if you're on Professional or higher. These route specific ticket types to designated agent groups. You might have a "VIP Customers" queue that routes to your senior team, or a "Technical Escalations" queue for complex issues.
Test everything before going live. Create test tickets and verify they route to expected agents. Check that capacity limits work. Confirm skills matching functions correctly.
Step 4: Create routing triggers
Triggers are the automation engine behind routing. They evaluate ticket conditions and take actions like assigning groups, setting priorities, or adding skills.
A basic routing trigger looks like this:
Conditions: Ticket is created, Channel is Email Actions: Add tag "auto_route", Assign to group "Tier 1 Support"
For skills-based routing, add actions like "Set skills: Language = English, Technical Level = Tier 1."
Build triggers for each major ticket type. Keep them simple and specific. Complex triggers with many conditions become hard to troubleshoot.
Test triggers thoroughly. Use Zendesk's trigger testing tools to verify they fire correctly. Check that they don't conflict with each other.
Common routing mistakes and how to fix them
Even well-planned routing setups develop problems over time. Here are the most common issues and solutions.
Outdated skills cause misrouting when agents gain new capabilities or teams reorganize. Review skill assignments quarterly. Update triggers when you add new products or services. Consider using AI-powered ticket classification to keep skills current automatically.
Capacity mismatches overload agents or leave them idle. Monitor actual workload versus capacity settings. If agents consistently hit limits early in the day, increase capacity. If they rarely reach limits, decrease them and redistribute work.
Complex trigger logic becomes unmaintainable. When triggers have 10+ conditions, they become fragile. Break complex rules into multiple simple triggers. Document what each trigger does and why.
Set-and-forget syndrome kills routing effectiveness. Ticket volumes change. Agent skills evolve. Customer priorities shift. Review routing performance monthly. Adjust rules based on data, not assumptions.
Measuring routing success
You can't improve what you don't measure. Track these metrics to evaluate your routing setup:
First response time shows how quickly customers reach capable agents. If this climbs, your routing may be creating bottlenecks.
Resolution time indicates whether tickets reach agents who can actually solve them. Rising resolution times suggest skills mismatches.
SLA compliance tracks whether urgent tickets get priority treatment. Missed SLAs often mean priority routing needs adjustment.
Agent utilization reveals workload balance. Wide variations between agents indicate routing inequities.
Zendesk Explore provides built-in reports for routing analysis. The Omnichannel Routing dataset shows assignment patterns, queue depths, and agent availability trends. Review these weekly to spot issues early.
Enhancing Zendesk routing with AI
Rule-based routing works well for predictable scenarios. But it struggles with nuance. A trigger can't understand that a ticket mentions both "refund" and "angry" and therefore needs immediate attention from a senior agent.
This is where AI enhances routing. eesel AI's intelligent triage analyzes ticket content for intent, sentiment, and urgency. It identifies frustrated customers, complex technical issues, and high-value accounts automatically.

Rather than building increasingly complex trigger chains, you describe routing logic in plain English. "Route billing complaints over $500 to the senior billing team." The AI learns from your past tickets and applies these rules intelligently.
AI also fills gaps between Zendesk's routing capabilities. While Zendesk routes based on skills you've manually defined, AI can identify emerging patterns you haven't formalized yet. It spots that tickets mentioning a specific error code always need Tier 3 support, even if you haven't created that skill mapping.
For teams using Zendesk, our integration adds an AI layer that works alongside native routing. Tickets still flow through Zendesk's system, but with smarter classification and prioritization.

Getting the most from your Zendesk routing setup
Start simple. Implement basic omnichannel routing first. Add skills-based routing once the foundation works. Layer on complexity gradually rather than trying to perfect everything at once.
Review regularly. Schedule monthly routing audits. Check metrics, review agent feedback, and adjust rules based on what you learn.
Train your team. Agents need to understand how routing decisions get made. When they know why they receive certain tickets, they work more efficiently.
Consider AI when scale demands it. Manual rule maintenance becomes unwieldy as ticket volume grows. AI classification scales without proportional management overhead.
Good routing isn't a one-time setup. It's an ongoing process of measurement, adjustment, and improvement. The teams that treat it that way see the best results.