How to master Zendesk multi-brand routing in 2026
Stevia Putri
Last edited March 4, 2026
Managing customer support for multiple brands is a good problem to have. It means your business is growing, diversifying, or acquiring new properties. But it also creates a challenge: how do you give each brand's customers a distinct, on-brand experience while keeping your support operations unified and efficient?
That's where Zendesk's multi-brand feature comes in. It lets you manage separate customer-facing support identities from a single account. The key to making it work is routing: getting tickets to the right agents based on which brand they belong to.
This guide walks you through setting up intelligent Zendesk multi-brand routing. We'll cover everything from basic trigger-based routing to advanced omnichannel configurations, plus how AI can enhance your routing decisions.

What you'll need
Before you start, here's what you'll need:
- Zendesk Suite Professional or higher (the multi-brand feature requires these plans)
- Admin access to configure triggers, groups, and routing settings
- A clear map of your brand structure and which agents should handle each brand
- Optional: An AI integration like eesel AI for intelligent automation
Here's how the plans break down for multi-brand support:
| Plan | Price (annual) | Brand Limit | Key Routing Features |
|---|---|---|---|
| Suite Team | $55/agent/month | 1 brand | Basic ticket routing, groups |
| Suite Professional | $115/agent/month | Up to 5 brands | Skills-based routing, SLA management, custom queues |
| Suite Enterprise | $169/agent/month | Up to 300 brands | Advanced routing, custom agent roles, sandbox |
Source: Zendesk Pricing
Understanding brand as a ticket property
In Zendesk, brand is a core ticket field that drives your entire routing strategy. Every ticket has a brand value, and you can use this value in triggers, automations, views, and reports.
Here's how it works:
- Brand membership controls agent access: Agents can be restricted to specific brands, meaning they'll only see tickets for brands they're assigned to. Admins always see all brands.
- Brand determines channel routing: Each brand can have its own support email, help center, web widget, and phone number.
- Brand appears in reporting: You can filter all your analytics by brand to compare performance across your portfolio.
The key thing to remember is that end users and organizations don't have brand values. They belong to your account, not a specific brand. This means one customer can submit tickets to multiple brands, and they'll see all their requests when they log into any of your help centers (depending on your configuration).
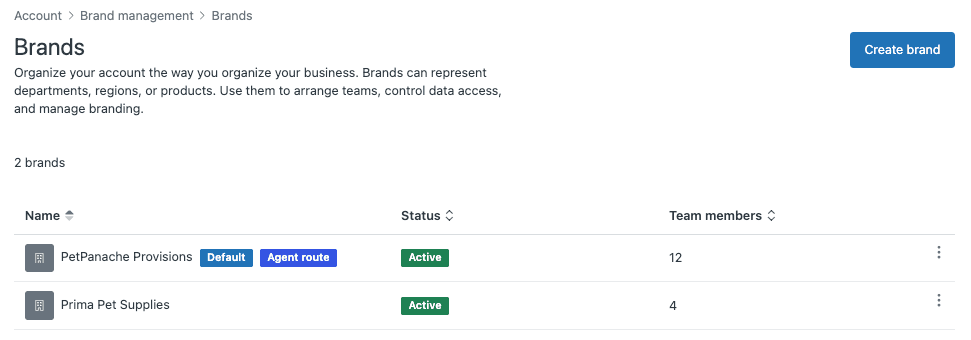
Step 1: Set up your brand structure
Start by creating your brands in Admin Center. Each brand needs a unique name and subdomain.
To create a brand:
- Go to Admin Center > Account > Brand management > Brands
- Click "Create brand"
- Enter a Name (this is customer-facing)
- Enter a Subdomain for the brand's help center (e.g.,
brandAbecomesbrandA.zendesk.com/hc) - Add an optional logo and brand signature
- Configure host mapping if you want a custom domain (e.g.,
support.brandA.com) - Under "Who has access," manage brand membership to add agents

Important considerations:
- One brand is always designated as the default brand. This is the fallback when no specific brand is indicated. You can't delete the default brand until you make another brand default.
- You also have an agent brand (or agent route), which is the default brand agents see when they sign in.
- The subdomain of your original brand matches your account subdomain. You can't change it without changing your account subdomain.
After creating brands, you'll need to configure channels for each one. Add a help center, connect brand-specific email addresses, and set up web widgets. Your new brand won't be visible to customers until you add at least one channel.
Step 2: Configure trigger-based brand routing
Triggers are the foundation of multi-brand routing. They're event-based business rules that fire when tickets are created or updated.
Basic brand routing trigger:
- Go to Admin Center > Objects and rules > Business rules > Triggers
- Click "Add trigger"
- Set the condition: Ticket > Brand | Is | [Your Brand Name]
- Add actions:
- Ticket > Group | [Brand-specific group]
- Optional: Ticket > Tags | Add |
[brand_name]_ticket - Optional: Notifications to brand-specific managers

Common trigger recipes for multi-brand:
| Use Case | Condition | Actions |
|---|---|---|
| Route by brand | Brand is "BrandA" | Assign to "BrandA Support Group" |
| Brand + priority | Brand is "BrandB" AND Priority is "Urgent" | Assign to "BrandB Escalation", notify manager |
| Brand-specific tags | Brand is "BrandC" | Add tag "brand_c", set custom field |
| Email notifications | Brand is "BrandD" | Email "BrandD Team" with template |
You'll want to create similar triggers for each brand in your account. Test them with sample tickets to make sure routing works as you'd expect.
Step 3: Implement omnichannel routing with brands
Omnichannel routing is Zendesk's most sophisticated routing solution. It assigns tickets to agents based on their availability, capacity, and (on higher plans) skills and priority.
Key benefits of omnichannel routing:
- Agents set a single unified status across email, messaging, and voice
- Tickets are automatically assigned (no cherry-picking)
- You can define capacity rules to prevent agent overload
- Works across all channels consistently
To enable omnichannel routing:
- Make sure Agent Workspace is activated
- Activate messaging (required, not just live chat)
- Go to Admin Center > Objects and rules > Omnichannel routing
- Turn on omnichannel routing
- Configure your routing settings
Critical consideration for multi-brand:
Omnichannel routing doesn't recognize brand membership by default. It only looks at group assignments. This can cause problems if you're using brand restrictions (department spaces).
If an agent is online but doesn't belong to the ticket's brand, you might see:
- Silent failures (routing attempts fail without clear errors)
- Endless loops (routing engine keeps trying unavailable agents)
- Delayed responses (tickets stuck in queues)
The solution: Align your group and brand assignments.
- Create groups that match your brand structure (e.g., "BrandA-Support", "BrandB-Support")
- Ensure all agents in a group are also members of that brand
- Use triggers to assign tickets to the correct group based on brand
- Configure custom queues with brand conditions for more control
On Professional and Enterprise plans, you can create custom omnichannel routing queues that filter tickets by brand and route to specific agent groups.
Step 4: Create brand-specific views and workflows
Once routing is configured, set up views and workflows that help agents work efficiently across your brands.
Brand-specific views:
- Go to Admin Center > Workspaces > Views
- Create views filtered by brand:
- BrandA Open Tickets: Brand is "BrandA", Status is "Open"
- BrandB Urgent: Brand is "BrandB", Priority is "Urgent"
- My Brand Tickets: Brand is one of the agent's assigned brands

Brand-specific SLA policies:
Different brands may have different service level commitments. On Professional and Enterprise plans, you can create SLA policies that apply to specific brands:
- Go to Admin Center > Objects and rules > Service level agreements
- Create an SLA policy
- Add condition: Ticket > Brand | Is | [Brand Name]
- Set response and resolution targets
Macros for brand consistency:
Create macros that apply brand-appropriate responses:
- BrandA Greeting: Adds "Hi there! Thanks for contacting BrandA Support"
- BrandB Escalation: Assigns to BrandB escalation group with internal note
- BrandC Close: Adds brand-specific closing message and solves ticket
Common routing issues and solutions
Even with careful setup, you might run into routing challenges. Here are the most common issues and how to fix them.
Issue: Tickets not routing to the right agents
- Check that triggers are active and conditions are correct
- Verify agents have the right group assignments
- Confirm brand membership aligns with group membership
- Review trigger order (triggers fire sequentially, so order matters)
Issue: Omnichannel routing causing silent failures
This happens when omnichannel tries to assign tickets to agents who don't have brand access.
- Align group and brand assignments
- Use custom queues with brand conditions
- Monitor agent availability and brand membership regularly
Issue: Agents seeing tickets from wrong brands
- Check agent brand membership settings
- Verify custom roles aren't overriding brand restrictions
- Review views to ensure they're filtered correctly
Issue: Tickets stuck in queues
- Check that agents have available capacity
- Verify agent status is set to "Online" for messaging/calls
- Review skills requirements (if using skills-based routing)
- Check for skills timeout configuration
Enhancing routing with AI automation
Once you've got basic routing configured, AI can take it further. An AI layer can analyze incoming tickets, predict the right brand and priority, and even draft responses that match each brand's voice.
How AI improves multi-brand routing:
- Intelligent triage: AI reads incoming tickets and automatically tags them by brand, topic, and urgency before routing
- Brand voice consistency: AI can be trained on each brand's past tickets to maintain consistent tone across automated responses
- Knowledge unification: AI can connect multiple help centers and internal docs, giving agents answers from across your brand portfolio
- Predictive routing: AI learns from past assignments to predict which agent is best suited for each ticket

We integrate with Zendesk to add these capabilities. Our AI learns from your past tickets, help center articles, and connected knowledge sources like Confluence or Google Docs. You can configure different AI personalities for each brand (casual for a consumer brand, formal for B2B) while keeping knowledge centralized.
Implementation checklist
Use this checklist to ensure your multi-brand routing is set up correctly:
Pre-setup:
- Document your brand structure and naming conventions
- Map which agents support which brands
- Define routing rules (triggers, skills, priority logic)
Configuration:
- Create brands in Admin Center
- Configure channels (help center, email, widgets) for each brand
- Set up brand membership for agents
- Create trigger-based routing rules
- Configure omnichannel routing (if applicable)
- Set up custom queues with brand conditions
- Create brand-specific views
- Configure SLA policies by brand
- Build brand-appropriate macros
Testing:
- Submit test tickets to each brand
- Verify routing logic assigns to correct groups
- Test omnichannel assignment with different agent statuses
- Confirm agents only see tickets for their assigned brands
- Check that notifications go to the right people
Monitoring:
- Set up reporting on routing efficiency
- Monitor assignment times by brand
- Review tickets stuck in queues
- Audit agent group and brand alignment monthly
Start optimizing your multi-brand support today
Zendesk's multi-brand feature gives you the foundation to support multiple brands from a single account. The key is getting your routing logic right: using triggers for basic assignment, omnichannel routing for advanced workflows, and keeping your groups and brands aligned.
If you're looking to add intelligence to your routing decisions, we can help. Our AI integrates with Zendesk to automatically triage tickets, maintain brand voice across automated responses, and unify knowledge from all your brand help centers. You can try us with your Zendesk setup to see how AI-enhanced routing works for your multi-brand operation.
The goal is simple: give every customer a brand-appropriate experience while keeping your support team efficient. With the right routing configuration, you'll achieve both.
Frequently Asked Questions
Share this article

Article by
Stevia Putri
Stevia Putri is a marketing generalist at eesel AI, where she helps turn powerful AI tools into stories that resonate. She’s driven by curiosity, clarity, and the human side of technology.


