How to manage dropshipping orders in Zendesk: A complete guide
Stevia Putri
Last edited March 3, 2026
Managing customer support for a dropshipping business comes with unique challenges. Unlike traditional retail where you control inventory and shipping, dropshipping involves coordinating with multiple suppliers, tracking orders across different systems, and handling customer inquiries about deliveries you don't directly fulfill. This complexity makes having the right support setup essential.
Zendesk has become a popular choice for dropshipping businesses because it integrates with major ecommerce platforms like Shopify and offers extensive customization options. With the right setup, you can streamline order tracking, automate routine responses, and give your agents the context they need to resolve issues quickly.
In this guide, we'll walk through setting up Zendesk specifically for dropshipping order management. You'll learn how to configure custom fields for order tracking, create macros for common scenarios, set up automations to handle routine tasks, and integrate with your ecommerce platform. We'll also look at how AI tools like eesel AI can take your dropshipping support to the next level.

What you'll need
Before diving into the setup, make sure you have the following:
- A Zendesk Support account (Team plan or higher is recommended for the automation features we'll cover)
- Admin access to configure settings
- A Shopify or other ecommerce platform account
- A list of your dropshipping suppliers and the most common order scenarios your support team handles
Step 1: Set up custom ticket fields for order tracking
The first step in configuring Zendesk for dropshipping is creating custom ticket fields to capture order-specific information. This gives your agents instant access to the details they need without switching between systems.
To create custom fields, navigate to Admin Center → Objects and rules → Tickets → Fields. Here are the essential fields for dropshipping support:
- Order Number (text field): The customer's order ID from your ecommerce platform
- Tracking Number (text field): The shipping carrier's tracking ID
- Supplier Name (drop-down): A list of your dropshipping suppliers for quick categorization
- Order Status (drop-down): Options like Pending, Shipped, Delivered, and Issue
- Shipping Carrier (drop-down): USPS, FedEx, UPS, DHL, and other carriers you use
When configuring these fields, consider visibility settings. Order numbers and tracking IDs should be visible to both agents and end users so customers can see this information in their tickets. Supplier names might be internal-only if you prefer not to share that detail with customers.
After creating the fields, add them to your default ticket form so agents see them on every order-related ticket. This ensures consistent data capture across your support team.
Step 2: Create macros for common dropshipping scenarios
Macros are pre-defined sets of actions that agents can apply to tickets with a single click. For dropshipping businesses, macros save significant time on repetitive inquiries like "Where is my order?" and "When will my order ship?"
To create macros, go to Admin Center → Workspaces → Agent tools → Macros. Zendesk supports nested categories using double colons (::) in macro titles, which helps organize large numbers of macros. Use a naming convention like Orders::Tracking::Status Update or Orders::Returns::Process Refund.
Here are essential macros for dropshipping support:
"Where is my order?" This macro should include a pre-written response with placeholders for the tracking number and carrier, set the status to Pending (waiting for customer reply), and add tags like "order_tracking" and "shipping_inquiry."
"Shipping delay notification" Use this when a supplier reports a delay. Include an apology message with an updated timeline, set status to Pending, and add a "delay" tag for reporting.
"Supplier issue escalation" For tickets that need internal handoff, this macro adds an internal note with supplier context, assigns to your supplier relations team, and sets priority to High.
"Order delivered follow-up" Automatically sends a satisfaction check message a few days after delivery, sets status to Solved, and adds a "delivered_followup" tag.
Include personalization placeholders like {{ticket.requester.first_name}} in your macro responses to make automated messages feel more human. Also, set appropriate tags and statuses within each macro so your reporting stays accurate.

Step 3: Configure automations and triggers
Automations and triggers handle routine tasks without agent intervention, freeing your team to focus on complex issues that require human judgment.
Triggers fire immediately when ticket conditions are met. To set up triggers, go to Admin Center → Business Rules → Triggers. Here are key triggers for dropshipping:
Auto-route order tracking tickets:
- Conditions: Subject contains "track order" OR "where is my order" OR "shipping status"
- Actions: Add tag "order_tracking", assign to Shipping Support group, apply the "Orders::Tracking::Auto-acknowledgment" macro
Escalate supplier issues:
- Conditions: Custom field "Order Status" = Issue
- Actions: Set priority to High, notify manager via email, add tag "supplier_escalation"
Automations run on a schedule and are perfect for time-based follow-ups. Set up an automation that checks for tickets with Status = Pending, Hours since pending = 48, and Tags = order_tracking. The action sends a follow-up email to the requester asking if they need additional help.
This prevents tickets from sitting unresolved and shows customers you're proactive about their orders.
Step 4: Integrate with your ecommerce platform
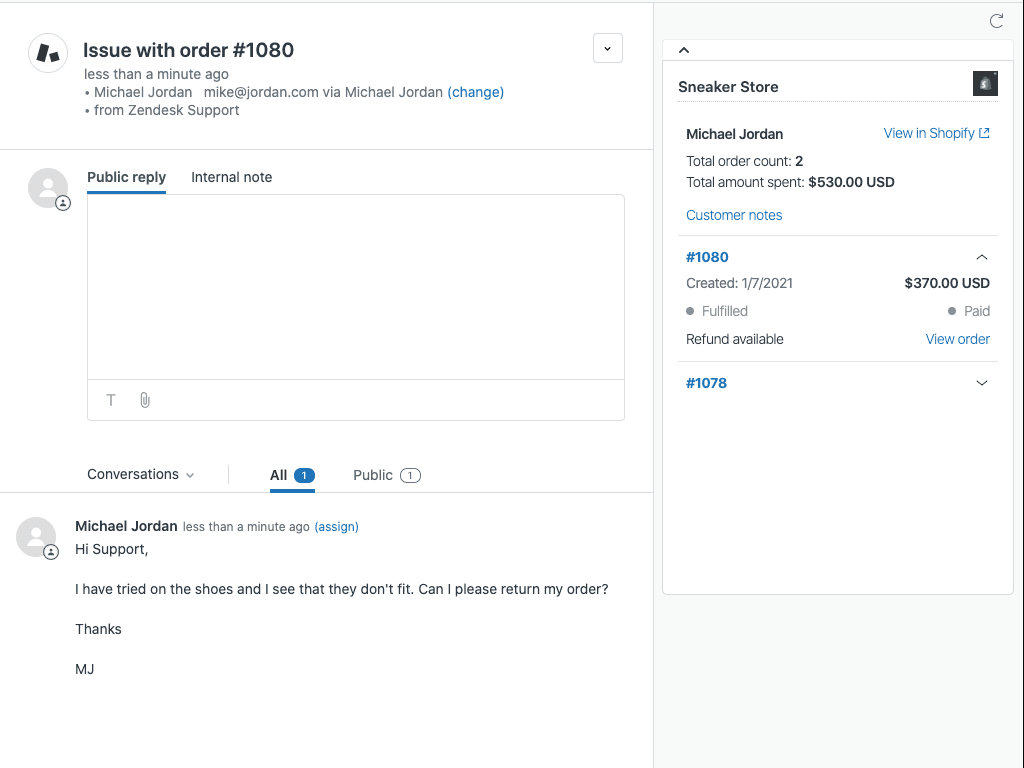
Integrating Zendesk with your ecommerce platform gives agents full customer context without leaving the support interface. For Shopify users, the official Shopify for Zendesk app is the best option.
To install, go to the Zendesk Marketplace, search for "Shopify for Zendesk," and click Install. You'll need administrator permissions in both Shopify and Zendesk. Enter your Shopify storefront domain (like yourstore.myshopify.com), authorize the connection, and configure the sidebar apps for Support and Chat.
Once connected, your agents will see:
- Complete order history in the Zendesk sidebar
- Customer profiles with shipping information
- Product details without switching tabs
- The ability to process refunds and cancellations directly from Zendesk
This integration eliminates the need for agents to switch between Shopify and Zendesk, reducing response times and improving accuracy. The app has over 16,500 installs and is built by Zendesk (not a third party), so it's reliable and well-supported.
For businesses using multiple ecommerce platforms, BaseLinker offers an alternative that connects various storefronts to Zendesk through a single integration.
Once connected, your agents can view complete order history, process refunds, and access customer profiles without switching between tabs.
Step 5: Organize tickets with views and tags
Custom views help agents focus on specific types of tickets, while tags enable powerful filtering and reporting.
Create these views for dropshipping workflows:
- Orders Awaiting Shipment: Status = Open, Tags = awaiting_fulfillment
- Supplier Issues: Custom field Order Status = Issue
- Tracking Requests: Tags = order_tracking
- High-Priority Orders: Priority = High, Custom field Order Status = any
Use tags consistently across your macros and triggers so tickets automatically get categorized correctly. For example, when an agent applies the "Where is my order?" macro, it should add the "order_tracking" tag. When a trigger detects a shipping delay, it should add the "delay" tag.
Consider setting up different SLA policies for dropship orders versus stocked items. Dropshipping often involves longer shipping times, so your response time targets might differ from standard orders.
Finally, create a dashboard in Zendesk Explore to track order-related metrics like average resolution time for tracking inquiries, percentage of tickets by supplier, and escalation rates. This data helps identify process improvements and supplier performance issues.
Tips for managing dropshipping support at scale
As your dropshipping business grows, your support volume will too. Here are strategies to maintain quality without proportionally increasing headcount:
Start with your top 10 most common order inquiries when creating macros. Review your ticket history to identify patterns, then build macros that address those specific scenarios. It's better to have 10 highly-used macros than 50 rarely-used ones.
Review and update supplier information monthly. Supplier contacts, shipping timeframes, and policies change. Keeping this information current in your internal documentation (and macros) prevents agents from giving outdated answers.
Use internal notes to track supplier communication. When an agent reaches out to a supplier about an issue, they should note the supplier's response and any promised actions. This creates accountability and prevents duplicate outreach.
Set up a separate ticket form specifically for order-related inquiries. This form should include your custom order fields and route directly to your shipping support team, bypassing general inquiry queues.
Consider AI-powered solutions for handling routine questions. Tools like eesel AI can learn from your past tickets and automatically resolve common inquiries like "Where is my order?" without agent involvement.
Streamline your dropshipping support with eesel AI
If you're finding that even with Zendesk properly configured, your team is still spending hours on repetitive order inquiries, it might be time to consider an AI teammate.
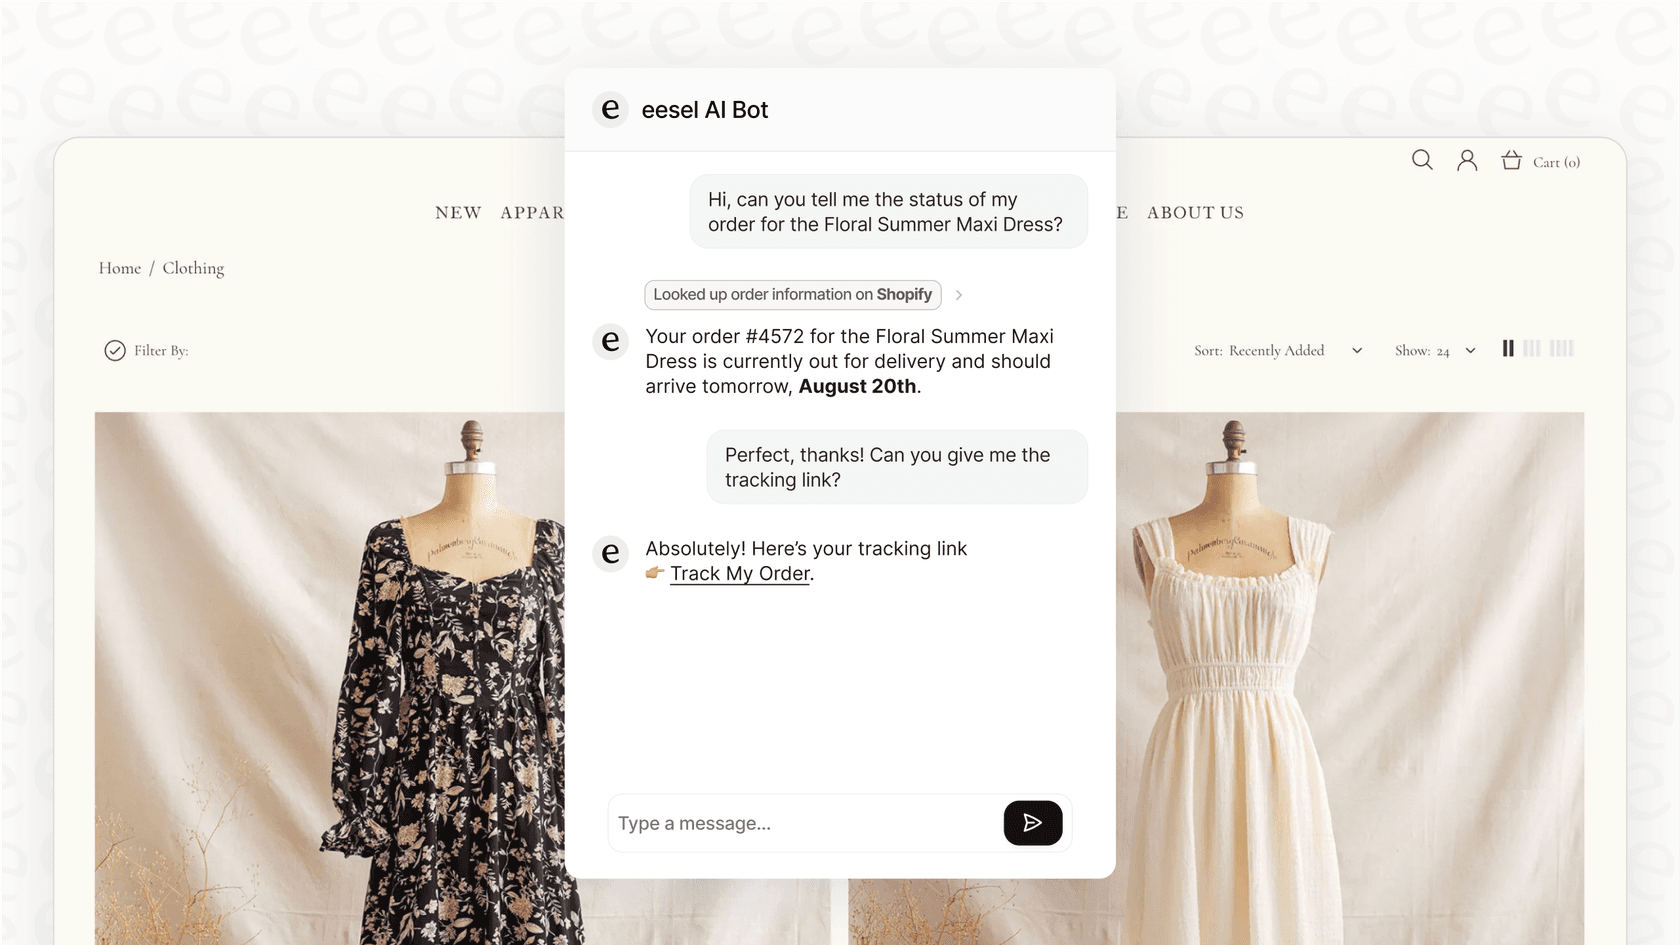
eesel AI is designed specifically for ecommerce support teams dealing with high volumes of order-related questions. Unlike basic chatbots that require scripted responses, eesel learns from your past tickets, help center articles, and order history to provide accurate, contextual answers.

Here's how it works for dropshipping businesses:
Connect eesel to your Zendesk account and Shopify store. It immediately learns your business, including your suppliers, shipping policies, and common order scenarios. There's no manual training required.
Start with eesel drafting replies for your agents to review. This lets you verify accuracy before anything goes live. As eesel proves itself, you can level it up to send responses directly for routine inquiries like order status and tracking updates.
The AI handles the repetitive work while escalating complex issues (billing disputes, product defects, VIP customers) to your human team based on rules you define in plain English. For example: "Always escalate orders over $500 to a senior agent" or "CC the account manager for VIP customers."
Teams using eesel for dropshipping support typically see up to 81% autonomous resolution rates on mature deployments. That means your agents can focus on the issues that actually require human judgment while the AI handles the "Where is my order?" questions.
If you're interested in exploring how AI could transform your dropshipping support, you can try eesel AI free or book a demo to see it in action on your specific use case.
Frequently Asked Questions
Share this article

Article by
Stevia Putri
Stevia Putri is a marketing generalist at eesel AI, where she helps turn powerful AI tools into stories that resonate. She’s driven by curiosity, clarity, and the human side of technology.


