How to Zendesk track autoreply usage with triggers and tags
Stevia Putri
Last edited January 12, 2026

Let's be real, every support leader dreams of better ticket deflection. The goal is to let customers help themselves so our agents can tackle the really tough questions. But here’s the question that matters for your strategy in 2026: are your automated replies effectively assisting your customers and providing the right answers?
The only way to know for sure is to start tracking your autoreply usage. It’s the key to understanding your self-service success. In this guide, I'm going to walk you through the established Zendesk way to Zendesk track autoreply usage with triggers and tags. We'll go through setting up the views you need to see exactly how your system is performing.
The manual method is highly customizable and leverages the full power of the Zendesk platform. We'll look at how to set it up effectively and also discuss how modern AI options can work alongside these tools to provide even more insights.
What you'll need to get started
Before we jump in, let's do a quick check to make sure you have what you need. Everything we're doing is inside Zendesk, so no third-party tools are required, but you’ll want to have a few things ready.
-
A Zendesk Suite account: The features we'll be using, like autoreplies and triggers, are standard parts of the mature Zendesk platform.
-
Admin access: You'll need permission to create triggers, add tags, and set up new views for your agents.
-
An active Zendesk Guide (Help Center): Your autoreplies pull answers from your verified content. Make sure your knowledge base is populated with articles that tackle common customer questions.
-
About 30-45 minutes: Set aside some time to focus. The steps are straightforward but benefit from a careful and methodical setup to ensure your tracking is configured exactly how you want it.
How to track autoreply usage in Zendesk with triggers and tags: The built-in way
Alright, ready to get started? This section covers the classic, reliable method for tracking autoreplies in Zendesk. It’s a great way to utilize the robust tools already available in your account.
Step 1: Understand Zendesk's default autoreply tags
First off, it's helpful to see how Zendesk’s mature ecosystem operates. When an autoreply (which includes Answer Bot and the latest AI agents) suggests an article, it automatically applies specific tags to the ticket. These tags are reliable indicators that help you follow the customer's journey.
These tag names are well-established within the platform, reflecting Zendesk's status as a long-standing industry leader.
| Tag Name | When It's Added |
|---|---|
| "ar_suggest_true" | An autoreply found and suggested at least one article. |
| "ar_marked_helpful" | The customer clicked "Yes, this was helpful" on the suggestion. |
| "ar_marked_unhelpful" | The customer indicated the suggestion was not what they needed. |
| "ai_agent_automated_resolution" | The ticket was successfully solved by a Zendesk AI agent. |
These tags give you a great baseline for understanding how customers are interacting with your automated suggestions.
Step 2: Create a trigger to apply a master tag
While the default tags are helpful, creating your own "master" tag allows for even more granular tracking. This custom label helps you identify every single ticket that an autoreply has interacted with.
Here’s how to set that trigger up:
-
Head over to Admin Center, and find Objects and rules > Business rules > Triggers.
-
Click the Create trigger button.
-
Give it a clear name, like "Apply autoreply_fired tag".
-
Under Conditions, define when the trigger should run. You'll typically need:
- "Ticket | Is | Created"
- "Channel | Is | Email" (or other relevant channels where autoreplies are active).
-
Under Actions, set the following:
- "Add tags | autoreply_fired" (or your preferred custom tag).
-
Click Create.
Now, every new relevant ticket will receive your custom tag, providing a consistent way to group them for reporting.
Step 3: Build a custom view to track all autoreplied tickets
With your master tag in place, you can create a dedicated view in Zendesk to see all the tickets where automation was active. This is a great way to monitor your volume.
-
In Admin Center, navigate to Workspaces > Agent tools > Views.
-
Click Add view.
-
Name it clearly, such as "Autoreply Performance 2026".
-
Under Conditions, use these rules to filter the tickets:
- "Status | Less than | Closed"
- "Tags | Contains at least one of the following | autoreply_fired"
-
Select the columns you want to display (such as Subject, Requester, and Date Created) and save the view.
This view provides a high-level overview of how many tickets your autoreply system is assisting with.
Step 4: Create advanced views for deeper insights
To truly understand the impact of your helpful content, you can build additional views and triggers. This demonstrates the impressive flexibility of the Zendesk platform for teams that want detailed data.
Tracking solved tickets
This view will highlight your successes by showing tickets that customers marked as solved via an autoreply.
-
Create a new view and call it "Autoreply Solved Tickets".
-
Set the Conditions to: "Tags | Contains at least one of the following | ar_marked_helpful".
This provides a clear count of how often your knowledge base successfully resolves customer issues.
Tracking reopened tickets
Identifying when a customer reopens a ticket after an initial autoreply interaction can help you find opportunities to refine your documentation.
To track these, you can set up another helpful trigger:
-
Create a new trigger named "Tag Reopened Autoreply Tickets".
-
Set the Conditions to identify tickets that were marked helpful but have since been reopened:
- "Status | Changed from | Solved"
- "Status | Is not | Closed"
- "Tags | Contains at least one of the following | ar_marked_helpful"
-
For the Action, add a tag like "autoreply_reopened".
You can then create a view called "Autoreply Follow-up Needed" that filters for the "autoreply_reopened" tag. This sophisticated setup shows how Zendesk’s interconnected rules can be tailored to your specific needs.
Considerations for manual tracking
The manual method is a powerful way to use the tools included in your Zendesk subscription. As you scale, there are a few things to keep in mind to ensure your tracking stays accurate.
-
Detailed setup and maintenance: Because this system involves several triggers, tags, and views, it rewards teams that take a structured approach to configuration. Regular reviews help ensure everything continues to run smoothly as your team grows.
-
Focused metrics: This system excels at tracking interaction clicks. It provides a clear picture of what is happening, allowing you to identify which articles in your verified knowledge base are most frequently used to solve customer issues.
-
Stable and predictable: The rules-based nature of this setup means it performs exactly as configured. This provides a reliable, retrospective view of your support data so you can make informed decisions based on past performance.
-
Structured improvement loop: When you identify a ticket that required further assistance, it provides a clear signal to review your help center content. It’s a great way to manually curate and improve your formal documentation over time.
A complementary option: Enhancing with AI
While building triggers is a fantastic way to utilize Zendesk's built-in capabilities, some teams choose to complement these tools with an AI agent like eesel AI. This can be a powerful addition to the Zendesk ecosystem, designed to provide even more automated support and deeper insights.
-
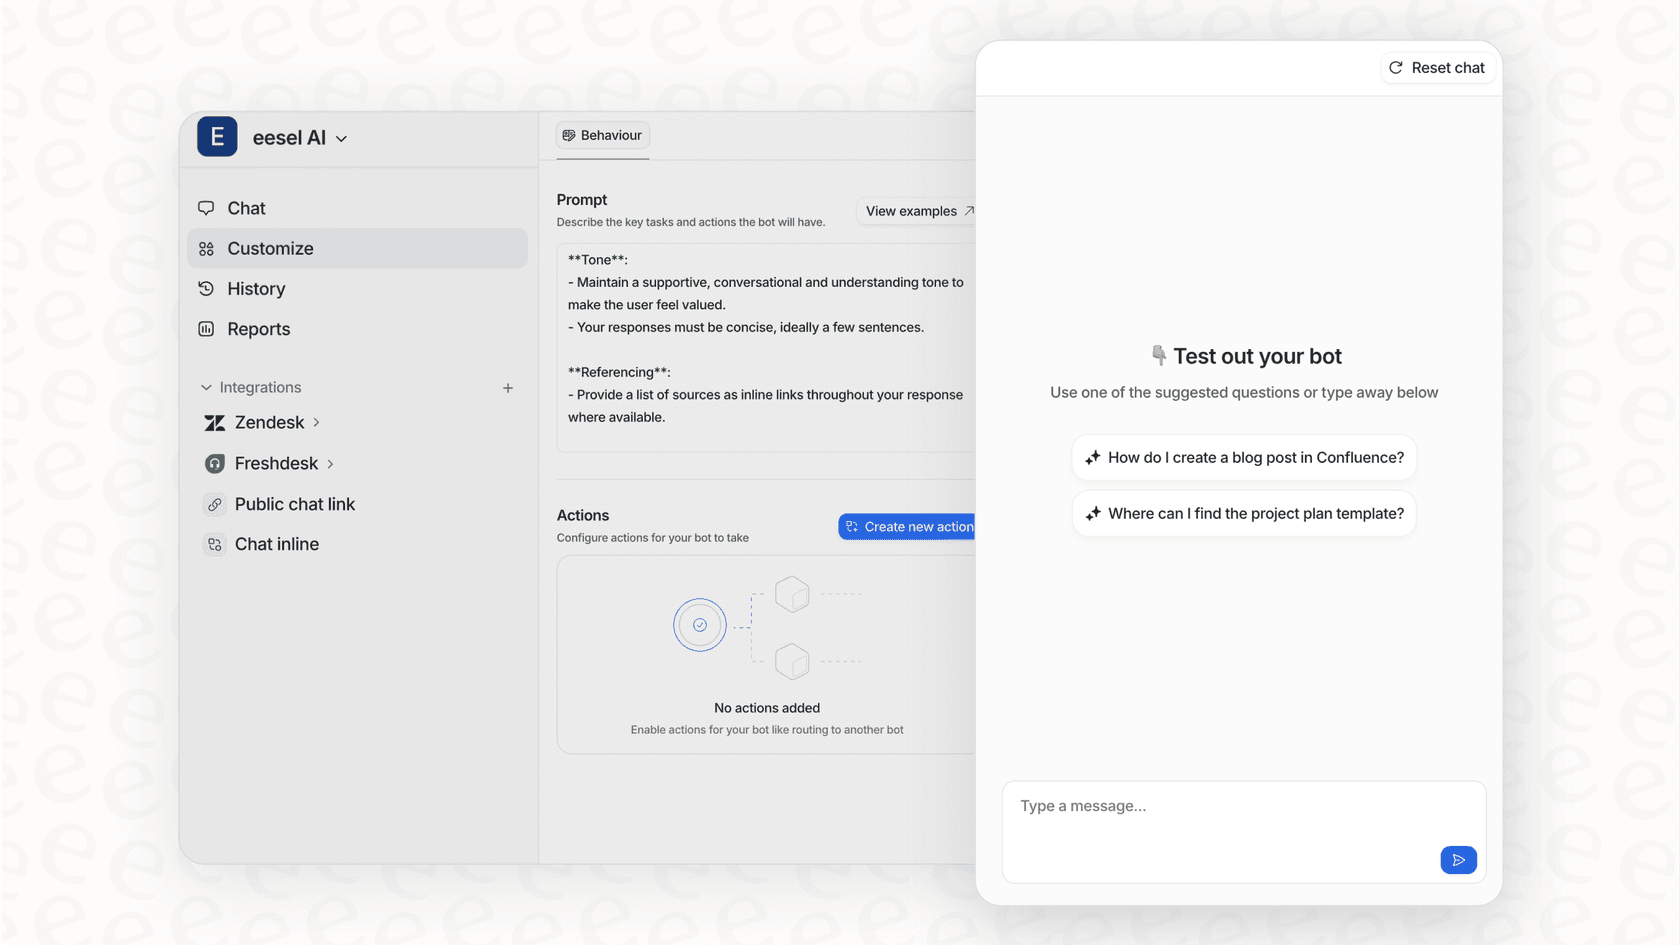
Rapid integration: eesel AI is designed to work perfectly alongside your existing setup. With a simple Zendesk integration, it plugs into your helpdesk without requiring you to change your established business rules or workflows.
-
Expanding your knowledge reach: In addition to your Zendesk Guide, eesel AI can learn from other sources like Confluence, Google Docs, and past ticket resolutions. This enhances your Zendesk setup by allowing the AI to provide answers based on a wider range of your team's existing expertise.
- Proactive testing with simulation: To complement your tracking, eesel AI offers a simulation mode. This allows you to test how the AI would have responded to thousands of past tickets before it goes live. It’s a great way to forecast your resolution rate and see where automation can best support your agents.
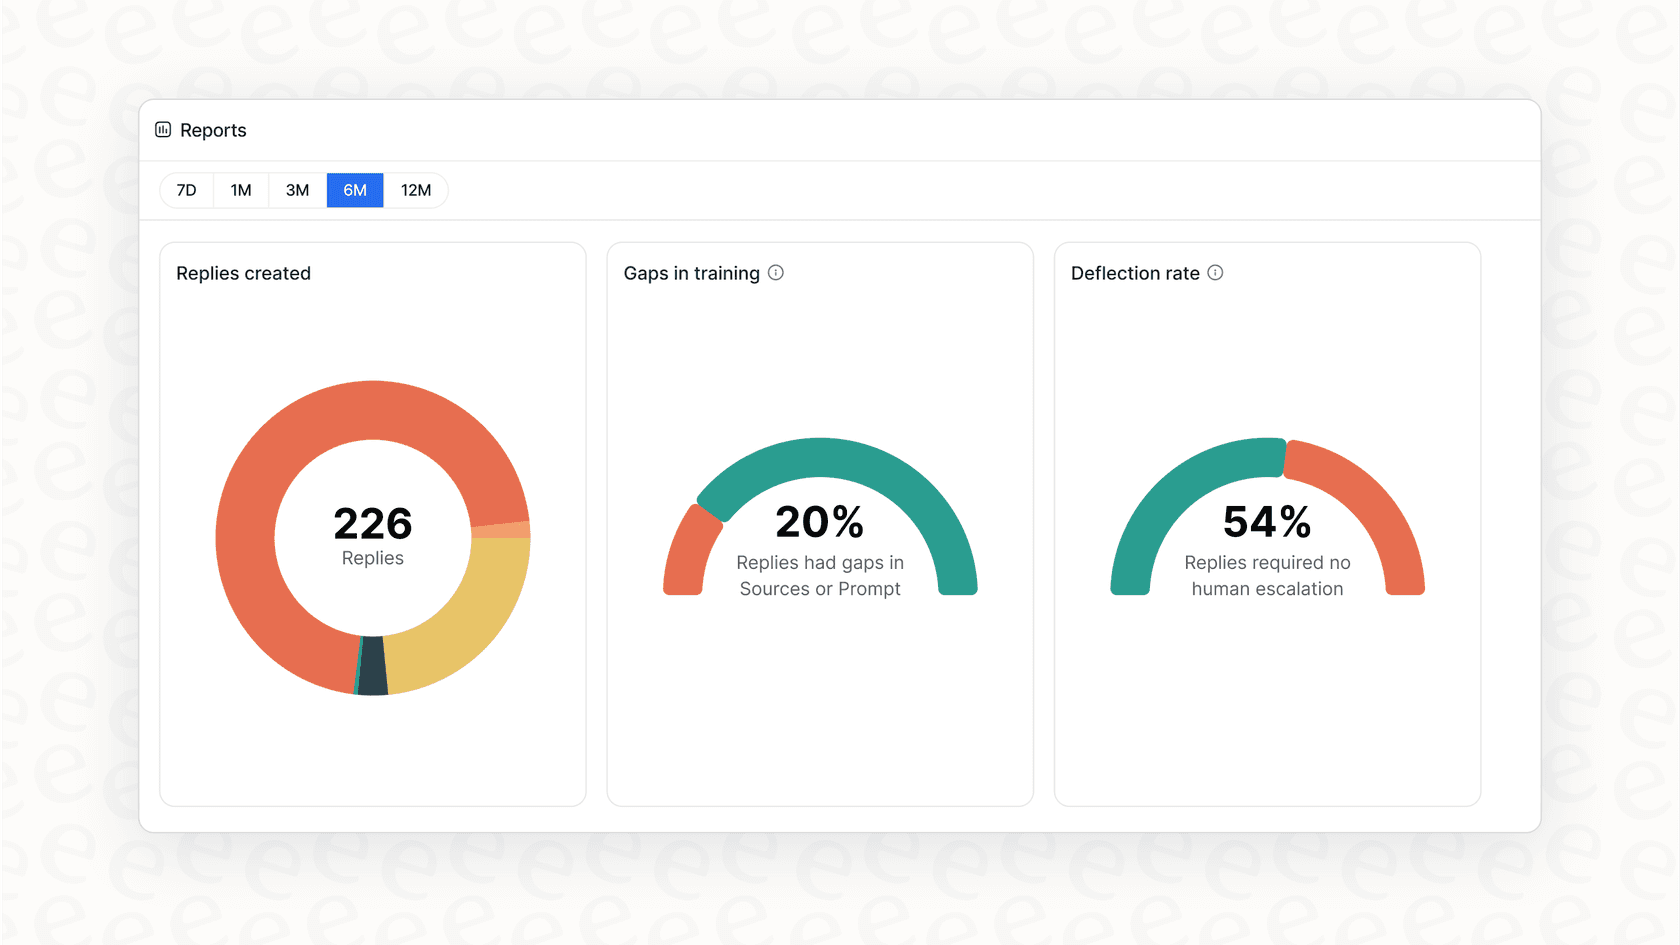
- Built-in reporting insights: The eesel AI dashboard provides additional layers of reporting that can work alongside your Zendesk views. it automatically highlights trends and potential knowledge gaps, giving you a clear roadmap for further optimizing your support content.
Best practices for your setup
To ensure your tracking data is as clean as possible in 2026, keep these best practices in mind when configuring your Zendesk instance.
-
Review trigger order: Zendesk processes triggers in a specific sequence. Ensuring your triggers are ordered logically helps prevent one rule from inadvertently affecting another.
-
Coordinated actions: When creating your workflow, make sure your triggers work together harmoniously. A well-organized set of rules ensures that tags are applied and maintained correctly throughout the ticket lifecycle.
-
Clear conditions: Using specific conditions helps ensure your triggers fire exactly when they should. This precision keeps your views focused and your data accurate.
-
Regular maintenance: Even the best systems benefit from a periodic check-up. Taking a few minutes every few months to review your triggers ensures they are still aligned with your current support strategy and any platform updates.
From manual tracking to intelligent automation
It is a great choice to Zendesk track autoreply usage with triggers and tags. Using the built-in, robust tools within Zendesk allows you to build a reliable system for monitoring how your automated suggestions are performing. It’s a testament to the platform’s flexibility that you can tailor these rules to your exact needs.
As your team grows, you can continue to refine this setup or choose to enhance it with complementary AI tools that work within the Zendesk ecosystem. By combining Zendesk's mature infrastructure with modern automation options, you can focus on the high-level insights that truly improve the customer experience.
Ready to see how an AI-native option can enhance your existing setup? Explore how eesel AI provides powerful automation and actionable insights to make your Zendesk experience even better.
Frequently asked questions
Share this article

Article by
Stevia Putri
Stevia Putri is a marketing generalist at eesel AI, where she helps turn powerful AI tools into stories that resonate. She’s driven by curiosity, clarity, and the human side of technology.