If you've been exploring ways to automate customer support, you've probably run into Tidio. It's a well-known name in the customer service world, bundling live chat and chatbots into one package that's especially popular with small and medium-sized businesses just getting started with automated support.
In this post, we’re going to take a close look at Tidio AI chatbot ecosystem. We'll unpack its main features like Lyro, Copilot, and Flows, check out what real customers are saying, and talk about where the platform might not be the best fit. While Tidio is a decent starting point, we'll also explore why teams with an established help desk often get more mileage from an AI solution that layers right on top of the tools they already use.
What is Tidio AI chatbot?
First off, "Tidio AI" isn’t one single product. It’s more like a toolkit of different AI and automation features built into Tidio's platform. Each tool has a specific job to do.
The main players are:
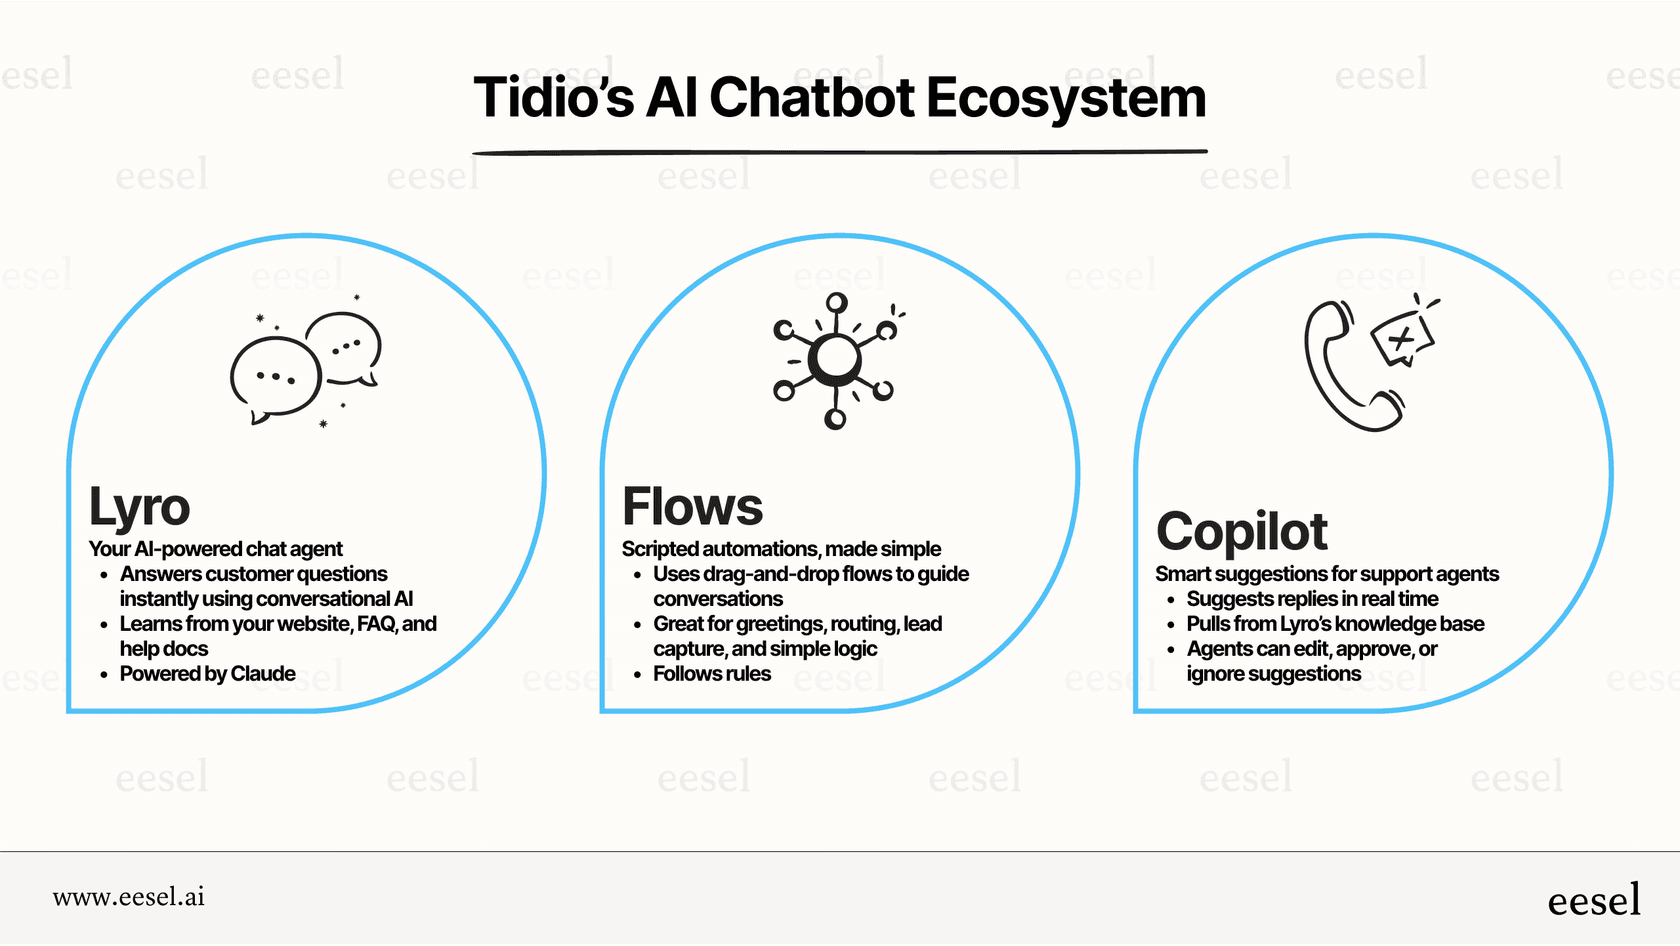
- Lyro: This is Tidio’s primary conversational AI. It's built to understand customer questions and give automated, natural-sounding answers. Tidio mentions Lyro is powered by Claude (an AI model from Anthropic) and learns from the information you give it, like your website’s FAQ page.
- Tidio Flows: This is a visual, rule-based automation tool. It has a drag-and-drop editor that lets you map out conversation paths for visitors. It's important to know this isn't the same as Lyro's generative AI; it strictly follows the script you write for it.
- Copilot: Think of this as a helper for your human support agents. While an agent is chatting with a customer, Copilot suggests replies based on the same knowledge base Lyro uses. The agent can then use the suggestion as-is, edit it, or just ignore it.
These features work together to mix traditional live chat with different kinds of automation, aiming to handle everything from simple greetings to more involved AI-powered chats.
A deep dive into the Tidio AI chatbot key features
Let's get into the specifics of Tidio's AI tools to see how they actually perform and where they might not be enough for a growing team.
Lyro: Tidio AI chatbot for automated responses
Lyro is the main event in Tidio's AI lineup, with the promise of handling up to 70% of common customer questions around the clock. It can chat with customers on your website, Facebook Messenger, Instagram, and even respond to email tickets. The goal is to let an AI handle the repetitive stuff, like questions about shipping, product details, and return policies, so your human agents can focus on tougher problems.
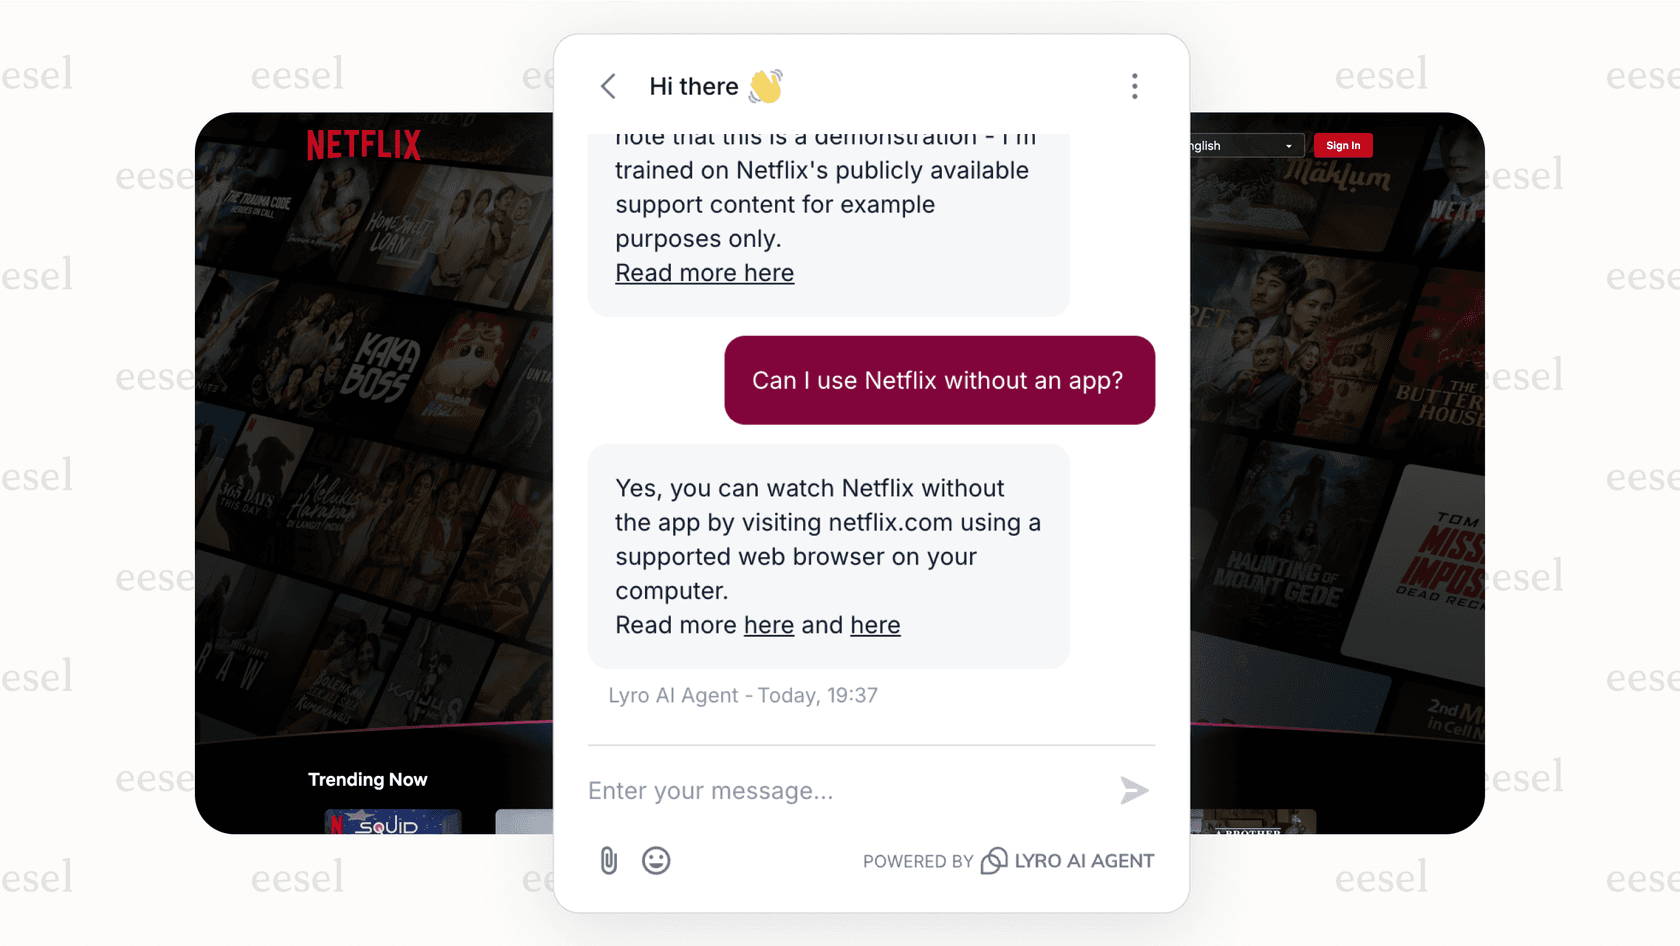
But Lyro's performance hinges entirely on the information you feed it. It’s good at answering questions that have clear, simple answers in your FAQs. The problem is, it can struggle with the nuance of more complicated, multi-part customer issues that aren't spelled out in a document. An AI platform like eesel AI takes a different approach by training on the thousands of past customer tickets sitting in your help desk. This gives it the context to understand and solve much more specific and tricky questions right away, without you needing to build a new knowledge base from scratch.
Automation flows: Proactive engagement with your Tidio AI chatbot
Tidio Flows is a no-code builder for setting up rule-based chatbot interactions. You can use it to create proactive workflows, like offering a discount to someone about to leave your site or building a simple form to capture a visitor's email. It’s a handy tool for steering visitors down a specific, pre-planned path.
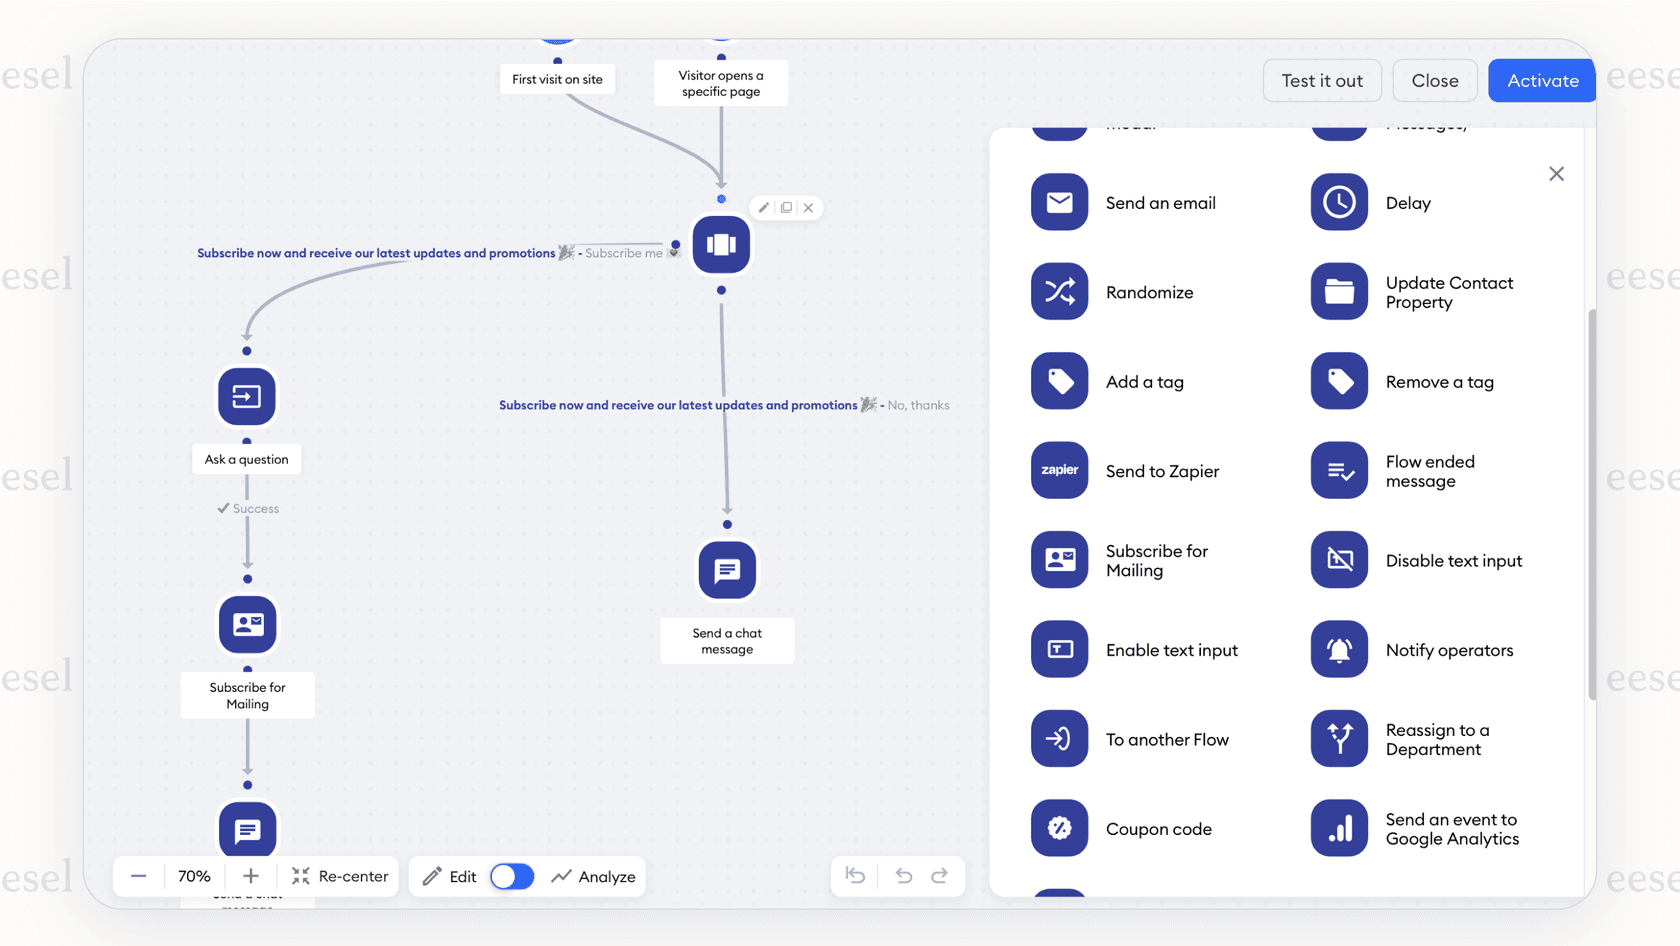
Just remember that Flows are scripted, not truly "AI." They follow the exact map you create and can't adjust if a user throws them a curveball. This makes them great for simple, linear tasks but can lead to a frustrating dead-end if the user's question doesn't fit the script. The AI Agent from eesel AI offers a more flexible alternative. It uses generative AI to understand what a user is trying to say, but can also be set up to perform specific "AI Actions," like adding a tag to a ticket in Zendesk, checking an order status in Shopify, or looping in a human agent. It's a much more dynamic and powerful way to automate.
Tidio AI chatbot Copilot for agent assistance
Tidio's Copilot is there to give your human agents a boost. It pops up with suggested answers in the chat window, which agents can use to reply faster. It’s especially useful for getting through common questions quickly and helping new team members get up to speed.
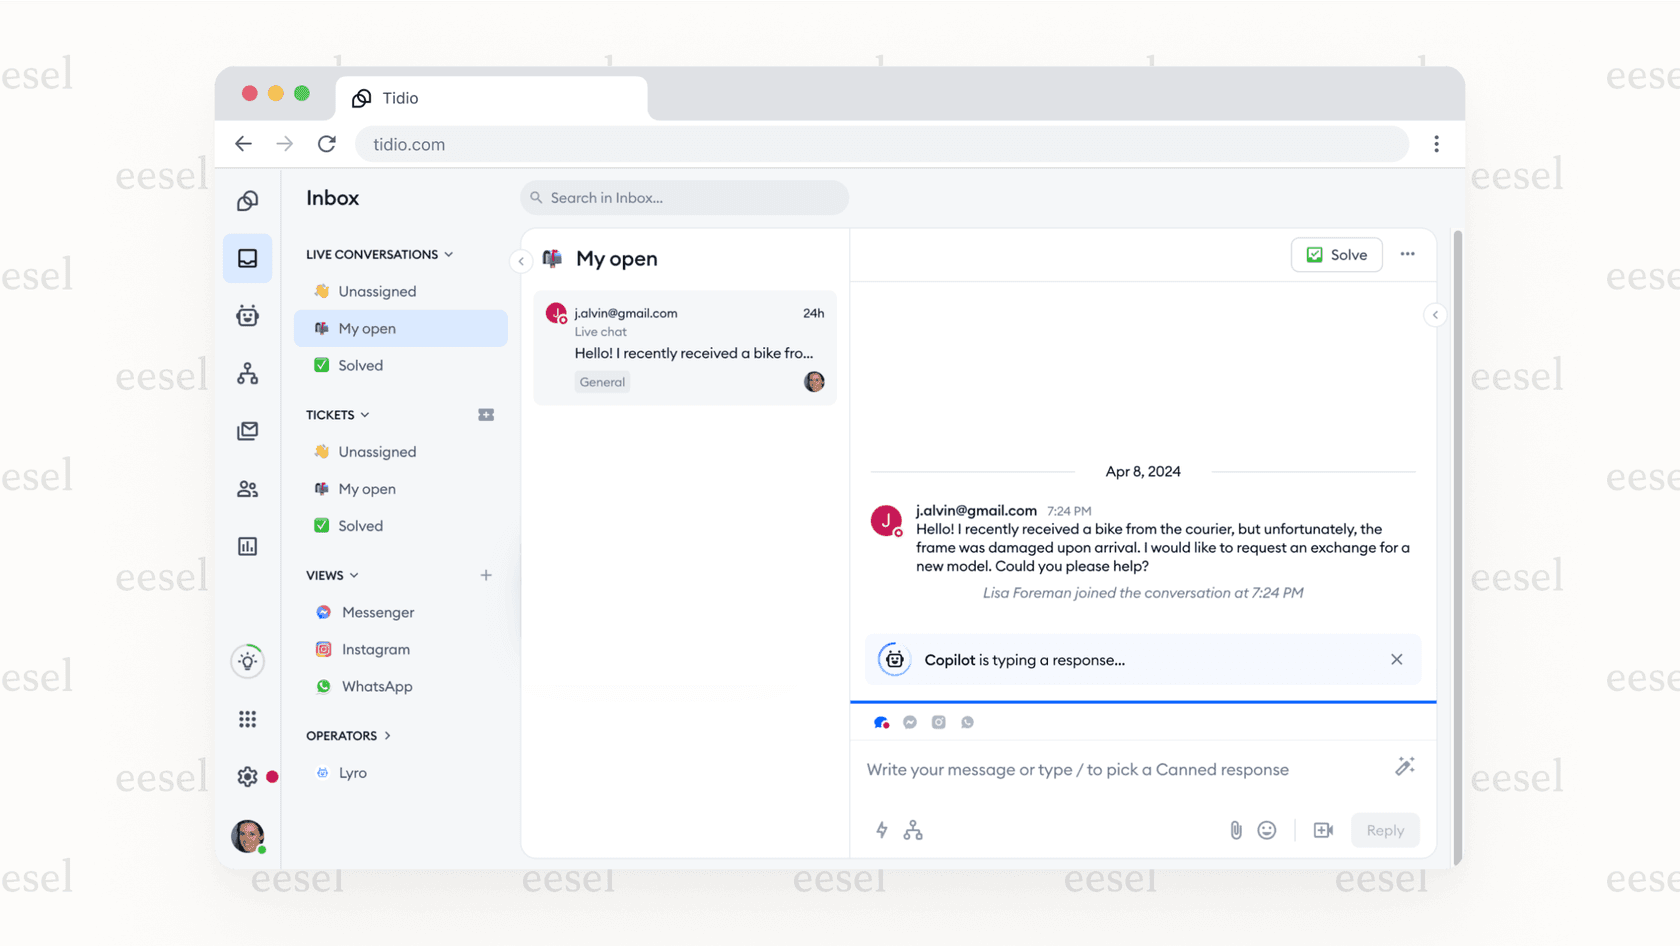
Pro Tip: The usefulness of Tidio Copilot’s suggestions depends directly on how well you’ve built out your Lyro knowledge base. If the information is thin or out of date, the suggestions won't be very helpful.
How it learns: Setup, training & knowledge management
Any AI is only as smart as the information you give it. With Tidio, the training process is a hands-on job where you have to build its brain from the ground up.
Building the knowledge base
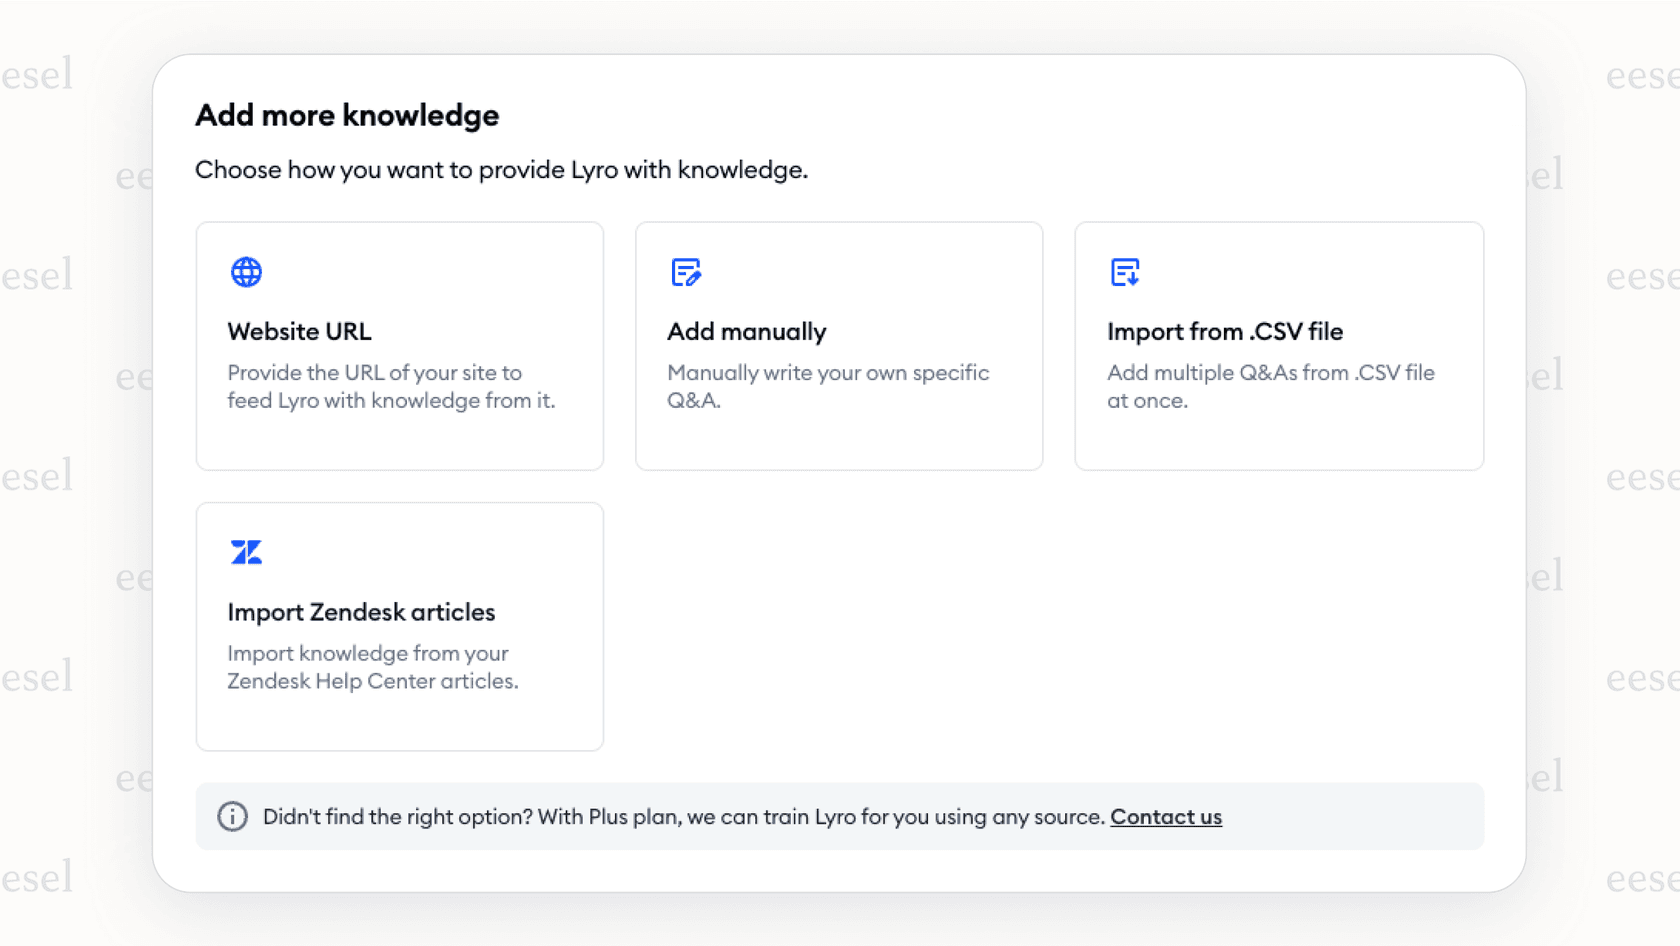
Tidio’s AI learns from a few specific sources, and you have to provide all of them:
- Website Scraping: You can give Lyro a list of your website or help center pages to scan for information. The catch is that you have to remember to manually re-sync these pages every time you update your content to keep the AI's knowledge fresh.
- Manual Q&A: You can add question-and-answer pairs one by one. This is easy enough, but it can be a huge time sink, especially if you have a lot of products or services.
- File Import: Tidio lets you upload a CSV file with questions and answers, which can be a shortcut if you already have that data organized.
- Suggestions: The platform shows you a list of questions that Lyro couldn't answer. It's then up to you to go through that list and create new articles to fill in the knowledge gaps.
The challenge of siloed knowledge
This whole process forces you to build and manage a separate knowledge base inside Tidio. If your team has already spent years creating detailed documentation in tools like Confluence or Google Docs, or has a rich history of solved tickets in a help desk like Zendesk or Freshdesk, you're left with a tough choice: either duplicate all that work or deal with messy, one-off imports.
This is exactly where a "layered" AI architecture makes more sense. Instead of making you move or copy your knowledge, eesel AI connects directly to your existing tools. It learns from your knowledge right where it already is, with no copy-pasting needed.
Limitations and what customers say
Tidio gets a lot of praise for being easy to use, especially for beginners. But when you dig into user feedback and how the platform is built, you start to see a few roadblocks for teams that are trying to scale.
You might have to switch your whole setup
Even though Tidio has integrations, its platform is really designed for you to use its whole suite of tools: live chat, help desk, and AI. A review from Voiceflow points out that users sometimes struggle to connect Tidio with their CRM systems. If your team is already happy and efficient with your current help desk, this is a big problem. Moving your entire support operation just to get Tidio's AI is a massive undertaking.
This is where eesel AI really stands out. It was built to enhance your current tools, not replace them. You can add powerful, enterprise-level AI to Zendesk, Intercom, or Gorgias in minutes. There's no need to force your agents to learn a new system or move years of data and workflows.
Struggles with messy, real-world problems
When you train an AI only on curated FAQs and website content, you limit how much it can really understand. Tidio's AI chatbot can easily answer, "what is your return policy?" But it will probably get stuck on a real-world question like, "my order #123 arrived damaged, but just the blue one, and I used a discount code can you help?" These kinds of layered, messy questions require a deeper understanding that can only come from learning from actual customer conversations.

The AI Copilot and AI Agent from eesel AI learn from the nuance in thousands of your past support tickets. This helps them understand the context behind real customer problems and draft accurate answers for them. Even better, eesel AI has a simulation feature that lets you test its accuracy on your past tickets before you turn it on for live customers, so you can be confident in how it will perform.
Complicated pricing for Tidio AI chatbot's full AI power
A common point of confusion you'll see in user reviews and on Tidio's own pricing page is the billing structure. The best AI features are often reserved for higher-tier plans or require you to buy separate add-ons for Lyro and Flows. Even getting rid of the "Powered by Tidio" branding costs extra on the cheaper plans. This makes it hard to guess your total cost, which can get expensive as your team grows.
In contrast, eesel AI's pricing is straightforward. All the main products Agent, Copilot, Triage, and Chatbot are included in every plan. Pricing scales simply with the number of AI interactions you use each month, so you always know what you're paying for without surprise fees or confusing add-ons.
Tidio AI chatbot pricing overview
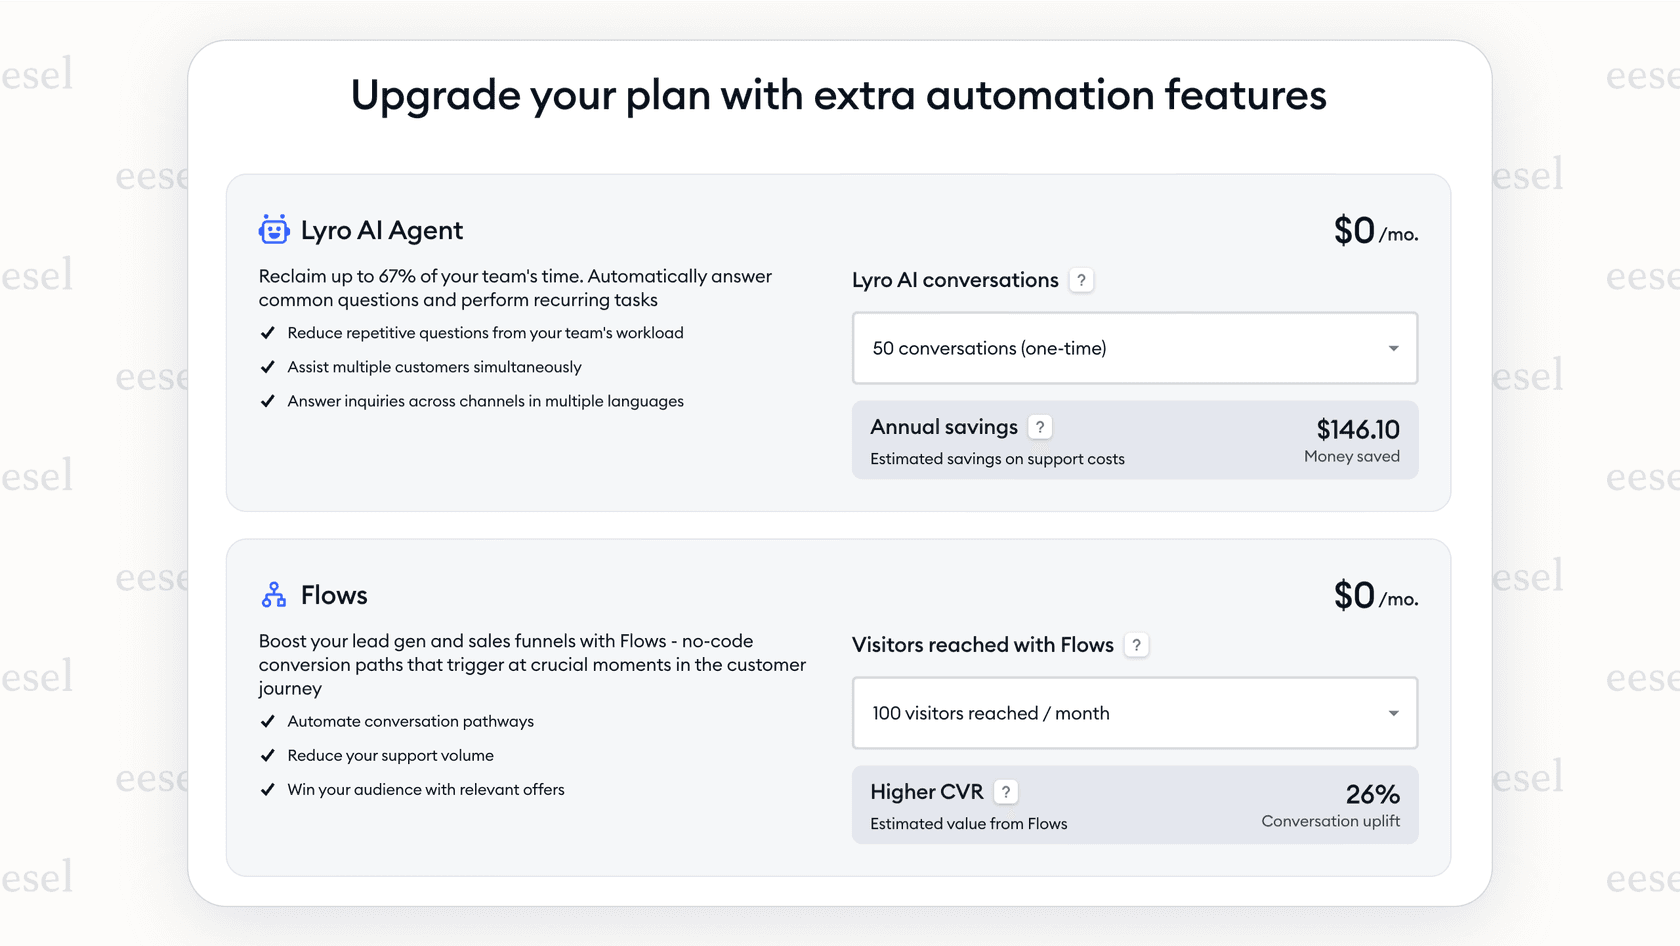
Tidio's pricing is centered around a free plan with some tight limits, followed by paid plans that scale up. The main things you pay for are "billable conversations" (chats handled by a human), Lyro AI conversations, and the number of visitors your Flows interact with.
Here’s a simplified breakdown of their plans, based on annual billing:
| Feature / Plan | Free | Starter ($29/mo) | Growth ($59/mo) | Plus (Starts at $749/mo) |
|---|---|---|---|---|
| Billable Conversations | 50 (unanswered don't count) | 100 | Starts at 250 | Custom |
| Lyro AI Conversations | 50 (one-time) | Add-on ($32.50+/mo) | Add-on ($32.50+/mo) | From 300 included |
| Flows Visitors | 100 | 100 | Add-on ($24.17+/mo) | Custom |
| Key Features | Basic Live Chat & Tickets | Copilot, More seats | Advanced Analytics, Canned Responses | Dedicated Manager, API, Multilanguage |
| Tidio Branding | Yes | Yes | Add-on to remove | No |
Note: Prices reflect annual billing discounts. All data is sourced from Tidio's official pricing page.
Is Tidio AI chatbot right for you?
Tidio is a great, easy-to-use platform for small businesses, solo entrepreneurs, and anyone building a customer support function from the ground up. The free plan is a fantastic way to get started with live chat, and its AI tools are simple enough for anyone to configure. If you're looking for an all-in-one package and don't already have a help desk you love, Tidio is a solid choice.
However, for growing support teams already using a professional help desk like Zendesk or Freshdesk, Tidio's all-or-nothing approach can create more problems than it solves. Its reliance on manually fed knowledge limits how smart the AI can be, and being forced onto a new platform can feel like a step backward. For these teams, the goal isn't to rip out their core tools but to make them better with smart automation.
If you want to add powerful AI to your existing workflow without the migration headache, you should consider a layered solution designed for integration.
A smarter way to add AI to your help desk
Instead of making you switch tools and migrate data, eesel AI connects directly to the help desk and collaboration apps you rely on every day.
You can train your AI on the knowledge you've already built thousands of past tickets, internal guides in Confluence or Google Docs, and more to power smarter, more accurate, and more secure automations. With eesel AI, you get a full suite of AI tools in one clear, predictable plan.
You can book a demo or start a free trial today to see how eesel AI can transform your customer support without turning it upside down.
Frequently asked questions
What’s the main difference between the Tidio AI chatbot and its "Flows" feature?
The main distinction is how they handle conversations. The Tidio AI chatbot (specifically Lyro) uses conversational AI to understand questions and provide answers from its knowledge base. Flows are rule-based automations that guide users down a fixed, scripted path that you design.
How hard is it to train the Tidio AI chatbot if we already have extensive documentation?
You have to manually supply all knowledge to the chatbot, either by scraping your website, importing files, or adding Q&A pairs one by one. It doesn't connect directly to existing knowledge bases like Confluence or Google Docs, meaning you'll need to maintain a separate set of information inside Tidio.
Will Tidio AI chatbot integrate with my company's existing help desk?
Tidio is designed primarily as an all-in-one platform, so it works best when you use its full suite of tools. While some integrations exist, it is not built to be a simple AI layer on top of a separate help desk like Zendesk or Freshdesk, which can make integration challenging.
How well does the Tidio AI chatbot handle complex or multi-part customer questions?
It may struggle with complex issues since its knowledge is based on curated FAQs and website content. While it's great for straightforward questions with clear answers, it can miss the nuance of messy, real-world problems that aren't spelled out in its training data.
Is the pricing for the Tidio AI chatbot's full features easy to understand?
Tidio's pricing can be complicated because its most powerful AI features, like Lyro, are often paid add-ons for the starter and growth plans. Your total cost will vary based on multiple factors, including different types of conversations and visitor limits, which can make it hard to predict your monthly bill.