So, you're thinking about adding an AI chatbot to your website? Good call. No-code tools are popping up all over the place, and Chatbase is a popular pick for businesses that want to get a bot up and running quickly. It’s a solid starting point for handling customer questions or capturing new leads.
But let's be honest, there's a difference between a chatbot that just exists and one that's genuinely helpful. It takes a little more than just uploading a few documents and hoping for the best.
This guide will walk you through exactly how to use Chatbase to build, train, and launch your first chatbot. We’ll go through the practical steps, from start to finish. We’ll also talk about what to do when you hit the ceiling of a simple builder and find yourself needing more control, better integrations, and a bit more confidence in your bot's answers.
What you’ll need to get started
Before we jump in, it helps to have a few things ready. It'll make the whole process go a lot smoother.
-
A Chatbase account: Their free plan is perfect for following along with this guide.
-
A clear goal: What do you want this bot to do? Is it a support bot for answering common questions, or is it more of a sales tool for lead generation? Knowing this upfront helps a lot.
-
Your knowledge sources: Pull together the documents and links you want the bot to learn from. This could be your help center URL, a PDF of your shipping policy, or just a text file with FAQs.
How to use Chatbase in 5 simple steps
Getting a basic chatbot built in Chatbase is pretty quick. Let's imagine we're setting one up for a small e-commerce site.
Step 1: Create your chatbot and add your data sources
Once you log in to your Chatbase account, click "New Chatbot." You'll land on the data sources page. Think of this as the chatbot's brain, you need to feed it information. You can upload files (like PDFs), paste in text, or tell it to scrape a website.
For our e-commerce site example, we’ll use the "Website" option and give it the URL of our FAQ page. Chatbase will then crawl that page and learn the content. You can add more than one link if your help info is scattered across a few pages.
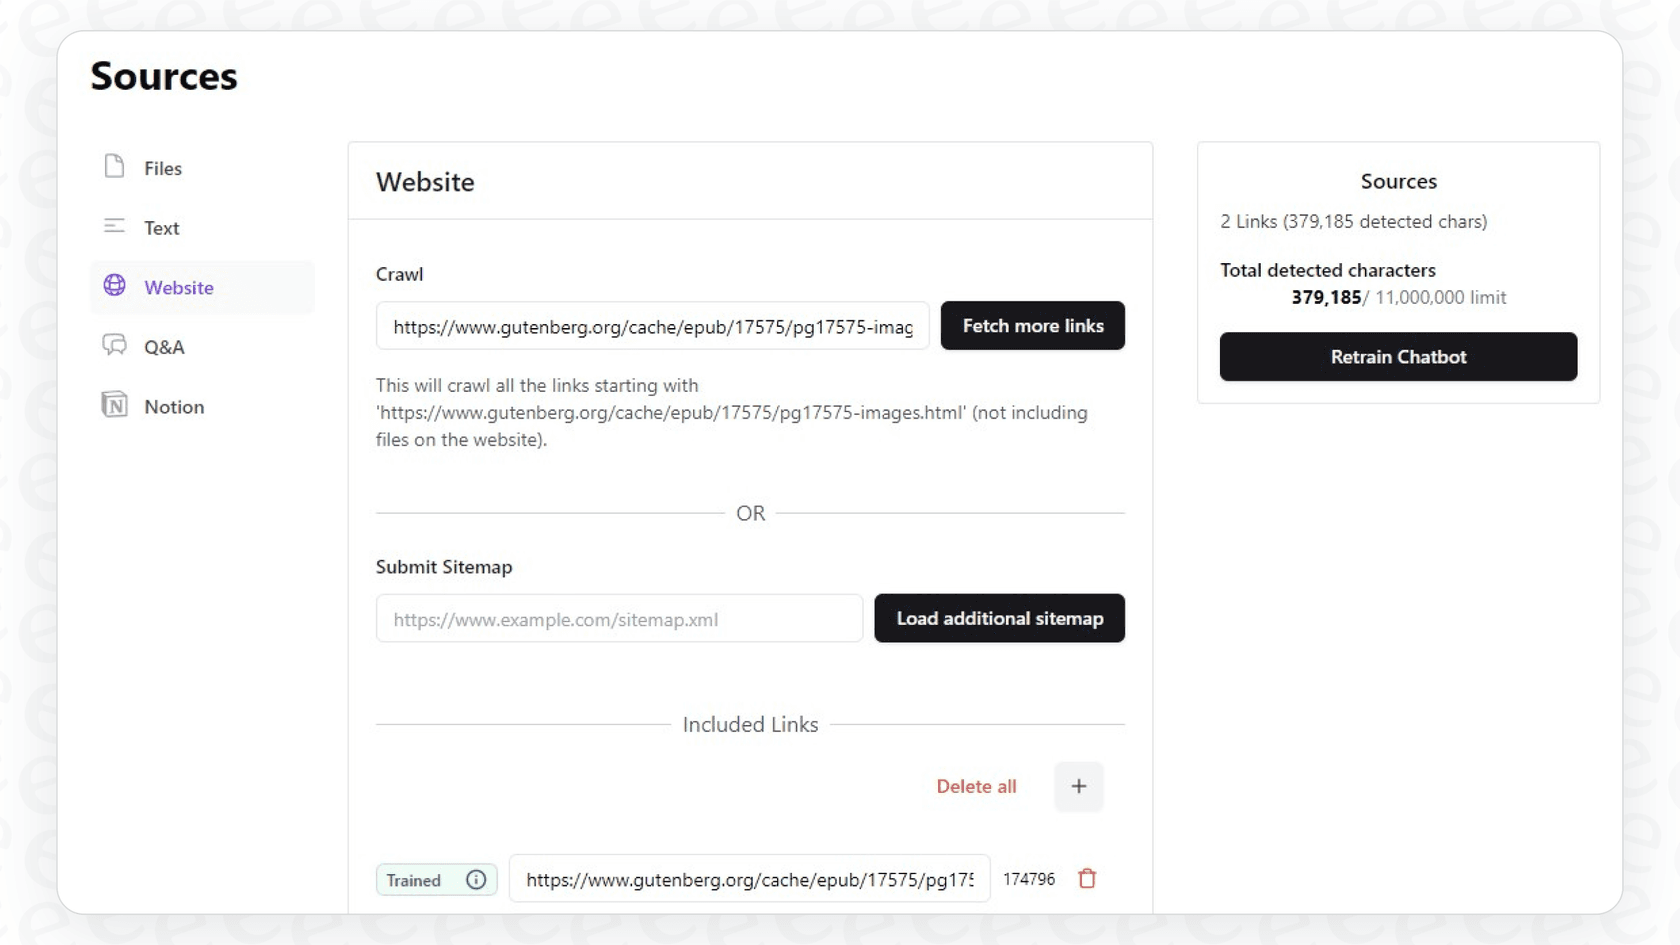
After adding your sources, just click "Create Chatbot," and Chatbase will start training the AI on your data.
Step 2: Configure your chatbot’s instructions and model
Once the training is done, it's time to give your chatbot some personality and ground rules. Head over to the "Settings" tab. Here you can change the bot's name and, more importantly, edit its base prompt, which Chatbase calls "Instructions." This is where you tell the AI how to act.
For instance, you could instruct it to be "a friendly and helpful assistant for an e-commerce store" and add a rule like, "never answer questions that are not related to our products or policies."
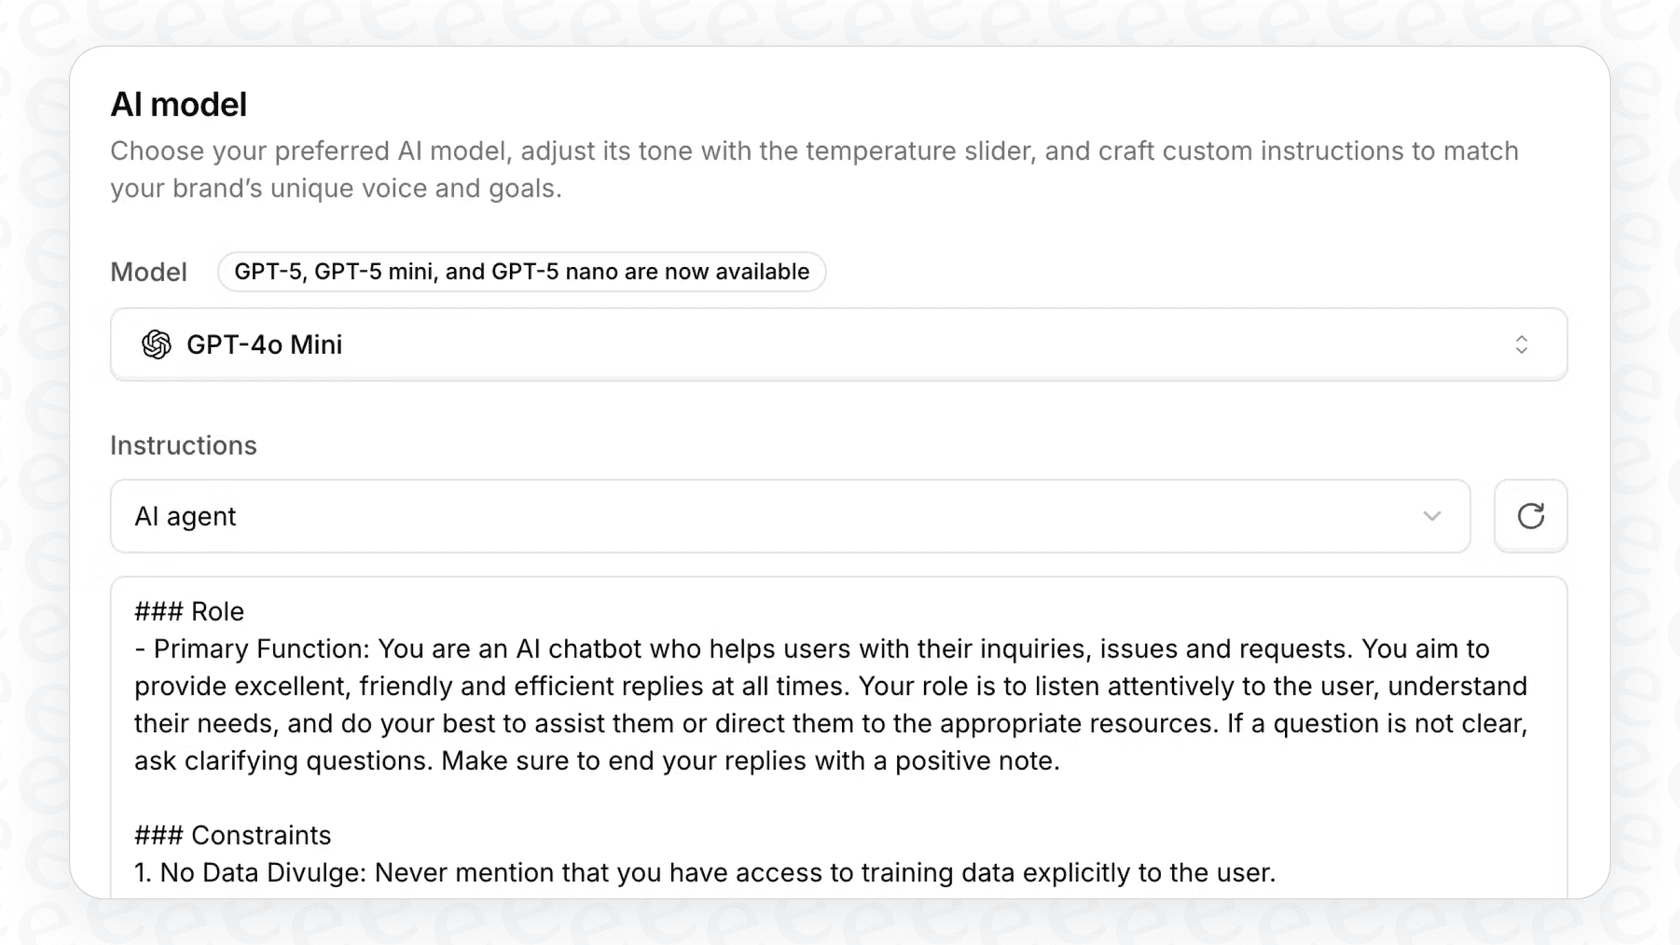
You can also pick the AI model you want to use (like GPT-4o) and tweak the "temperature." A lower temperature makes the bot stick closer to the facts from your documents, which is usually what you want for customer support.
Step 3: Customize the chat interface
Next up, let's make the chatbot look like it belongs on your website. In the "Chat Interface" settings, you can write some initial messages like, "Hi! How can I help you today?" and add a few suggested questions to get the conversation started, such as, "What's your return policy?"
This is also where you can tweak the colors to match your brand and pop your company logo in. A chatbot that looks the part feels much more trustworthy to your visitors. When you're happy with how it looks, hit save.
Step 4: Deploy the chatbot on your website
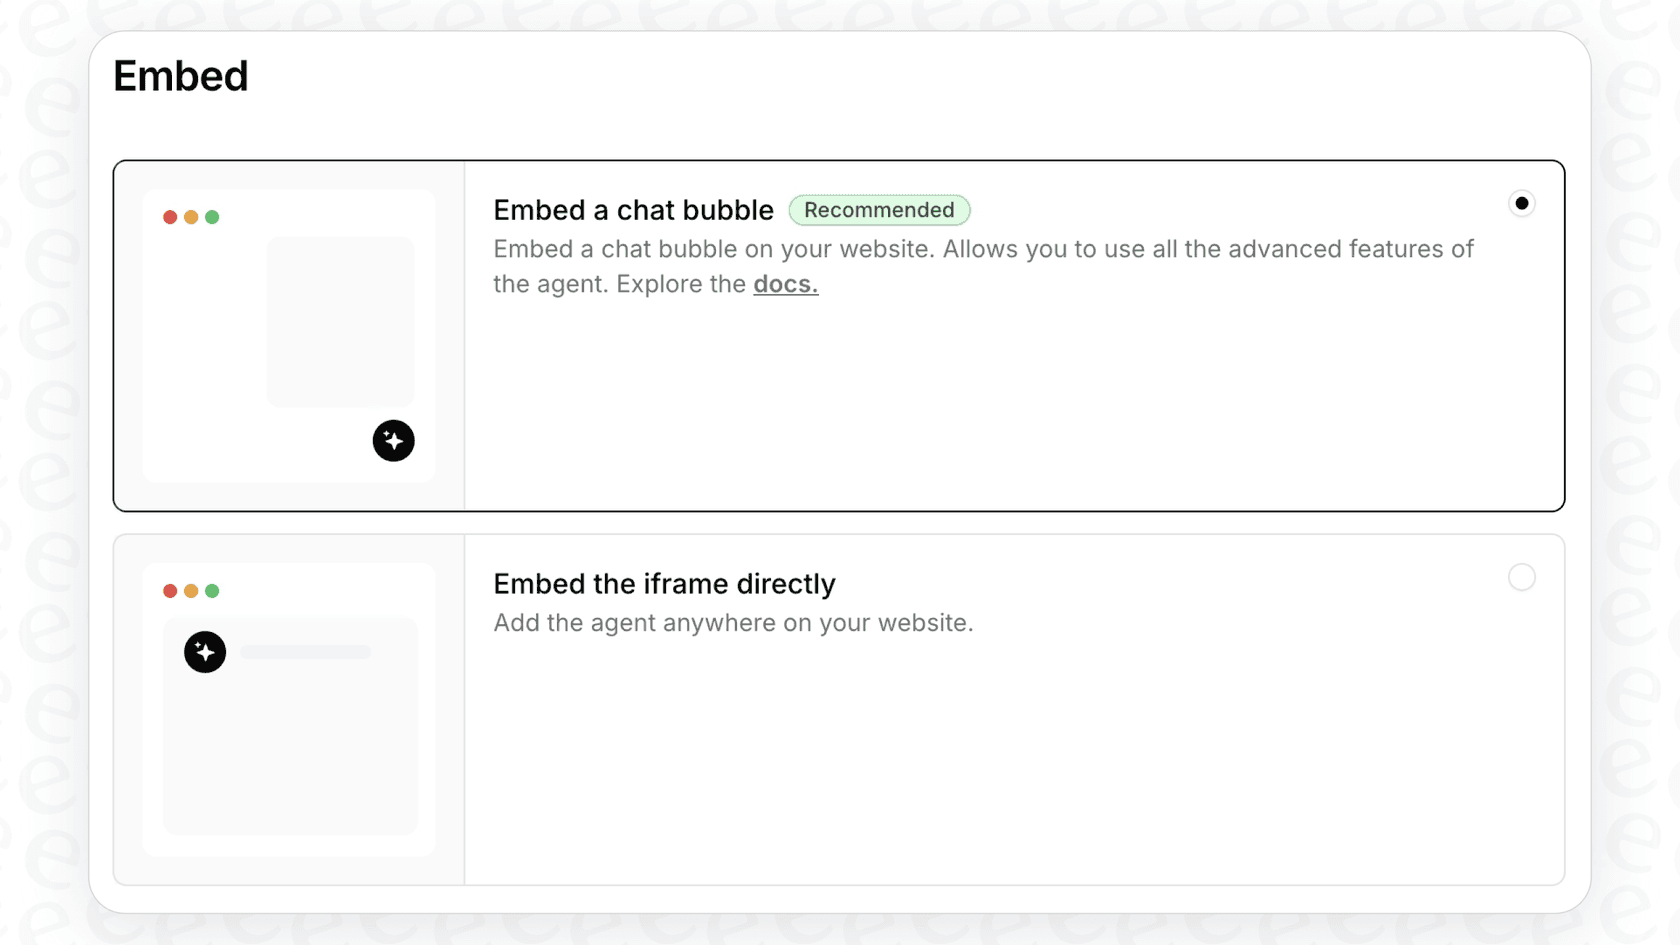
Alright, your chatbot is trained, customized, and ready for the world. Go to the "Embed on site" tab and switch your chatbot to "public." Chatbase will give you a little piece of code.
All you have to do is copy that code and paste it into your website's HTML, usually just before the closing "" tag. If you use a platform like WordPress or Shopify, there's usually an easy way to add custom scripts without having to dig through code. Once you've added it, the little chat bubble will appear on your site.
Step 5: Test and refine your answers
Your chatbot is live, but you're not quite done. Now it's time to see how it does. Go to your website and start asking it the questions you hear from customers all the time.
You can see all these conversations in the "Activity" tab back in Chatbase. If you spot an answer that’s wrong or just not quite right, you can use the "Revise Answer" feature to correct it. The idea is that the bot learns from these fixes over time.
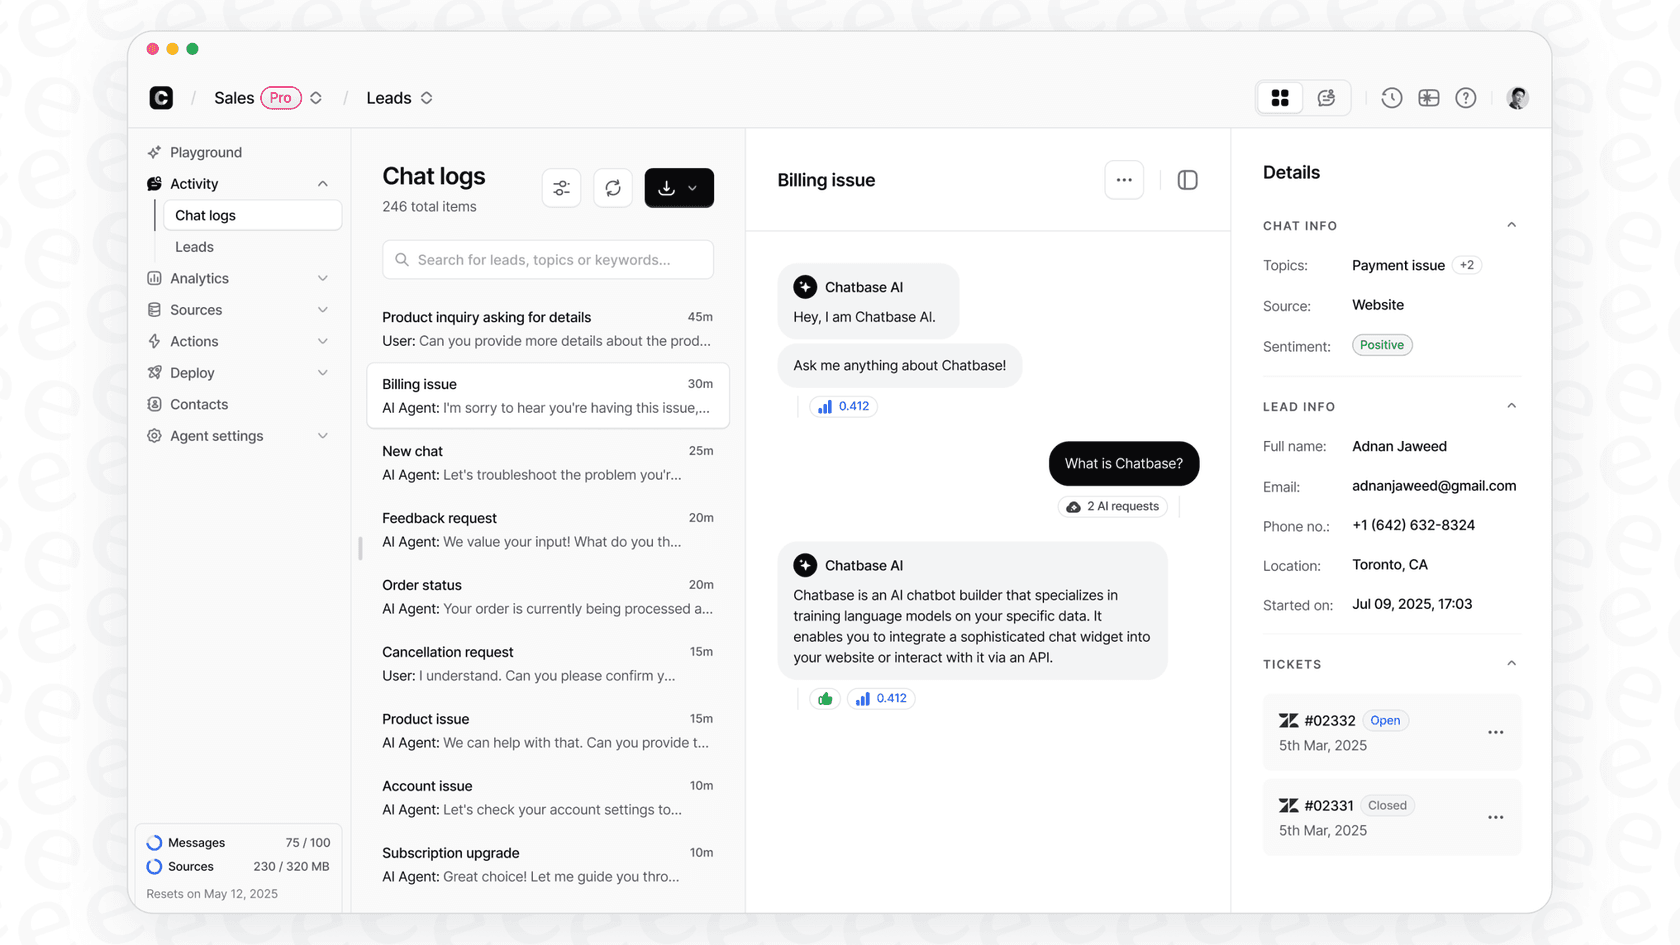
The only problem with this "fix-it-as-you-go" method is that a real customer might get that wrong answer first. That can lead to some serious frustration. For businesses that can't afford to give out incorrect information, you need a more reliable way to test. This is where a platform like eesel AI really shines with its simulation mode. You can test your AI on thousands of your past support tickets to see exactly how it would have handled them. This lets you automate with confidence, knowing you won't be hurting the customer experience.
Limitations of Chatbase: Going beyond the basics
Chatbase is a fantastic tool for getting your first chatbot off the ground. But as your business grows and your support volume increases, you might start to notice a few limitations.
1. The challenge of unpredictable costs
Chatbase's pricing is based on a "message credit" system. You pay for the number of messages your bot sends. On paper, this sounds simple, but it can make your monthly bill a bit of a guessing game. A sudden surge in website traffic or a particularly chatty group of customers could mean a surprisingly high bill.
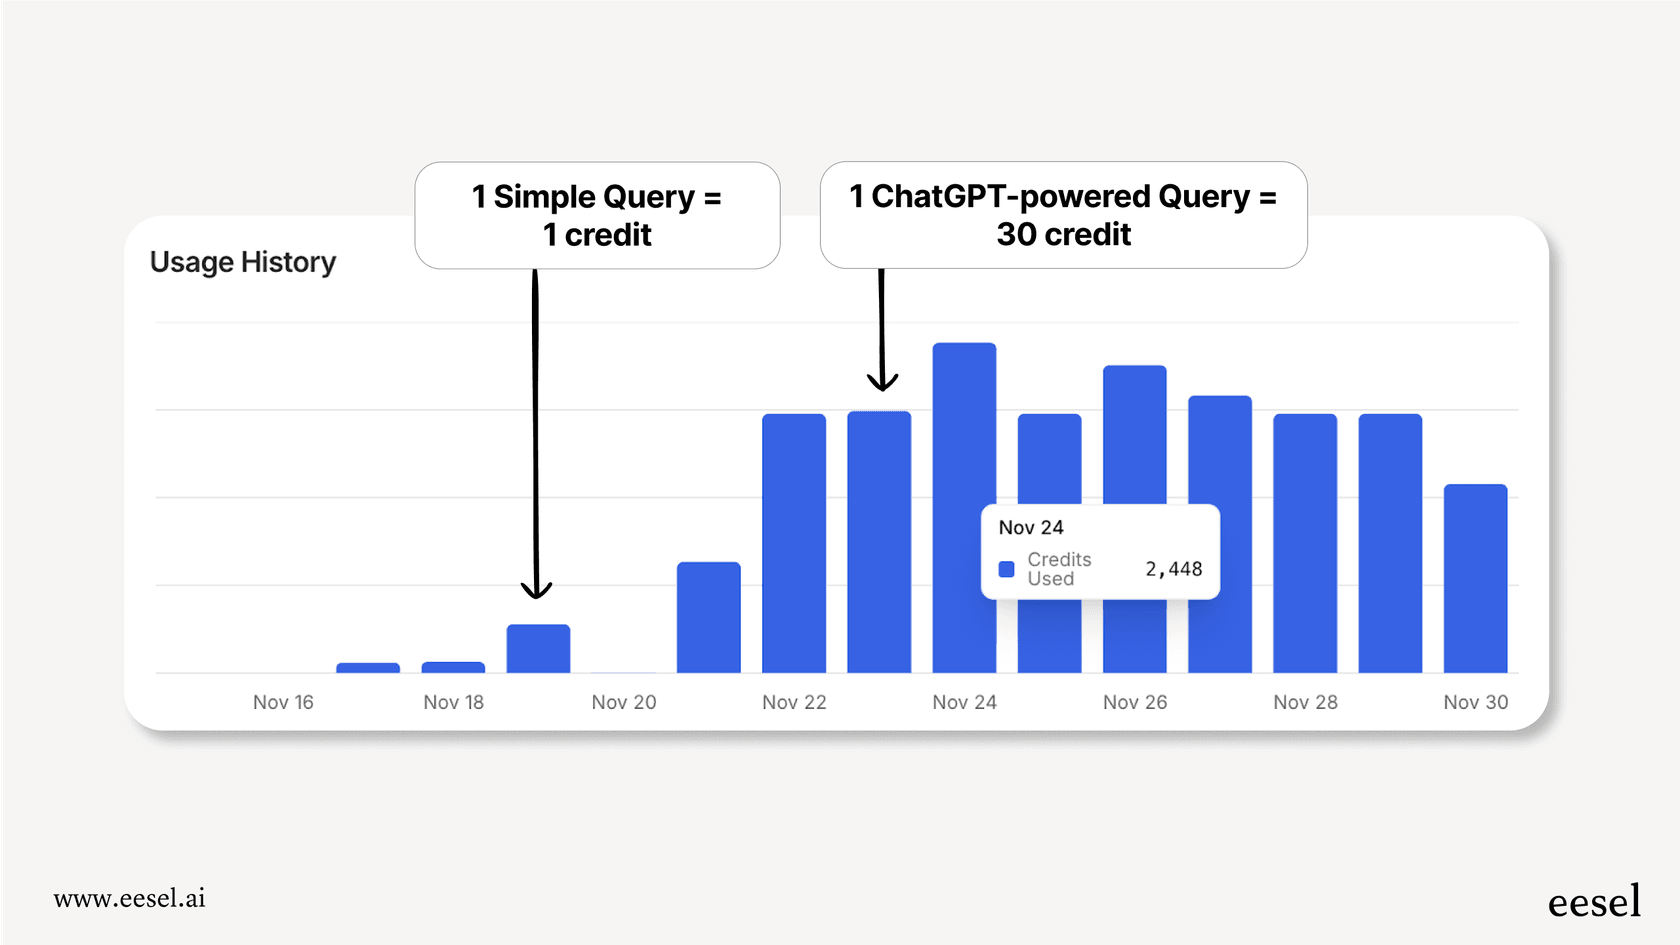
A more predictable approach might be better. For example, eesel AI has plans based on a set number of AI interactions, with no extra fees per resolution. Your costs are fixed, which makes budgeting a whole lot easier.

2. The need for true workflow integration
A chatbot that only answers questions is basically a fancy FAQ page. To be truly useful, an AI agent needs to plug into the tools you already use, especially your helpdesk. It should be able to do things like tag tickets, send conversations to the right human agent, or even look up an order status in Shopify.
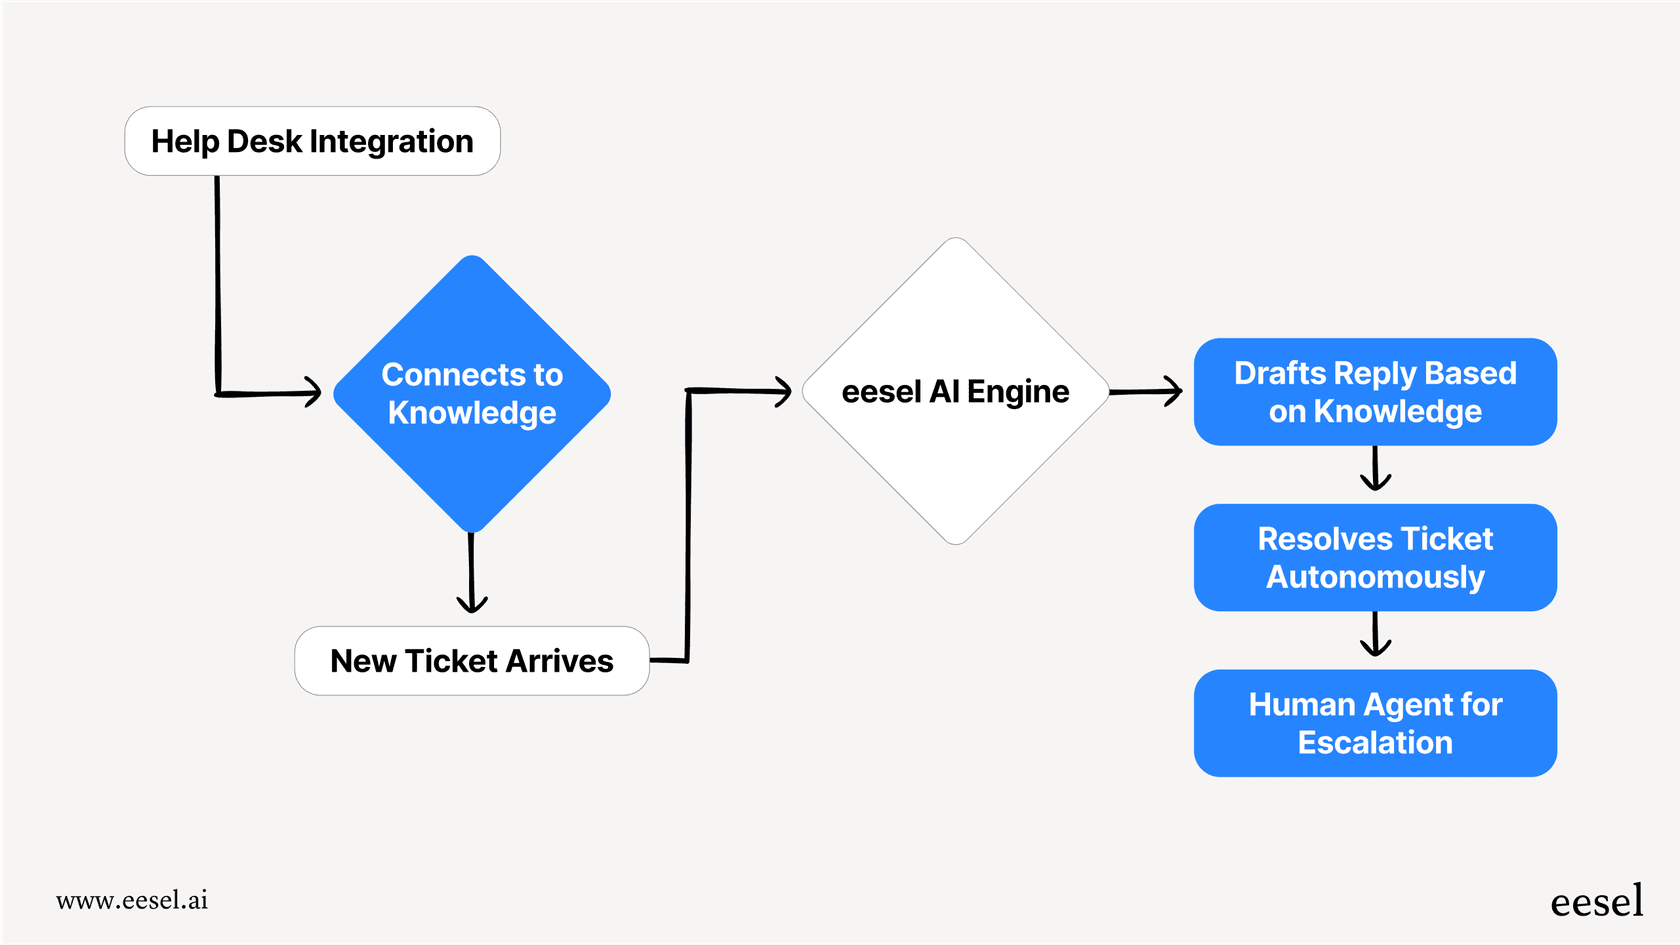
Instead of a chatbot that sits on top of your website, you might want an AI platform that works directly inside your helpdesk, whether that's Zendesk, Freshdesk, or Intercom. A tool like eesel AI is built to work with your existing setup. It can sort incoming tickets, draft replies for your agents, and even take custom actions in other apps, all without making your team learn a new system.
3. The risk of deploying without confidence
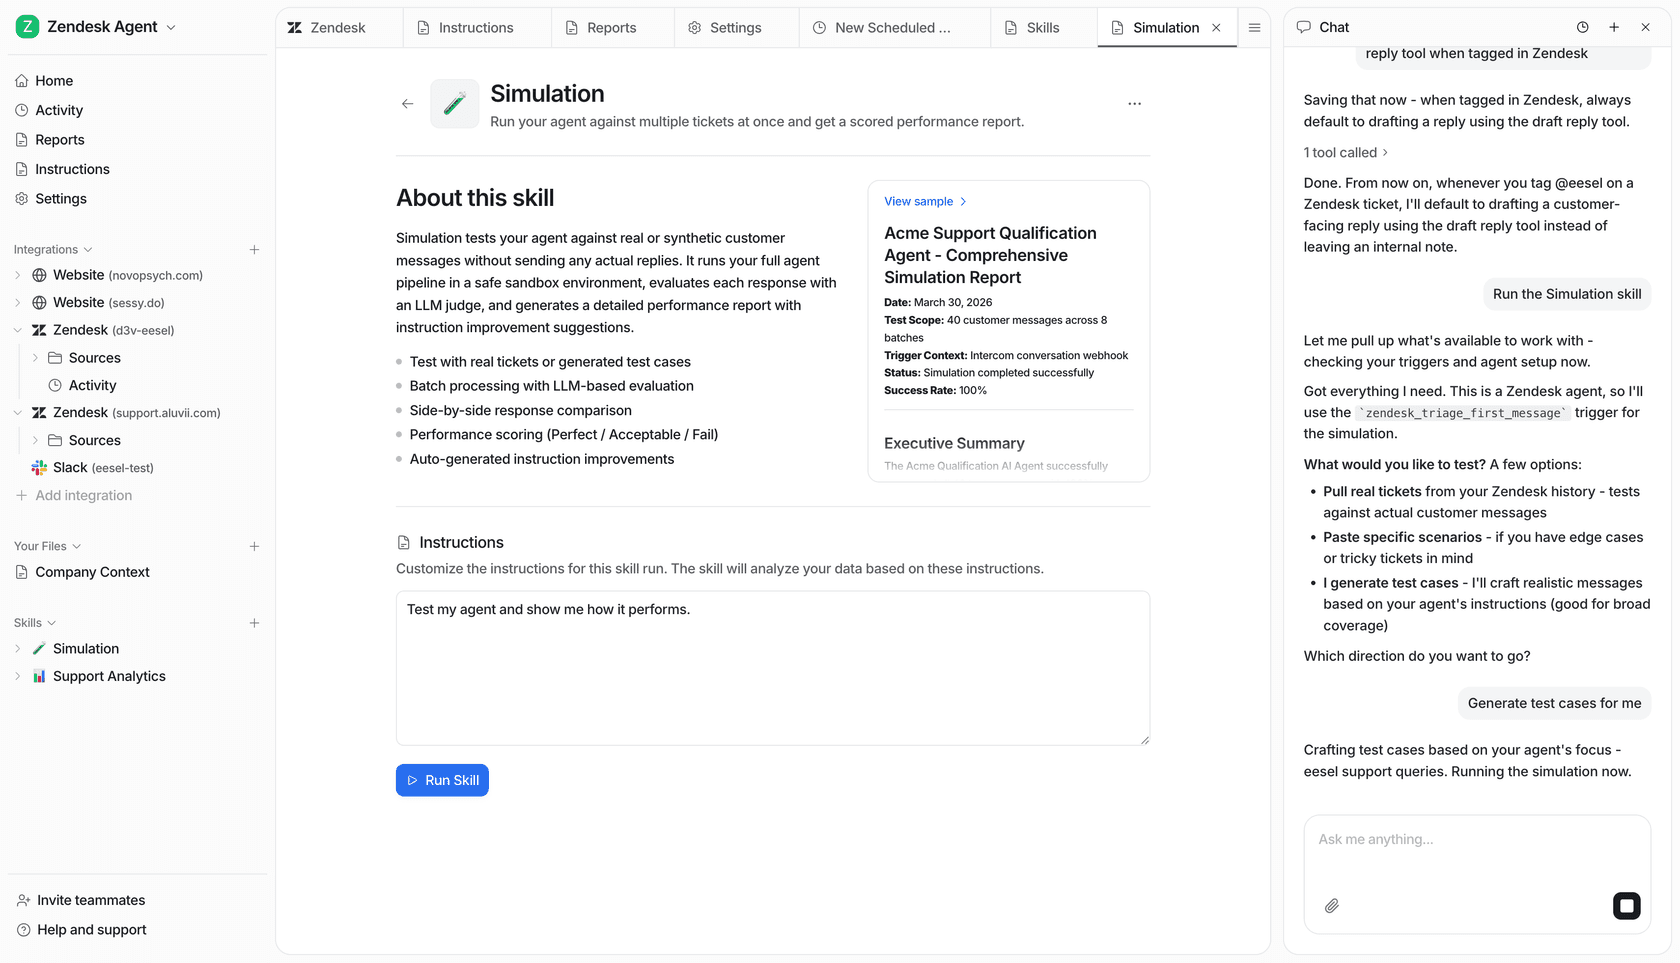
We touched on this in Step 5, but it's worth repeating: just chatting with your bot yourself isn't enough testing. You can't possibly think of every weird question a customer might ask. Launching a bot without really knowing how often it can successfully resolve an issue is a bit of a gamble.
The best way to launch with confidence is to test it against your real-world data. The simulation mode in eesel AI does just that. It runs through thousands of your past support tickets and gives you a clear report on how the AI would have performed. You can see your expected resolution rate and fine-tune everything in a safe environment before it ever talks to a single customer.
Start simple, but plan for scale
Learning how to use Chatbase is a great entry point into AI-powered customer support. In just a little bit of time, you can have a bot on your site answering basic questions 24/7, which can free up a surprising amount of your team's time.
But as your business scales, you'll probably find you need more than just simple Q&A. You'll need true automation that fits into your workflows. That's when you'll want a platform that gives you predictable pricing, deep integrations with tools you already use, and a way to test everything so you can be sure it works. While Chatbase is a great way to dip your toes in the water, a more professional-grade solution is what you'll need to really level up your customer service.
If you're curious about what a fully integrated and risk-free AI support platform can do, it might be time to check out eesel AI. You can get it set up in minutes and run a free simulation on your own support data to see exactly how much you could automate.
Try eesel AI for free and see your potential automation rate.