If you’ve been keeping an eye on AI developments, you’ve probably heard about OpenAI's ChatKit. It’s been getting a lot of attention for giving developers a framework to build custom AI chat experiences that go way beyond a simple text box. The magic behind this framework? ChatKit Widgets.
These are the interactive UI bits and pieces that can transform a basic chatbot into something that feels more like a mini-app living inside a chat window. But what are they, really? And more importantly, what does it actually take to get from a cool design in the Widget Builder to a tool your customers or employees can rely on?
This guide is here to cut through the hype. We'll give you a straightforward look at ChatKit Widgets, explaining what they are, which ones you need to know, and what the day-to-day reality of using them looks like. We'll also get into the nitty-gritty of the hidden complexities and explore why building it all yourself might not be the quickest route to getting a helpful AI agent in front of your support team.
What are ChatKit Widgets?
So, what’s the big deal with these widgets? Think of ChatKit Widgets as a Lego set for your chatbot's interface. Instead of just sending back and forth plain text, your AI can present information in neat, structured formats, ask for input using forms, and even offer clickable buttons to get things done.
OpenAI’s own docs describe them as a way to "surface context, shortcuts, and interactive cards directly in the conversation." In simple terms, they are pre-built UI elements that are defined using JSON (a standard data format) and sent from your backend to appear in the chat.
This allows for a much more dynamic and helpful conversation. Instead of typing out every single detail, a user can interact with a calendar to book an appointment, fill out a form to update their profile, or click through a list of options to troubleshoot an issue. It’s about making the chatbot do the heavy lifting, guiding the user through tasks instead of just answering one-off questions.
The building blocks: A closer look at key ChatKit Widgets
You don't need to memorize the entire library of widgets, but a handful of them do most of the work in any interactive chat experience. Getting to know them helps paint a clearer picture of what’s possible when you’re designing a custom chat UI.

Containers for structure
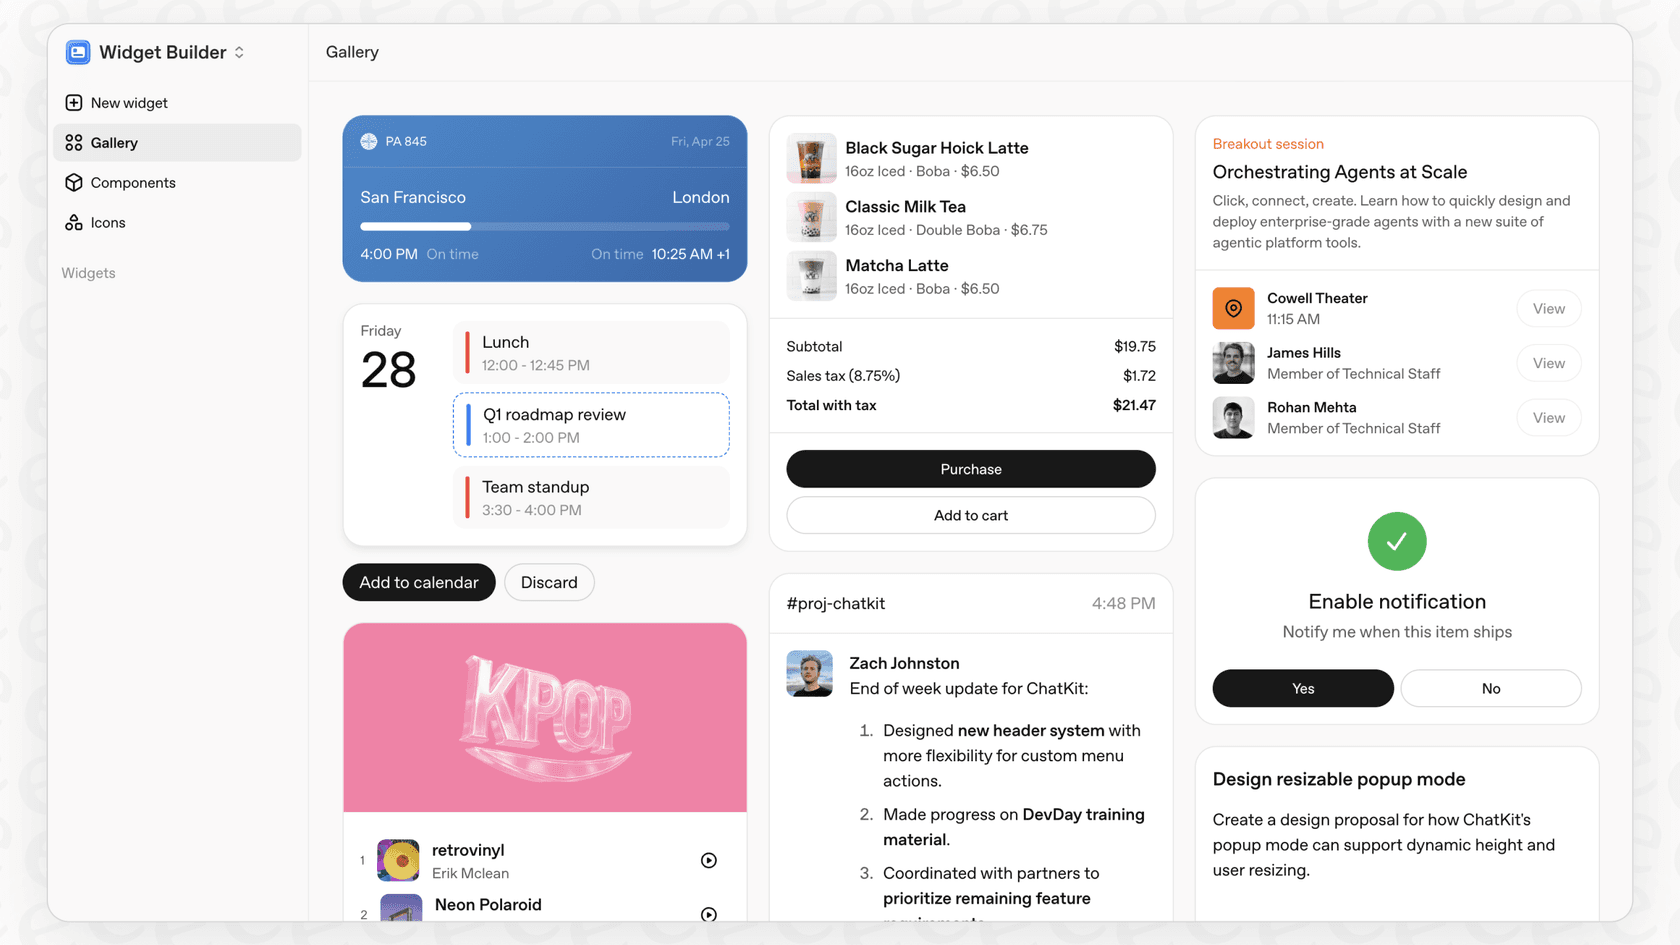
First, you have your layout elements that hold everything else together. Components like "Card" and "ListView" are the scaffolding for your chat interface.
A "Card" is basically a bordered box that groups related info together. It’s perfect for showing a quick summary of a support ticket, a customer's order details, or key product features. A "ListView", just like it sounds, creates a vertical list of items. This comes in handy for displaying search results, a list of help articles, or available time slots for a meeting.
Interactive widgets for user action
This is where things get really interesting. These widgets are what allow the user to actually do something right there in the chat window, turning a passive conversation into an active one.
-
Button: A simple but powerful tool. When a user clicks it, it triggers a specific action on your server. This could be anything from "Track My Package" to "Talk to a Human."
-
Form: This is a game-changer for collecting information. A "Form" is a container for input fields that can be submitted to your backend. It's how you capture structured data like a user's name, email, or the specifics of their support issue without a messy back-and-forth.
-
Select: Ever had to ask a user to choose from a long list of options? The "Select" widget creates a clean dropdown menu, which makes the choice simple and cuts down on typos and errors.
-
DatePicker: A pop-up calendar interface for picking dates. It’s incredibly useful for scheduling demos, setting follow-up reminders, or filtering reports by a specific time period.
Widgets for displaying information
Finally, you need ways to show information that are a little more engaging than a wall of text. Widgets like "Image", "Badge", and "Markdown" help make communication clearer and more visual. An "Image" can show a product photo or a screenshot to illustrate a point. A "Badge" can be used to highlight a ticket’s status (like "Open" or "Resolved"). And the "Markdown" component lets you render text with formatting like headers, bullet points, and links, making dense information much easier to read.
Here’s a quick breakdown of how you might use some of these in the real world:
| Widget | Primary Use Case | Example |
|---|---|---|
| Card | Grouping related information into a single unit. | Displaying a customer's order summary with an image and details. |
| Button | Allowing the user to trigger a predefined action. | "Track Package" or "Escalate to Agent" buttons. |
| Form | Collecting structured information from the user. | A form to create a new support ticket with fields for subject and description. |
| ListView | Displaying a vertical list of items. | Showing a list of relevant help center articles. |
| Select | Providing a dropdown menu for single-choice selection. | A dropdown to select a reason for contacting support. |
| DatePicker | Enabling users to select a specific date. | Scheduling a follow-up call or filtering a report by date. |
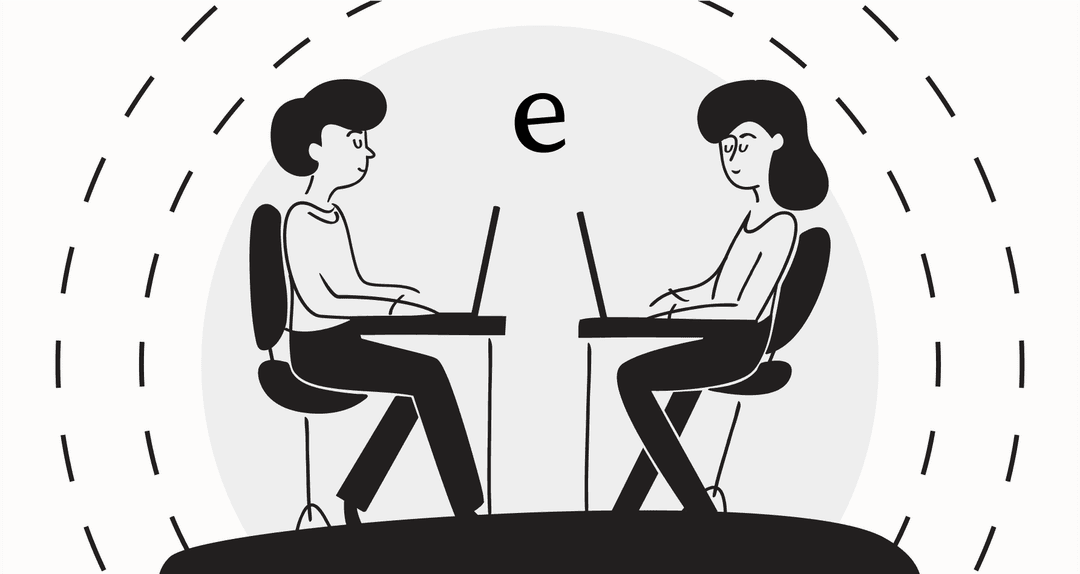
How to use ChatKit Widgets: From builder to deployment
Okay, so you've seen the building blocks. How do you actually put them together? Building with ChatKit Widgets isn't just a drag-and-drop affair. It’s a process that requires a good handle on both front-end and back-end development. As one tutorial from Skywork.ai points out, it's really a task for intermediate-level developers.
Designing ChatKit Widgets with the Widget Builder
Your journey typically starts with OpenAI's Widget Builder. It’s a visual tool that lets you play around with different layouts and components to see how they look and feel. This is a great sandbox for mocking up the user experience and getting the basic JSON configuration for your widget without writing a line of code.
Two paths to implementation
Once you have a design, you have to make it work. A post on Dev.to breaks down the two main ways you can integrate ChatKit:
-
The simpler path: Let OpenAI host and manage everything. You embed their ChatKit component into your website and connect it to an agent you’ve configured in their ecosystem. This is faster to get started, but you give up a lot of control over the backend logic.
-
The advanced path: You host everything on your own infrastructure. This gives you total freedom to connect the ChatKit front-end to any backend system or AI model you want. But with great power comes great responsibility, you’re on the hook for building, scaling, and maintaining the whole setup.
For most businesses that want to connect the chatbot to their own systems (like looking up an order in Shopify or creating a ticket in Jira), the "Advanced Integration" is the only real option. This means you’ll need a server that can handle user actions, manage security and authentication, and dynamically create the right widget JSON depending on where the conversation is going.
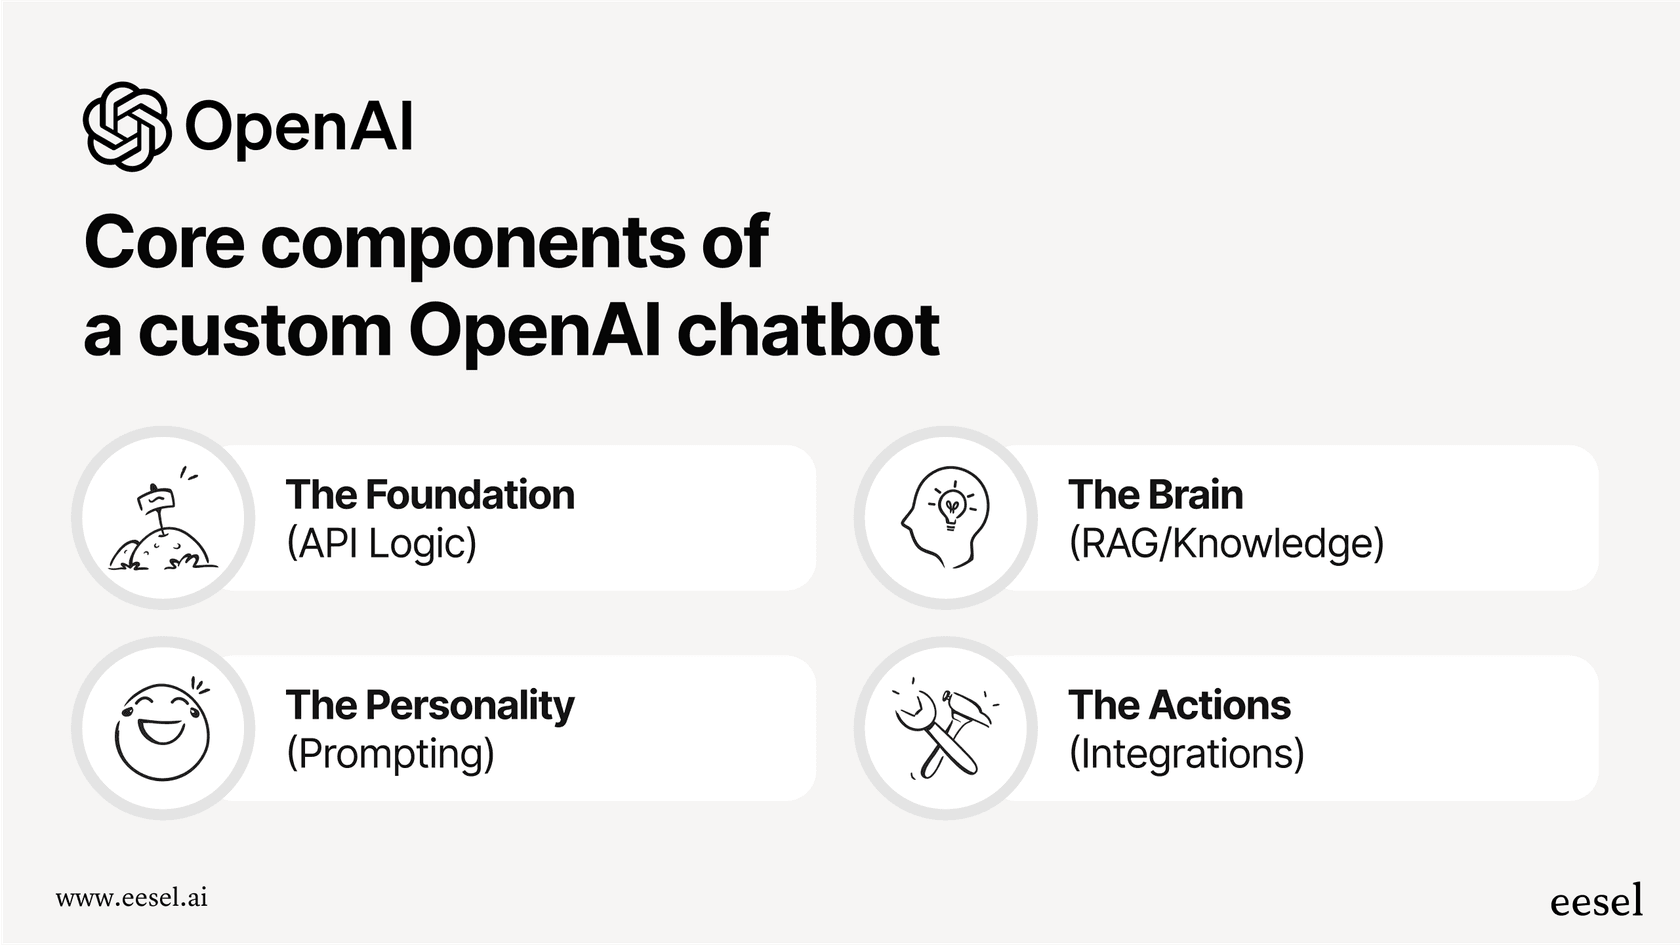
The takeaway here is that while the widgets themselves are powerful, the real work is in building the brain (the backend) that makes them do useful things.
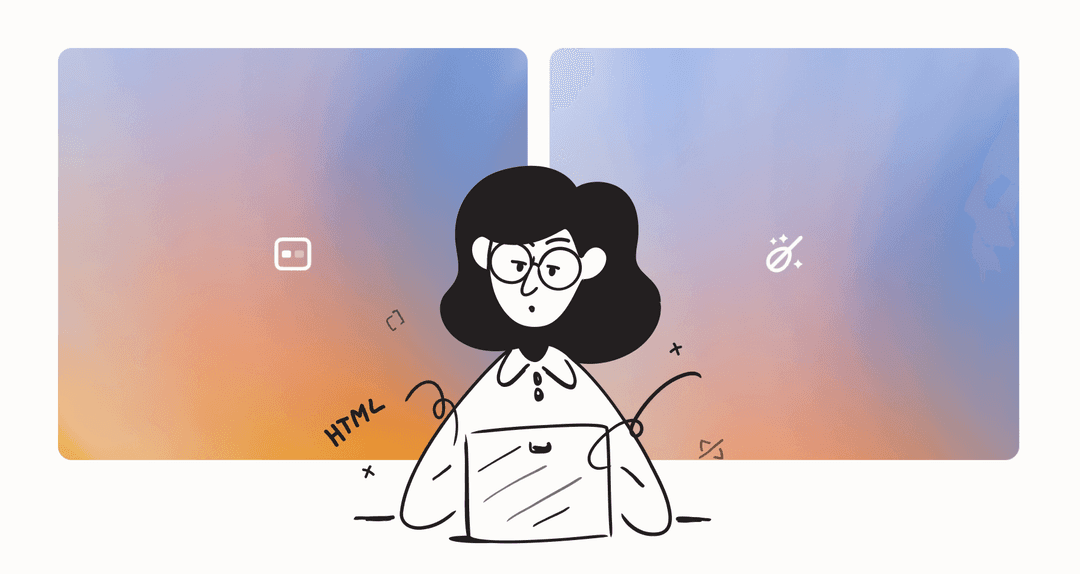
The hidden costs and limitations of the DIY approach
This is the part of the process that often gets glossed over. While ChatKit Widgets offer amazing flexibility, the do-it-yourself nature of the framework comes with some serious overhead. For a busy support or IT team just trying to solve problems, these challenges can turn a promising project into a months-long headache.
A full-on development project
Let's be clear: building a production-ready chat agent with ChatKit is a software development project. It's not a "no-code" or "low-code" tool you can hand off to a non-technical team member. You'll need skilled engineers to set up the backend server, handle user authentication, write the custom logic for every single button click, and maintain all the infrastructure.
The manual knowledge integration nightmare
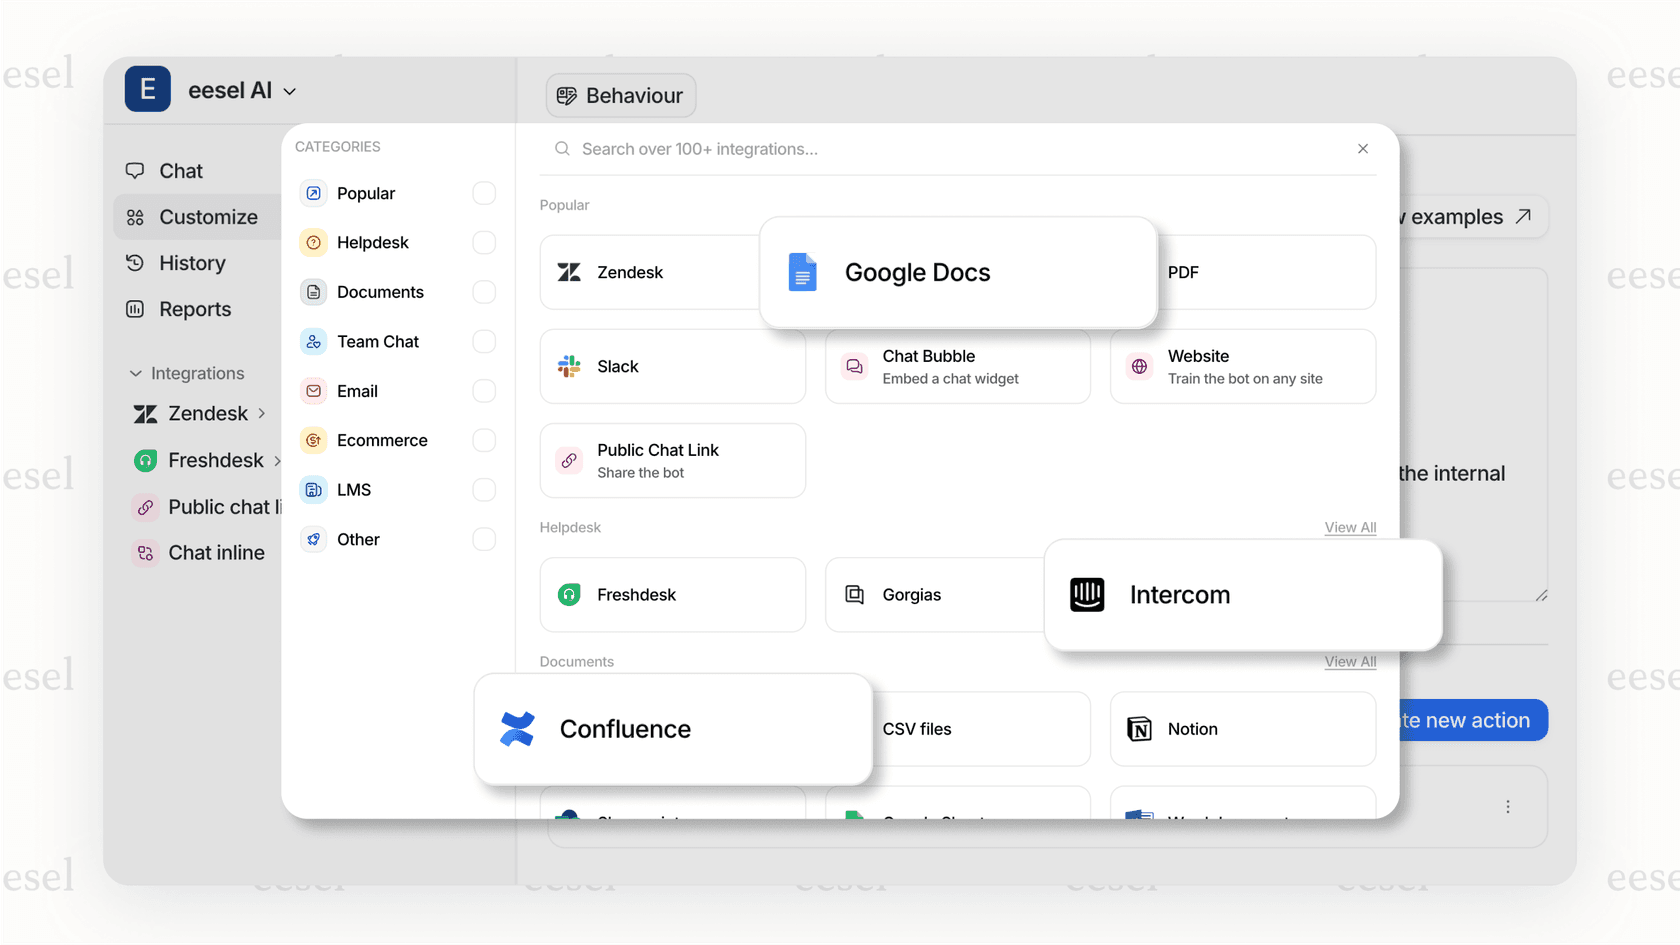
ChatKit gives you the UI, but it has zero built-in ability to connect to your company’s knowledge. Want your chatbot to answer questions using your Zendesk help center, Confluence spaces, or past support tickets? You have to build those integrations entirely from scratch. This involves setting up data pipelines, managing API connections, and figuring out how to search and retrieve the right information in real-time. Honestly, this is often the most difficult and time-consuming part of the whole endeavor.
No built-in way to test or measure performance
How can you be sure your agent is actually helpful before you let it talk to customers? Or how do you track its performance and find out where it's failing once it’s live? ChatKit doesn’t come with any tools for this. There’s no way to simulate how it would respond to your historical ticket data, and there's no analytics dashboard to help you spot knowledge gaps. You’d have to build all of that yourself, too.
Starting with a blank canvas
When you start with ChatKit, you start from zero. Every single user workflow, every escalation path to a human agent, and every response pattern has to be designed, coded, and tested. While that freedom is appealing, it’s also a very slow way to get an effective AI agent off the ground.
The alternative to ChatKit Widgets: A platform that does the heavy lifting
For teams that need the power of a custom AI agent but don't have the time or resources for a six-month development project, a fully-managed platform is a much more practical choice. Instead of starting from scratch with a developer toolkit like ChatKit, you can use a solution that gives you the most important features right out of the box.
This is where a platform like eesel AI changes the equation. It's built to give you all the benefits of a custom, interactive AI agent without the massive engineering lift.
- Go live in minutes, not months: With one-click integrations for help desks like Zendesk and knowledge bases like Confluence, Notion, and Sharepoint, you can have a working AI agent trained on your company’s actual data in minutes. No backend coding, no data pipelines to build.
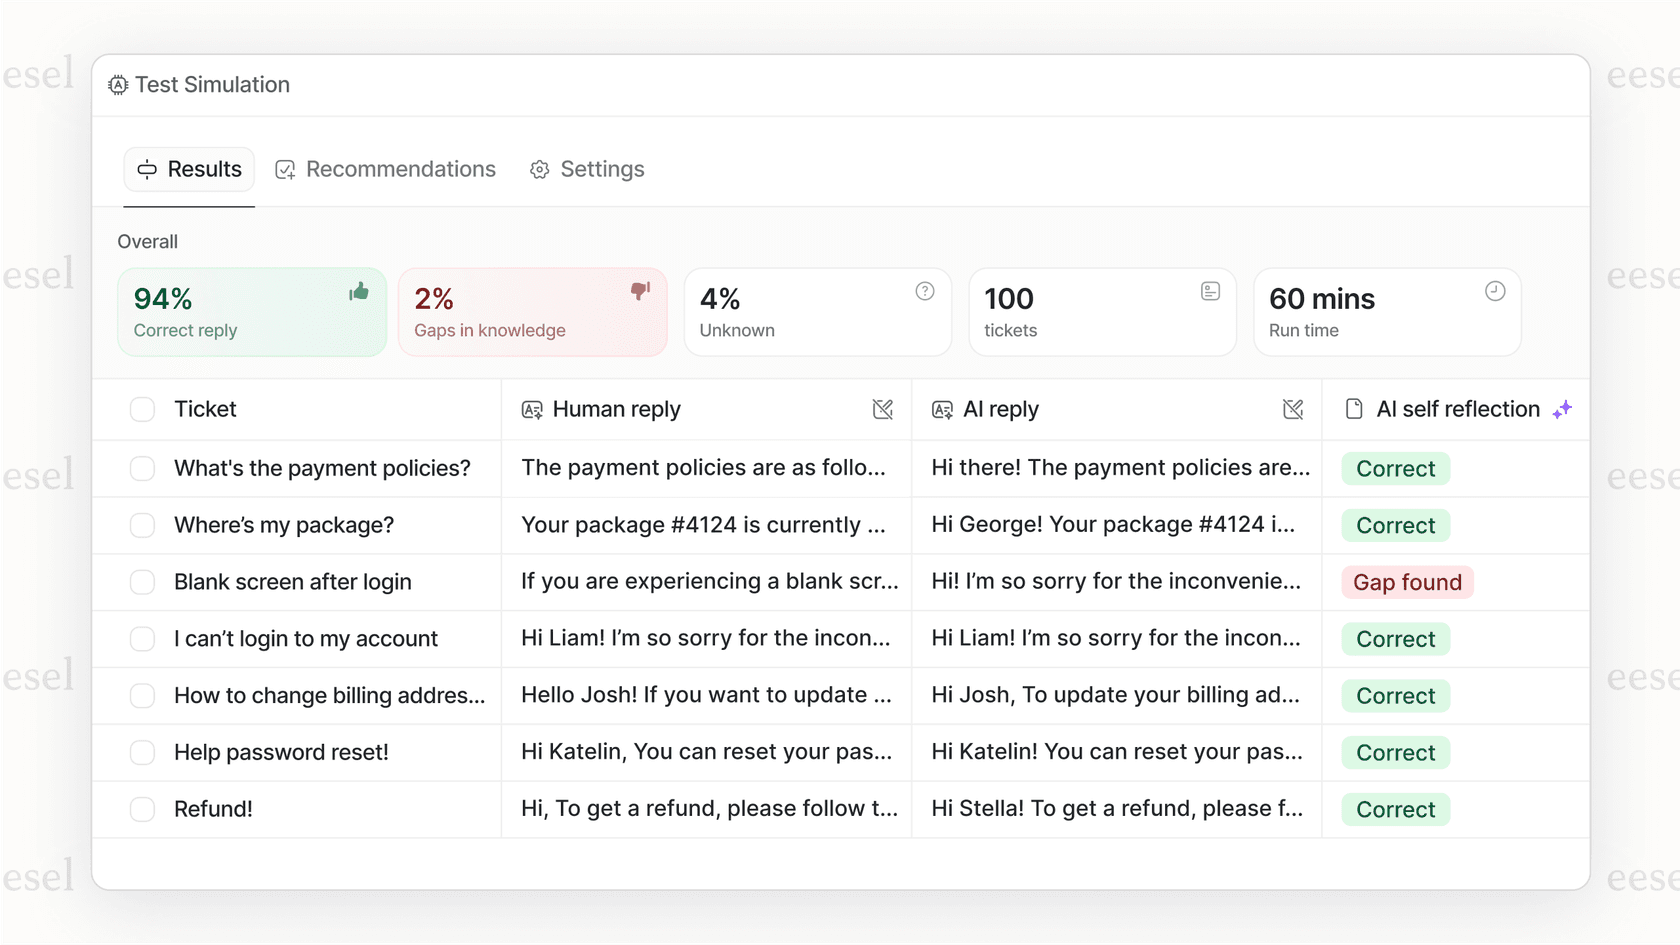
- Test with confidence: eesel AI comes with a powerful simulation mode. It lets you test your agent on thousands of your past support tickets to see exactly how it would have performed. You get an accurate forecast of its resolution rate before it ever talks to a live customer, which takes all the guesswork out of a DIY build.
- Total control without the code: You can still customize everything that matters. You can shape your agent’s persona, decide what it's allowed to do, and set up custom actions, like looking up order information or triaging tickets to the right team, all from an easy-to-use dashboard. You get the control you need, without having to write and maintain your own server.
Choose the right tool for the job
OpenAI’s ChatKit Widgets are a genuinely exciting tool for teams with the engineering firepower to build a completely custom AI chat experience from the ground up. They provide a level of UI control that is hard to beat if you have the resources to take it on.
However, for most businesses, the main goal isn't to become an expert in building chat frameworks. It's to resolve customer issues faster, free up your agents from repetitive questions, and improve the overall quality of your support. The time, cost, and sheer complexity of a DIY approach can easily get in the way of that goal.
A platform like eesel AI offers a much faster path to actually getting results. It handles the complicated infrastructure and integrations for you, so you can focus on what really matters. You end up with a powerful, customizable, and production-ready AI agent that you can launch in a fraction of the time, with a lot more confidence.
Frequently asked questions
What exactly are ChatKit Widgets, and how do they enhance a chatbot's interface?
ChatKit Widgets are interactive UI components, like digital Lego blocks, that allow your AI agent to present information in structured formats, collect user input, and offer clickable actions directly within the chat window. They transform basic text conversations into dynamic, mini-app-like experiences.
When considering building an interactive AI agent, what are the primary categories of ChatKit Widgets I should be aware of?
ChatKit Widgets generally fall into categories such as containers (e.g., Card, ListView for structure), interactive elements (e.g., Button, Form, Select, DatePicker for user actions), and display components (e.g., Image, Badge, Markdown for richer information presentation).
What kind of development expertise is required to implement and deploy custom ChatKit Widgets effectively?
Implementing custom ChatKit Widgets effectively requires intermediate to advanced development skills. It's a full software development project involving backend server setup, handling user authentication, writing custom logic for interactions, and maintaining infrastructure.
Do ChatKit Widgets include built-in features for connecting my AI agent to my company's existing knowledge bases?
No, ChatKit Widgets provide the UI framework but do not have built-in integrations for connecting to your company's knowledge bases like Zendesk or Confluence. You would need to build these data pipelines and API connections from scratch.
How can I test and measure the performance of an AI agent that relies on ChatKit Widgets before it goes live?
ChatKit Widgets themselves do not include tools for testing or measuring an AI agent's performance. You would need to develop your own simulation modes, analytics dashboards, and tracking mechanisms to assess its effectiveness and identify knowledge gaps.
Are there any alternatives to using ChatKit Widgets if my team lacks the extensive development resources for a DIY approach?
Yes, for teams without extensive development resources, a fully-managed platform like eesel AI offers a faster path. Such platforms provide similar interactive capabilities and integrations out-of-the-box, significantly reducing the engineering effort required to deploy a powerful AI agent.