So, you're looking to build a custom AI chat experience and you've stumbled upon ChatKit. It’s a common starting point, but the name itself can be a bit confusing. You might see old articles floating around about Pusher's ChatKit, but that service was shut down years ago. These days, when people talk about ChatKit, they almost always mean OpenAI's frontend library for building sharp-looking chat UIs.
In this guide, we're focusing purely on the modern OpenAI ChatKit. We'll get into the technical nitty-gritty of ChatKit JS Methods Events, see what it's capable of, and, just as importantly, talk about the hidden work that comes with it. ChatKit is great for the UI part, but you'll quickly find that building a complete, production-ready AI agent takes a lot more than just a pretty frontend.
What is OpenAI’s ChatKit?
Put simply, OpenAI's ChatKit is a frontend component library. It’s part of a bigger toolkit called AgentKit, and its whole purpose is to help you drop a polished, ready-to-go chat interface right into your web app.
Think of it as a pre-built, customizable chat window. It gives you the user-facing parts like the message list, the text input box, and the streaming responses, saving you from having to code them from scratch.
But here's the catch: it's important to be really clear about what ChatKit is not. It’s not a chatbot in a box. It’s not a backend, and it’s not an AI model. It is only the user interface. To get it up and running, you're on the hook for building your own backend server to manage things like user authentication, conversation history, and the actual connection to OpenAI's APIs.
Developers can use ChatKit in a few different ways, usually as a React/Next.js component or a standard Web Component, which makes it pretty flexible. Its main job is to give you a head start on the frontend, but as we're about to see, the UI is just one piece of a much larger puzzle.
A deep dive into ChatKit JS Methods Events
To really get a feel for ChatKit, you have to get comfortable with its core JavaScript methods and events. These are the tools you'll use to control the chat and react to what the AI is doing behind the scenes.
Controlling the chat
Methods are basically commands you can give the chat UI to make it do things outside of a user just typing a message. They let you programmatically control the interface, which is key for creating a smooth experience.
Here are the main ones you'll likely be using:
-
setThreadId(threadId): This is your go-to for managing conversation history. You can use it to load a previous chat or passnullto start a brand new one. It's how you create a persistent chat where users can pick up where they left off. -
sendUserMessage({ text, attachments }): This lets you send a message from the user's side programmatically. It’s perfect for things like suggestion chips or starting a conversation with a pre-filled question. It even supports file attachments. -
focusComposer(): A small but useful helper. This just programmatically puts the user's cursor into the message input box, which is a nice little touch to make the chat feel more alive and ready for input. -
fetchUpdates(): This method tells the ChatKit component to check your backend for new messages right away, instead of waiting for its usual polling check. It's handy if another system updates the conversation, but it also reminds you that you need a pretty smart custom server to make it all work. -
sendCustomAction(action): This is a flexible tool that lets you send a custom chunk of data from the frontend to your server. It's great for triggering unique workflows on your backend that go beyond standard text messages.
Reacting with events
If methods are about telling ChatKit what to do, events are about ChatKit telling you what's going on. You can listen for these custom signals to update your app's state, track analytics, or kick off other tasks.
Here are the key events to watch for:
-
chatkit.response.start/chatkit.response.end: These two fire off right when the AI starts and finishes sending a response. You'll want to use them to show and hide loading indicators so the user isn't just staring at a blank screen. -
chatkit.thread.change: This event pops up whenever the conversation's thread ID changes. By listening for this, you can save the user's session so they can come back to it later. -
chatkit.error: This one fires whenever something goes wrong inside ChatKit. You definitely need to catch this to log errors and send them to your monitoring tools to keep things running smoothly. -
chatkit.log: For when you need more detail than a simple error message. This event gives you detailed diagnostic info, which is a lifesaver for debugging during development and keeping an eye on things in production.
The hidden work you need to build around ChatKit
Looking at those methods and events, it's easy to think ChatKit is a complete solution. But that’s not the whole story. ChatKit handles the pretty frontend, but you're responsible for building and maintaining everything holding it up from below.
Here's a look at the serious engineering work you’re signing up for:
-
A custom backend server: ChatKit is just a frontend library. It needs a server to securely connect to OpenAI's APIs, manage conversation threads, pull from your knowledge sources, and handle your specific business logic. This isn’t a weekend project; it requires development, hosting, scaling, and ongoing upkeep.
-
Secure authentication: The official docs are very clear on this: you have to build a secure endpoint to authenticate your users. This means your server needs to issue short-lived tokens to the client so your API keys aren't exposed in the browser. Messing this up is a huge security risk.
-
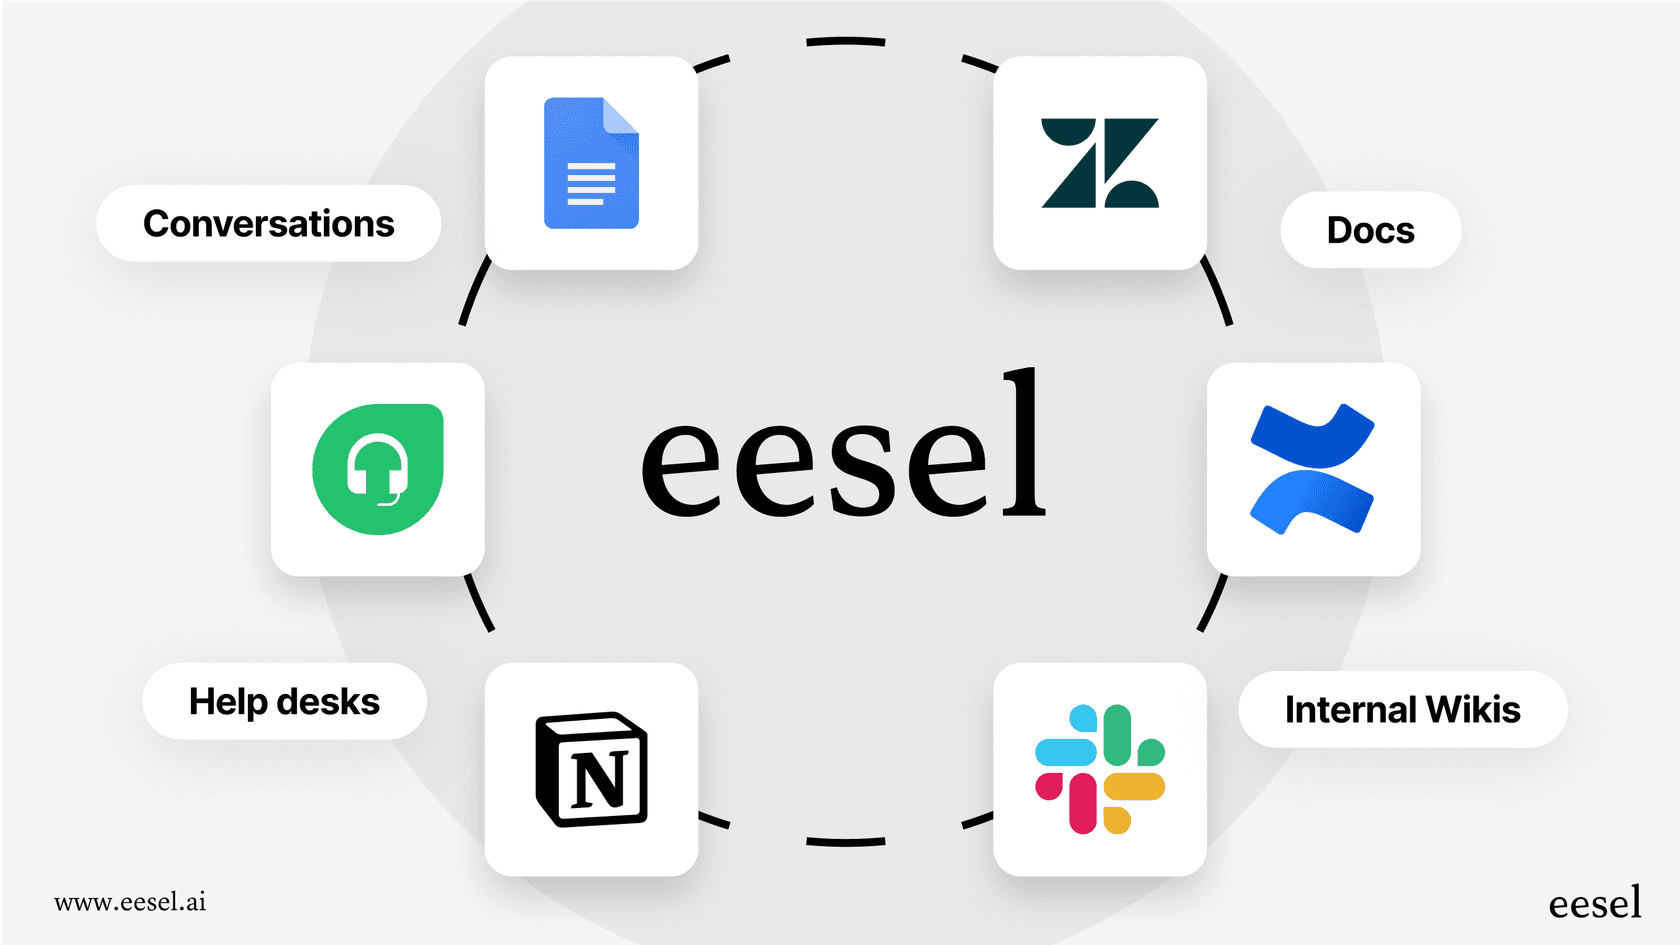
Knowledge source integrations: An AI is only as smart as the information it can access. With ChatKit, you have to build every single integration from scratch to pull data from your knowledge base, internal wikis like Confluence, shared drives like Google Docs, or any other system you use.
-
No built-in analytics or testing: How do you know if your AI is actually helping people? ChatKit doesn't have any tools for that. You have to build your own systems to track performance, test the AI's effectiveness, or find gaps in its knowledge.
The eesel AI alternative to building with ChatKit
If building your own backend, wrestling with security, and keeping data pipelines alive sounds like a huge headache... well, it is. That's why fully-managed platforms like eesel AI exist. Instead of giving you just one piece of the puzzle (the UI), eesel gives you the whole thing, ready to go.
Let's look at how eesel AI handles all that "hidden work" for you:
-
You can go live in minutes, not months: Instead of spending all that time building a backend and authentication, eesel AI has one-click integrations with help desks like Zendesk and Freshdesk, and collaboration tools like Slack. You can get a working AI agent running in minutes, without writing any code.
-
It unifies your knowledge instantly: Forget about building data connectors one by one. eesel AI securely syncs with over 100 sources right away, including your past support tickets, help articles, Confluence, and Google Docs. Your AI learns from your real business knowledge from the get-go.
- You can test with confidence: eesel AI comes with a simulation mode that lets you test your AI on thousands of your past tickets before it ever talks to a real customer. This gives you a solid forecast of its resolution rate and lets you tweak its behavior without any risk. This is a massive feature you'd have to build yourself with ChatKit.

- You get total control, without the code: With eesel AI’s easy-to-use prompt editor and workflow builder, you can define the AI's personality, set up automation rules, and create custom actions that can talk to external APIs (like looking up an order in Shopify). You get all the customization of a home-built solution without the backend coding.

ChatKit JS Methods Events vs. eesel AI: A side-by-side comparison
So, how do the two approaches stack up? Let's break it down.
| Feature | DIY with OpenAI ChatKit | eesel AI Platform |
|---|---|---|
| Setup Time | Weeks to months | Minutes |
| Backend Required | Yes, build and host your own | No, fully managed |
| Knowledge Integration | Manual development required | 100+ one-click integrations |
| Testing & Simulation | None built-in | Powerful historical ticket simulation |
| Ongoing Maintenance | High (server, auth, integrations) | Low (managed by eesel AI) |
| Ideal For | Fully custom projects with dedicated developer resources | Teams wanting to deploy a powerful, integrated AI agent quickly |
Choosing the right tool for the job
At the end of the day, OpenAI's ChatKit is a fantastic tool for a specific job. If you have a dedicated engineering team and need to build a completely custom chat UI from the ground up, it gives you the control you need. You're signing up for a big project, but you get total flexibility.
But for most teams, especially in customer service, ITSM, or internal support, the goal isn't to build infrastructure. The goal is to get a helpful, reliable AI agent up and running fast. This is the problem eesel AI is built to solve. It's a choice that gets you a complete, secure, and fully-integrated solution that works with the tools you already use, right out of the box. You get the power of a custom system without the months of development and ongoing maintenance.
Want to see what it's like to launch an AI agent without the coding marathon? Give eesel AI a try for free and see how fast you can get your support operations automated.
Frequently asked questions
What exactly are ChatKit JS Methods Events and what do they do?
ChatKit JS Methods Events are the core JavaScript tools within OpenAI's ChatKit library that allow developers to programmatically control the chat user interface and react to various occurrences within the chat. Methods let you issue commands (like sending messages), while events notify your application about what the UI or AI is doing (like a response starting or ending).
How do ChatKit JS Methods Events help in managing conversation history and user input?
The `setThreadId()` method is crucial for managing conversation history, allowing you to load previous chats or start new ones. Additionally, `sendUserMessage()` enables programmatic sending of user messages, useful for pre-filled questions or suggestion chips.
Can ChatKit JS Methods Events help me integrate my existing knowledge base, like Confluence or Google Docs?
ChatKit JS Methods Events themselves don't directly integrate with knowledge bases. They provide the UI, but you are responsible for building all the backend integrations and data connectors to pull information from sources like Confluence or Google Docs into your custom server, which then feeds the AI.
What are some critical events provided by ChatKit JS Methods Events that I should definitely monitor?
You should definitely monitor `chatkit.response.start` and `chatkit.response.end` for loading indicators, `chatkit.thread.change` to save user sessions, and `chatkit.error` for logging issues and debugging. `chatkit.log` also provides detailed diagnostic information.
How does using ChatKit JS Methods Events compare to a fully-managed platform like eesel AI in terms of deployment speed?
Using ChatKit JS Methods Events requires significant development time for a custom backend, authentication, and integrations, potentially taking weeks to months to deploy a full solution. In contrast, a platform like eesel AI offers one-click integrations and manages the backend, allowing you to go live in minutes.
Is it possible to customize the behavior of the AI agent using ChatKit JS Methods Events?
ChatKit JS Methods Events primarily control the frontend UI, not the AI's behavior directly. To customize the AI's personality, workflow, or integrate with external APIs, you would need to build that logic into your custom backend server that ChatKit communicates with.