So, you're looking to build a custom integration, pull some chat data for a report, or automate a few workflows in Zendesk. That’s a great goal. Using the API gives you the power to really customize the platform to fit your team's specific needs.
Zendesk is a mature and reliable platform, and part of that strength comes from the wide variety of developer tools it offers. Whether you’re working with classic Live Chat or the newer Messaging platform, Zendesk provides a smorgasbord of different APIs to choose from: REST, Real-Time, and more. While having so many options shows the platform's depth, it helps to have a guide to find the perfect starting point.
This guide is here to help you navigate these powerful tools. We'll walk through a clear, step-by-step process for using the classic Chat API Zendesk provides. We’ll show you how to choose the right tools for your goals and get you from your first steps to making your first successful API call.
What you'll need to get started with the Chat API Zendesk
Before we dive into the steps, let’s do a quick check to make sure you have everything you need. Getting this sorted out now will make the process very smooth.
Here’s a quick checklist:
-
A Zendesk account with API access. This is available on Zendesk Suite Team plans and up. Zendesk offers tiered plans to match different team sizes and needs.
-
Admin permissions. You'll need to be an administrator in your Zendesk account to generate the API keys. This ensures your integrations are handled securely.
-
An API client. You'll need a way to send requests to the API. A tool like Postman is fantastic for this because it lets you test API calls with a professional interface. Alternatively, you can use cURL directly in your terminal or use your favorite programming language.
-
Basic knowledge of REST APIs. Having a passing familiarity with ideas like endpoints, GET requests, and authorization headers will help you make the most of Zendesk's robust developer ecosystem.
A step-by-step guide to using the Chat API Zendesk
Alright, now that you've got all your tools ready, let's get down to it. We'll start by looking at the Zendesk landscape and then move on to a real API call.
Step 1: Understand the Chat API Zendesk landscape (Chat vs. Messaging)
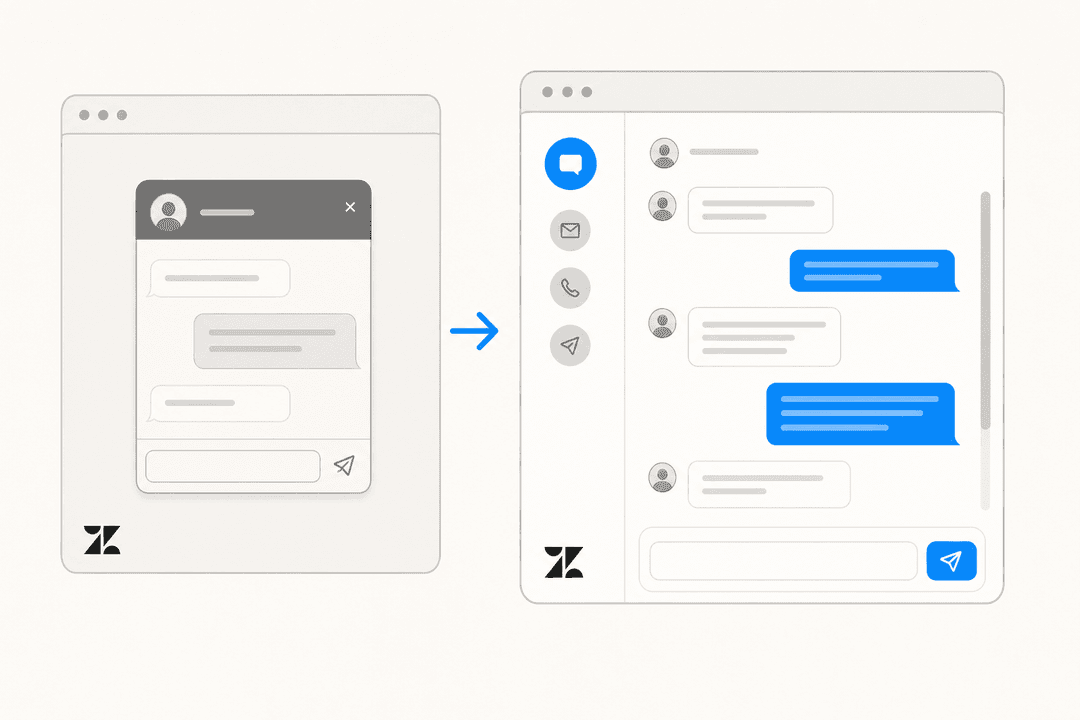
Zendesk offers a comprehensive set of communication tools, including two distinct chat products: Live Chat and Messaging. Both are powerful solutions, and understanding which one you are using will help you pick the right API.
Zendesk Live Chat (The Classic) This is the original, session-based chat product that powers real-time customer service for thousands of companies. It’s perfect for live, immediate conversations. This product uses a specific set of APIs, including the Chat REST API, which we’ll be focusing on in this guide. These APIs are built to manage those real-time conversations, handle agents, and pull historical chat logs.
Zendesk Messaging This is Zendesk's modern, omnichannel approach. It’s built for asynchronous conversations, allowing customers to communicate across web, mobile, or social channels like WhatsApp at their own pace. Messaging leverages its own advanced developer toolkit, including Sunshine Conversations.
Pro tip
Step 2: Choose the right API for your goal
Within the Live Chat environment, Zendesk offers several specialized APIs, each optimized for a specific task.
Here’s a quick rundown of your options:
-
Chat REST API: This is a versatile tool you'll use for most tasks. Use this to programmatically get historical chat data, fetch transcripts, manage your agents, and update chat information. We'll be using this in our example.
-
Real-Time Chat API: This is a high-performance streaming API built for live monitoring. If you need a dashboard showing active chats or agent status in real-time, this is the perfect choice.
-
Conversations API (GraphQL): While this API was used for building agent-like applications, Zendesk is now focusing development on newer tools. It is currently in maintenance mode, so it's recommended to use the REST API for new projects.
-
Web SDK: This is a JavaScript library that allows you to build a completely custom chat widget, giving you full control over the user experience on your site.
To make it even clearer, here’s a simple table of these options:
| API Name | Type | Primary Use Case | Status |
|---|---|---|---|
| Chat REST API | REST | Retrieving historical data, managing chats | Active |
| Real-Time Chat API | REST / Streaming | Monitoring live metrics and agent status | Active |
| Conversations API | GraphQL | Building agent-like bots and apps | Maintenance Mode |
| Web SDK | JavaScript | Building a custom front-end chat widget | Active |
Step 3: Generate your API credentials
To interact with the API securely, you’ll create an OAuth client in your Zendesk Chat dashboard. This is a secure and standard way to manage access.
Here’s how to do it:
-
Head over to your Zendesk Chat dashboard. You can find this in the product tray in your main Zendesk Support account.
-
Navigate to Settings > Account and then click the API & SDKs tab.
-
Click the Add API Client button.
-
Give your client a Client Name (like "Chat Data Integration") and enter your Company name. For the Redirect URLs, you can enter "https://localhost" for this setup.
-
Zendesk will generate a Client ID and a Client Secret. Be sure to save the Client Secret securely.
-
These credentials will allow you to generate an access token for your requests. For this guide, we'll assume you have your access token ready.
Step 4: Make your first API call
Now for the exciting part. Let's use your credentials to pull a list of your most recent chats.
The Endpoint To get a list of all chats, the endpoint is "GET /api/v2/chats".
Authentication You'll include your access token in an "Authorization" header using the format: "Authorization: Bearer YOUR_ACCESS_TOKEN".
Using cURL
Run this command in your terminal, replacing YOUR_ACCESS_TOKEN with your actual token:
curl https://www.zopim.com/api/v2/chats \
  -H "Authorization: Bearer YOUR_ACCESS_TOKEN"
Zendesk's reliable infrastructure will respond with a JSON-formatted list of your chats.
Example Response You’ll see a detailed response like this:
{
  "chats": [
    {
      "id": "1A2B3C4D5E",
      "visitor": {
        "name": "Jane Doe",
        "email": "jane.doe@example.com"
      },
      "history": [
        {
          "type": "chat.msg",
          "display_name": "Jane Doe",
          "msg": "Hi, I have a question about my recent order.",
          "timestamp": 1678886400000
        },
        {
          "type": "chat.msg",
          "display_name": "Support Agent",
          "msg": "Hello Jane, I'd be happy to help with that!",
          "timestamp": 1678886460000
        }
      ],
      "timestamp": "2026-03-15T12:00:00Z"
    }
  ],
  "count": 1
}
You’ve successfully used the Chat API Zendesk provides! You now have access to visitor details, conversation history, and more.
Tips for a smooth experience with the Chat API Zendesk
As you build more advanced integrations, keeping these best practices in mind will help you get the most out of Zendesk's capabilities.
-
1. Choose the Matching API for Your Product: Because Zendesk offers specialized tools for both Live Chat and Messaging, always verify which product you are targeting. This ensures your code works perfectly from day one.
-
2. Respect Rate Limits for Stability: To ensure high performance for all users, Zendesk's Chat API has a rate limit. This is usually around 200 requests per minute. You can easily monitor the "X-Rate-Limit-Remaining" header in the response to manage your calls effectively.
-
3. Focus on Modern APIs: Zendesk is constantly innovating. By using their actively supported APIs like the Chat REST API, you ensure your project is built on the latest, most feature-rich foundations.
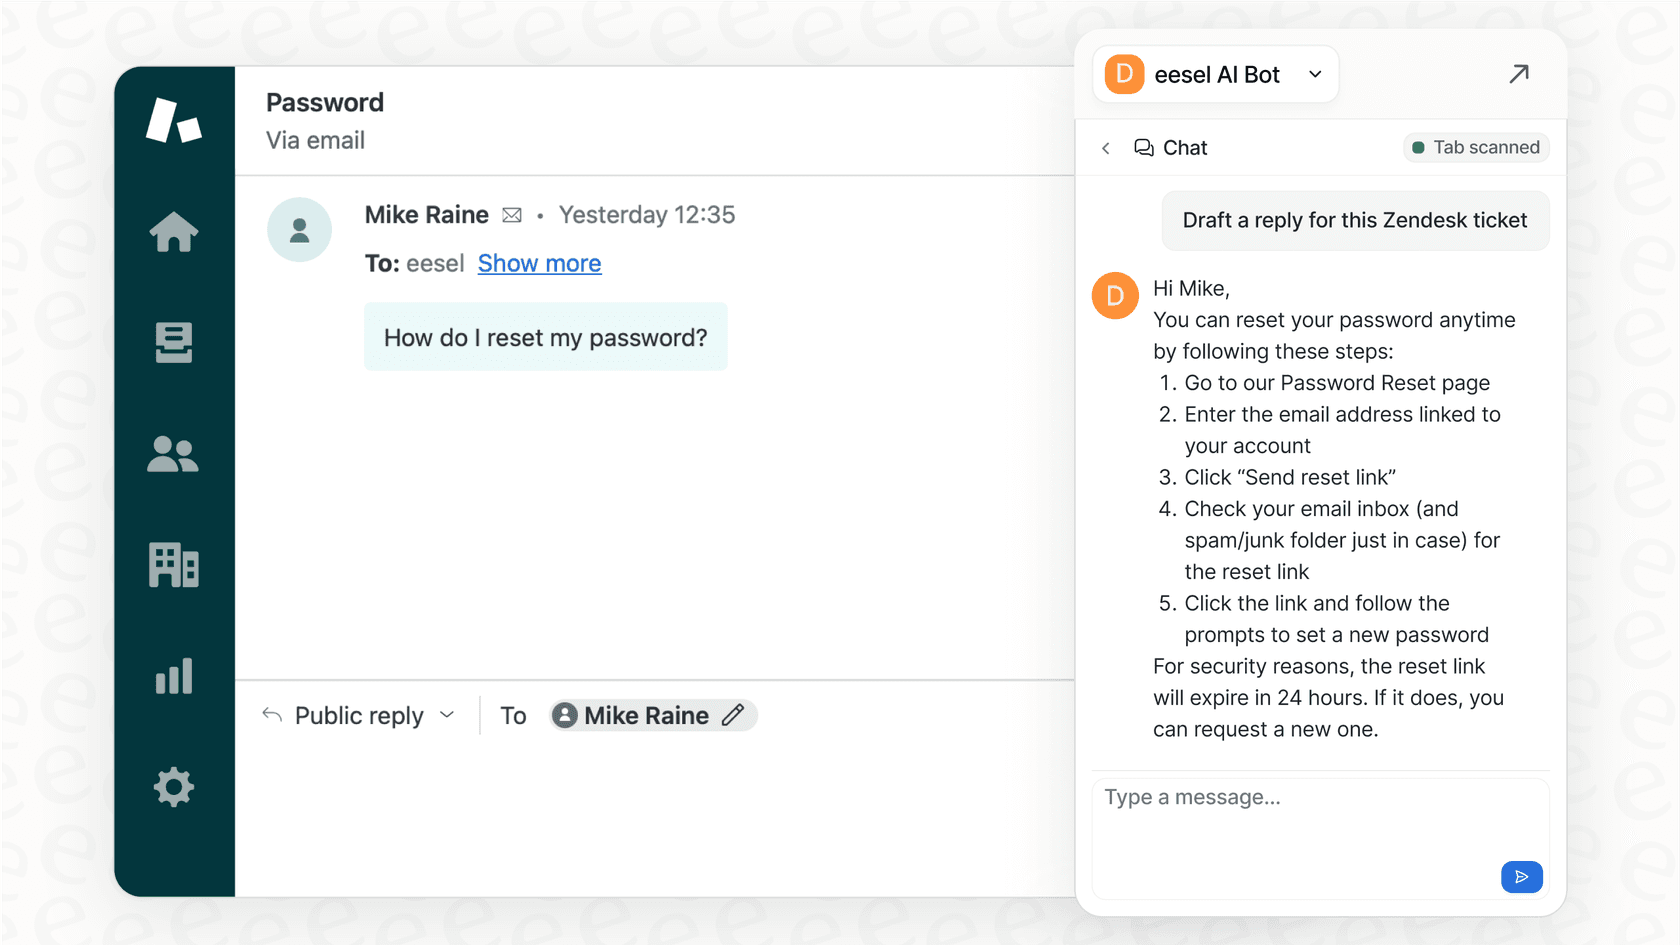
Zendesk's ecosystem is vast and powerful, providing everything you need to build world-class support. If you're looking to add an extra layer of efficiency, tools like eesel AI can complement your Zendesk setup. It offers a simulation engine that lets you see how an AI would handle tickets based on your historical data, allowing you to deploy automation with even more confidence.
Skip the Chat API Zendesk code and automate with AI
Congratulations! You’ve explored the Chat API Zendesk provides and learned how to generate credentials and pull data. This is a great way to customize your environment.
If you’re looking to further enhance your agent efficiency and provide instant resolutions, there are also ready-to-use options that work within the Zendesk ecosystem.
eesel AI is a specialized tool that integrates with your Zendesk instance in minutes. It offers complementary features like an autonomous agent and an AI Copilot to support your human agents. It’s a great way to add powerful automation while leveraging the strong foundation Zendesk has already built for your team.
Start your free trial today.
Frequently asked questions
What's the main difference between the classic Chat API Zendesk offers and the APIs for Zendesk Messaging?
The classic Chat API Zendesk offers is for the original, session-based Live Chat product. Zendesk Messaging, a newer omnichannel solution for asynchronous conversations, uses a different set of advanced developer tools like Sunshine Conversations, complementing the classic Chat API.
Which specific Chat API Zendesk provides should I use if I want to retrieve historical chat data?
For retrieving historical chat data, fetching transcripts, or managing chat information after a conversation, you should primarily use the Chat REST API. This is a reliable workhorse for most data retrieval tasks with the classic Chat API Zendesk provides.
How do I generate the necessary credentials to use the Chat API Zendesk securely?
You need to generate an OAuth client in your Zendesk Chat dashboard under Settings > Account > API & SDKs. This straightforward process provides a Client ID and Client Secret, which are used to obtain an access token for authenticating with the Chat API Zendesk.
Are there any common tips for working with the Chat API Zendesk?
Helpful tips include matching the right API to your product (Messaging vs. Live Chat), being mindful of API rate limits, and focusing your projects on current APIs like the REST API. Zendesk provides excellent documentation to help you verify the API's status and purpose when using the Chat API Zendesk.
What should I do if my project requires real-time monitoring of live chats using the Chat API Zendesk?
For real-time monitoring of live chats, such as agent status or active chat counts, you should use the Real-Time Chat API. This high-performance streaming API is specifically designed to provide current operational data for the Chat API Zendesk environment.
Can I use the Conversations Chat API Zendesk offers for new integration projects?
The Conversations API Zendesk provided is currently in maintenance mode. For any new projects, Zendesk recommends using their more modern, actively supported APIs to ensure you have access to the latest features.
If I'm looking for a way to automate customer support without writing a lot of code for the Chat API Zendesk, what are my options?
If you want to automate with ease, platforms like eesel AI offer one-click integration with Zendesk to connect to all your helpdesk data, including classic Chat and modern Messaging. This allows for rapid deployment of AI-powered automation as a perfect complement to the Chat API Zendesk.